Showing posts with label MTS. Show all posts

Thursday, April 25, 2013

Canon C100 and FCP WorkFlow- How to Import and Edit Canon C100 AVCHD in FCP(X)

This guide will teach you the best way we tested to import Canon C100  MTS to FCP X natively with Apple ProRes codec.


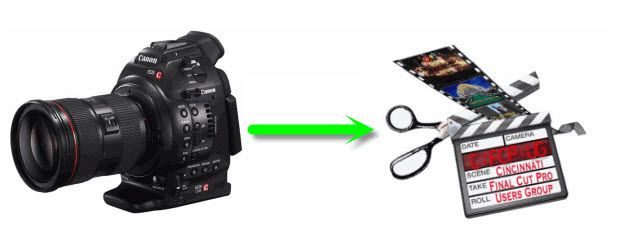
Canon already gave those looking for a full-frame DSLR plenty to think about, and now it's stirring up the movie-maker's pot. It's just announced a new member to its EOS digital cinema collection -- the EOS C100 -- and given us a better idea of when we can expect that C500 to land.

For the record, my C100 is easily the best camera I own. Its images always blow me away and its handling and form factor are just superb. But the most terrible thing is that when I imput these cilps to Final Cut Pro, I got the error message directly, no matter FCP 7 or FCP X. Why? I am eager to editing in FCP further. Is there anyone here can help me? Thanks in advance.


In my opinion, the key problem lies in the different codec. The most compatible Codec for FCP is Apple Prores Codec, but for Canon EOS C100 recordings, they are compressed by MPEG-4 AVC/H.264. That's the reason why the person mentioned above got the error while imputing Canon EOS C100 cilps to FCP 7/X. So the fastest and safest way to solve this problem is to convert Canon C100 AVCHD to Prores .MOV before editing in FCP (X). To do the job, Pavtube MTS/M2TS Converter for Mac is a good tool.

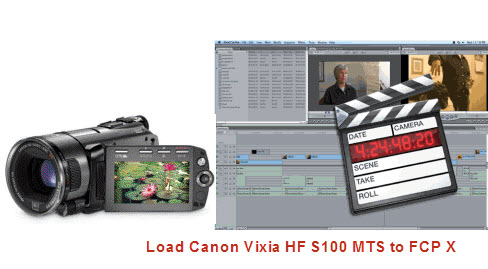
How to import Canon C100 AVCHD 1080p MTS to Final Cut Pro (X) for editing without rendering for beginners?

FCP (X) best supported video format is Apple ProRes 422 codec MOV format, so FCP X doesn't support Canon C100 AVCHD footages well. The best method to solve this problem is to convert Canon C100 AVCHD MTS footage to ProRes for editing in Final Cut Pro X, you can follow the steps below to transcode Canon C100 AVCHD MTS to FCP X for editing without rendering.

1.Load AVCHD files.

After install and launch the Pavtube Canon C100 Converter for Mac, drag and drop Canon C100 AVCHD MTS file. You can drag several files to the program directly.


2.Choose output format.

Apple ProRes MOV is the best format for Final Cut Pro (X), here you just need to choose the target application as output format, for example, "Final Cut Pro"->"Apple ProRes 422(*.mov)".


3. Do some settings as you want.


4.Transcode Canon C100 AVCHD to FCP (X).

At last, hit the "Convert" button to transcode Canon C100 AVCHD MTS to FCP (X).

With this Pavtube Canon C100 Video Converter for Mac, you can easily change Canon C100 AVCHD files to FCP (X) compatible codec for editing, this software runs fast, so you can convert your Canon C100 AVCHD footages to ProRes 422 MOV for importing to FCP (X) in less time, video and audio synchronization are perfectly guaranteed.

After converting you can follow this guide Final Cut Pro X files Transferring to import the converted Canon C100 AVCHD videos to FCP (X) for editing.

Realted Canon AVCHD solutions:

Sunday, April 21, 2013

Convert/import Panasonic GF3 and GF2 AVCHD to iMovie

This is a guide assisting you to import AVCHD MTS files from Panasonic GF3 and GF2 to iMovie for editing.


Recently Panasonic GF3 and GF2 are two kinds of popular cameras among so many cameras.GF Series are choosen by many photographers due to its high quality images, and GF3/GF2 is convenient for you to take when you commute or travel.

Although Panasonic has been trying to ensure the widest compatibility with existing industry infrastructure and non-linear editing (NLE) systems, you will still meet the incompatibility when you want to get the GF3/GF2 footage off this sd card into iMovie. What does the problem lie in? After googling, you will get the reason. It is because that the iMovie can not support .MTS files while AIC is the perfect codec for it. So the solution is clear now. You need to convert Panasonic MTS files to AIC. After the MTS to AIC conversion, you can easily import Panasonic GF3/GF2 AVCHD to iMovie for further editing.


All you need is Pavtube MTS/M2TS Converter for Mac, this software can transcode Panasonic AVCHD to iMovie best codec AIC with the best quality and make the converted files more smooth in iMovie.


Now please follow the steps below to convert Panasonic GF3/GF2 AVCHD to AIC for iMovie.

1. Go to download and install the best Mac Panasonic MTS Converter to make the transcoding AVCHD to AIC task without quality loss, which offers you particular not only AIC for iMovie/FCE, but also Apple ProRes profiles for Final Cut Pro and DNxHD for Avid. Then launch the software to import your GF3/GF2 AVCHD clips to it.


2. Click on the Format box to choose iMovie and Final Cut Express-> Apple InterMediate Codec (AIC) (*.mov) for iMovie.


3. You can click the Settings icon to do some audio/video settings. We recommend 1920*1080 as video size and 30fps as video bitrate for easier editing on Mac. If you are in PAL(50p) area, you are recommended 25fps as video bitrate.

4. Hit the Convert button; it will convert Panasonic GF3/GF2 1080p AVCHD to iMovie immediately.

When the conversion process shows in 100% with the top AVCHD to MOV Converter Mac, you can get the resulted videos from output folder easily for loading into iMovie on Mac.

See also: 

Natively Work with Canon HF R50/R500/R52 MTS/MP4 with FCP X

Wednesday, April 17, 2013

How to Use Sony Alpha DSLR AVCHD MTS recordings in Final Cut Pro X/7

To get Final Cut Pro working perfectly with Sony Alpha AVCHD .mts files, a best way is to convert MTS to ProRes MOV at first. 

As Sony Alpha DSLR cameras are becoming more and more popular in the market, many Sony camera and camcorder users are wondering how to import Sony Alpha DSLR AVCHD MTS/M2TS files to FCP X/7 for editing on Mac. Most users have the issue to import Sony Alpha camera AVCHD MTS/M2TS files, the main problems are: 1. FCP doesn’t support 1080 50/60P AVCHD import; 2. Sony AVCHD codec is not well to FCP X or FCP 7.

You may like shooting video with Sony Alpha DSLR, after recording, you may need to import the Sony AVCHD footages to Final Cut Pro for editing, but, Sony Alpha DSLR AVCHD MTS/M2TS format is not compatible with many editing software, such as Final Cut Pro X/7, the FCP doesn’t supports AVCHD MTS/M2TS 60P/50P.


What's the best solution to import Sony Alpha DSLR AVCHD files to FCP X/7 for editing? How to edit Sony AVCHD smoothly without rendering? The best way is to convert Sony recorded AVCHD to ProRes codec MOV format, Apple ProRes 422 MOV format is best supported by FCP, below is a brief guide for you.

1. Download Mac Sony Alpha MTS Converter, it's an professional Sony DSLR AVCHD converter on Mac which can convert Sony Alpha DSLR AVCHD files to different formats.


2. Install and launch this Sony Alpha DSLR MTS/M2TS Converter. Import the 1080p footages to the converter.

3. Click format bar to choose output format, you can click and choose Final Cut Pro -> Apple ProRes 422 (*.mov) or Apple Prores 422(HQ) (*.mov).


4. If you want to customize the output parameters, you can click settings button. Adjust the resolution and others as you need.

5. Click convert button to start the Sony Alpha DSLR AVCHD to ProRes 422 conversion.

With Pavtube MTS/M2TS converter for Mac, you can easily transcode Sony Alpha DSLR AVCHD files to Final Cut Pro X/7 for editing with Prores 422 codec MOV format, just try and have a good time.

Sunday, April 14, 2013

How to convert Canon Vixia video AVCHD (.mts) to iMovie

This guide shows users how to convert Canon Vixia AVCHD files to AIC with Mac MTS to iMovie Converter on Mac.

Canon are very popular in the market, it's a great competitor to sony and Panasonic. And Canon Vixia camcorder can give us high quality images, the HD Video Lens make every scene clear and steady, and new built-in features make it easy to give your videos added creativity, so it's a good choice if you have got one.


If you have used Canon vixia camcorders to recorded many HD videos, you may need to import Canon Vixia AVCHD files to iMovie for editing. But, you may encounter many problems when you want to load and edit Canon MTS/M2TS in iMovie, the reason is that AVCHD format is not well supported by iMovie on Mac, iMovie best format is Apple InterMediate Codec (AIC) MOV format, so if you want to import and edit Canon AVCHD videos in iMovie smoothly, the best way is to convert AVCHD to AIC format. Below is a guide for you.

1. Free download Canon Vixia Converter for Mac, it's an excellent Canon Vixia AVCHD converter which can help you convert Canon Vixia recorded files to FCP, iMovie, etc.

2. Install and run this Vixia MTS converter. Import the files you want to convert.


3. Click format bar to choose the format for output, you can choose iMovie and Final Cut Express -> Apple InterMediate Codec (AIC) (*.mov). It's the best format for iMovie - to import Canon Vixia MTS clips to iMovie or FCE.


4. You can click settings button to adjust output parameters, such as resolution, bitrate, etc.

5. Click "Convert" button to start.

This Canon Vixia AVCHD converter can help you transcode Canon Vixia AVCDH files to rich formats for use, and Vixia series camcorders are well supported, you can convert Canon XA10 to iMovie, convert Vixia HF M300 to iMovie, convert Vixia HF M500 to iMovie, convert Canon Vixia HF S10 to iMovie, convert Canon Vixia HF S100 to iMovie, etc. just follow the steps above and import Canon Vixia video to iMovie for further use.

More Related Guide:

Thursday, April 11, 2013

How to get Sony Alpha NEX-F3 AVCHD Video (.MTS) into Adobe Premiere

Does Sony MTS just go straight into Adobe Premiere Pro? In this article, we will give you the tips how to import and edit Sony Alpha NEX-F3 AVCHD MTS files in Adobe Premiere Pro without problems.

The Sony Alpha NEX-F3 Mirrorless Digital Camera with 18-55mm f/3.5-5.6 and 55-210mm f/4.5-6.3 Lenses Bundle contains a mirrorless digital camera and two zoom lenses that cover a wide spectrum of focal lengths from wide-angle to telephoto.


Sony NEX-F3 can record AVCHD video, you may have recorded many vivid clips when you travel. AVCHD format is not a widely used video format, so edit Sony NEX-F3 AVCHD in Adobe Premiere is not so easy. To edit Sony NEX-F3 video in Premiere smoothly without any problems, the best way is to convert Sony NEX-F3 AVCHD to Adobe Premiere best supported WMV format. Below is a brief guide for you, and you will know how to convert SONY NEX-F3 AVCHD to WMV format for Adobe Premiere.

1. Download Pavtube Video Converter Ultimate. This is professional SONY NEX-F3 MTS/M2TS Converter, it can convert SONY NEX-F3 AVCHD files between rich formats, such as convert SONY AVCHD to WMV format.


2. Install and launch this NEX-F3 AVCHD to WMV converter.

3. Click format bar to choose the output format, you can click and choose Adobe Premiere/Sony Vegas > WMV (VC-1) (*.wmv), this is the best format for editing in Adobe Premiere.


4. You can click settings button to adjust the resolution, bitrate, etc.

5. Click convert button to start.

With this Sony NEX AVCHD Converter, you can transcode SONY NEX-F3 MTS/M2TS files to Premiere easily, just follow the steps above and have a try.

Read More:

Wednesday, April 10, 2013

Import/Load Canon VIXIA HF S100 MTS to FCP X on Mac OS X

Have got a Canon VIXIA HF S100 and have issues with importing movies from HF S100 into FCP X? Is there any solution? Just convert MTS video to Prores for FCP editing on Mac.

Canon Vixia HF S100 goes beyond home movies with features specially included for the aspiring film-maker. The camera has microphone and headphone terminals and a Mini Advanced Accessory shoe for holding external lights and mics. Not only that, but 24p Cinema mode gives your video a film-look while 30p Progressive mode is ideal for action or sports footage. The VIXIA HF S100 allows you to record at up to 24Mbps, the highest bit rate in AVCHD format, for the highest quality image.

My Sister Jane is a user of Canon VIXIA HF S100, she likes it very much as it can shot 1080p 60p HD movies smoothly for her , which make her gain a stanout experience of hdcamcorder, and currently she uses the FCP X for editing, she told me while she is trying to drag and import the avchd files from S100 to FCP X timeline, they immediately need rendering, and the timeline becomes extremely sluggish for scan or preview.


Actually, as we all know, AVCHD is not the favorable format for all the non-linear editing software like Final Cut Pro, FCE, iMovie, including Adobe Premiere Pro.
So if we want to import AVCHD files to FCP X with less quality loss, we need to google and download an excellent MTS Converter for FCP to transcode Canon Vixia AVCHD to Prores MOV(compatible format for FCP 6/7X) without rendering.

As far as I know, Pavtube MTS/M2TS Converter for Mac is the best Mac AVCHD to FCP Converter, you can go to download it and have a free try! Below is a simple guide for importing Canon Vixia HF S100 AVCHD MTS/M2TS to FCP X for editing on Mac OS X, take a look at it and take as a reference.

Step 1. Load Canon HF S100 AVCHD videos to Mac AVCHD to Prores Converter.

Just connect Canon HF S100 to iMac with USB cable, and copy the files to hard drive. Run Pavtube Canon AVCHD Video Converter for Mac as the best Canon AVCHD to FCP Converter, and click the "Add" button to load 1920×1080 .mts videos.


Step 2. Choose the best output video format for editing in FCP X.

Clock the format column and choose the Final Cut Pro > Apple ProRes 422 (*.mov). It’s the best video format for FCP.


Step 3. If you want to adjust the output videos’ parameters, you can click settings button to change the Size, the Bitrate, and the Codec for getting the perfect effects.

Step 4. If you want to edit the video before converting Canon HF S100 AVCHD to FCP MOV format, Pavtube iMedia for Mac offers easy but useful edit function as shows below.

Step 5.Click "Convert" button to transcode Canon HF S100 AVCHD to ProRes 422 for FCP X editing on Mac OS X Lion.

P.S.

Pavtube MTS/M2TS Converter for Mac can convert 1080p cameras/camcorders footages to editable HD video formats for non-linear editing software like iMovie, Final Cut Express, Final Cut Pro, Final Cut Studio, Avid, Adobe Premiere etc. The HD footage can be compressed to SD video clips for storage when you wanna save storage space.

Read More:

Tuesday, April 2, 2013

AVCHD and Mac- Play and Edit MTS footage on Mac natively

Wanna a MTS/M2TS Converter for Mac? This article will give you the best AVCHD Converter Mac to help you find convert camcorder AVCHD files to any popular video formats for play and edit anywhere you want.


AVCHD is a format for the recording and playback of high definition (HD) video. It is with .mts extension which is a high-definition MPEG, AVC, H.264 transport stream video file format. AVCHD MTS files are used primarily with Sony hardware. Some camcorder models from Canon also use MTS files. These files are also present on Blu-ray disc compilations, therefore they are capable of storing quite a large amount of information and data tracks. So Most Mac product users will have to face to the problem of Mac being not so compatible with AVCHD videos.


 Part I: Play AVCHD Videos on Mac:

On your Mac OS computer, you can not play AVCHD files (.mts, .m2ts) on Mac from the camcorder connected via USB as an external storage device, or from removable media or from the computer's internal hard disk drive.

To enjoy AVCHD/MTS files on Mac, you can use one of the following options:

1. VLC Player (FREE)

Download VLC Player from videolan.com and start playing your AVCHD movies. You may required iLife 08 or 09 for playback.

2. Toast 9 or 10

Toast Player which is included with Toast 9 or 10 can play AVCHD files beautifully. Another advantage of Toast is fast conversion of .mts and .m2ts files to any other format you like.

Part II: Edit AVCHD Videos on Mac:

Limit:

a. As we know, Sony Vegas Pro is specially designed for Sony brand camcorders, in the purpose to allow shooting fans to edit AVCHD records from HD Camera or Camcorder. And this program usually works well in AVCHD video editing. However, Sony Vegas Pro is compatible of Windows system, but can not be used on Mac platform.

b. On Mac platform, iMovie, Final Cut Express, Final Cut Pro, ect are all the popular Mac editing tools. While, there's always a pain around the 1080p users that these video editing programs usually cannot ingest AVCHD natively, because both the container and codec of AVCHD are too difficult to handle.

Solution for the two question above:

To deal with the problems between Mac and AVCHD, a third-party software is necessary. But what can this software do? Generally speaking, this software is called Pavtube MTS/M2TS Converter for Mac, it is mainly for users who are always puzzled about video formats between their Mac and HD camcorders/cameras, which means it could convert AVCHD to other various formats for different use.

1. How to make camcorder/camera AVCHD compatible with QuickTime Player. .mov is the perfect format for QuickTime to handle. As we know, .mov is QuickTime's native format as it could be broadcasted in the highest quality. So, Convert AVCHD to MOV for QuickTime is the answer.

2. What about iMovie and FCP (X)? For iMovie, AIC (Apple InterMedia Codec) works best while Apple ProRes is FCP's native format. This video codec is mainly for editing HD camcorder/camera videos and designed for editing too as it can keep the highest quality.

Learn to Use AVCHD Converter for Making AVCHD Mac-friendly

Free download Mac AVCHD Converter for Mac. and it is quite easy to achieve AVCHD converting on Mac:

1. Launch the program and import your video by clicking "Add" button.


2. Choose Final Cut Pro > Apple ProRes 422 (*.mov), iMovie and Final Cut Express > Apple InterMediate Codec (AIC) (*.mov), Avid Media Composer -> Avid DNxHD (*.mov), it's for Avid editing, HD Video -> QuickTime MOV, or MP4 format for output as your task.


3. Click "Start" button to start converting.

This best Mac MTS to Mac converter will convert recorded 1080pvideos on Mac at top speed, you can choose rich formats for output on Mac, and then you can use HD MTS footages to playback, editing or sharing. If you need to edit AVCHD on Windows platform, you can try MTS Converter for Windows. Please take a try now, good luck to you!

Read more: