Monday, June 10, 2013

2013 Lossless MTS M2TS Editor and Converter for Camcorder Fans

Are you a beginner of video editing? Do you want to edit the hundreds of movies shot by cameras, camcorders, Smart Phones, and tablets in various formats? Do you want to save your storage space by trimming and deleting unwanted parts from MTS or M2TS videos without quality loss? Do you want to convert camcorder videos into Apple ProRes, AVI, or other formats for better editing in Final Cut Pro, Avid Studio, Adobe Premiere, Pinnacle Studio, Sony Vegas, Windows Movie Maker, etc? Do you want to remove ads from TiVo shows and watch them on your tablets, SmartPhone or Apple TV?

If yes, you can do all of the above with one simple and easy video editing software for beginners, Pavtube Media Magician, or its Mac version, Pavtube Media Magician for Mac.


Free Download and Trial for Windows or Mac

Free Trial on Windows
Free Trial on Mac 10.5 & 10.6
Free Trial on Mac 10. 7 & 10.8

Satisfied with it? Ready to Buy? Leaked away for you to save money: if you buy Pavtube Media Magician in Facebook Giveaway page, you will Get 45% OFF, Save $20, God! Awesome! If you are camcorder fans, this product is absolute value for money!

See Also: FaceBook Leak: 45% OFF to Get Pavtube Media Magician – A Useful Video Editor and Converter


What can Pavtube Media Magician (for Win or Mac) help you?
  • Input: 

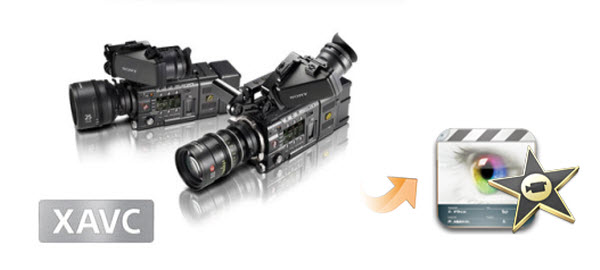
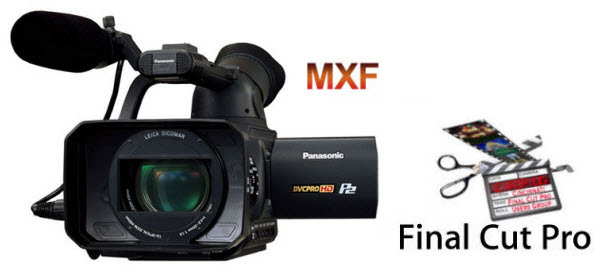
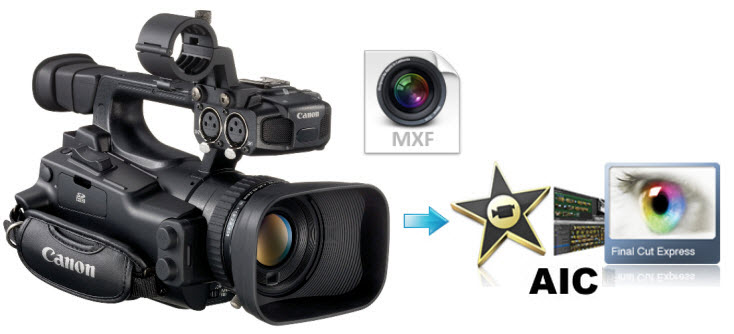
Camcorder footages: MXF, AVCHD(MTS, M2TS), AVCHD Lite(MTS, M2TS), MOV,TOD, MOD, etc.

Other video formats: *.avi,*.divx, *.wmv, *.wma, *.asf, *.dvr-ms, *.wav, dts in wav, *.rm, *.rmvb, *.ra, *.mov, *.qt, *.mp4, *.3gp, *.3g2, *.dv, *.m4b, *.m4v, *.m4a, *.aac, *.flv, *.f4v from YouTube, Hulu, Fox, etc., *.dat, *.mpg, *.m2v, *.m2t, *.m2ts, *.ts, *.tp, *.evo, *.mkv, *.dv, *.flc, *.fli,*.gxf, *.pss, *.mvi, *.mtv, *.vdr, *.pmf, *.pva, *.k3g, *.vp6, *.nsv, *.nuv, *.dmskm
  • Output: 
Common format: MPEG-2 (*.mpg), MPEG-4 (*.mp4), *.avi, *.wmv, *.mov, *.mkv, *.m2ts

Device: Andoid Tablets and smart phones, Windows Tablets and smart phones, iPad, iPhone, Apple TV, HD Player, PSP/PS3, HDV
  • Editor

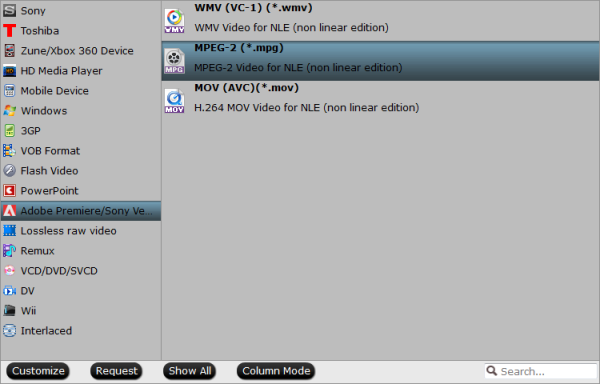
For Windows: Avid Media Composer (*.mov), Adobe Premiere & Sony Vegas (*.wmv, *.mov, *.mpg), Adobe After Effect(*.mpg, *.mov), Cybelink PowerDirector (*.avi, *.wmv), Pinnacle Studio(*.mp4, *.mpg).

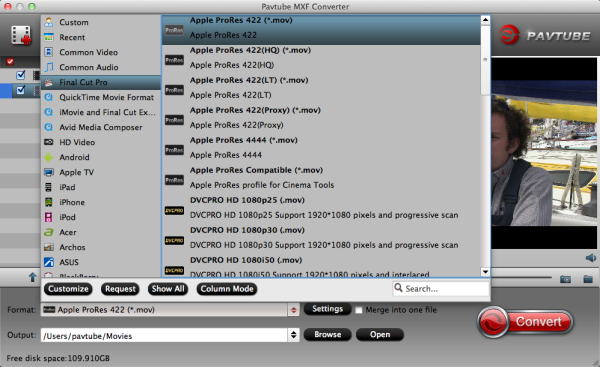
For Mac: iMovie and Final Cut Express (*.mov), Avid Studio (*.mov), Adobe Premiere (*.wmv, *.mpg, *.mov), Adobe After Effect (*.mpg, *.mov), Apple Aperture (*.mov), Final Cut Pro (Apple ProRes MOV).
  • Lossless: Original format (*.mts, *.m2ts, *.mod, *.tod), MKV (*.mkv) 
  • Online: YouTube (*.mp4, *.webm) 
  • Features:

Import/ backup/ manage camcorder footages
The smart camcorder wizard helps connect camcorders to PC and import directly from camcorder or backup camcorder videos to local.

Lossless output from AVCHD MTS to MTS or MKV
Output Apple Prores MOV, lossless MTS/MKV, MPEG-2/4, AVI/WMV/MOV/MKV/M2TS.

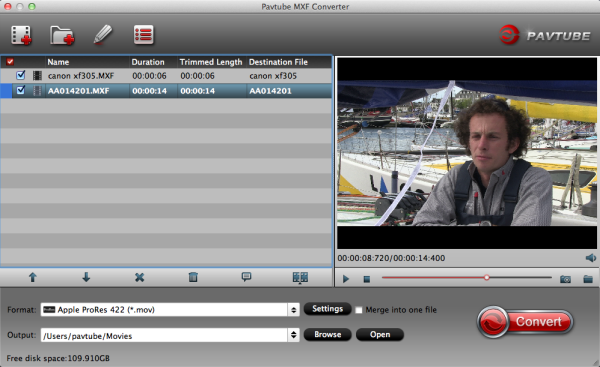
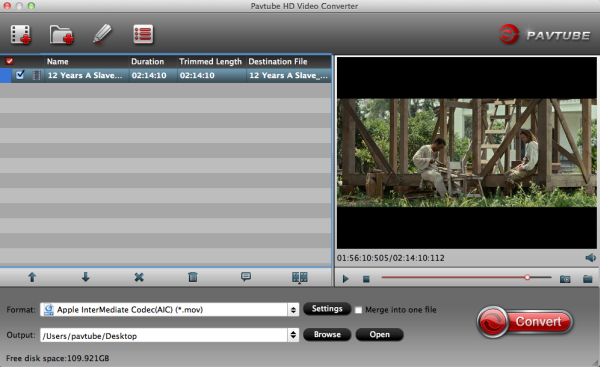
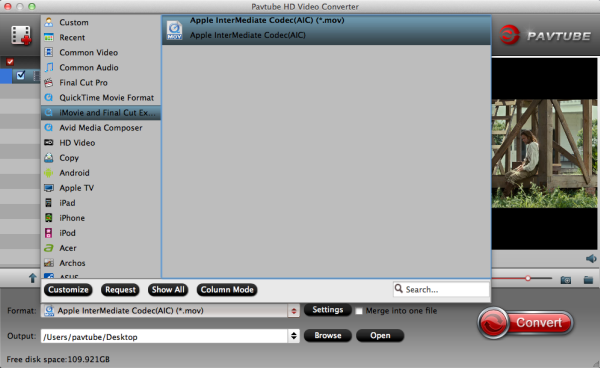
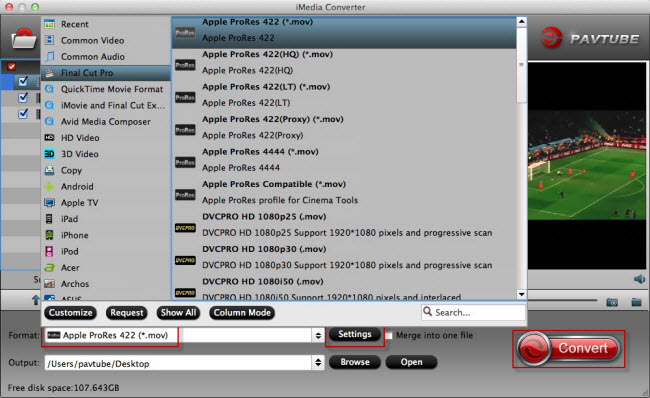
Output Apple ProRes MOV for editing in FCP without rendering (Mac only)
As long as you have right version of FCP installed, you can output Apple ProRes MOV like Apple ProRes 422, Apple ProRes 4444, etc.

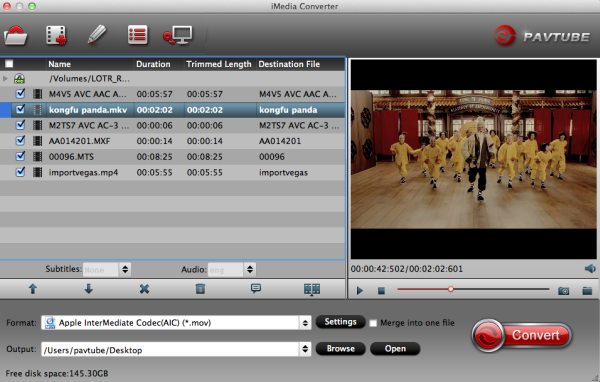
Timeline editing easily trim, cut, delete, and join
To output videos you can drag relative source from resource list and trim, cut, delete, and join. You can seek the clip frame by frame.

Add 3D and other special effects to clips on timeline
Want to get 3D effect to your clips? It’s easy with Media Magician. Just a one click, you can add the effect. And you can also add simple Gauss blur, old film, etc.

Enlarge or reduce original volume
If the volume is too large or too small, you can drag bar in Volume Adjustment section to enlarge or reduce.

Adjust brightness, contrast, and saturation
For footages shot with low light or bad color, you can easily make them better with the help of brightness, contrast, and saturation adjustment.

Easily choose output formats with one click
With the preset output profiles, you can choose the right settings with just one click.

Output different formats from the same sources on timeline
In conversion settings section, you can create several conversion tasks with different output formats and output from the same sources placed on timeline.

Directly upload videos to YouTube
The converted videos can be uploaded to YouTube directly as long as you have set your account and relative information.

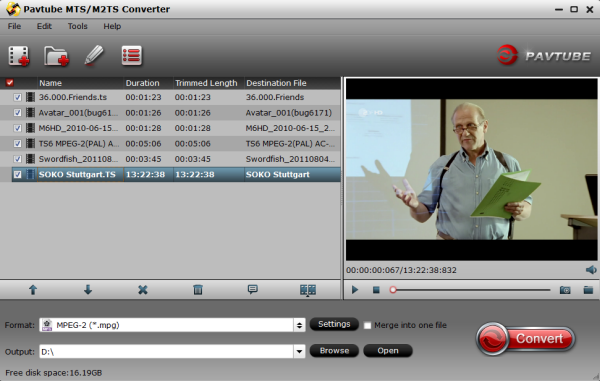
Output M2TS, MPEG-4/2, MKV, MOV, WMV, AVI files
It supports output formats like M2TS, MPEG-4 (*.mp4), MPEG-2 (*.mpg), MKV, MOV, WMV, and AVI. You can reset parameters with ease.

Reviews from customers of Pavtube Media Magician and Pavtube Media Magician for Mac:

1. Works well on Windows 8. Successfully transcoded a .TiVo file to MP4 format.

- D.C.

2. Runs flawlessly on Win7. It does lots of things Moviemaker can’t do, like changing brightness etc. The conversions can be very useful as well. For me it is good to have. Thanks

- Sepp

3. …The benefit of lossless trimming for me is that often I set up one or more cameras at an event and let them roll, sometimes for hours. This is done in anticipation that something interesting might occur in that camera’s field of view in the next couple of hours. Out of all those hours there might only be a few minutes I really want to keep. This results in enormous files with only a few seconds of really good footage. Ideally I wish to keep only the good bits and delete the rest but so far I’ve found no way to extract the bits I want to keep and delete the rest without any loss of video quality…

- Doug Thompson

4. Installed fine on Mac 10.7 and Win 7 ultimate 64.

- Beth

5. Pavtube Media Magican! Perfect for my use. I shot movie of my younger daughter few years ago. And with today I succeed to take still pictures out of the movie. And same time I edited mistakes out of the movie. I highly recommend it for Mac users!

- Jari, Lahti, Finland

6. Very nice program. I can now leave my PC and some of the editing software I’ve purchased over the years and now use my Mac with Media Magician. I just converted a bunch of Thanksgiving and Christmas videos and added some cool effects as well.

- Trey, Dallas, Texas

7. A very good program, I was able to import an AVI file, crop it to size, then imported an MP4 file, added the two files together play them without rendering and exported to an MKV file within minutes. Highly recommended.

Now get this "Lossless MTS M2TS Editor and Converter 2013"!

Read More:

Saturday, June 8, 2013

2013 Father’s Day best Gift-Up to 30% off Blu-ray/DVD/HD Video Converter

Hey, guys! Nice to see you again!  

Father’s Day is drawing near! It is time to show your appreciation to thank the man who most shaped your life! Have you prepared a specil gift for your beloved Daddy? Wanna make a unique gift that will be truly memorable? Why don't you take a look at Pavtube Father's Day Speical Offers?


To celebrate Father’s Day with you, Pavtube Studio launch a huge Coupon Code as the 2013 Father’s Day Special Gifts. Up to 30% off Blu-ray Ripping tools and all in one Video Converter for your beloved dad! It will surely spread smile on his face. Like us on our Facbook page to get it Now! Expires on June 23, 2013. Never miss!!!

So here are the top four gift ideas from Pavtube for your dad at father’s day. You can  backup/convert BD/DVD and HD Videos for home server, iPhone/iPad/Android/Windows 8 Tablets & Phones, various Video Editing Software(FCP, iMovie, FCE, Avid, Premiere, Sony Vegas, Windows Movie Maker, etc.) with these useful tools!

1. Top iMedia Converter for Mac as Father’s Day Gift 2013

Pavtube iMedia Converter for Mac is an all-in-one Blu-ray Converter for Mac, Mac DVD Converter, and Video Converter for Mac. It helps you convert videos, non-protected Blu-ray and DVD movies to a wide variety of devices for well playback, including iPad/iPad 2, the new iPad, iPad mini, iPad 4, Galaxy Tab 10.1, Kindle Fire HD 7/8.9, Microsoft Surface RT/Pro, Toshiba Thrive, Dell Streak, Archos 101/70/7/5 , Apple TV/Apple TV 2/Apple TV 3, iTouch 4, Nokia N9, Droid X, Motorola Atrix 4G, PS3, Xbox 360, etc.

The iMedia Converter for Mac can convert 1080p/720p camera/camcorder footage(.MXF, .MTS, .MOV, .AVI…)to editable files for using in non-linear editing apps like iMovie, Final Cut Express, Final Cut Pro (X), Avid Media Composer, Adobe Premiere Pro and more. The HD footage can be compressed to SD video clips for storage when you wanna save storage space. The Mac iMedia Converter is also able to extract audios from Blu-rays, DVDs and various videos for media players with high quality and fast conversion speed.

2. Useful all-in-one Video Converter Ultimate program as best Father’s Day Gift 2013

Pavtube Video Converter Ultimate integrates a best Blu-ray Ripper, a DVD Ripper, and a Video Converter together for your father to backup and rip Blu-ray/DVD, ISO/IFO movies and convert various video and audio files to device optimized formats with super fast conversion speed and excellent image and sound quality.

An all-in-one solution to fast convert Blu-ray/DVD and various videos to MKV/AVI/H.264…
Stream media contents from your PC to Android, Windows and iOS devices over wireless network.

Backup Blu-ray 3D movies to 3D/2D video files like MP4, AVI, MKV, MOV, WMV, etc.
Convert Video/DVD/Blu-ray to the new iPad 3, Apple TV 3, Xoom. Galaxy Tab, HTC One X, Asus Transformer Pad TF300, Galaxy Note 10.1… with pleasant quality.
Support NVIDIA CUDA and ATI Stream (AMD APP) acceleration technologies.
Convert Blu-ray and DVD movies with your specified audio/subs tracks.

3. Best Blu-ray Ripper software as Father’s Day Gift 2013

Pavtube BDMagic which is considered as professional Blu-ray and DVD movie ripping program is capable of ripping 3D Blu-ray discs, 2D Blu-ray Discs and standard DVDs to required video formats including MPEG-4/H.264 MP4, MPEG, RM, QuickTime MOV, MPG, Xvid, Divx, 3GP, FLV, VOB, ASF, SWF, DV, MP3, AC3, AAC, OGG, FLAC, etc, so that you can play the generated BD\DVD movies on media players like Apple TV 3rd Generation, WD TV Media Player and PS3, and portable devices, such as iPad 3, Galaxy Tab 3, Samsung Galaxy S III, Google Nexus 10, Nexus 7, and video editing programs including Window Movie Maker, Sony Vegas, Adobe Premiere Pro, Avid, Pinnacle Studio.

Pavtube (3D) Blu-ray Ripper is a perfect Blu-ray copy software tool which supports full disc copy (1:1) to the hard drive of your PC with Blu-ray and DVD’s original structures without any quality loss. Plus, taking advantage of the NVIDIA CUDA technology and AMD APP technology, the conversion speed can be increased up to 6 times faster than ever before.

4. Wonderful DVD Ripper software as Father’s Day Gift 2013

Playing DVD movies on DVD player at home has never been a problem for you. The question is, what if you’d like to enjoy your favorite DVD movies when on the road? Bringing several discs along tend to be inconvenient, not to mention they jump on the most crucial scenes and are prone to scratches. Now that Android-based devices have rocked into the mainstream, there’s an easy way taking DVD movies alongside, i.e., ripping DVD and putting movies onto your Android tablet/phone or iPad, iPhone and Windows 8 devices, etc.

Pavtube DVDAid is the best DVD ripping software that provides movie lovers with the easiest way to rip and convert DVD movies to MP4/AVI/MKV/WMV and many other video and audio formats with high quality. It works as a powerful DVD to tablet/smartphone/HD media player converter which enables you to enjoy DVD movie on your portable devices and HD Media Players

Taking advantage of the NVIDIA CUDA and ATI Stream acceleration technologies, the conversion speed is increased up to 6 times faster than ever before.


Other user-friendly and effective products for Father’s Day 2013

Pavtube brings many other programs for our fathers to entertain their spare time, like Pavtube DVD Creator for burning Blu-ray/DVD movies and video clips onto a blank DVD, Pavtube ByteCopy for backing up Blu-ray and DVD movies to MKV with lossless quality and full preservation of all audio tracks, subtitles and chapter markers, etc.

Never miss to get 20% off iMedia Converter for Mac, Video Converter Ultimate and 30% off Blu-ray Ripper and DVD Ripper at 2013 Father's Day Special Offer!                       

Thursday, June 6, 2013

P2 Card Mac Converter- Convert Panasonic AG-HPX170 P2 MXF to FCP X

As FCP X won't import Panasonic AG-HPX170 P2 MXF footage, so this easy workaround aims to help you to import/edit AJ-HPX170 P2 MXF files into Final Cut Pro X flawlessly.

Panasonic AG-HPX170 is an ultra-mobile P2 HD handheld camcorder featuring full, 4:2:2 independent frame production quality HD and solid-state recording. Its newly enhanced 1/3'' progressive 16:9 3-CCD imager delivers an excellent signal-to-noise ratio, lower noise/smear, and exceptional low-light performance. And HPX170 has two P2 card slots and records in 20 HD and SD formats. Files are saved onto the P2 memory card in MXF format allowing direct data transfer to broadcasting and production system.


After recording some files on the Panasonic AG-HPX170, you may find your Mac FCP X can not recognize the HPX170 P2 .mxf videos as below:

"I have a project has 26 files and a total size of 5.7GB. The camera was the Panasonic AG-HPX170, I found that all the video record by Panasonic P2 camcorder is of .mxf format which Final Cut Pro X don't support. How can I import the P2 MXF project into Final Cut Pro X?"

Panasonic AG-HPX170 records MXF file using AVC-Intra codecs. Due to the unfriendly codec, it is not easy to import such a P2 MXF file directly into FCP X. To edit Panasonic AG-HPX170 P2 MXF footage with Final Cut Pro X smoothly, you have to import AG-HPX170 P2 MXF to FCP X natively with FCP supported video format like MOV in Apple ProRes Codec.

Here we recommend you the best Mac P2 MXF to MOV Converter, which can help you to  easily and losslessly convert Panasonic AG-HPX170 P2 MXF to ProRes 422 for FCP X on Mac. And the latest Mac OS X Mountain Lion 10.8.3 is supported; just feel free to try it!

http://download.pavtube.com/mxf-converter-mac/mxfconvertermac_setup.dmg

How to convert Panasonic AG-HPX170 P2 MXF to ProRes 422 for FCP X on Mac? 
Step 1. Connect your Panasonic  AG-HPX170 P2 Camcorder to Mac with USB cable or use card reader to transfer the P2 MXF files to Apple hard drive disk.


Step 2. Add Panasonic Panasonic  AG-HPX170 P2 MXF videos to MXF Converter for Mac.

Run this MXF to ProRes Converter for Mac, and click the "Add Files" button to load individuals mxf videos; or click "Add from folder" to load the entire folder.


Step 3. Choose FCP X compatible format.

Click the "Format" option and click to choose Final Cut Pro>Apple ProRes 422 for editing HPX-170 P2 MXF in Final Cut Pro X.


Pls note the "merge into one file" box above "Open", you can lossless merge Panasonic MXF footages a few clicks.

Step 4. Now click the big red "Convert" and wait for a while to get the fresh hot converted video. Click Browse the locate them directly.

Launch FCP X, and go to "File > Import > Files…" to import converted P2 footage to FCP X project.


Now you can smoothly import Panasonic AG-HPX170 P2 MXF to FCP X on Mac Mountain Lion.

Read More:

Wednesday, June 5, 2013

Make Sony CX550V AVCHD video workable with Avid, Premiere, Sony Vegas Pro, Windows Movie Maker, Pinnacle

If you are Facing the problem with importing Sony CX550V MTS to Windows PC in Avid, Premiere, Sony Vegas Pro, Windows Movie Maker, Pinnacle, you can fix the issues via transcoding AVCHD video to Windows compatible format first.


Sony's flagship 2010 model, the HDR-CX550V, is a larger camcorder than its predecessor. With a $1049 price tag, the CX550 is also one of the cheaper high-end models on the market and it marks the first instance of Sony offering a 24Mbps bitrate for recording AVCHD video on a consumer camcorder.

Sony CX550V Windows solutions:

"I have just bought a CX550V camcorder, this device records AVCHD.MTS video format, now I would like to import these projects to my computer. What I want is to edit my 1920 * 1080, 24Mbps AVCHD video files smoothly without codec problems, what video codec should I use on Windows platform? Can you recommend some software which can help me import and convert Sony CX550V AVCHD videos for editing smoothly?"

As above, editing Sony CX550V MTS files on Windows PC is not an easy job as we thought. As Windows editing software like Avid, Premiere, Sony Vegas Pro, Windows Movie Maker and Pinnacle are not friendly with AVCHD format and did not handle large AVCHD videos with great stability. Plus, there are so many limits you are facing like the System Requirements: Intel Core 2 Quad 2.66 gHz or higher required for 1920x1080 AVCHD editing, 2GB system memory required for AVCHD and more.

To make Sony CX550V AVCHD MTS/M2TS video workable with  Avid, Premiere, Sony Vegas Pro, Windows Movie Maker and Pinnacle, you only need to convert MTS to AVI/WMV/MPEG-2, the most suitable video format for editing.

Software Requirement:

Sony AVCHD MTS Converter
 is mainly used to transcode Sony CX550V AVCHD MTS/M2TS files for editing in Avid, Premiere, Sony Vegas Pro, Windows Movie Maker and Pinnacle.


Features: 

  • Helping you to convert Sony AVCHD MTS files to AVI/WMV/MPEG-2 with original quality. Also it supports other popular used format like MP4, DV, FLV, 3GP etc for playing back.
  • Thanks to its adoption of NVIDIA CUDA & AMD APP(ATI Stream) acceleration technology, the conversion process has been accelerated up to 5 times the speed of other converters.
  • With this MTS Converter, you can edit the video clips with trimming videos, deinterlacing 1080i videos, adding text/image/video as watermarks to your original files, replacing audios, adjusting brightness/contast/saturation of the imported files, etc. 

Guide to edit Sony CX550V MTS files in Pinnacle Studio, Sony Vegas and Adobe Premiere

Step 1: Free download the best MTS to Windows PC Converter and run it to add the AVCHD footages from Sony CX550V.


Step 2: Hit the Format box and select “HD Video” option on the dropdown menu and you can choose “AVI/WMV/MPEG-2” as output format for editing with Avid, Premiere, Sony Vegas Pro, Windows Movie Maker and Pinnacle . Besides, you can also choose “H.264 HD Video (*.mp4) “for playing back.


Step 3: Adjust video and audio parameters, including the Bitrate of Video and Audio, the Codec of Video and Audio, Video Size, Sample Rate, Frame Rate, Audio Channels, etc., by clicking the “Settings” button on the main interface for getting the best quality.

Step 4: Click the “Convert” button on the main interface to start transcoding Sony AVCHD footages to AVI/WMV/MPEG-2 for editing in Avid, Premiere, Sony Vegas Pro, Windows Movie Maker and Pinnacle.

When the conversion is completed, click “Open” in the main interface and get the converted files for importing and further editing.

With this Pavtube Sony MTS Converter, it becomes easy for you to convert Sony CX550V MTS video to Windows editing software compatible file formats. Now transferring and editing Sony CX550V AVCHD in  Avid, Premiere, Sony Vegas Pro, Windows Movie Maker and Pinnacle is smooth and without any problem.

Tuesday, June 4, 2013

Best XAVC Video Converter-Make Sony F55/F5 4K XAVC Video editable in iMovie and FCE

In this guide, I will show you some useful tips for importing Sony PMW-F55/F5 4K Digital Camera XAVC Footages to iMovie/FCE for smoothly editing.


Sony has announced that cameras that will support XAVC include two CineAlta cameras which are the Sony PMW-F55 and Sony PMW-F5. Both cameras record XAVC with a color depth of 10-bits and 4:2:2 chroma subsampling. The Sony PMW-F55 can record XAVC with 4K resolution at 30 fps at 300 Mbit/s and 2K resolution at 30 fps at 100 Mbit/s. The Sony PMW-F5 can record XAVC with 2K resolution at 30 fps at 100 Mbits/s.

XAVC can record 4K resolution at 60 fps with 4:2:2 chroma subsampling at 600 Mbit/s.A 128 Gigabyte SxS PRO+ media card can record up to 20 minutes of 4K resolution XAVC video at 60 fps, up to 40 minutes of 4K resolution XAVC video at 30 fps, and up to 120 minutes of 2K resolution XAVC video at 30 fps. As the lasted HD recording formats introduced by Sony, XAVC format is seldom used now, when you are planning to conduct post production to the PMW-F55 (or PMW-F5) XAVC footages with your Mac editor like iMovie and FCE, you may encounter with the problem like "the file cannot be imported/opened".

So how to solve the problem with loading Sony F55/F5 4K XAVC to iMovie/FCE? At first, you need to convert XAVC to AIC .mov which is best editing format for iMovie and Final Cut Express. Now please get the help of a professional 4K XAVC Video Converter for Mac and follow the guide below to transcode Sony F55/F5 4K XAVC to iMovie/FCE step by step:

How to make Sony F55/F5 4K XAVC Video editable in iMovie and FCE?

Step 1. Add XAVC MXF files

Install and launch Pavtube HD Video Converter for Mac, and click "Add File" to import your Sony PMW-F5/F55 XAVC files; or click "Add from folder" to load videos in batch.

This is a powerful XAVC video converting software which can not only easily convert XAVC footages to FCE/iMovie preferred formats smoothly, but also import Sony PMW XAVC into FCP without any problem.


Step 2. Choose AIC codec for iMovie and Final Cut Express.

Choose output video format from the 'Format' preset, and click 'Output' to change converted video path. Then pls click iMovie and FCE>Apple InterMediate Codec(AIC)(*.mov) to get Sony XAVC to FCE/iMovie preferred codec.


Step 3. Adjust output settings

If you want to locate your videos quickly, click Browse. The "Settings" icon will meet your requirements of adjusting video bitrate, frame rate and so on.

To get 1080 videos, we need to click the "Settings" button and choose 1920*1080 as output video resolution.

Moreover, you can edit your Sony XAVC videos before converting. By clicking the pencil icon on the top of Mac XAVC Video Converter, you can trim/crop the video clips, add or adjust video effect, or take snapshots from video as you like.

Step 3. Start converting Sony XAVC to AIC MOV for iMovie/FCE.

Click the big red circle to convert Sony PMW-F5/F55 XAVC videos to iMovie/FCE on Mac.

After conversion finished, you then are able to edit or share your XAVC HD videos on the go.

See more:

XAVC and Premiere Pro workflow
Convert XAVC to AVI/WMV/MOV/MP4/FLV

Monday, June 3, 2013

How to get Panasonic AG-HVX200 P2 MXF to Final Cut Pro 6/7

Here it mainly introduce you a top P2 Card MXF Mac Converter so that you transcode Panasonic HVX200 P2 MXF to Apple ProRes MOV for FCP 6/7.


AG-HVX200 is a P2-based camera that answers the demands of nearly any professional videographer. It builds on the overwhelming success of the original AG-HVX200, with the addition of some much sought-after revisions. The most important new feature is an updated sensor, which yields higher sensitivity, creating less noise in low-light situations. With its compact and feature-rich frame, the AG-HVX200 will never disappoint. The unit is compatible with DVCPRO HD, DVCPRO50, DVCPRO25 and consumer DV recording standards.

Have you got this professional P2 camcorder? If so, have you tried to download MXF fotoages from P2 card to FCP 6/7 for further editing? If so, you won't find anything in FCP because FCP 6 and FCP 7 can't recognise MXF format.

Question: How to make it easier for editing Panasonic AG-HVX200 P2 MXF in FCP 6/7?

Answer: Convert Panasonic AG-HVX200 P2 MXF to ProRes for importing to FCP 6/7.

P2 MXF to FCP Converter is the highly recommended here for you to quickly and easily convert/transcode HVX200 P2 MXF to FCP supported Prores .mov format. It supports encoding Panasonic P2 and Canon C300/XF105/XF100/XF300 MXF files to FCP for editing on Mac. This will help you import the file correctly and saving the rendering time. Below is the detailed guide.

Convert and Edit Panasonic AG-HVX200 P2 MXF in FCP 6/7 with Apple Prores codec

Step 1. Free download the Panasonic MXF to FCP Converter for Mac, load your P2 MXF files into the program. As a top P2 MXF Converter, it also supports transcoding MXF to AIC Codec for editing with iMovie 8/9/11.


Step 2. Click the format bar, and move mouse cursor to "Final Cut Pro > Apple ProRes 422 (*.mov)" as output format for editing MXF in FCP 6/7.


Step 3. Click convert button in the main interface to start transcoding AG-HVX200 Panasonic P2 MXF to FCP Prores .MOV on mac.

Some more helpful features of the P2 MXF to Prores Converter for Mac:

1. Settings- click to set video resolution(1920×1080/1440×1080/1280×720/720×480), bitrate(from 1Mbps to 20Mbps), frame rate (24p/30p)

2. Editor (next to "Add" icon)- click to set deinterlace, denoise, mute, volume up, trim, crop, etc.

After the workflow, you can go to the output folder to find the converted video files. Now you are free to load/edit Panasonic AG-HVX200 P2 MXF files in FCP 6/7 under Mac without problems.

Read Related Articles:

Top MXF to MOV Transcoder- Convert Canon XF300 MXF files to AIC .MOV for iMovie/FCE

This guide will show you how to convert Canon MXF files to AIC MOV on Mac so that you can smoothly import/edit Canon XF300 MXF files in iMovie and Final Cut Express without any problem. 

Canon HD camcorders are more and more popular and XF300 Professional Camcorder takes advantage of the latest HD technology, along with Canon's newly developed MPEG-2 4:2:2 codec to record Full HD video to affordable Compact Flash cards. So it is a good choice to shoot funny videos or record their interesting family life with it. But for the Canon XF300 output format is mxf, and most of video editors can not recognize mxf file format, like iMovie and Final Cut Express, this make many Canon fans be headache. Below, I will throw a quick guide up for those who wanna ingest/edit Canon XF300 MXF footages into iMovie and FCE smoothly.


Here is the easy way to fix it, namely, converting Canon XF300 MXF to AIC MOV on Mac. If you are interested doing likewise, check out Pavtube's iMedia Converter for Mac, the best Mac MXF to MOV Converter. The program is an easy-to-use and intuitive Mac tool for camcorder users. It is good at batch converting MXF recordings shot by Panasonic P2 camcorders, Canon XF series cameras to AIC MOV formats compatible with your Mac iMovie and FCE, becide it supports XF300 MXF to FCP transcoding.

Guide on how to convert Canon XF300 MXF files to AIC for iMovie/FCE on Mac

If you have the same problems about editing Canon XF300/XF105/XF100 or C300 MXF Videos on Mac, you may follow the step-by-step guide.

Step 1. Free download and run the best Mac MXF to AIC Transcoder for FCE/iMovie, add MXF captured by XF300 to the program. You can not only click "add video" button to import Canon mxf files, but also you can click "add from folder" button to add MXF folder.


Step 2: In order to convert/import Canon XF300 MXF files to AIC for iMovie/FCE, you just need select AIC (*.mov) as output format.

Please click on the dropdown menu of "Format", and then follow "iMovie and Final Cut Express > Apple InterMediate Codec(AIC)(*mov)."


Some more helpful features of the batch MXF to MOV Converter for Mac:

1. Settings- click to set video resolution(1920×1080/1440×1080/1280×720/720×480), bitrate (from 1Mbps to 20Mbps), frame rate (24p/30p)

2. Editor (next to "Add" icon)- click to set deinterlace, denoise, mute, volume up, trim, crop, etc.

3. This all-in-one toolbox can not only convert MXF files, but also transcode other HD video and rip Blu-ray/DVD  for playback, storage or editing.

Step 3: Click Convert" button to start transcoding XF300 MXF files to AIC MOV for iMovie/FCE  editing on Mac.

So there you have it. Once the MXF to MOV Conversion is done, you can go to the output folder to find the converted video files. Now you are free to import/edit Canon XF300 MXF files in iMovie/FCE under Mac without problems.

Read More: