This is an article about how to convert rmvb file to AIC codec for importing to iMovie on Mac OS X Mavericks, along with the introduction of RMVB Converter for Mavericks.

RMVB,short for a variable bitrate extension of the RealMedia multimedia container format developed by RealNetworks. RMVB is typically used for multimedia content stored locally. Files using this format have the file extension ".rmvb".
RMVB files are extremely popular for distributing Asian content, especially Chinese television episodes and movies. For this reason, they have become noticeably present (though not entirely popular, partly due to their incompatibility with other media players) on file sharing platforms such as BitTorrent, eDonkey and Gnutella. So RMVB files can be great for online downloads.
Mavericks brings more iOS features into the MAC along with other tweaks including iBooks, Apple Maps, Finder Tabs, and a number of other time-saving enhancements. However, it becomes even harder for you to get RMVB files into video editing program like iMovie on Mavericks due to the unsupported codec. You may know pretty well that iMovie can only import DV, MPEG-4, MPEG-4 and M4V, etc, but iMovie can't recognize RMVB naturally.
To import RMVB files to iMovie on Mavericks without any problem, you require this professional RMVB to iMovie Converter to convert Variable Bite Rate RMVB first to iMovie acceptable AIC codec and then import RMVB to iMovie with constant bit rate, with super fast conversion speed and excellent output audio and visual quality. Basic edition function supported, including crop, effect, merge, snapshot and rotate.
With this RMVB Converter for Mavericks, you can perfectly enjoy .rmvb videos on any common video players on Mac OS X Mavericks. Only change .rmvb format to accepted one by your video player, e.g. Apple QuickTime, convert .rmvb/rm files to .mov, .mp4, .3gp; Windows Media Player for Mac, covert .rmvb to .avi, .mpg. Just follow the steps below to transcode RMVB to AIC for importing to imovie for editing on Mavericks.
Preparation:
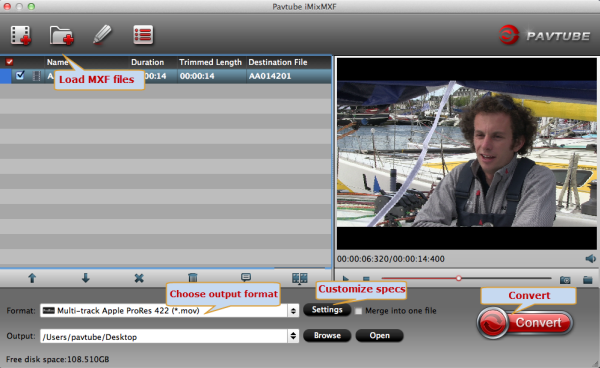
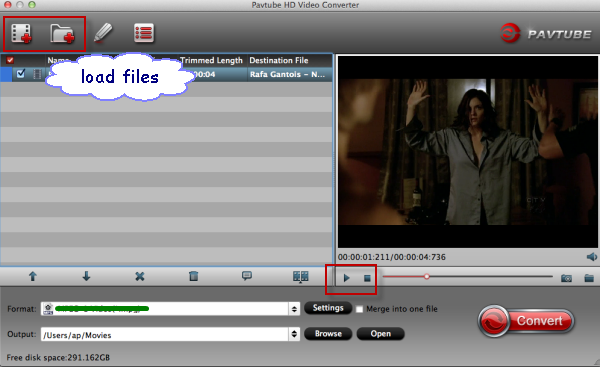
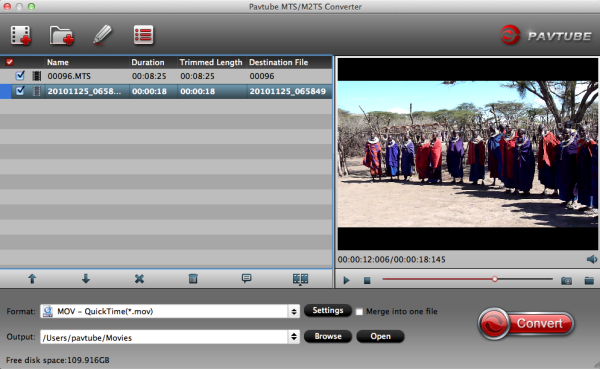
1. Install and launch the Mavericks HD Video Converter. You can directly drag and drop .rmvb/.rm video files to this software.
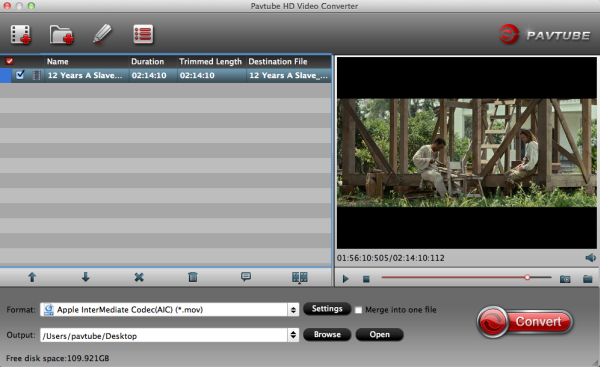
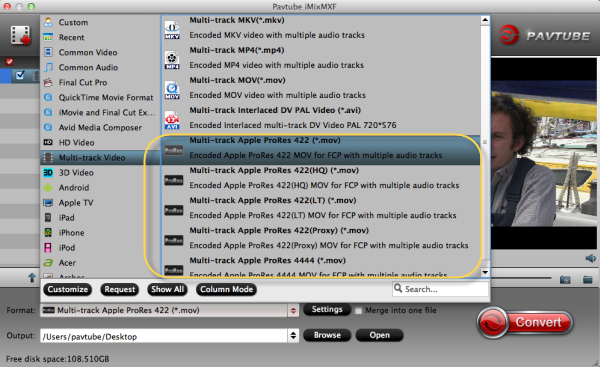
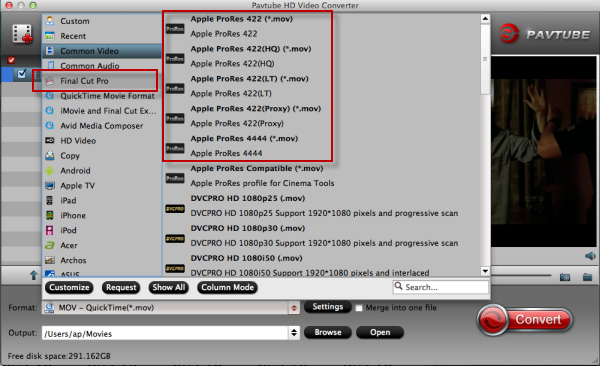
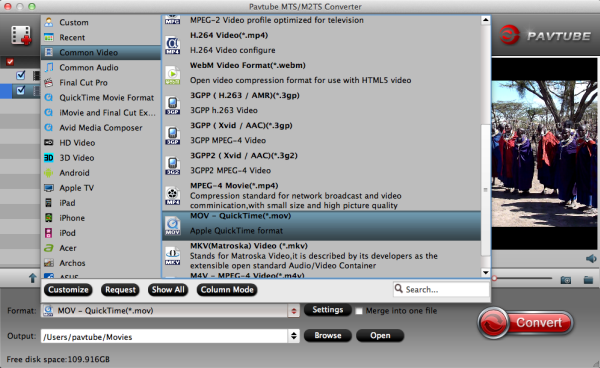
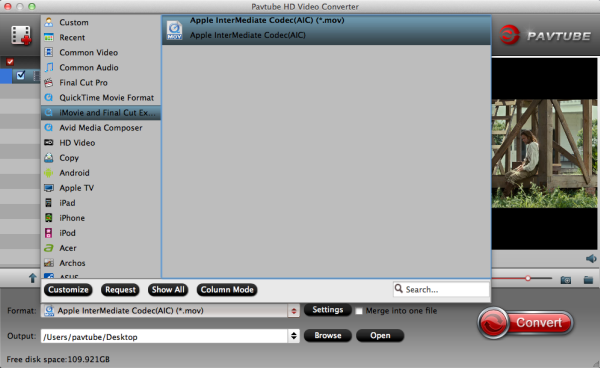
2. Click Format bar to choose the output format. Click and choose iMovie and Final Cut Express>Apple Intermediate Codec(AIC) (*.mov).
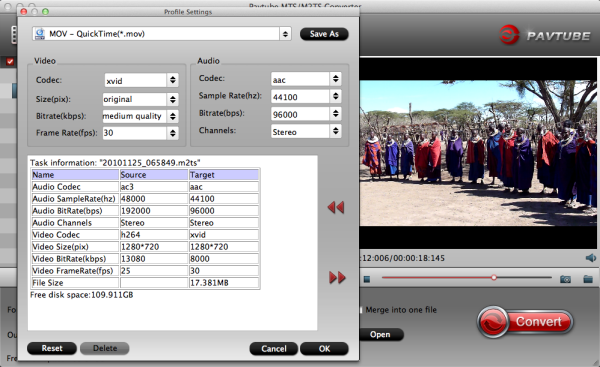
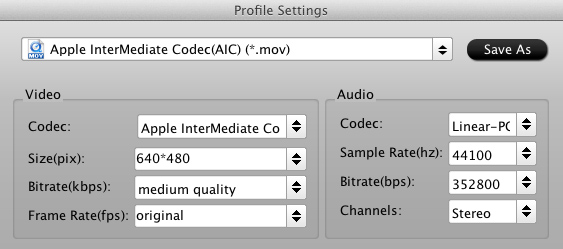
4.You can click "Settings" to customize the output parameters, adjust the resolution, bitrate as you want.
5.Start convert RMVB to AIC for iMovie editing on Mac OS X 10.9 Mavericks.
Click the "Convert" button to start transcoding RMVB to AIC .MOV videos to be compatible with iMovie.
After the MP4 to Prores conversion finished, you can easily import video files and projects into iMovie for further editing without any trouble. Congratulations! You have successfully taken the first step to make your own masterpiece.
With this RMVB to AIC Converter, you can easily change RMVB .rmvb/.rm files to iMovie for editing on Mac OS X mavericks
More Related Guides:
Import Canon VIXIA HF G20 1080 60i AVCHD to iMovie/FCE
Get Panasonic AJ-HPX2000 P2 .MXF into iMovie 6/8/9/11on Mac
Convert Lumix GM1 MTS for Editing in iMovie 11/9/8