Want to keep the 3D Blu-ray Disc "Jack the Giant Slayer" on your Hard Drive for storage? Check out this article to learn how to backup/copy Blu-ray/DVD discs onto hard drive with the best 3D Blu-ray Backup Tool.

Jack the Giant Slayer is now in 3D Blu-ray version, it will bring us an imaginative fantasy realm straight into our room without going to the cinema. Need to back up your favourite Blu-rays like "Jack the Giant Slayer" on your hard drive, then you can easily get the 3D movies playback on any device?
At first, to backup Jack the Giant Slayer 3D Blu-ray Disc to Hard Drive, you need to a third-party software to backup Blu-ray discs without sacrificing the picture quality seems to the best choice for you. And for those who rent lots of movie of discs, it is also a great way to copy the discs for future watching.
Here Pavtube BDMagic is a professional program in making digital copy of Blu-ray. It can rip the latest 3D/2D Blu-ray and DVD and convert to various video formats for some popular smartphones and tablets as well as editing software. Simple interface and CUDA acceleration will bring you an easy but effective conversion. The following guide will show you detailed steps. (Another two programs can also do the job like ByteCopy and Video Converter Ultimate.)
Now you can have the trial version to try all the functions firstly, and then download the retail version to install it. (Mac users go to get BDMagic for Mac).
How to convert/copy Jack the Giant Slayer 3D Blu-ray Disc to Hard Drive for enjoying
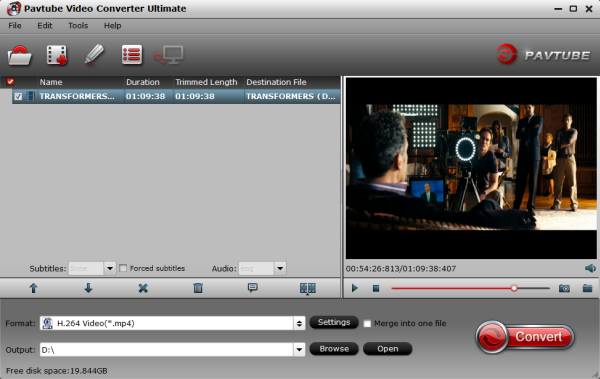
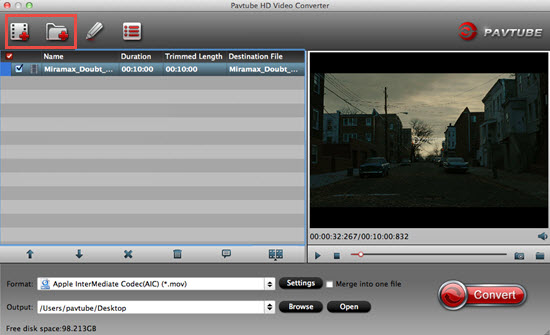
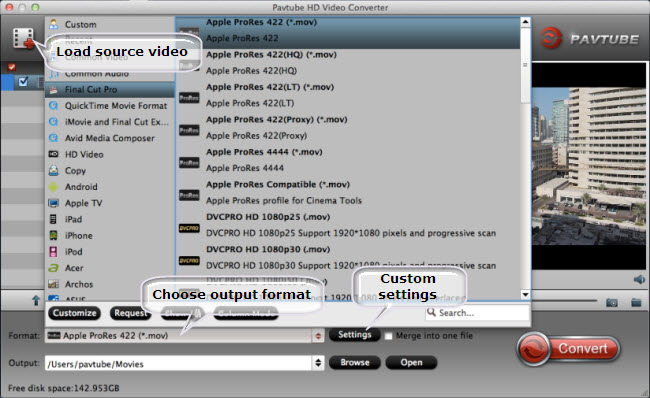
1. Import Blu-ray source.
Click "Load file" button to import the inserted Jack the Giant Slayer 3D Blu-ray disc. After few second, it will be imported successfully and you can preview the whole movie in the preview window.
Then, you need to select the subtitle and audio track for output. As blu-ray movie contains multiple audio and subtitle tracks, you could choose your favorite one for output.
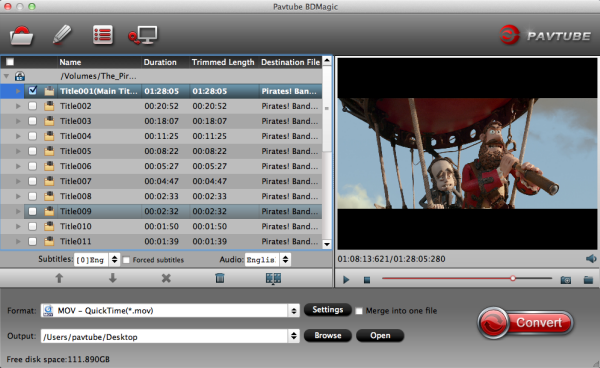
Note: Force subtitle can be checked for output so as to help you to read the unknown language and fully enjoy the blu-ray.
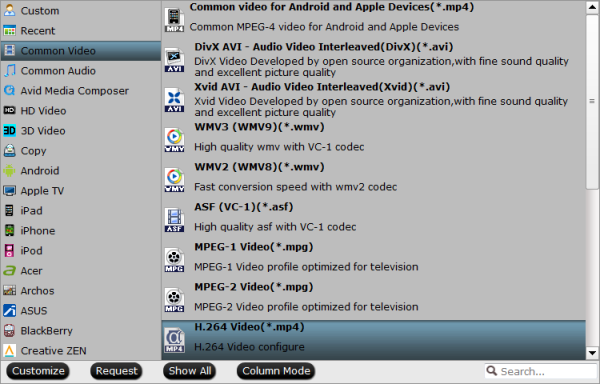
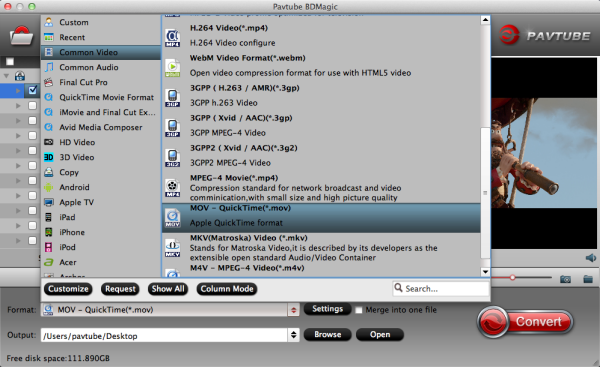
2. Choose output format.
Now go to "Format" menu to select output format there. A variety of options are listed such as many portable devices, video editing software, various HD video formats, etc. Choose the one you desired.
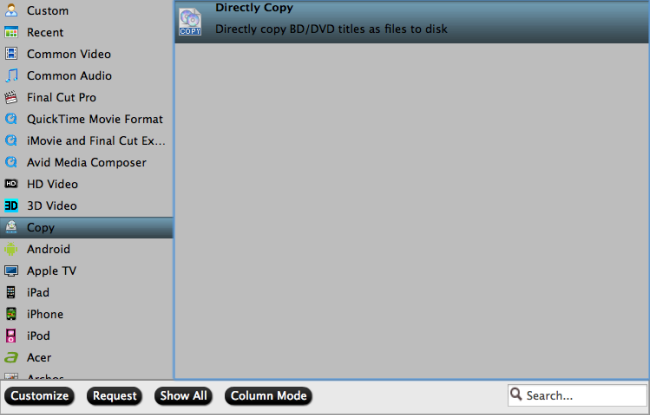
Note: You can find the "Directly Copy" option there. It will support to backup 100% intact the blu-ray main movie with all multiple tracks preserved. And you will get one M2TS file for output. If you want to backup blu-ray, it is a good choice for you.
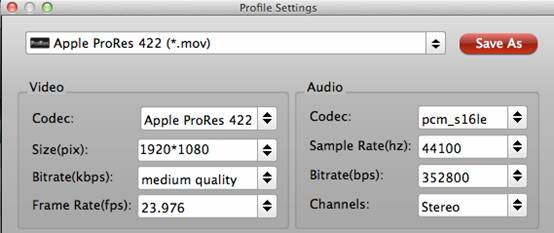
By the way, if you want, you can adjust output video and audio parameters according to your own needs. You can change bitrate, frame rate, channels, etc. Click "Settings" button to set output profiles.
3. Convert Jack the Giant Slayer 3D Blu-ray disc.
Now it's time to start conversion. Click big Convert button on the interface and then you will get a conversion dialogue box to show the exact progress, like time left, estimated size, state and so on.
Note: If you are bothered about waiting for conversion to finish, you can choose to check "shut down computer after conversion". Then just let it alone, you are free to go out to do anything you like.
Now you have copied Jack the Giant Slayer 3D Blu-ray onto your hard drive. With the best 3D Blu-ray Backup and copy tool, you can take your favorite blu-ray anywhere and enjoy them whenever you want to. Just try it now!
Meanwhile, there are many Money Saving Software Bundles, such as Blu-ray Ripper + DVD Creator for rip blu-ray and burn to DVD. You will get 49% off for bundled software. Go to find the one you need.
Read More: