An MP4 file is a file format for storing digital multimedia including video, audio, still images, subtitles and other data. MP4 files require relatively low bandwidth and if uses highly efficient compression codecs for audio and video that are able to preserve the quality of the content. MP4 is actually a "container" video format, which comprises different audio and video codecs. That's to say, if the video and audio codec inside MP4 is unmatch with Avid Media Composer, you'll certainly fail to import and open your MP4 in Avid Media Composer.
On Avid official website, it recommends DNxHD or XDCAM codec for editing, and DNxHD codec is the first choice. So if want to get Avid Media Composer work perfectly with MP4 videos, the easy workaround is to convert MP4 to DNxHD mov. Pavtube Video Converter for Mac (Best Video Converter for Mac Reviewe) can be of great help in this task. With it, you can effortlessly transcode MP4 files to DNxHD 720p, DNxHD 1080p for Avid Media Composer, and it works well and converts flawlessly. Meanwhile, with it you can create files compatible with various non-linear editing systems like FCP, iMovie, etc. If you are running on Windows, get Windows Version.
Here we are going to guide you through to solve all your problems concerning editing MP4 on Avid Media Composer. Just download and achieve your goal smoothly.
How to Convert MP4 Files to DNxHD for Avid Media Composer
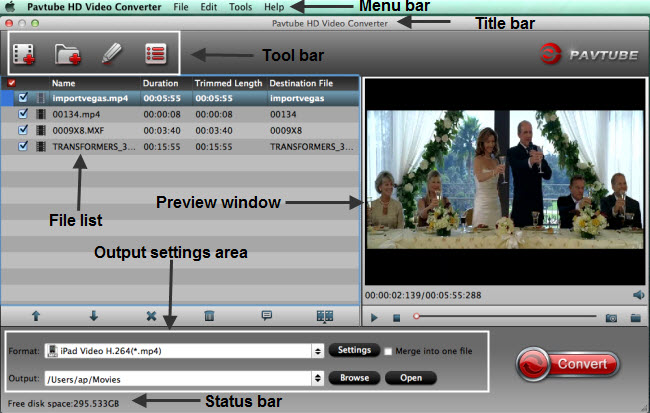
Download and install Pavtube Video Converter on Mac (compatible with Mac OS X 10.11 El Capitan, 10.10 Yosemite, 10.9 Mavericks, 10.8 Mountain Lion, 10.7 Lion, 10.6 Snow Leopard, 10.5 Leopard and lower versions). Run this program, you will find the interface is very brief, this program is very easy to use.
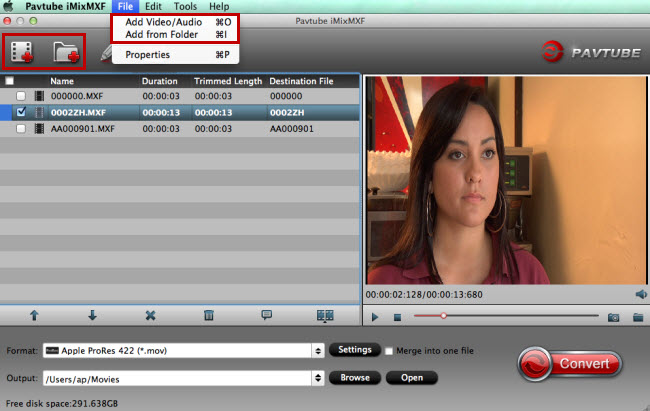
Step 1. Add MP4 files
Click "Add Video" button to load MP4 files to the program. You can also directly drag the video files into the program directly.

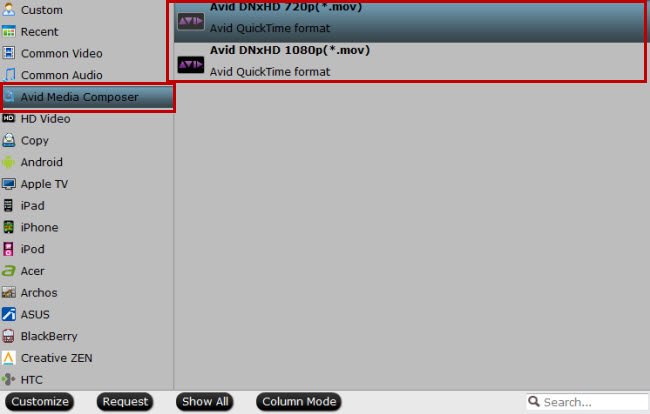
Step 2. Select output format
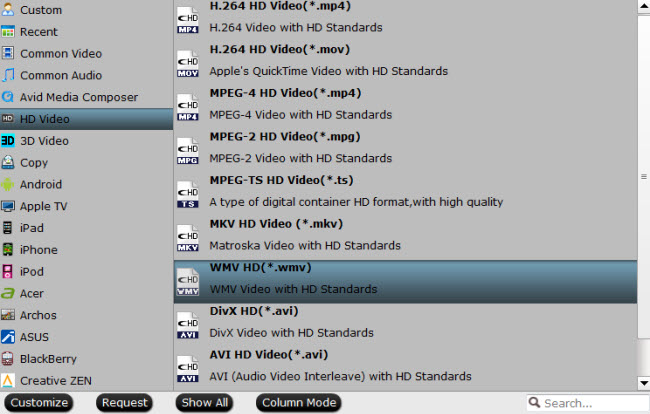
From "Format" drop-down lists, you can select Avid Media Composer preferable editing codec from "Avid Media Composer" > "Avid DNxHD(*.mov)" as the output format.

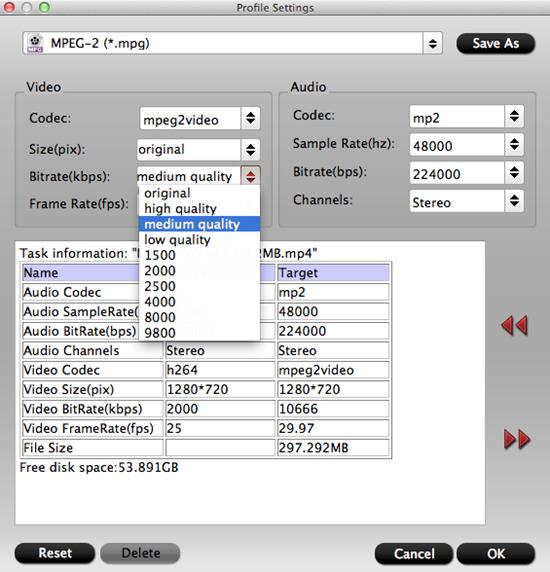
Tip: If you like, adjust video and audio parameters, including the Bitrate of Video and Audio, the Codec of Video and Audio, Video Size, Sample Rate, Frame Rate, Audio Channels, etc., by clicking the Settings button on the main interface for getting the best quality.

Step 3. Start the conversion
Finally, simply hig the big Convert button to start converting MP4 to Avid Media Composer friendly video formats.
Within several minutes, you can find the converted file on your computer by clicking the "Open" button. And then you can import the converted files to Avid Media Composer easily.
Related program:
Pavtube Media Magician / Mac Version: A nice camcorder assistant manager, lossless camcorder video joiner, MTS/ M2TS/ MXF/ P2 MXF/ MOV/ MKV/ TiVo/ WMV/ AVI/ MPG converter and editor. Meamwhile it supported upload edited video to YouTube directly.
Pavtube HD Video Converter / Mac Version: It is designed for converting HD videos from HD camcorders or DVs (like JVC, Panasonic, Sony and Cannon), non-protected HD or movies, DVR files (*.tivo) to other file types for playback on popular media devices like Apple TV, PS3, Xobx, Xobx360, WD TV HD Player.
Read More: