Tuesday, September 26, 2017

Edit Panasoni GH5 4K with Avid Media Composer

The Lumix DC-GH5 Mirrorless Micro Four Thirds Digital Camera from Panasonic has the ability to shot 4K MOV or MP4 video with H.264 compression codec at up to 60 fps. When loading the Panasonic GH5 4K video to Avid, a lot of people complain that they can't get a smooth GH5 4K workflow with Avid Media Composer. The following article will illustrate this issue and offer the detailed solutions for you.

Can Avid Media Composer handle 4K video?

Avid has enhanced the ability to edit 4K resolutions video to Media Composer 8.31. But all previous version, including version 8, can only edit at up to HD resolutions. In addition, Avid's 4K playback is not as good as Premiere Pro or Grass Valley EDIUS if you are using native footage (ie footage which has not been converted to Avid's format). What's more, Avid's system requirements for 4K editing at quite high. You should have a dual 10 core Xeon system as an "entry level" 4K editing suite and ideally a faster computer for more 4K editing. For those people who wish to get the best editing workflow of 4K with Avid, it would be much ideal for you to use Avid's own 4K codec - DNxHR, which can perfectly handle 4K file sizes. Alternatively, you can choose to edit with the Proxy modes, which helps to drop your footage to a resolution which your system can cope with.

Best workflow of GH5 4K with Avid Media Composer

Obviously that a lot of computer that people currently use may not meet the high requirements for Avid Media Composer to handle 4K resolution video. Since it is not sensible for you to switch to a powerful computer at once, therefore, it would be a good option for you to compress 4K to 1080p for creating a smaller Proxy file so that you can get a smooth post editing workflow even if your computer is a little old or slow. For those people who wish to get the best HD editing workflow with Avid Media Composer, we highly recommend you to use the DNxHD codec, a lossy high-definition video post-production codec developed by Avid for creating mastering-quality media with reduced storage and bandwidth requirements.

Transcode and compress GH5 4K to Avid 1080p DNxHD codec

To produce Avid best compatible 1080p DNxHD codec, we highly recommend you to download Pavtube Video Converter for Mac, a powerful 4K Video Converter with perfect importing support for Panasonic GH5 4K MOV and MP4 files. The program supports batch conversion mode, so that you can load multiple GH5 4K video into the application for conversion at one time. With just few clicks, you can then efficiently transcode Panasonic GH5 4K to Avid Media Composer most favorable 1080p DNxHD codec with perfect quality and super fast conversion speed.

Pavtube Video Converter for Mac has full OS compatibility with the new macOS High Sierra, macOS Sierra, Mac OS X El Capitan, Mac OS X Yosemite, Mac OS X Mavericks, etc. In addition, it is also accompanied by an up-to-date Windows version - Pavtube Video Converter for Windows 10/8.1/8/7.

Step by Step to Convert and Compress Panasonic GH5 4K to Avid Media Composer

Step 1: Load Panasonic GH5 4K video.

Download the free trial version of the program. Launch it on your computer. Click "File" menu and select "Add Video/Audio" or click the "Add Video" button on the top tool bar to import Panasonic GH5 4K video files into the program.

Load Panasonic GH5 4K video

Step 2: Define the output format.

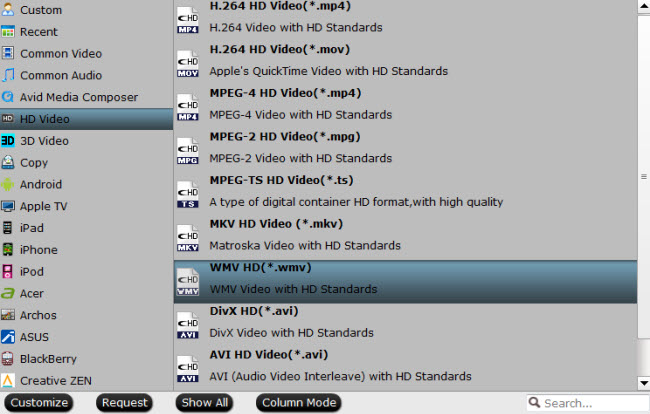
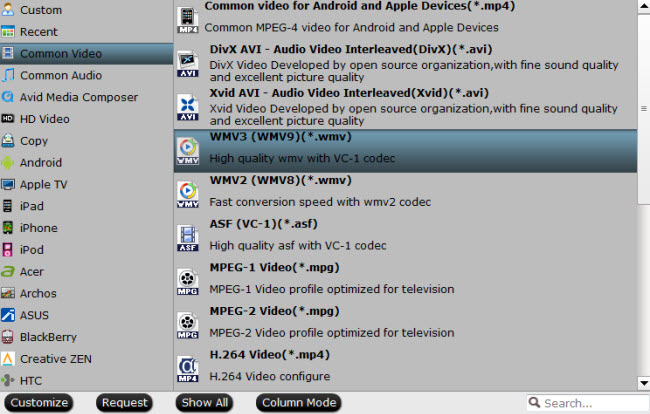
Clicking the Format bar, from its drop-down list, select Avid Media Composer best compatible editing codec "Avid DNxHD(*.mov)" under "Avid Media Composer" main category.

Output Avid Media Composer supported editing codec

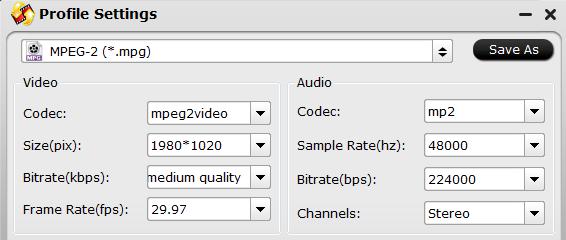
Step 3: Compress 4K to 1080p.

Click "Settings" on the main interface to open "Profile Settings" window, from "Size(pix)" drop-down list, choose "1980*1020" or "1020*720" to compress 4K to 1080p or 720p for smooth editing workflow with Avid on old or slow computer.

Step 4: Begin the conversion process.

After all setting is completed, hit the "Convert" button at the right bottom of the main interface to begin the conversion process from Panasonic GH5 4K to Avid Media Composer 1080p DNxHD codec.

When the conversion is finished, click "Open Output Folder" icon on the main interface to open the folder with generated files. Then you can get a smooth workflow of Panasonic GH5 4K with Avid Media Composer.

Tuesday, September 19, 2017

Import Sony RX10 IV 4K XAVC S to Avid Media Composer

The Cyber-shot DSC-RX10 IV from Sony is a compact solution for the multimedia image-makers. With the camera, you can record UHD 4K video at 30/24 fps, which helps to produce movies with exceptional clarity. When the shooting is done, you may wonder the possibility of using the RX10 IV 4K XAVC S in Avid Media Composer directly for post editing workflow without using a third-party application. The following article will illustrate this issue for you with great details.

Workflow of 4K XAVC S with Avid Media Composer

For faster and fluid workflow, Sony has created a special free of charge AMA plug-in for AVID (PDZK-MA2 V.3.4). This software for Microsoft Windows and MAC OS X operating systems provides support for XAVC and XDCAM / XDCAM HD files in Avid Media Composer. The bad news is that XAVC S is not currently supported natively by Avid Media Composer. To import XAVC S into Avid for smooth editing, a third-party software is required to convert XAVC S to DNxHD, an editing codec developed by Avid to create mastering-quality media at reduced file sizes, shattering the barriers to real-time productivity, whether using local storage or in real-time collaborative workflows.

Transcode RX10 IV 4K XAVC S to DNxHD for Avid

To get the best editing workflow of 4K XAVC S with Avid, then it is essential for you to encode RX10 IV 4K XAVC S to Avid Media Composer most favorable DNxHD codec. Here, you can get the job easily completed with our powerful yet simple to use application Pavtube Video Converter for Mac (review). The program has perfect compatibility with the 4K XAVC S video shot with Sony RX10 IV. Thanks to its batch conversion mode, you can load multiple video into the application for conversion at one time.

With the program, you can easily produce Avid Media Composer specially optimized high quality and high performance editing codec - DNxHD from Sony RX IV 4K XAVC S with perfect quality and super fast conversion speed.

Edit 4K XAVC S with built-in editing options

Before loading the camera footage into Avid for some professional post editing workflow, you can complete some simple editing work with the program's built-in editing functions. You can trim or cut video to remove the unwanted parts from the video, crop video to remove the black bars or unwanted size area, add video/image/transparent text watermark, apply special rendering effect, deinterlaced interlaced video into progressive form, add external srt/ass/ssa subtitle to video, etc.

For Windows users, you can download Pavtube Video Converter to complete the conversion on Windows 10/8.1/8/7.

Step by Step to Convert Sony RX IV 4K XAVC S to DNxHD for Avid Media Composer

Step 1: Load Sony RX IV 4K XAVC S video.

Download the free trial version of the program. Launch it on your computer. Click "File" menu and select "Add Video/Audio" or click the "Add Video" button on the top tool bar to import Sony RX IV 4K XAVC S files into the program.

Load Sony RX IV 4K XAVC S video

Step 2: Define the output format.

Clicking the Format bar, from its drop-down list, select Avid Media Composer best compatible "Avid DNxHD(*.mov)" under "Avid Media Composer" main category.

Output Avid Media Composer best supported editing codec

Tips: Click "Settings" on the main interface to open "Profile Settings" window, here, you can flexibly adjust the output profile parameters including video codec, resolution, bit rate, frame rate, audio codec, bit rate, sample rate, channels, etc as you like to get better output video and audio quality.

Adjust output profile parameters

Step 3: Edit Sony RX IV 4K XAVC S video.

By default the Edit icon is grayed out. To activate the Edit menu, you have to select an item first. When a video or movie is selected, click the pencil like Edit icon on the left top tool bar to open the video editor window, here, you can play and preview the original video and output effects. Trim video length, crop video file size, add transparent watermark, apply special effect, insert external subtitle.

Edit Sony RX IV 4K XAVC S video

Step 4: Start the conversion process.

After all settings is over, go back to the main interface and hit right-bottom "Convert" button to start Sony RX IV 4K XAVC S to Avid Media Composer 1080p DNxHD conversion process.

When the conversion is finished, click "Open Output Folder" icon on the main interface to open the folder with generated files. Then you can get a smooth and high quality workflow of Sony RX IV 4K XAVC S with Avid Media Composer.

Wednesday, September 13, 2017

Edit AVCHD with Windows Movie Maker

Have shot some high definition AVCHD video with your Sony, Canon, Panasonic or JVC camcorder and wish to load them into the free video editing software Windows Movie Maker by adding some titles, effects and transitions. The bad news is that AVCHD video mts/m2ts is not the supported editing formats for Windows Movie Maker. The following article will show you how to convert AVCHD to Windows Movie Maker supported file formats.

Convert AVCHD for Windows Movie Maker

Windows Movie Maker supported file formats

To convert AVCHD to Windows Movie Maker, you should first be clear of supported file formats by Windows Movie Maker. After searching online, we get the following tablets:

Best tool to convert AVCHD to Windows Movie Maker

If you are looking for powerful yet simple to use application to get the job done, we highly recommend Pavtube Video Converter to you. The program has full support for both AVCHD MTS or M2TS files. Thanks to its batch conversion mode, you can load multiple AVCHD video into the program for conversion at one time. With this remarkable application, you can easily convert AVCHD to Windows Movie Maker compatible editing formats AVI, WMV, etc. To get better output quality, you can flexibly adjust output profile parameters including video codec, resolution, bit rate, frame rate, audio codec, bit rate, sample rate, channels, etc as you like.

Edit AVCHD with built-in editing tools

Before converting AVCHD video for Windows Movie Maker, you can also use the program to complete some simple editing work. You can trim or cut video to remove unwanted parts or segments, crop video to remove the black bars or unwanted size area, apply special rendering effect to video, flip or rotate video, deinterlace interlaced video into progressive form, split large video into small parts by file size, count or length, merge multiple separate video into one file, add external subtitle to video, etc.

Step by Step to Convert AVCHD for Windows Movie Maker Editing

Step 1: Load AVCHD into the application.

Download the free trial version of the program. Launch it on your computer. Click "File" menu and select "Add Video/Audio" or click the "Add Video" button on the top tool bar to import source AVCHD video files into the program.

Load AVCHD video into the program

Step 2: Choose output file formats.

Clicking the Format bar, from its drop-down list, select Windows Movie Maker supported "WMV HD(*.wmv)" under "HD Video" main category.

Output Windows Movie Maker supported file formats

Tips: Click "Settings" on the main interface to open "Profile Settings" window, here, you can flexibly choose or specify exactly the profile parameters including video codec, resolution, bit rate, frame rate, audio codec, bit rate, sample rate, channels, etc as you like to get better output video and audio quality.

Step 3: Edit AVCHD video.

By default the Edit icon is grayed out. To activate the Edit menu, you have to select an item first. When a video or movie is selected, click the pencil like Edit icon on the left top tool bar to open the video editor window, here, you can play and preview the original video and output effects. Also you can flip or rotate video, trim, crop, add watermark, apply special effect, edit audio or insert external.

Edit AVCHD video

Step 4: Start the final conversion process.

Simply click the "Convert" button to start converting AVCHD video to Windows Movie Maker friendly video formats, Within several minutes, you can find the converted file on your computer by clicking the "Open Folder" button. And then you can import the converted WMV file into Windows Movie Maker by clicking "File" > "Import" to select the converted files.

Wednesday, September 6, 2017

Edit GoPro MP4 with Windows Movie Maker

Have shot some MP4 footage with your GoPro Hero camera and when you try to load the footage into Windows Movie Maker, the default video editing software for Windows, you are disappointed to find that the editing software doesn't import MP4 files. The following article will show you why Windows Movie Maker not import GoPro Hero MP4 files and how to fix this problem with ease.

Why Windows Movie Maker not import GoPro MP4 video?

To find answer for this question, we should be clear what Windows Movie Maker supported file formats and the specific compression codec used by GoPro MP4 camera. After searching online, we find that Windows Movie Maker has included native importing support for MP4 files, however, only MP4 files compressed with MPEG-4 compression codec can be loaded into it. In addition, some MPEG 4 video files can not be used when you're using Movie Maker on a computer running Windows Vista if the necessary audio and video codecs are not installed.

As for the specific tech information of GoPro Hero camera, we get the information that the GoPro Hero camera records footage in MP4 container format with H.264 compression codec, which is not the native importing codec for Windows Movie Maker.

Related article: Edit 4K video with Windows Movie Maker | Convert Windows Movie Maker to MP4

Fix Windows Movie Maker not edit GoPro MP4 video

To successfully import GoPro Hero MP4 video into Windows Movie Maker, a codec transcoding process is essential. Here, you can get the job easily done with our powerful yet simple to use application - Pavtube Video Converter. The program supports batch conversion mode, so that you can load multiple GoPro Hero MP4 video into the application for conversion at one time. The program is pretty simple to use, you can easily complete the whole conversion with just few clicks. Just load the GoPro MP4 video into the application, choose Windows Movie Maker native compatible editing formats such as WMV format. Then hit the conversion button in the right bottom.

For those people who wish to get better output video and audio quality, you can flexibly adjust output video and audio profile parameters such as video codec, resolution, bit rate, frame rate, audio codec, bit rate, sample rate, channels, etc as you like.

Step by Step to Convert GoPro Hero MP4 for Windows Movie Maker Editing

Step 1: Load GoPro Hero MP4 video.

Download the free trial version of the program. Launch it on your computer. Click "File" menu and select "Add Video/Audio" or click the "Add Video" button on the top tool bar to import GoPro Hero MP4 files into the program.

Load GoPro Hero MP4 video

Step 2: Output Windows Movie Maker supported editing formats.

Click the Format bar, from its drop-down list, select Windows Movie Maker supported editing formats "WMV HD(*.wmv)" under "HD Video" main category.

Output Windows Movie Maker supported file formats

Step 3: Edit video(optional).

The program can also function as an alternative to Windows Movie Maker to assist you to do some simple video editing work. You can trim video length, crop video black bars, add watermark, apply special rendering effect, remove/replace audio in video, add external subtitle to video, etc.

Edit video with built-in editing tools

Step 4: Begin the conversion process.

After all setting is completed, hit the "Convert" button at the right bottom of the main interface to begin the conversion process from GoPro Hero MP4 to Windows Movie Maker supported WMV HD editing formats.

When the conversion is finished, click "Open Output Folder" icon on the main interface to open the folder with generated files. Then you will have no problem to edit GoPro Hero MP4 video with Windows Movie Maker.

Wednesday, August 30, 2017

Best Windows Movie Maker Alternatives

Why need to find Windows Movie Maker alternative?

As a part of Windows Essentials software suite, Windows Movie Maker was officially discontinued. Microsoft removed the installer from its website earlier this year, and has deleted all references to a potential new version for Windows 10. The good news is that there are still some excellent powerful, easy to use yet free editing software that can substitutes Windows Movie Maker to assist you to create great-looking video. The following article has listed top 5 best alternatives to Windows Movie Maker for you as a reference.

Best 5 Windows Movie Maker Alternatives

Top 1: Pavtube Video Converter Ultimate

Why we ranked Pavtube Video Converter Ultimate as the best alternative to Windows Movie Maker is due to its friendly and easy to navigate interface, perfect Windows 10 compatibility, various input and output format options and versatile video editing functions. It can perfectly satisfy all great basic editing demand to create professional looking video in just few clicks.

Get Pavtube Video Converter Ultimate with 20% off discount, coupon codec: 45K2D47GJH

Unlike Windows Movie Maker that only support limited file formats for inputting, Pavtube Video Converter Ultimate has full support for not only 4K/2K/HD/SD 4K video in virtually any file formats bt also commercial Blu-ray or DVD disc. Whats more, the program supports batch conversion mode, so that you can load multiple digital video into the program for conversion at one time to save your precious time. As for the core editing function, you can use our program to easily complete the following simple editing work:
- Trim or cut video to leave only your unwanted specific parts
- Crop video to remove black edges or unwanted size area
- Add video/image/transparent text watermark to video
- Apply special rendering effect to video
- Change video picture effect such as brightness, contrast or saturation
- Deinterlace interlaced video into progressive form
- Flip video horizontally, vertically, rotate video clock-wise or counter-clockwise
- Remove/replace audio in video
- Add external SRT/ASS/SSA subtitle to video
- Merge multiple separate video clips into one file (WMM only allows you to join contiguous video into one file)
- Split large video into smaller parts by file size, count or length

When the editing work is completed, you can use our program to export the edited video to various popular file formats, device or editing program preset profile formats for conveniently viewing on computer with media player software, transfer to portable devices, upload and share on popular video sharing sites, etc.

The program is available on Windows 10/8.1/8/7. The program is quite simple to use, anyone can learn to use it in minutes. Whats more, the program is 100% clean, there is no spyware, no malware, no adware and no virus.

Top 2: Avidemux (for Windows)

For those people who only used Windows Movie Maker for basic video editing tasks, Avidemux is well worth a look. It doesnt offer a fancy interface or direct sharing to social media, but if you take a little time to peruse its menus, youll find its surprisingly capable. Avidemux offers preset profiles for different output devices, video and audio filters, fades, subtitles, and lots of customizable encoding options.

The main downside of Avidemux is that you cant join videos together with different heights or widths. This wont matter if your footage are shot with the same smartphone or screen tool, but can be inconvenient if your media come from different sources. To fix this problem, you have to resize each clip separately, export it, then make a new project. Although its not a serious issue, but the developers are aware and it should be resolved in a future update.

Top 3: VSDC Free Video Editor (for Windows)

As a friendly-looking video editor, the The VSDC Free Video Editor starts off with a bunch of options such as a blank project, creating a slideshow, importing content, capturing video, or capturing a screen.

Most of the features you need for your project are under the Editor tab. This includes various filters, video effects, audio effects, add music, trim videos, and add text or subtitles. One thing that's really nice about VSDC is that it's easy to shift the point at which your music track starts. So if you want it to start a few seconds after the video is running, you just have to click and drag the bar representing the audio file.

Once you've got your project set-up the way you like it, head over to the Export project tab where you can easily export it using a specific video format, as well as modify the resolution for specific screen sizes such as the PC, iPhone, Web, DVD, and so on.

VSDC lacks the in-app uploads for various web services so you'll have to do that the old fashioned way: through each website's manual upload system.

Top 4: VirtualDub

This open-source software program runs smoothly with Windows 10. It has a very user-friendly interface makes navigating the program easy for those with a little experience in video editing. Your files can even be extended using third-party video filters and it supports batch processing which means it is possible to handle multiple videos at the same time. Unfortunately, even with its friendly interface, this program can be a little difficult to understand for beginners.

Top 5: VideoPad Video Editor

If youve ever used Windows Movie Maker, VideoPad Video Editor will look immediately familiar. Simply load your video clips, images and sound files that you want to include in your project, then drag them into the timeline to start cutting them together.

Theres an excellent selection of transitional effects for moving between clips and images, plus a collection of filters to give them a whole new look. You can preview the various filters with a single click, combine several to create a custom effect, and decide how long transitions should last.

There are also manual settings for refining brightness, saturation and color - ideal if youre using video clips that were shot in different lighting conditions and want to give them a consistent look.
The export functions are extensive, too. Burn your finished videos to DVD, save them to your hard drive in one of several available formats or share them directly to YouTube or Facebook. There are also compatible presets available for selected smartphones and mobile video players.

Conclusion:

Based on above reviews and comparisons, if you are looking for a powerful, simple to use yet safe alternative to Windows Movie Maker, there is no better choice than Pavtube Video Converter Ultimate.

Wednesday, August 23, 2017

Edit Prores with Windows Movie Maker

Have some Prores files exported from your NLE editing software such as Premiere Pro CC, After Effects CC, Premiere Elements, Avid Media Composer or shot with your Canon/Panasonic/Red/Sony/Alexa camera and wish to load the Prores files into Windows Movie Maker for adding titles, effects and transitions. The bad news is that although Prores has perfect compatibility with Final Cut Pro, Premiere Pro CC and Avid Media Composer, however, you may get no chance to load it into Windows Movie Maker, the free video editing software from Microsoft, since Prores is not included in Windows Movie Maker supported file formats.

Windows Movie Maker supported file formats

To successfully adding Prores files to WMM, you should first be clear of what are Windows Movie Maker supported file types. Following are the video and audio files can be used in Windows Movie Maker.

Video files

Video file types (format) File name extensions 
Windows Media Video (WMV) files  .wmv
Windows Media files .asf and .wm
AVCHD files .m2ts, .mts, and .m2t
Apple QuickTime files .mov and .qt
DV‑AVI files .avi
Microsoft Recorded TV Show files .dvr-ms and .wtv
MPEG‑4 movie files .mp4, .mov,.m4v, .3gp, .3g2, and .k3g
MPEG‑2 movie files .mpeg, .mpg, .mpe, .m1v, .mp2, .mpv2, .mod, .vob, and .m2t
MPEG‑1 movie files .m1v
Motion JPEG files .avi and .mov

Audio files

Audio file types (format) File name extensions
Windows Media Audio (WMA) files .asf, .wm, and .wma
Pulse‑code Modulation (PCM) files .aif, .aiff, and .wav
Advanced Audio Coding (AAC) files .m4a
MP3 files .mp3

Convert Prores to Windows Movie Maker editable file formats

To convert Prores for Windows Movie Maker editing, you can download our best Prores Converter for Windows - Pavtube Video Converter, which has full support for both 4K/HD Prores format produced from either video editing software or professional cameras.

With the program, you can batch import multiple Prores format into the program for conversion at one time to save your precious time. As for which format to choose for Windows Movie Maker editing, we highly recommend you to choose "WMV" format, which is the native format supported by WMM without installing any extra codec.

Edit Prores with built-in editing options

Besides transcoding Prores format for you, you can also use the program to do some simple editing task. You can trim or cut video to get only your unwanted parts or segments, merge separate video clips into one file, split large files into small parts by file size, length or count, crop the black bars around the video frame, add video/image/transparent text watermark to video, apply special rendering effects to video, etc.

Step by Step to Convert and Import Prores to Windows Movie Maker Editing

Step 1: Load Prores files.

Run the program on your computer and click "File" > "Add Video/Audio" or "Add from folder" to add Prores files into the program.

Load Prores files into the program

Step 2: Choose output file format.

Clicking the Format bar, from its drop-down list, select Windows Movie Maker native compatible WMV file format to output. The program allows you to produce 3 different types of Apple Prores format.

If you wish to have a fast conversion speed, it would be ideal for you to choose "WMV2(WMV8)(*.wmv)" format.

Output WMV2 format

If you wish to produce a high quality file format, just choose "WMV3(WMV9)(*.wmv)".

Output WMV3 format

If you wish to produce a high definition file format, select "WMV HD(*.wmv)" under "HD Video" main category.

Output WMV HD format

Step 3: Edit video.

Check an item to active the "Video Editor" function, then click the pencil like icon on the top tool bar to open the "Video Editor" window, you can trim video length, crop video black bars, add watermark, apply special rendering effect, remove/replace audio in video, etc.

Edit video

Step 4: Begin the conversion process.

Click right-bottom "Convert" button to convert Prores to Windows Movie Maker supported file WMV file formats.

Once the conversion is finished, you can click "Open Output Folder" button to get the output files effortlessly, and now feel free to import converted files to Windows Movie Maker for editing via its "Import video" option.

Wednesday, August 16, 2017

Edit 4K MXF with After Effects CC/CS6

You might have shot some 4K MXF files with you Canon XC10, Canon XF100/XF105/XF305/XF300, or EOS C300 Mark II, when you try to load the 4K MXF files into After Effects CC/CS6, you may receive an error message says "file < file name > .mxf can not be imported - this mxf file is damaged or unsupported". Why does this happen and how to fix this problems.

Can After Effects CC/CS6 support 4K MXF files?

Since After Effects CS4, MXF is supported by AE. As for the ability to process 4K resolution video, only the latest version of After Effects CC can handle 4K video. Therefore, if you try to import 4K MXF to After Effects CS6, the 4K video will stutter, lag or jump when you are playing with After Effects CS6. Therefore, it would be much ideal for you to compress 4K to 1080p for smooth editing workflow of 4K MXF with After Effects CS6 or previous version.

Although you can smoothly load 4K video into After Effects CC, however, it doesn't mean that you can throw any 4K MXF video into the editing software. It is well known that MXF is a container file format, which supports a number of different streams of coded "essence", encoded in any of a variety of video and audio compression formats. However, from After Effects CC supported file formats, we can see that you can only load XDCAM HD MXF and Panasonic P2 MXF into After Effects CC. However, Canon XF is not supported by this professional non-linear editing software.

Convert/Compress 4K MXF for After Effects CC/CS6

To get a smooth and successful editing workflow of 4K MXF with After Effects CC/CS6, it would be much ideal for you to transcode and compress 4K MXF to After Effects CC/CS6 supported file formats. Here, you can get the job easily completed with a simple to use application called Pavtube Video Converter, which has full support for 4K MXF files produced by Sony XDCAM/Panasonic P2/Canon XF. With the program, you can batch convert and compress 4K MXF files After Effects CC/CS6 native compatible MPEG-2, WMV (VC-1) editing format.

Compress 4K to 1080p

Click "Settings" on the main interface to open "Profile Settings" window, in video section, from "Size(pix)" drop-down list, select "1980*1020" or "1080*720" to compress 4K video to 1080p or 720p to get smooth editing workflow with After Effects CC.

For Mac users, you can switch to download Pavtube Video Converter for Mac to perform the conversion on macOS High Sierra, macOS Sierra, Mac OS X El Capitan, Mac OS X Yosemite, etc.

Step by Step to Convert and Compress 4K MXF for After Effects CC/CS6 Editing

Step 1: Load 4K MXF files.

Download the free trial version of the program. Launch it on your computer. Click "File" menu and select "Add Video/Audio" or click the "Add Video" button on the top tool bar to import source 4K MXF files into the program.

Load 4K MXF files

Step 2: Define the output format.

Clicking the Format bar, from its drop-down list, select After Effects CC/CS6 specially optimized "Adobe Premiere/Son...">"MPEG-2(*.mpg)" as the best editing format.

Output After Effects CC/CS6 preset profile format

Step 3: Compress 4K video to 1080p.

Click "Settings" on the main interface to open "Profile Settings" window, in video section, from "Size(pix)" drop-down list, select "1980*1020" or "1080*720" to compress 4K to 1080p or 720p.

Compress 4K to 1080p

Step 4: Begin the conversion process.

After all setting is completed, hit the "Convert" button at the right bottom of the main interface to begin the conversion process from 4K MXF to After Effects CC/CS6 native compatible MPEG-2 video with 1080p resolution.

When the conversion is finished, click "Open Output Folder" icon on the main interface to open the folder with generated files. Then you can easily import video to After Effects CC/CS6 for smooth editing workflow.