Tuesday, June 17, 2014

Lossless Backup DVD to MKV format with all audio tracks, subtitles and chapter markers keeping

If you are wondering how to rip DVD to MKV format with all audio tracks, subtitles and chapter markers keeping on Mac, this article shows you exactly how to make it work.

As a DVD lover, you may collected many DVD discs. With hundreds of DVDs in hand, you may want to make a lossless copy of those DVD and then you can easily search and play it with a remote control.


Generally, there are multiple audio tracks in the DVD movies, and you can choose the audio track to play with the DVD player as you want. If you want to keep the multiple subtitles and audio tracks when ripping a DVD movie, MKV is actually a pretty good output format choice as the MKV format can store multiple video/audio tracks with all meta-information and preserve chapters.

To help him to solve the problem, I tested some softwares and did comparison. Here we recommended this Pavtube ByteCopy for Mac which does a great job in quick decrypting the protected discs within a few clicks. Best of all, it can handle the latest Blu-ray/DVD and is capable of backup BD/DVD to lossless MKV preserving all the multiple audio and subtitle tracks as well as chapter markers. In this way, I can freely watch Anime on my VLC Player.

Money-saving Trip:

ByteCopy for Mac($42) + iMedia Converter for Mac($65) = Only $79.9, Save $27.1
ByteCopy for Mac($42) + DVD Creator for Mac($35) = Only $44.9, Save $32.1
ByteCopy for Mac($42) + Vidpie for Mac($29) = Only $54.9, Save $16.1
ByteCopy for Mac($42) + iMixMXF($45) = Only $69.9, Save $16.1
BDMagic for Mac($49) + Vidpie for for Mac($29) = Only $49.9, Save $28.1
BDMagic for Mac($49) + DVD Creator for Mac($35) = Only $49.9, Save $28.1

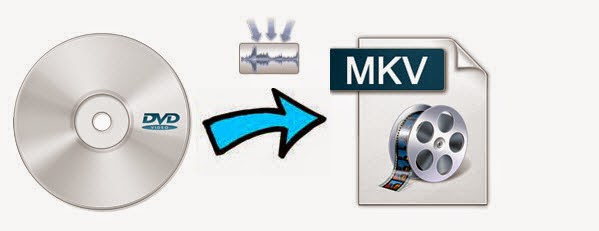
Convert and Rip DVD movies to lossless mkv format for watching on Mac

Step 1. Load DVD movie.

Get ready to insert your DVD disc, click this "Load Disc" button to browser to disc drive and import the disc. Or you could load DVD folder and DVD ISO from computer hard drive to this best DVD to MKV Converter for Mac.


Step 2. Choose suitable output format.

Pavtubr ByteCopy for Mac offers an special category for users who would like to keep multiple audio tracks including Dolby Digital 5.1 and subtitles in saved Lossless MKV file.

To pass-through original TrueHD/Dolby Digital/DTS/PCM audio, just select Multi-track Video > Lossless/encoded Multi-track MKV(*.MKV) for output. In this way the original audio tracks are streamed without transcoding from source DVD Disc to saved MKV file.


Step 3. Adjust profile presets (Optional).

You are allowed to customize profile presets as you like, you could remove unwanted audio track in Audio tab under Settings menu, and uncheck subtitles you do not need in Subtitles tab.


Step 4. Start ripping DVD to multi-track mkv on Mac.

Save all your settings, and back to ByteCopy for Mac main interface, hit the "Convert" button to start converting. When the lossless backup completes, you would get a single large MKV file saved in output file destination. And you could play copied DVD MKV movie on Mac with Dolby Digital 5.1 audio preserved.

Read more:

Convert DVD ISO/IFO to Multi-track MP4 for watch on iPad Air
Rip Blu-ray to Multi-track MKV/MP4/MOV on Mac Mavericks & Mountain Lion
2014 Best Blu-ray/DVD Multi-track Movie Converter Review

Sunday, June 15, 2014

Up to 50% OFF Father's Day Sales & Deals 2014 at Pavtube

Now it’s time to celebrate that all-important guy in your life—dad. Dad is notoriously the toughest family member to shop for. If you've waited until now to pick up this year's Father's Day Gift, then you're going to need a great idea — fast.

Luckily, to celebrate Father's Day with you, Pavtube Studio launch a huge Coupon Code as the 2014 Father's Day Special Offer. Up to 50% off for your beloved dad! Backup your dad's favorite Blu-ray/DVD movie to iOS/Android gadgets, HD TV, home theatre or game console. Even better you can make a father's day video for your beloved dad on your own! It’s more precious than just picking up something on store casually!

Her are Pavtube Great Deals and Specials at Father's Day 2014 weekend

1. 50% OFF Pavtube DVDAid (Win/Mac) as Father's Day Gift 2014

With this professional DVD ripping tool, playing DVD movies on DVD player at home has never been a problem for you. And you can now freely enjoy your favorite DVD movies on the road without worrying about the issues they jump on the most crucial scenes and are prone to scratches.

2. 30% OFF Pavtube Video Converter Ultimate/iMedia Converter for Mac as Father's Day Gift 2014

An all-in-one solution to fast convert Blu-ray/DVD and various videos to virtually any video/audio format for watching on any Android/iOS/Windows devices. Save a 100% intact BD M2TS/ DVD VOB movie without extras.Backup 3D Blu-ray movies to 3D video for watching on 3D devices with pleasant quality. 

3. 20% OFF Pavtube ByteCopy (Win/Mac) as Father's Day Gift 2014

An easy to use Blu-ray and DVD movie ripping program is capable of ripping 3D Blu-ray discs, 2D Blu-ray Discs and standard DVDs to required video formats. Most important, it can lossless BD/DVD to MKV backup with multiple audio/subtitle tracks and convert BD/DVD to Multi-track MP4, MOV, AVI for watching on Plex, Roku 3, WDTV Live, Popcorn and more HD media players.

Like our Facbook page to get it Now! Expires on June 21, 2014. Never miss it!


More money saving bundles can be found here: 


How to edit 2014 FIFA World Cup MP4 recordings from GoPro Hero 3 in iMovie/FCE

If you have any issue when importing 2014 World Cup GoPro Hero 3 MP4 recordings to iMovie/FCE, just follow this simple guide, which offers you a quick fix for the problems. 

With everyone's expectations, the 2014 FIFA World Cup Brazil games have entered the countdown stage. But because of the time zone difference, you may miss your favorite team’s match. In such cases, you may choose your GoPro Hero 3 to record the game competition and edit in your iMovie or FCE as long as someone can help you do the editing workflow.

Because Mac (iMovie/FCE) does not seem to like the videos that come right out of my GoPro Hero 3, you need to convert World Cup mp4 videos from my Gopro Hero 3 to use these converted files in iMovie/FCE. Keep reading a brief how-to on the simple process, which guaranteed to edit your 2014 FIFA World Cup GoPro Hero 3 MP4 clips in iMovie/FCE smoothly.

To get the work done, a third-party software is needed. Here Pavtube iMedia Converter for Mac is highly recommended. It's a professional and powerful high-quality Mac video converter and editor. With it, you can effortlessly transcode World Cup GoPro Hero 3 HD MP4 files to AIC encoded MOV for iMovie/FCE.

Meanwhile, the Mac Video Conversion tool can create files compatible with various non-linear editing systems like Avid, iMovie, FCE, FCP, and Adobe Premiere (Pro) etc. Just download it and follow the tutorials below to transfer and import World Cup GoPro Hero 3 HD footage to for smoothly editing in  iMovie/FCE. 

Guide: Transcoding 2014 FIFA World Cup GoPro Hero 3 HD MP4 to AIC codec for Final Cut Pro

Step 1. Download, install and run the Mac MP4 to AIC Converter, click "Add Video" to load your World Cup GoPro Hero 3 mp4 footage.


Step 2. Click the format bar, and move mouse cursor to ""iMovie and Final Cut Express > Apple InterMediate Codec(*.mov)" as output format.


Some more helpful features of the app:

1. Settings- click to set video resolution(1920×1080/1440×1080/1280×720/720×480), bitrate(from 1Mbps to 20Mbps), frame rate (24p/30p)

2. Editor (next to "Add" icon)- click to set deinterlace, denoise, mute, volume up, trim, crop, etc.

Step 3. Click "Convert" button to start World Cup GoPro Hero 3 MP4 to AIC MOV conversion.

As soon as the encoding process finished, you can get the final output .mov files via clicking "Open" button effortlessly. The transcoded files now are ready for editing in iMovie/FCE.

Additional Tips:

If you want to edit GoPro video in Final Cut Pro X or FCP 7/6, you just need to choose the "Final Cut Pro > Apple ProRes 422 (*.mov)" as output format in the second step; For Avid Media Composer, choose "Avid Media Composer > Avid DNxHD(*.mov)" as output; For Adobe Premiere Pro, choose Adobe Premiere/Sony Vegas> MPEG-2(*.mpg) as output.

Read More:

Best workaround for editing GoPro Hero 3 videos on PC/Mac
Converting 2014 FIFA World Cup Brazil video to MP4 and burning to DVD
Edit your GoPro Hero 3 footage in iMovie and share on Instagram with friends

Thursday, June 12, 2014

How to Rip and Backup DVD Godzilla for Playback on Galaxy TabPro 10.1 with Ease

In this tutorial, you can get a brief guide which shows you an easy way to load movies from DVD Godzilla and onto your Samsung Galaxy Tab Pro 10.1 for playback with ease.

Samsung announced a new range of Android tablets at CES 2014 in Las Vegas dubbed the Samsung Galaxy Tab Pro. Ideal for watching HD movies, the Samsung Galaxy Tab Pro 10.1 features a 10.1-inch, 2560x1600 resolution screen with more than 4 million pixels, so you experience rich HD graphics, vivid colors, and crisp text.


For movie fans, it is an ideal mobile device tool to enjoy latest DVD movies when they are on the way to office or under a travel with Galaxy Tab Pro 10.1. This article will show you how to rip and backup the latest DVD Godzilla for playback on your Galaxy Tab Pro 10.1 with high quality and fast speed.

Godzilla is a giant monster or daikaiju originating from a series of tokusatsu films of the same name from Japan. To rip and convert DVD Godzilla to Galaxy Tab Pro 10.1, you need a professional DVD to Tab Pro 10.1 ripper. To accomplish this goal, a professional powerful ripping program will help you a lot.

Pavtube DVD to Galaxy Converter
is such a tool with the easiest workflow to help you rip off DVD disc/ISO/folder protection, then convert the decrypted movie to MP4 format with best video settings for Galaxy TabPro 10.1. Get DVD to Galaxy Converter for Mac here; well support Mac Mavericks! Dowload the right version and follow the steps below:

How to convert DVD Godzilla movies to Samsung Galaxy TabPro 10.1

Step 1. After the installtion of Pavtube DVDAid, Click the “Load DVD” button to choose and import DVD movies from your computer's DVD-ROM.


Step 2. Click “Format” bar, follow “ Samsung >Samsung Galaxy Tab 10.1(*.mp4)”. The output videos fits Galaxy TabPro 10.1 tablet just right.


Tip: You can also click “Settings” to manually change the video encoder, resolution, frame rate, etc. as you wish. (Optional)

Tip: If you want to convert blu-ray/dvd to 3D videos or transcode Blu-ray/DVD to MP4 with multiple audio and subtitle tracks, try Pavtube ByteCopy and ByteCopy for Mac.

Step 3. When all is OK, click “Start” to rip DVD for Galaxy Tab Pro 10.1. After the ripping, you can click “Open” to locate the converted MP4 video files and just transfer them to your Galaxy TabPro 10.1 for watching anywhere! You may also interested in Money-saving bundles from Pavtube Special Offer page:

DVDAid($35) + Vidpie($29) = Only $49.9, Save $14.1
DVDAid($35) + DVD Creator($35) = Only $35.9, Save $34.1

Read more: 

Rip & convert DVD ISO/IFO files to Galaxy TabPro 10.1 for playback?
Convert 1080p/720p SD/HD Videos to Galaxy TabPro 10.1/8.4
Copy and Backup Blu-ray to Galaxy - Create Digital Copy of Bluray to Galaxy Tab 4

Tuesday, June 3, 2014

Why Can't I Export My Final Cut Files to iDVD

Drag or import movie files from Final Cut into iDVD and find problems? In this guide, you will learn the best solution to export your Final Cut files to iDVD on Mac.

iDVD is a discontinued DVD-creation application for OS X produced by Apple Inc. iDVD’s job is to integrate and present assets from other programs. The assets you’re most likely to add to your DVDs are movies you’ve created in iMovie or another video-editing program, such as Apple’s Final Cut Express or Final Cut Pro.


Question: I exported a movie for DVD authoring and now have two files. A .ac3 file for the audio and a .m2v for the video. I want to make that into a DVD in iDVD, but it won't allow me to use those files. Says it doesn't recognise them. So what should I be doing to make a file for iDVD? It seems that since iDVD is no longer supported, it's now unclear how to do it because Final Cut no longer has "export to media browser". Hope someone can help. Thanks.                                                                                              

                                                                                                                      - From discussions apple

iDVD supported formats:

As we know, iDVD accepts movies in QuickTime format, which is supported by most video editing and creation tools and the best way to export Final Cut mov to iDVD is to convert Final Cut mov files to quicktime mov on a Mac using Pavtube iMedia Converter for Mac.

Overall, it is just the ideal final cut mov to qt mov conversion software. It can easily transcode any kind of mov video to quicktime mov for adding to iDVD for playing. Becide, it allows you to trim, crop, rotate, merge files, very simple to use. Here is how it works.

Preparation: Run Pavtube Final Cut to iDVD Converter for Mac

Download and install the Mac Final Cut to iDVD converter on your Mac computer, it works on Mac OS 10.5 or above.

Step 1. Run the program and load your Final Cut video files into it.


Step 2. Choose MOV- QuickTime(*.mov) as output. You can easily find it in "Common Video" category.


Step 3. Start transcoding Final Cut mov to QuickTime mov by clicking on "Convert" button.

Of course, the process will take some time, please wait patiently. When it's finished, you can easily get the converted media file exported to iDVD for playing.

Except help you handling Final Cut mov video files, this iMedia converter for Mac can convert Blu-ray, DVD and a wide range of video formats for your tablets or smartphones with optimized presets. Overall, it's really a good helper that worth having.

Read more:

Convert DVD to QuickTime MOV on Mac 10.9 Mavericks
How to Rip/Convert Blu-ray to QuickTime on Mac
10 Methods to Convert QuickTime MOV to WMV/AVI/MPG/MP4/FLV, etc.

Friday, May 30, 2014

A Full Guide for converting 2014 FIFA World Cup Brazil video to MP4 and burning to DVD

This post will be divided into two parts to explain how to convert recorded 2014 FIFA World Cup videos to MP4 for playback, as well as how to burn them into DVD.

The 2014 FIFA World Cup is the 20th FIFA World Cup scheduled to take place in Brazil from 12 June to 13 July 2014. 2014 FIFA World Cup is a crazy party for football fans. They rock and roll, screaming, drinking, dancing, and singing to celebrate the days on which they can show their crazy fancy for football and their idols.


Actually, for most footaball fans, they prefer to watch live but not every fan can stay at home whole day for World Cup live. Instead, it may be a good choice to downloaded World Cup videos on computer and turn them to playable mp4 fomat or just burn them into watchable DVD video, then you can freely enjoy FIFA World Cup Brazil 2014 without missing awesome moments of this match.

Then how to get it done? Look no further? Never mind. Just follow the guide as follows and you will find an easy way to get full entertainment with 2014 FIFA World Cup videos.

Part I: Convert 2014 FIFA World Cup Games to MP4 format for playing

Software Required:

Free download the best Ultimate Converter which provides the easiest and fastest way to rip Blu-ray/DVD and convert all kinds of movies to MP4/AVI/MKV/WMV and many other video and audio formats, then enjoy 2014 World Cup Video on your portable device on the go for great fun. With clean and simple interface, fast conversion speed and perfect video quality, it will become your most reliable converting tool.

For Win: Pavtube Video Converter Ultimate
For Mac: Pavtube iMedia Converter for Mac

Below is how to convert 2014 Fifa World Cup Videos to MP4 format.

Step 1. Load the World Cup Video to the converter

Download and install the converter, run it and click the "Add Video" button to import the recorded World Cup videos to the program. Batch conversion supported.


Step 2. Specify the output format as MP4

Choose suitable format by clicking "Format" drop-down menu. There are optimized format for Galaxy Tab, Galaxy Note, Google Nexus 7, Kindle Fire HDX, Galaxy S3, iPad, iPhone, Surface RT & Pro and more. Basically the "Common Video -> H.264 Video (*.mp4)" is a universal format for Android/IOS/Windows tablets and smartphones.


Meanwhile, specify a destination folder to save the converted video files.

Tip: If you think the video size this not suitable for your portable Tablet or Phone, you can first choose any one of the provided type, then change the settings. Please remember the file size is based more on bitrate than resolution which means bitrate higher results in big file size, and lower visible quality loss.

Step 3. Start converting recorded World Cup Video to MP4

When all the settings are done, click the "Convert" button to begin converting recorded World Cup Video to MP4 format. When the conversion ends, you can enjoy the recorded 2014 FIFA World Cup videos on your MP4 compatible devices without any hassles.

Part 2: Burn World Cup Videos to playable DVD video

Software Required:

Here I recommend using Pavtube DVD Creator, it's on sale with half price, and can help you to easily and fastly burn videos to DVD ISO/Disc for backup or DVD Player.

For Win: Pavtube DVD Creator
For Mac: Pavtube DVD Creator for Mac

Below is how to burn 2014 FIFA World Cup Brazil video to DVD 

Step 1. Free download Pavtube DVD Creator, install and run, import the recorded World Cup Video to the software. Click to load and you click Add title button to add more titles.

Step 2. Switch to Menu pane. Double-click a DVD menu beneath the Menu Template to apply it to your DVD. You can customize the background video/image, background music, text, title thumbnail and more for your DVD menu.


Step 3. Click the Burn button to start burning videos to DVD/DVD ISO. You can choose to burn into DVD disc, save as ISO file, or Generate to DVD Folder.


When the World Cup Video Conversion and DVD Burnning Process is completed, you will be able to get the export files for editing, uploading or sharing with best video quality!

Breaking news: With Pavtube new site releasing, now we are offering some new money saving bundles. With either bundle package, not only can you save more money, you will get the most powerful combination from Pavtube to handle Blu-rays, DVDs, regular videos as well as DRM protected videos files at this Special Offer Page.

Video Converter Ultimate($65) + DVD Creater($35) = Only $64.9, Save $35.1
iMedia Converter for Mac($65) + DVD Creater for Mac($35) = Only $64.9, Save $35.1

More related: 

Fast and Easy way to Upload Recorded World Cup Video to YouTube
How to play MKV, AVI, VOB, Tivo, WMV, MPG, FLV, F4V on Kindle Fire HDX 7
How to Convert Video_TS to MKV Videos on Windows 8.1/8

Tuesday, May 27, 2014

Get my BD copied in lossless MKV format for easily controlling multiple audio sound tracks when watching

This guide provides a simple way to complete lossless backup Blu-ray Disc to lossless mkv format keeping multiple audio tracks, subtitle streams and chapter markers on Mac(Mavericks included).

My problems are I can't seem to create a mkv of the full blu ray (BD) with all the sound tracks. Each time I do it I only get one audio sound track. One time Japanese. I would like to choose English French and Spanish. Sound tracks and subtitles. I also see a problem when down converting the BD from HD to SD. Again I can't seem to control the audio sound tracks that get copied. Is there a way to go from blu ray direct to SD MKV multi track?


Every time you play blu-ray in blu-ray drive, the disc will suffer little quality loss. So a digital backup will help to save the storage space of blu-ray collection, and make it easier to access and carry with. As most Blu-ray Discs include multiple audio and subtitle tracks so that people from different countries who speaking different languages can enjoy same movies in their native languages, so this is reason why people choose to "go from blu ray direct to lossless MKV format" as above.

If you are a Mac use, here recommend you Pavtube Bytecopy for Mac which can help you to backup BD/DVD to mkv without any quality loss. It helps to convert to lossless mkv files with all multiple audio and subtitle tracks, and chapter markers from original BD/DVD. So you can enjoy your movies at any time just like watching BD/DVD and freely choose your desired language.

Let me show you how to do it and you will find the workflow is so easy.

Firstly, you should have download and installed the software. (PS: If you wanna a Windows version, please go to Pavtube Bytecopy. Both are 30% off now.)

Let's go!

Lossless Backup BD disc to MKV with Multi-track/stream on Mac

Note: Put Blu-ray onto Blu-ray drive before ripping Blu-rays.

1. Run the Pavtube ByteCopy for Mac. Press “Load Disc” icon to import Blu-ray movie.


2. Go to Format to find "Multi-track Video catalogue. Select "Loss/encoded Multi-track MKV(*.mkv) , which will provide lossless backup Blu-ray to MKV with multiple audio and subtitle tracks.


Tip: One special function that makes ByteCopy stands out is you can easily select you needed tracks, subtitles.


3. Click "Convert to start conversion. Conversion can be completed within a short time, then click "Open to find generated mkv files.

With a very easy operation, you get the lossless mkv files from Blu-ray, which make you to enjoy movies with high quality wherever you want. However, what Bytecopy for Mac can do is more than it, let's go to below tips to find more.
Tip 1: You may be confused about the other two options under "Multi-track Video" catalogue: Muti-track MP4(*.mp4) and Multi-track MOV(*.mov). They are used to transcode BD/DVD to .mp4 and .mov output files. The point is that they support saving encoded multiple audio tracks. So you could enjoy it in your iPhone or iPod.

Tip 2: Directly Copy will provide you another way to lossless output. It will provide you a 100% backup in original format without extracts. If you do not want to output mkv files or your player cannot play mkv files, directly copy is the best choice for you. It will save 100% intact .M2TS main movie from original BD disc, and allow all. subtitle and audio tracks preservation. You can see more details about it in backup blu-ray disc to M2TS streams flawlessly.

Good news for you: To save your money, Pavtube Special Offer offers various product bundles, save up to $35.1, such as:

ByteCopy($42) + Video Converter Ultimate($65) = Only $79.9, Save $27.1
ByteCopy($42) + DVD Creater($35) = Only $44.9, Save $32.1
ByteCopy($42) + Vidpie($29) = Only $54.9, Save $16.1
ByteCopy($42) + MXF MultiMixer($45) = Only $69.9, Save $16.1

Related articles:

Rip Blu-ray to multi-track MP4/MOV for iPad Air, iPad Mini 2, iPhone 5S/5C
Convert DVD ISO/IFO to Multi-track MP4 for watch on iPad Air
Fastest Digitize your Disney DVD collections to Mac Hard Drive keeping original structure