Showing posts with label MTS. Show all posts

Monday, September 9, 2013

Re-encode Sony FS700 AVCHD to ProRes for freely importing in FCP

Sony FS700 users often meet the problem that they cannot edit AVCHD MTS files made by Sony high definition camcorder in FCP. The following will tell how to use FCP to edit Sony FS700 AVCHD MTS, which is not a Mac friendly format.


I've just got a bunch of CF cards in from a shoot from yesterday. I believe the camera used for the interview was a Sony FS700 On the CF cards, I have 2 folders: }CLP{ and then a }STT{ file, but FCP L&T doesn't like that structure so I can't use that. The files here are QT movs (M-PEG2) and I need to convert to ProRes 422. Not using MPEG since they don't keep source TC, so I'm using Compressor but it's taking EXTREMELY long, even for a 2 minute clip. Is there a quicker way to do these batches because I have to get all this footage over to the editor, but fear at this rate it will take all day!

  
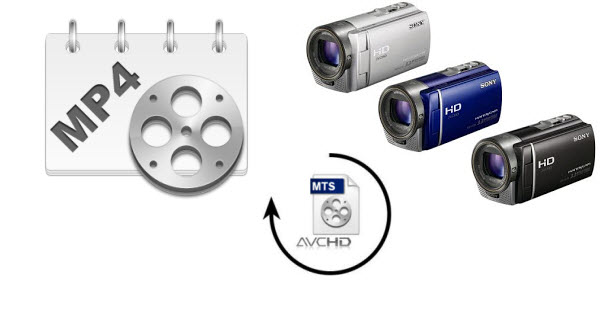
The FS700 shoots AVCHD. And with any tapeless workflow, you need to copy the ENTIRE card structure to a hard drive. (refer to the guide). If you don't like the complex workflow as above, here hands down the best and easiest way we've found, that is to convert to Prores from a FS700 for importing. You should know that the FCP's native format is Apple ProRes, so after converting you can avoid the headache "FS700 and FCP incompatibility importing problem". Here is a simple tip for you how to make Sony FS700 AVCHD editable in FCP.

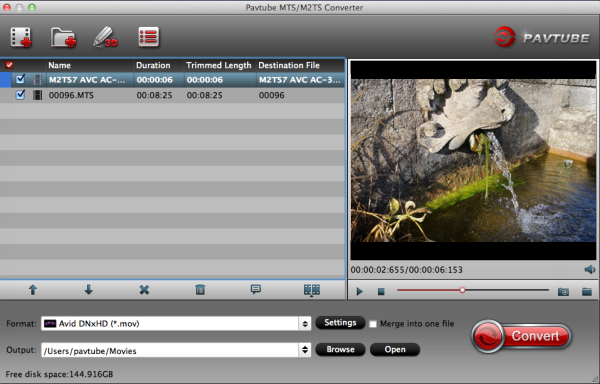
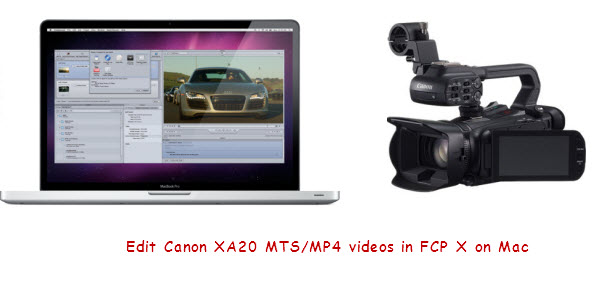
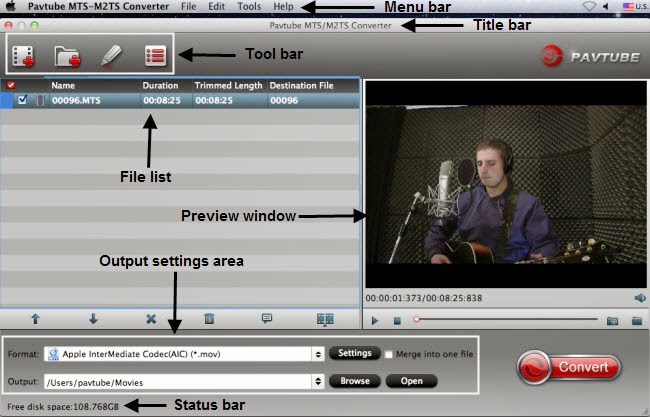
If you are planning to edit FS700 MTS clips with FCP, you'd better give the app a try. Here Pavtube MTS/M2TS Converter for Mac is recommended. It is an easy-to-use MTS to FCP Converter for Mac program with clean interface. And it is good at converting Sony FS700 MTS files to Mac native format for editing. You can try the free trial version to test the functions at first.

Guide: Re-encode Sony FS700 AVCHD to ProRes for freely editing with FCP on Mac OS X

Step 1. Download and install the best MTS to ProRes Converter and connet FS700 cam to Mac, or insert the SD or Memor card into the computer.


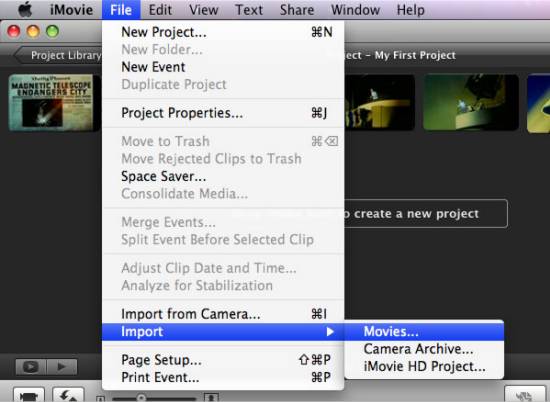
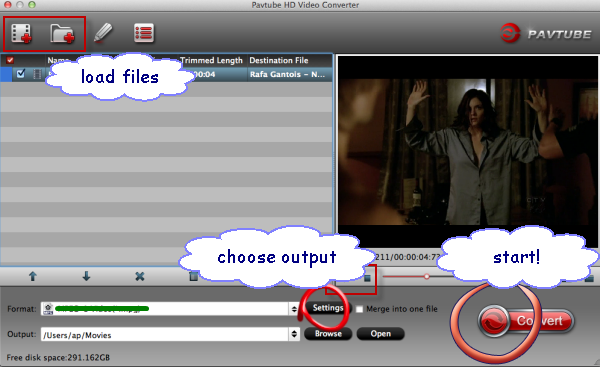
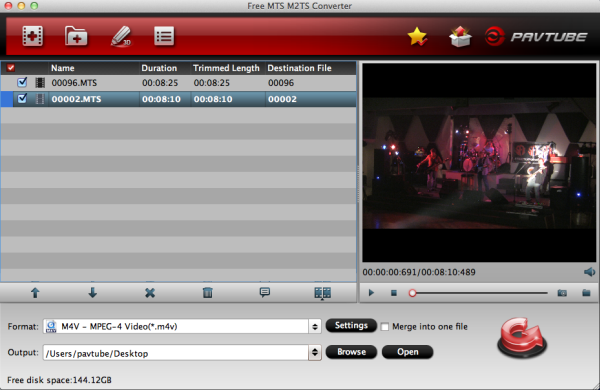
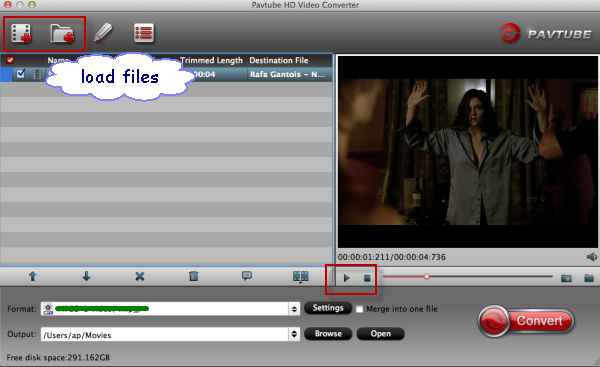
Step 2. Open the encoder and click "Add File" or "Add from folder" to load .mts from FS700.

Note: If necessary, you can click "Edit" to edit the file- trim, crop and add special effects to the file.

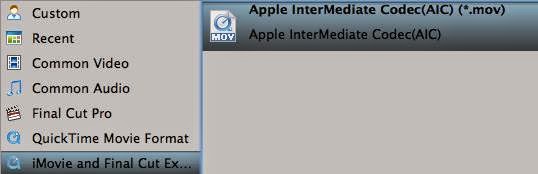
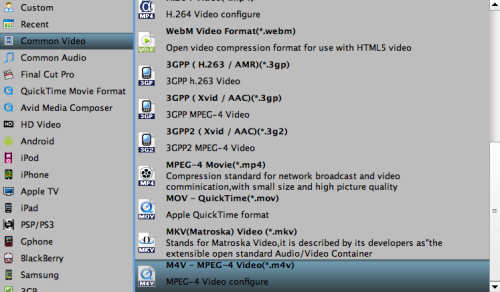
Step 3. Click on "Format" bar, you will see the "Final Cut Pro" menu. The menu has several formats for choosing as the best output format. You'd better choose Apple proRes 422(HQ)(*.mov) to keep the original video qaulity.

Tip: If your source file is 1080p, you'd better keep the video frame rate as 30fps, video size as 1920*1080.


Step 4. Start ticking "Convert" button to convert Sony FS700 MTS file for editing in Final Cut Pro.

As soon as the conversion ends, you can clcik "Open" to get the converted file. Now, you can directly drag and drop the ProRes MOV file to Finla Cut Pro for further editing on your Mac OS X.

PS:

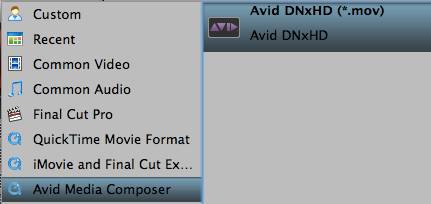
With the top MTS Converter for FCP, you also can transocde AVCHD/MTS/M2TS clips to compatible formats for editing with iMovie, Adobe PPro, Avid MC, FCE, ect. Mac OS X editors.

Read Related Articles:

Tuesday, September 3, 2013

Convert Sony Handycam video to MP4 format for playback,backup and sharing

Do you have got one Sony Handycam camcorder? In this article, you will get the best solution to convert Sony Handycam mts video to MP4 format for playback,backup and sharing.

Sony Handycam is a high-definition camcorder with hybrid video recording capability. With extraordinary imaging quality, Sony Handycam has all the capabilities of being a professional choice and acceptable by users to record videos with good clarity.


After 
celebrating your son’s birthday and recording videos of that moment using Sony Handycam, you may busy with looking for a way to backup, play or share your Sony Handycam videos with friends and family.

As the videos from Sony Handycam are recorded with AVCHD format which is not support by many device, like iPad, iPhone, Galaxy Tab, Nexus 7, etc, Media Players like Windows Media Player, QuickTime, VLC player, and some video sharing website, such as Youtube, Viemo and Facebook. Converting Sony handycam video to the compatible mp4 format on Windows and Mac is the best solution.

Here a professional app for converting MTS to H.264 is strongly recommended, that is Pavtube MTS/M2TS Converter for Windows/Mac. It is an easy-to-use MTS/M2TS to H.264 Mac app for completing the task to convert sony hanycaom video to MP4 format on window and mac. You can totally depend on it. 

Now begin to operate the Sony Handycam MTS to H.264 MP4 Mac app.

1. Add Sony Hanycam MTS files to the application

Install and run the best Sony Handycam Video Converter, import the mts videos from Sony Hanycam by clicking "Add video" or "Add from folder",you can also directly drag and drop MTS files to the program.


2. Choose the output format

Now you should choose MP4 as the output format, H.264 as the video codec. This is the best and native format for storage, playback and sharing.


3. You can click settings to adjust the parameters


4. Start the Sony Handycam MTS to H.264 HD mp4 Mac Conversion

Click the "Convert" button to get the Mac conversion done.

Just in a few minutes, you can transfer or put HD mp4 videos on iPad, iPhone and other tablets or samrtphones for watching, backup the mp4 video on your Mac, or upload the video for sharing .

With Pavtube MTS/M2TS Converter for Win/Mac, you can convert Sony Handycam mts video to H.264 MP4 format easily.

Read more:

Sunday, September 1, 2013

How to import Sony AVCHD mts video files dans premiere pro cs5

Have some .mts files from Sony camcorder and want to import/edit AVCHD .mts footages in Adobe Premiere CS5 without rendering; check out the guide to learn how to convert Sony AVCDH MTS to Adobe Premiere Pro CS5 compatible MOV/MPEG-2 video format.


Recently, we have a France client who has the question that "How to importer video mts sony dans premiere pro cs5". So I searched Sony MTS and Adobe Premiere Pro on Google, and found there are other users who are also facing the importing problems:

Q1: The videos are from Sony NEX-5N and the format shows AVCHD Video (.MTS) - into Adobe Premiere. Can someone explain the best way to get my video into the editing software?

Q2: I have a Sony FS700, when I wanna edit those AVCHD MTS footage in Adobe Premiere, I met problems: the Premiere handled with the mts files so slowly, and I couldn't edit my videos smoothly. What's the problem?

Q3: I'm getting a failure error "... unsupported compression format" when importing video from Sony NX5U AVCHD camera (which has MTS files) into CS5.5 Adobe Premiere Pro. Never had this problem with CS5. The video was shot at 1080i/24fps. I tried to convert it into AVI format but lost image quality. I will appreciate assistance from anyone with solution. Thanks.

In fact, we have used many AVCHD camcorders but only met the similar trouble many times. I know the main reason is that AVCHD is a compressed format, and not fit for editing. The best method to solve those problems is to transcode Sony AVCHD .mts to Adobe Premiere Pro CS5 most compatible format, like MOV or MPEG-2 format.

At this time, you need a Mac Sony MTS to Premiere Pro Converter, Pavtube MTS/M2TS Converter for Mac can help you, it can transcode Sony MTS to MPG/MOV for Premiere Pro CS5 native editing on Mac with maintaining the original effect, below is a brief guide for you to convert Sony AVCHD mts video to Premiere CS5 on Mac.

Steps to transcode Sony MTS video files for importing into Adobe Premiere Pro CS5

1. Download and install Pavtube Mac AVCHD to Premiere Converter. It's an excellent software which can convert Sony AVCHD for Premiere Pro, more output formats are also supported, such as MKV, AVI, MP4, MOV, WMV, FLV, etc.

2. Import the Sony AVCHD MTS video to the best MTS/M2TS Converter for Mac.


3. Click "Format" column to choose the best video format for editing in Adobe Premiere Pro CS5 on Mac. Click and choose Adobe Premiere/Sony Vegas -> MOV or MPEG-2 for output. You can also choose Final Cut Pro  -> Apple ProRes 422 MOV for editing in Premiere Pro CS5.


4. You can customize output parameters as you want. Adjust the resolution, bitrate, etc according to your need; you can also keep the parameters as original.

After these steps above, click convert button to start converting Sony AVCHD MTS to MOV/MPEG-2 for Premiere Pro CS5.

With this best Sony MTS/M2TS Converter for Premiere Pro CS5, you can convert you mts videos with best quality, supported devices include Sony HDR-CX160, CX130, TD10, PJ760V, HDR-CX11E, CX155, CX150, CX100, SR1, etc. Now just have a try, and then you can get quick and smooth Sony AVCHD editing workflow in Adobe Premiere Pro CS5 as you want with no codec problems.

If you want to import or edit your Sony camera video files on FCP 6/7, FCP X, iMovie, FCE, Avid, Song Vegas, Pinnacle, Windows Movie Maker, etc., you can check out "Sony Camcorder/Camera Video Tips or MTS Tools" to get your solutions.

Read More:

Thursday, August 22, 2013

Correct way to import Canon XA25 AVCHD MTS into Avid Media Composer and Xpress Pro

If you need to better edit Canon XA25 AVCHD footages in Avid Media Composer and Xpress Pro on Mac, just follow the guide to know the best way to convert Canon AVCHD to Avid DNxHD codec.


I am in school for broadcast journalism. I am stills photographer leaving print media behind. I'm think that it would be best for me to learn how to shoot video and tell unscripted stories using a small chip camera like the Canon XA25. I need to film on the go and get great footage, this is the camera I planned to buy.

And I have an iMac and installed Avid Media Composer 5; the question is whether Avid Media Composer or Xpress Pro works with mts videos for XA25? So it would be great if someone could provide me some timely advice.


The XA25 camcorder combines outstanding image quality with dual-format recording and HD-SDI output in a compact form factor, making it ideal for professional broadcast and web-based content capture.

Canon XA25 recording file is AVCHD ( MTS/M2TS ) video format. Now the latest Avid MC is version 7, though it added many new features, but it can't support XA25 AVCHD footages well. And thus you can't easily import Canon X25 AVCHD MTS into Avid Media Composer and Xpress Pro. But things can be different if you get help wih a top third AVCHD Converter Tool.

Thiis MTS/M2TS Converter for Mac is an ideal converting program from Pavtube. I have used this tools for some time and it works perfectly in transcoding Canon XA25 AVCHD to DNxHD codec, which is best natively supported by Avid MC and Xpress Pro. After converting, you can edit your Canon XA25 AVCHD MTS files in Avid as well as Xpress Pro natively. Just take a look at the brief guide below.


(If you are a Windows user, try this MTS/M2TS Converter)

1. Connect your Canon XA25 to your Apple with USB2.0.

Install and launch MTS to Avid Converter on Mac. Drag and drop Canon XA25 AVCHD video files into file list. If it is necessary, you can double click the each file to have a preview.


Tip: If you have multiple 1080/50p MTS/M2TS files, you can tick the “Merge into one” box to merge the files into one single file so that you can edit Canon XA25 1080/50p AVCHD in Avid Media Composer and Xpress Pro on Mac without interruption.

2. Click on “Format” and you will get a dropdown menu, then move you pointer to Avid Media Composer -> Avid DNxHD (*.mov). The Avid DNxHD .mov format is the native format for Avid Media Composer and Xpress Pro. Then you can set the output folder by clicking “Browse” icon as you need.


3. If you would like to customize the video and audio parameters, you can click "settings", adjust the parameters as you want, like Video Codec, aspect ratio, bit rate, frame rate, Audio codec, sampling rate, bit rate, channels.


4. Click "Convert" botton, it will convert Canon XA10 mts footage to DNxHD for Avid Media Composer and Xpress Pro on Mac OS immediately.

After converting, you can follow this guide how to import media files to Avid Media Composer to know the importing process. Now you you will be able to import Canon XA25 AVCHD 1080p files to Avid Media Composer and Xpress Pro effortlessly.

Read More:

Tuesday, August 20, 2013

How to get iMovie to work with Canon Vixia HF G30 60p mts video?

Here is a simple guide for you to convert Canon Vixia HF G30 60p mts video to AIC for iMovie editing.

I just received the HF G30 and am still working my way through learning how it works. I'm using the iLife '11 version of iMovie on my MacBook Pro and MacPro desktop and neither is recognizing my Canon HF G30 camcorder when I connect it via the USB cable. The strange thing is the Canon icon and SD card icon both show up on my desktop but iMovie isn't recognizing the camcorder as connected and therefore won't import the 60p mts files.

When I try to manually import the AVCHD footage from the SD card, iMovie says there are no recognizable files, although the AVCHD files are definitely there (this is consistent with all my recordings and not just on one SD card). I wrote Canon and they have no idea why this occurring, claiming it's an Apple issue. Any idea what's going on and how I can solve it?

Canon VIXIA HF G30 Full HD Camcorder

Canon HF G30 supports MP4 recording at up to 35Mbps and AVCHD recording at up to 35Mbps. Both formats support Full HD 1080/60p resolution. Plus, images captured at 60 frames per second means that diagonal noise is mostly eliminated - even when shooting fast moving subjects. The camera also supports enhanced color and tonal gradation.

In fact, the 60p AVCHD MTS file is not an acceptable format by iMovie and then it has to convert them to a format it's able to edit in iMovie. So the best solution is to transcode Canon Vixia AVCHD to iMovie preferred format like AIC mov. If you have got one AVCHD camcorder Canon HF G30, and like editing with iMovie, below is a simple step by step guide for you to smoothly import and edit Canon HF G30 AVCHD 60p .mts files on iMovie editing with AIC codec.

Download Pavtube MTS/M2TS Converter for Mac

This best Canon AVCHD Converter for Mac offers optimal conversion by converting Canon HF G30 .mts to Apple Intermediate Codec, which works best in iMovie.

What's more, t
he software is a great choice for converting AVCHD videos to iMovie/Final Cut Express/Final Cut Pro editable formats. It works with Sony, Panasonic and Canon AVCHD .mts and .m2ts footage. There are various export format for users to choose from, including Apple’s ProRes 422 codec, Intermediate codec and QuickTime codec. It also lets users to convert AVCHD files into common video formats like AVI, MP4, WMV, MKV, MOV, M4V, etc.

How to convert Canon HF G30 60p AVCHD to AIC for iMovie on Mac

1. Connect Canon HF G30 Camcorder to Mac, and transfer the 60p mts files that you want to deal with onto Mac HDD.

2. Run the Mac MTS to iMovie Converter, click the "Add" button to browse and import Canon HF G30 60p .mts files.


3. Click the "Format" bar, choose "iMovie and Final Cut Express>Apple Intermediate Codec (*.mov)" as output video format.


P.S. 

If you want to transfer Canon HF G30 MTS to Adobe Premiere Pro CS6 and After Effects CS6, choose Adobe Premiere/Sony Vegas> MPEG-2 (*.mpg) for editing.
4. Click the "Convert" button and the MTS Converter will start converting Canon HF G30 60p AVCHD MTS files to AIC .mov clips.

5. When the conversion completes, press "Open" to find encoded files. After Conversion, you can work with Canon HF G30 AVCHD MTS recordings in iMovie natively.


Tips:

1. For your original 1080/60i footages, you need to deinterlace 1080/60i AVCHD footages to remove all these interlacing artifacts from videos via ticking the “Deinterlacing” box in the Video Editor interface.

2. If the supposed size of the input files is 1GB, then the memory space should be up to 40GB.

3. Auto shutdown: Click Option and tick the box “Shut down the computer after conversion” before conversion starts.

4. 3D conversion. The Red-Blue/Red-Green 3D conversions are supported.

5. Crop: Edit --> Crop and you can get the imported videos cropped as you want.

6. Double click the imputed file, you can preview your footages in the software window.

Read More:

Sunday, August 18, 2013

Lossless converting Canon MTS/MP4 files for editing in Final Cut Pro X

To get Final Cut Pro X working perfectly with MTS/MP4 files, a best way is to convert them to ProRes MOV. Read on to learn details. 


The XA20 is a compact, "run-and-gun" HD camcorder with an impressive Optical performance from a powerful new Genuine Canon 20x HD Video Lens with a new 8-Blade Circular Aperture, capable of focusing down to just 23.6 inches (60cm). Other features include multiple HD/SD Recording rates - including 24p for a "cinematic" look - together with a choice of industry-standard MP4 (up to 35 Mbps) and AVCHD (up to 28 Mbps) codecs. 

The high image quality and recording versatility make the XA20 ideal for independent and documentary filmmaking, as well as event videography and educational institutions. However, many Mac users complain that they can’t import the MTS/MP4 files recording from Canon XA20 to FCP X because FCP doesn’t accept .MTS/.MP4 footage.

Well, don’t worry. It is known to us that Apple ProRes codec is well compatible to FCP. So, in order to smoothly import Canon XA20 MTS/MP4 files into Final Cut Pro X for editing, you can use 3rd-party software to convert Canon XA20 MTS/MP4 to Apple ProRes encoded mov format with excellent quality of videos as it applies advanced audio and video sync technology, which is a native format for FCP X.

Here Pavtube HD Video Converter for Mac is highly recommended. It is an easy-to-use Canon Video Converter for Mac program with clean interface. And it is good at converting 1080/60p MTS and MPEG-2 MP4 videos from Canon XA20 to various formats for editing, playback, uploading, burning etc. on Mac OS X (Mountain Lion, Mavericks included). You can try the free trial versionto test the functions at first.

Now let' learn how to transcode Canon XA20 MTS/MP4 clips to Apple ProRes MOV for editing on Final Cut Pro X. At first, download, install and run the best and easy-to-use Mac MTS/MP4 to FCP Converter.

Step 1. Load AVCHD MTS/MP4 files. 

Connect your Canon X20 camcorder to your Mac via USB, or insert your SD card to Mac, browser the .mts files from AVCHD > BDMV > STREAM. Load your 1080/60p .mts or .mp4 files from XA20 or local computer which you have copied from camcorder before into Pavtube HD Converter for Mac. 
 

P.S. There are two ways for you to import files: add video directly and add the entire folder.
 

Step 2. Select Apple ProRes MOV format for FCP.

You are recommended to choose the “Format” under “Final Cut Pro” which is preferable to your FCP X, and it is the easiest way to find the suitable format. 


Tip 1: You are allowed to adjust output video and video parameters. However, if you have no idea about profile setting, keep it as original recordings will provide you the files with less quality loss, and keep default settings is also a good choice for your to get a high quality files.

Tip 2: In order to get customized videos, you can add subtitles to your own videos.
Step 3. Start MTS/MP4 to Apple ProRes conversion.

Click “Convert” button to start transcoding Canon XA20 AVCHD MTS/MP4 to Apple ProRes MOV, and then click “Open” button will bring you to the generated Apple ProRes MOV files for Final Cut Pro X.

In this way, you will have no difficulty in importing and editing Canon XA20 MTS/MP4 footage into FCP X with excellent audio and video quality. You can enjoy sharing edited video with friends and taking any individual frames you want.

What’s more, if you are a Windows user, try this Pavtube HD Video Converter, which is considered as best HD Video Converter. It is specially developed for HD camera/camcorder users to transcode all kinds of HD video footage to various fotmats accepted by Sony Vegas, Avid, Premiere, Pinnacle, Cyberlink and Windows Movie Maker and more similar Windows video editing software with least quality loss. 

Canon XA20 more related:

Read Related Articles:

Thursday, August 15, 2013

Working with Panasonic HC-X920M 1080/50p mts Footage in FCE and FCP 6

Is there anyway we can injest MTS Files shot on canon Panasonic HC-X920M into FCE and FCP 6? Keep on reading to learn.

I'm the owner and publisher of Australian Videocamera. My media experience can be dating back to 1979 when I first got involved with photojournalism in motorsport. Recently we have got this Panasonic HC-X920M.


Reviews:

I am more than impressed with the HC-X920M. At this stage of the game, if anyone asked me what camcorder to buy sub $2K, this would unquestionably be it. It has all the functions you will ever need, and I'd almost call it a game changer. If there is camcorder to sway the pro away from the larger models as used in "run and gun"shooting for current affairs, short documentaries or films etc, then at the moment this is it.

All the necessaries are there; top lens, manual programmable focus ring, face detection, manual or auto controls for contrast, shutter speed etc and of course superb imaging. And for future proofing, the HC-X920 also supports the optional 3D lens.

Recordings:

Panasonic HC-X920M can provide us 1080p Full HD. We live in Australia - so we are PAL.


Recording Format: [AVCHD] AVCHD 3D / Progressive / [iFrame] MP4

Compression Method: [2D] MPEG-4 AVC/H.264 / [3D] MPEG-4 MVC/H.264


Asks:

Now we are doing some editing work. We make some 1080/50p AVCHD videos from Panasonic HC-X920M, working on Final Cut Express and also FCP 6, but when loading into the FCE and FCP 6, the .mts files need rendering and everytime I touch them they again need to be rendered. Hoping anyone can help - rendering takes so much time... 

Answers: 

At last, I have figured out Pavtube HD Video Converter for Mac. Having used it as the best Panasonic AVCHD Converter and now I have successfully converted the Panasonic HC-X920M 1080/50p mts video files from the camera to AIC/Prores .mov which is native for editing in FCE and FCP 6. It works great and wonderful video quality.

Detailed instructions: 

In case that you may have the same issue with importing Panasonic HC-X920M 1080/50p mts footage into FCE and FCP 6, here offers you a step by step guide:

Convert Panasonic HC-X920M 1080/50p AVCHD MTS to AIC/Prores MOV format

Step 1. Add .mts files to the Mac MTS to MOV Converter.

Launch the MTS/M2TS to AIC/Prores Converter for Mac. Click "Add Video" or "Add from folder" button to load your source 1080/50p .mts or .m2ts files from Panasonic HC-X920M.


Tip: If you want lossless merge multiple MTS, M2TS files, pleas check the "Merge into one file" box.

Step 2. Choose FCE and FCP 6 compatible foramt as output.

For FCE, click "Format > iMovie/Final Cut Express", choose "Apple Intermediate Codec(AIC) .mov" as the best output format.


For editing in FCP 6, you can choose Final Cut Pro -> Apple ProRes 422 (*.mov).


Tip: If you wanna edit the video/audio parameters, you need to go to "Settings" window.

Step 3. Start MTS to FCE 6/FCP Conversion.

Click the "Convert" button under the preview window, and the best Mac MTS to MOV Converter will start converting Panasonic HC-X920M 1080/50p MTS clips to FCE and FCP 6 compatible AIC/Prores mov format on Mac OS X.

When the conversion is done, you will be directed to open the folder where you saved the converted files, and then you can import output video files to FCE or import converted videos to fcp to edit.

More Tips for you:

Wednesday, August 7, 2013

Convert Panasonic HC-V707 1080/50p MTS to iMovie in a correct way

Follow this guide below you will get to know the 50p MTS to iMovie solution. Now keep on reading the info about how to import Panasonic HC-V707 1080/50p AVCHD to iMovie for editing without rendering.

The Panasonic HC-V707 looks remarkably compact and shines in the test environment, especially with their manual functions. It offers the best manual control and Full HD recordings running at 50 progressive frames per second. 

  
I started the video project last year (with an old DV Camera that soon became defective) and since february this year I work with the Panasonic V707. I am working on a spiritual movie, that will be presented on my homepage only. After importing my 1080 50p/60p AVCHD films from V707 into iMovie, I get failed many times.

After a long search (google, forums) I understand the reason. For imovie editing workflow, the first clip you add to the project has a different frame rate from the project, iMovie prompts you to adjust the project frame rate to match. Therefore, the video clip from your Panasonic 1080 50p or 1080 60p camcorder doesn't match the project frame rate and as a result, imovie will not support my 1080/50p mts footage by my Panasonic V707. So the best workaround is to converPanasonic V707 50p Videos to iMovie in a correct way.

At first, I’ve been working with Xilisoft HD Video Converter, but my camera produces 1080/50p slow motion videos, which are not converted completely with Xilisoft. Fortunately, I find this professional Mac 1080/50p MTS Converter from Pavtube at last

With it, I have successfully converted 1080/50p AVCHD clips to compatible AIC .mov format with iMovie, and then I can import without rendering. In fact, I know this Pansonic AVCHD Converter for Mac still has a lot of functions, such as many optimized output formats for editing software or playable devices as well as its editing functions. In a word, I'm pleased with the software, very satisfied. 

If you have the same problem with importing Panasonic HC-V707 1080/50p AVCHD to iMovie, you can follow the step-by-step guide below to transcode 1080/50p Slow Motion Video from the  HC-V707 (MTS-File) to  MOV-File with AIC codec to use in iMovie.

1. Download Pavtube Panasonic AVCHD Converter for iMovie. Install and run to import your 1080/50p MTS footage from V707 to it.


2. Click format column to choose the output format for iMovie. Click and choose iMovie and Final Cut Express -> Apple InterMediate Codec (AIC) (*.mov), it's the best format for editing 1080/50p mts in iMovie.


3. You can click settings button to adjust output parameters, such as resolution and bitrate.


4. Click convert button to start.

The Mac 50p mts to iMovie Converter will convert Panasonic HC-V707 1080/50p AVCHD to iMovie compatible format quickly. After conversion, you can edit the converted video in iMovie as you want.

Pavtube MTS/M2TS Converter for Mac works as the companion for your Panasonic HC-V707 camcorder to convert 1080/50p AVCHD videos to AIC for editing in iMovie flawlessly. It keeps better color than compressor. What’s more, it can keep 50fps and 60fps in MOV, now you can have a try.  

Wednesday, July 17, 2013

Best AVCHD Converter for Mac-Free Converting .MTS files to .M4V on Mac

This article will show the best free way to convert Canon MTS to M4V, so that you can enjoy and edit mts files as you like.
MTS and M4V are both video file formats. However, there are clear differences between them. This tutorial will teach you how to free convert .mts file to .m4v file on Mac.


MTS format is a high-definition MPEG, AVC, H.264 transport stream video file format which commonly used by HD camcorders such as Sony, Canon, Panasonic. MTS files are used primarily with Sony hardware.

M4V file is the common but non-standard use of the MPEG-4 file extensions. M4V format is due to the popularity of Apple's iPod and the iTunes Store and it is also a mobile video file format which often used in handheld devices. M4V is a special type of MP4 format. The video part of M4V file is encoded with H264 and the audio part is encoded with AAC.

Have saved many MTS files copied from your cameras/camcorders on Mac and want to transfer these fantastic videos to your device, such as iPod, iPhone or iPad for playback? You might have found out that some 1080p mts files are unaccepted by your Mac application or Apple devices, you then need to convert MTS to M4V Mac, for M4V is fully compatible with Apple products.

This article focuses on the best and easiest way to convert MTS to M4V on Mac (Snow Leopard, Lion included). First and for the most, you need to choose a professional app- the best Free MTS file to M4V converter for Mac as your assistant. It can finish the entire task with super high speed and keep the output files in good quality simultaneously.

This is a freeware designed by Pavtube studio for Sony, Canon, JVC and Panasonic AVCHD Camcorder/camera owners to convert recorded AVCHD .mts/m2ts videos to various video formats for using in portable devices. Once upgraded to full version, you can get even more presets for video editing software (e.g. Apple Intermediate Code for iMovie, Apple ProRes for Final Cut Pro, etc). There’s also Windows version available.

Step-by-step: Best and Free solution to fast convert .mts to .m4v on Mac

Step 1:  Add mts files to the MTS to M4V Mac app 

Run the installed free AVCHD Converter for Mac program; hit the "Add Files" button to import the .mts videos from camcorder or you can drag & drop the mts files to the converter.


Tips: 
Batch conversion is available, so you can add several files in one go – that’s helpful to save your time. See the main interface below, you can combine several files into one by checking the “Merge into One File”. 

Step 2:Select M4V as the output format 

Now you need to go to the "Format" drop-down list, choose "M4V - MPEG-4 Video(*.m4v)" from "Common Video" option as the output format. 


If you want to import the output videos to Apple devices like iPad(iPad 2), iPod, iPhone(iPhone  4, iPhone 4S) and more for convenient playback, you can choose the corresponding device as the output format. The output files could be automatically imported to iTunes. 
For your convenience, the app has already optimized the video settings for you. And for better quality and higher resolution, you may click on "Settings" and set higher bitrate.

Step 3:  Start the MTS to M4V Mac conversion 

Click the “Convert” button and let this smart MTS to M4V Video Converter for Mac do the rest for you! Bingo! That’s it! You did it.

After the MTS to M4V conversion, the 
H.264 AAC M4V video files are ready for you. Now you can enjoy your MTS videos on iPhone 4, iPad, iPod, Apple TV, iTunes etc freely. Or edit them in iMovie for making a movie of your own style. 

What's more:

If you wanna edit/cut the video files to make your own creative movie, click the "Edit" button. In the Video Editor interface you can edit your AVCHD videos by cropping, trimming, adding watermarks and setting special effects including 3D effect.

With this powerful MTS to M4V Video Converter for Mac, you can convert and edit a batch of videos in one time. Moreover, it supports MOV, MPG, MKV, WMV, MP4, VOB, DV, 3G2, 3GP, ASF, TS etc.  

See also:

Wednesday, July 10, 2013

Best way to import Panasonic HC-X900 3D AVCHD videos to Final Cut Pro (X)

Follow this article you will know how to import Panasonic HC-X900 3D AVCHD to Final Cut Pro (X) for editing on Mac.

Panasonic HC-X900 is a full HD camcorder has three separate sensors for red, green and blue light; these help it capture more accurate colours and more detail, while reducing noise, compared to single-chip camcorders. The camera supports 1080 50/60p video as well as 1080i and PAL. The new model adds updated image stabilisation and an auto-stereoscopic screen for glasses-free 3D viewing with the optional 3D adaptor.


Now summer holidays are coming, users prefer to shoot videos or movies with this Panasonic HC-X900 when travelling or do some outdoor activities such as skating or riding a bike. Yes,  HC-X900 camcoder brings the sweet memory back to them, and for better effect they will choose Final Cut Pro to do the editing this 3D mts shootings from HC-X900. But when impoting, they may meet many problems.

Well, something’s wrong for with the unacceptable and incompatible AVCHD video format, so they can’t edit Panasonic HC-X900 3D AVCHD mts file in FCP (X) freely. The best way to deal with the problems is to do some conversion first. FCP (X) best supported video format is Apple ProRes 422 codec MOV format, so if you convert Panasonic HC-X900 3D AVCHD to ProRes 422 format, you can edit Panasonic HC-X900 3D MTS footages in FCP (X) smoothly without rendering.

Below is a guide for you to transcode Panasonic HC-X900 3D AVCHD to FCP (X) ProRes

At first, you need to Download the best 3D AVCHD Converter for Mac from Pavtube. 

This professional app helps you import native 3D stereoscopic AVHCD footage(2D as well) and export Apple ProRes 422 encoded .mov video, which can be imported to Final Cut Pro 7 and X without rendering. You can convert 3D MTS to 2D MOV video, or encode 3D AVCHD footage to Anaglyphic 3D that is also compatible with FCP X. Plus, this Mac MTS Converter also provides optimal presets for iMovie, FCE, Adobe Premiere Pro, Avid Media Composer, etc, ensuring smooth editing with different video editing programs on Mac OS X.

Step 1. Add Panasonic HC-X900 3D AVCHD footage
Install and run the Pavtube Mac 3D MTS to FCP Converter as the best Panasonic AVCHD to FCP (X) Converter, and directly drag and drop Panasonic HC-X900 3D AVCHD videos.


Step 2. Select "Apple ProRes 422" as output video format compatible with FCP (X).
Click the drop-down list in the Format line to get the format box. Then choose the Final Cut Pro -> Apple ProRes 422 (*.mov) for editing HC-X900 full HD 3D AVCHD files.


Step 3. Adjust the output video's parameters as you want.
Click the Setting button after the Format to get the Profile Settings. Change the Size to 1920*1080, the and set frame rate as 30fps.


Step 4. Convert Panasonic HC-X900 3D MTS/M2TS to ProRes for FCP (X) for editing on Mac OS X.
Click the "Convert" button to start convert Panasonic  HC-X900  3D AVCHD MTS/M2TS to ProRes .mov for FCP (X).

With this Panasonic 3D AVCHD to ProRes Converter, you can edit Panasonic HC-X900 3D AVCHD video in FCP 6/7/X smoothly.

Red more Related gudie:

Thursday, July 4, 2013

Deinterlace and import Canon VIXIA HF G20 1080 60i AVCHD to iMovie/FCE

In order to get better importing and editing effect, you'd better deinterlace/convert Canon Vixia HF G20 1080 60i MTS video before importing to iMovie or FCE on Mac, just follow this article.


Canon VIXIA HF G20 Full HD Camcorder shoots 1920 x 1080 Full HD video at 60i, in native 24p and 30p. With the 24p frame rate option you can give your footage a cinematic look. Using Cinema-Looks Filters you can boost that film look with multiple built-in adjustable filters. The HF G20 features a Genuine Canon 10x HD Video Lens with an 8-Blade iris for more professional-looking video and stills. It has a 30.4 - 304mm (35mm equivalent) focal length. The camcorder is also equipped with a Canon HD CMOS Pro image sensor that supports improved low-light performance and a wide dynamic range.


Vixia HF G20 captures Full HD 1920x1080p videos in MPEG4 or AVCHD format. The AVCHD delivers stunning picture quality, but is not full supported by iMovie and FCE. So it is headache if you want to deinterlace and edit Canon Vixia HF G20 1080 60i MTS in iMovie or FCE. To successfully get Canon VIXIA HF20 1080i MTS files to iMovie/FCE for further editing, the best way is to transcode Canon Vixia AVCHD to iMovie/FCE most compatible format like AIC. mov.

Here we recommend you to choose the top Canon MTS to AIC Converter for mac, which can convert Canon HF G20 AVCHD recordings to AIC for editing in iMovie/FCE on Mac and keep the quality as original. Plus, 1080i videos are not perfectly readable for these video edit programs like FCP, iMovie and FCE. Thus, deinterlacing Canon 1080/60i MTS on Mac is imperative to be considered.

Steps: Deinterlace and Convert Canon Vixia HF G20 1080 60i MTS clips to iMovie or FCE.

Step 1: Install the best Canon AVCHD Converter for Mac on your Mac OS X, and run it to import your Canon Vixia HF G20 1080 60i MTS footages to it.

Tip: If you want to combine the files together, please tick the box "Merge into one" on the main interface.


Step 2: Click the Format box and select best output format on the dropdown list. You are advised to choose Apple Intermediate Codec(AIC)(*.mov) as the export.


Step 3: Click the “Settings” icon on the main interface and you’d better set the video size as 1920*1080, video frame rate as 30fps(or 25fps PAL) for importing Canon HF G20 1080i MTS to iMovie or FCE with the best quality.


Step 4: Click Edit button and you can deinterlace Canon VIXIA HF G20 1080i AVCHD file for iMovie via ticking the “Deinterlacing” box in the Video Editor interface.

Step 5: Click the "Convert" button on main interface to start converting/deinterlace Canon HF G20 1080/60i MTS recordings to AIC for editing in iMovie and FCE  immediately.

After the Canon MTS to iMovie/FCE Converter finished transcoding, you can run the iMovie or FCE to import the converted files and edit Canon Vixia HF G20 1080/60i MTS in iMovie and FCE without any rendering or incompatibility problem.

You may also learn how to convert AVCHD to ProRes 422 for FCP.

Read More:

Monday, June 24, 2013

Import & Edit Panasonic HC-V720K 1080 60p/50p MTS files in Final Cut Pro X

In this post, you can get the info of Panasonic HC-V720K camcorder and learn how to import and edit Panasonic HC-V720K 1080 60p/50p AVCHD MTS in Final Cut Pro.
 
The Panasonic HC-V720K Live Streaming HD Camcorder features a 1/2.33" MOS sensor for recording Full HD 1080/60p video in the AVCHD format. The 21x zoom lens has a fast f/1.8 max aperture and a 35mm equivalent of 28-729.6mm, and the optical zoom is supplemented by an 50x Intelligent Zoom. Built-in Wi-Fi enables real time broadcasting via Ustream, and Near Field Communication technology allows users to connect a smartphone or tablet in one touch. Other features include a 3" LCD touchscreen monitor, Five Axis Hybrid OIS, 5.1-channel surround sound, and iA Plus Mode.


Panasonic HC-V720K camcorder works great, takes good video, and now I can easily create and share videos instantly from just about anywhere with it. Discover the power of instant sharing with Ustream, the ability to add excitement to your videos with built-in creative effects, and the delight in making high quality HD videos with ease. After making some footage with Panasonic HC-V720K camcorder in 1080 60p/50p AVCHD format, I'd like to edit the video from HC-V720K with Final Cut Pro X and upload the edited video to MySpace, but I was frustrated that HC-V720K 1080 60p/50p .mts file could not be imported into FCP X.

After googling, I was recommended to transcode V720K 1080 50/60p videos to Prores MOV for FCP X along with some help from a 3rd-party Pansonic AVCHD Converter for Mac.

If you looking for a solution for this problem likewise, check out Pavtube's iMedia Converter for Mac which is entitled as a top Panasonic MTS to FCP Converter. It supports encoding all Panasonic 1080p 50/60P AVCHD MTS files to Apple ProRes 422 so that you can easily and smoothly edit Panasonic HC-V720K Camcorder 1080 60p/50p recordings in Final Cut Pro X for editing on Mac. This will help you import the file correctly and saving the rendering time. 

Here is the step-by-step guide for you to import and edit Panasonic HC-V720K 60p/50p MTS to Prores MOV for Final Cut Pro X editing with Mac OS X like Mountain Lion, Lion, Tiger, Leopard, Snow Leopard. 

Step 1: Free Download and install Panasonic 50/60p MTS to FCP Converter to your Mac. It's excellent Panasonic AVCHD Converter which can convert nearly all Panasonic camcorder videos to any formats you need, such as Apple Prores 422 MOV, Apple InterMediate Codec MOV, QuickTime MOV, etc.


Step 2: Click the format bar, and move mouse cursor to "Final Cut Pro > Apple ProRes 422 (*.mov)" as output format for editing in Final Cut Pro X.

Here we recommend the Apple ProRes 422. In the settings you will find Pavtube allows you to keep the original frame rate 50/60fbps in the final ProRes files.


Step 3. Click "Convert" button to start transcoding Panasonic HC-V720K AVCHD 50/60p videos to FCP Apple ProRes on Mac OS.

After a shot conversion, you will be able to import/load Panasonic HC-V720K 1080 50/60p videos into Final Cut Pro X for editing without rendering.

Tips: Before you try to do the conversion, if you are also a FCP X user, please make sure that you have installed the Apple ProRes Codec manually since the FCP X asks users to install it by themselves.

Read More:

Thursday, May 16, 2013

Mac Canon MTS Converter-Working with Canon Legria HF20/HF200 MTS (AVCHD) Videos on Mac

Using a top Canon MTS Converter, you can make it easy to import and edit Canon Legria HF20/HF200 AVCHD files in Final Cut Pro, Avid, iMovie, Final Cut Express and Premiere Pro on Mac.


Canon's acquitted itself quite well with a nearly identical trio of flash-based AVCHD camcorders, the HF10/HF11/HF100, and follow-up models HF20 and HF200 manage to improve upon their legacy. Canon Legria HF20 and HF200 are hot Canon cameras, and the only difference between the two models is color and memory configuration: the HF20 has 32GB built in, while the HF200 has none. Aside from their stunning features, the compatibility of Canon Legria HF20/HF200 with Mac is the hot topic of discussion among the users.


As the AVCHD format is not good for Mac editing, it takes long time to render, and you can't edit the Canon HF20/HF200 AVCHD MTS files smoothly in Final Cut Pro (X), Avid, iMovie,FCE and Premiere Pro. To achieve you goal smoothly, below is simple tutorial for you.

Tips:Watch MTS Movies on Mac via iTunes?

Converting Canon Legria HF20/HF200 MTS files for editing in FCP (X), Avid, iMovie,FCE and Premiere Pro etc.

In order to process Canon HF20/HF200 footage fast and seamless on Mac, it requires that the AVCHD .mts videos to be transcoded into an editing friendly format before importing the HF20/HF200 video to non-linear editing apps. This is usually done with a Mac Canon Video Converter.

Recommended Tool: Pavtube HD Video Converter for Mac

The software converts Canon HF20/HF200 mts to Apple ProRes/DVCPRO/HDV/Avid DNxHD/AIC/AVI/WMV/MOV/MP4 and creates stunning high definition footage up to 1080p.

1. Download and run the perfect Mac Canon MTS Converter (If you are windows user, clik to download Canon MTS Converter), and then click "Add Video" button or "Add from folder" button to load HF20/HF200 AVCHD MTS source files.


2. Click format bar to choose the format for output.

For iMovie and FCE, you can choose 'Final Cut Express -> Apple InterMediate Codec (AIC) (*.mov)';


For FCP (X), you can choose 'Final Cut Pro -> Apple ProRes 422 (*.mov)';


For Avid, choose 'Avid Media Composer -> Avid DNxHD (*.mov)';


For Premiere, just choose Adobe Premiere -> WMV (VC-1) (*.wmv).

You can click "Settings" button to customize the output settings such as resolution and bitrate. Edit function is also available in this great Canon AVCHD Converter.

3.. Click "Convert" button to start transcoding Canon AVCHD MTS files on Mac for popular NLEs. Once the coversion completes, you can import and edit Canon HF20/HF200 AVCHD files natively with Final Cut Pro (X), Avid, FCE, iMovie, Premiere you want.

To make things much easier, please learn to know how to huge MTS files to DVD if you like, and learn More Canon MTS Video Converter Related Guide: 

Read More: