Showing posts with label Final Cut Pro. Show all posts

Monday, July 22, 2013

Convert Canon XF300 MXF to ProRes for FCP/Premiere Pro on OS X Mavericks 10.9

Follow this article you will know how to solve Canon XF300 MXF editing problems with Final Cut Pro and Premiere Pro on Apple OS X Mavericks 10.9 as well as how to work out the "no audio issues".


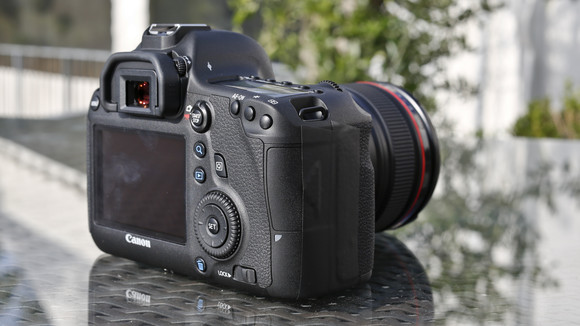
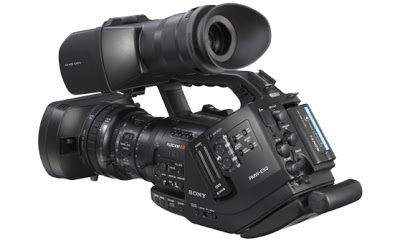
The XF300 Professional Camcorder represents Canon's entry into professional solid state video acquisition. Following on the heels of its widely respected XH line of tape-based camcorders, the XF300 takes advantage of the latest HD technology--along with Canon's newly developed MPEG-2 4:2:2 codec--to record Full HD video to affordable Compact Flash cards.

While, when you want to import Canon XF300 XF MXF files in FCP/Premiere Pro on OS X Mavericks 10.9 for editing, you will get frustrated due to the video codec incompatibility problem as below.

I have some multi-stream mxf files from a normal Canon XF300 and want convert them into any format that FCP and Premirere Pro adopts. The key point is I don’t want to loss any of the audio channels that I recorded with two microphones. Is that any work flow for this? I hope this still fits for the OS X Mavericks 10.9 to be coming.

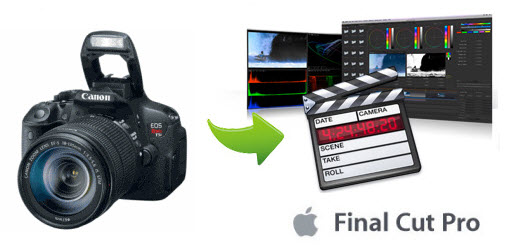
Here is the best solution for editing Canon XF300 MXF files in FCP and Premiere Pro on Mavericks 10.9, that is, to transcode Canon XF300 MXF to FCP/Premiere Pro compatible Apple Prores for editing.

To achieve this goal, you can use this professional iMedia Converter for Mac, which is a great help for Canon XF300 users to convert Canon XF300 1080i 50Mbps MXF to ProRes for FCP/Premiere on Mavericks 10.9, but also make it easy for you get the right audio track for the MXF files without losing sound. Plus, this Mac MXF Converter fully support other Canon XF camcorders like Canon XF105, XF100, XF305, Canon EOS C300, Canon EOS C500 etc.  

Guide: Convert Canon XF300 MXF files to FCP/Premiere Pro on OS X Mavericks 10.9  . 

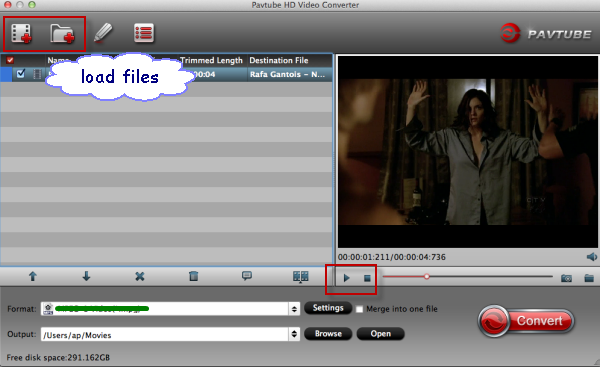
Step 1: Add MXF video files.

Download and run Pavtube Mac OS X Mavericks MXF Converter. Connect Canon XF300 camcorder to your Mac computer hard drive via USB cable. Click the button "Add Video" to add Canon XF300 MXF files, or directly drag and drop your HD MXF files.

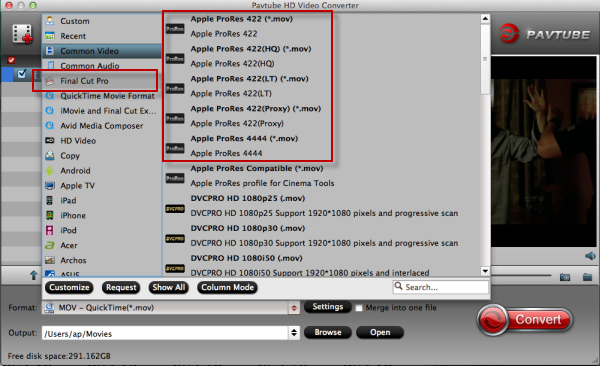
Step 2: Select an output format for FCP and Premiere Pro and set the output folder.

Click on the "Format" and get the dropdown menu, then move you pointer to Final Cut Pro -> Apple ProRes 422 (*.mov), it’s the best format for editing in FCP, if you need to edit in Premiere, you can also choose Prores code.

Or you can select MOV format from "Adobe Premiere/Sony Vegas" option, this format is best for Premiere Pro native editing.


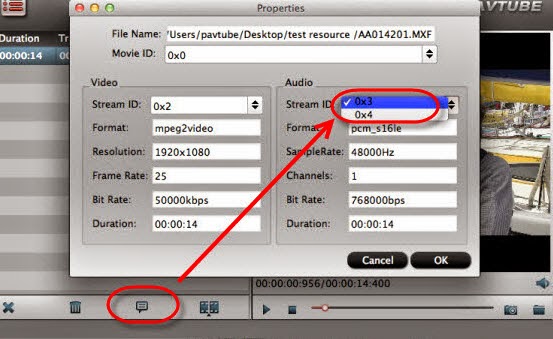
Step 3: Click "Settings" icon to adjust audio and video parameters.

Click the "Settings" icon and you will go into a new interface named "Profile Settings". You can adjust codec, bit rate, frame rate, sample rate and audio channel in the interface according to your needs and optimize the output file quality.

Tips:
If your default audio track is in mute when recording, you may get only video without audio. So you can switch to the audio stream ID option to choose the right audio track.


Step 4: Start Converting. 

Click the "Convert" button; it will convert Canon XF300 MXF files to Apple ProRes for FCP X and Premiere Pro on Mavericks 10.9 immediately.

After the MXF to ProRes conversion, you will be able to get the output files for FCPand Premiere Pro via clicking on "Open" button effortlessly. Afterwards, you can import the converted videos to FCP or Premiere Pro freely for further editing without any trouble. 

Futhermore, if your MXF files have 2 audio tracks or more, here is a new program named iMixMXF with multi-track preserving and mixing features. You can download the trial version for evaluation!
 

Read More:

Tuesday, July 16, 2013

Transcode Canon XF100 MXF footage to FCP 6/7 for editing

From this article, you can know the best codec for importing Canon XF100 MXF clips to Final Cut Pro 6/7 editing on Mac by converting XF100 MXF to ProRes 422.

Canon XF100 Professional Camcorder can be tailored to fit a wide range of individual needs. XF100 offers some exciting new features of its own, it is geared for a wide range of applications where high image quality, extreme portability, and efficient workflow are of the utmost importance. And with infrared recording and true stereoscopic 3-D production capabilities, the XF100 allows users to explore new creative outlets and emerging markets.


The XF100 utilizes Canon's XF Codec – a file-based MPEG-2 compression with an MXF File Wrapper. If you record a great deal of MXF footages with Canon XF100 and desire to edit them with Final Cut Pro 6/7, you may encounter dilemma like the MXF files can't be recognized by FCP 6/7.

And the truth is, it is possible to smoothly import Canon XF100 MXF clips to FCP 6/7, as long as you convert Canon XF100 MXF to Final Cut Pro compatible ProRes 422 codec first. 


Here I recommend you the professional MXF to FCP Converter for Mac from Pavtube Studion that works fine for me. I like the batch processing and joining of multiple mxf videos into one file. The editing feature to trim the recorded videos is great, as I can control the content for conversion.

To help those who may face the same problem like me, or want to rewrap MXF to Prores .mov on Mac for HD editing in Final Cut Pro 6/7, I here list a few steps with the fast MXF video conversion.

1. Download Pavtube MXF Converter for Mac, install this Canon XF100 MXF to FCP X converter. Import or drag and drop the XF100 MXF files to the converter you want to convert.


2. Click "Format" bar to choose output format. Click and choose "Final Cut Pro -> Apple ProRes 422 (*.mov)", it's the best format for editing in FCP 6/7.


3. If you want to customize the output settings, you can click "Settings" button to adjust the resolution, bitrate, etc.

4. Click "Convert" button to start transcode Canon XF100 MXF to ProRes 422 for FCP 6/7. with the excellent MXF to Mac Converter, you can use XF100 MXF files on Mac as you want.

P.S. You can try iMixMXF from Pavtube, which is a wonderful MXF multi audio track/ channel preserver, mixer and converter supporting Multi-track MXF importing and exporting on Mac.

Read More:

Monday, July 15, 2013

XF105 workflow- How to import .mxf files from Canon XF105 to Final Cut Pro X?

Here it mainly shows an easy way to transcode Canon XF105 MXF to Apple ProRes MOV on Mac so that you can smoothly import and edit Canon XF105 recorded MXF footage in Final Cut Pro X without rendering.   


Q1: I love photography and take pictures and have a Canon XF105 and shoot the videos recently, it supports Full HD 1920×1080 resolution with Canon XF codec, up to 50Mbps bit rate and 4:2:2 color sampling. After shooting some .mxf videos with Canon XF105, I want to join various mxf files into one and edit Canon xf105 mxf in FCP X. But I find the problem that Fianl Cut Pro X does not recognize the .mxf videos? What happened?

Q2:I've run into a problem with a project. I copied the entire card file structure of XF105 onto a hard drive, installed all the right codecs...and it's telling me the file structure is invalid. My question is, can I still have all the videos and work them in FCP X?

Q3:I am using the Canon XF105 camcorder. The format is MXF from a memory card. It's kind of obnoxious at the moment since FCP X won't work natively with MXF files, which isn't the end of the world, but is a pain.

So the Question is : How to Import Canon XF105 MXF files to FCP X on Mac 

AnswerConvert MXF to Apple Prores for Final Cut Pro X Editing on Mac OS X 

By Google search, I found a professional HD Video Converter for Mac , which is a best OS X Lion/Mountain Lion MXF Converter for Mac Software. It can not only convert Canon XF105 MXF videos to Prores MOV, but also join videos into one.

Transcode/Convert Canon XF105 recordings to Apple ProRes 422 for FCP X 

Step 1: Connect Canon camcorder to iMac with USB 2.0 cable, run the top MXF to FCP Converter for Mac as the best Canon MXF to MOV converter on Mac. Click the “Add” button to import Canon XF105 camcorder .mxf files.

Step 2. Click on "Format" and choose "Final Cut Pro > Apple ProRes 422 (*.mov)".


Step 3. Click "Convert" to start transcoding the Canon XF105 MPEG2 MXF recordings to Apple ProRes / converting .mxf to .mov videos. After conversion click "Open" to find .mov videos.  

Some more helpful features of the app: 

1. Settings- click to set video resolution(1920x1080/1440x1080/1280x720/720x480), bitrate(from 1Mbps to 20Mbps), frame rate (24p/30p) 

2. Editor (next to "Add" icon)- click to set deinterlace, denoise, mute, volume up, trim, crop, etc. 

Load/Import converted Canon XF105 footage to Final Cut Pro X 


Step 1. Start up Final Cut Pro X, follow "File > Import > Files". 

Step 2. Browse to the converted .mov video in the "Import Files" window. Press "Open" at the right bottom. 

Now you can import Canon XF105 footage to FCP X successfully and get down to video editing. 

MXF Related articles: 


Read More:

Wednesday, July 10, 2013

Best way to import Panasonic HC-X900 3D AVCHD videos to Final Cut Pro (X)

Follow this article you will know how to import Panasonic HC-X900 3D AVCHD to Final Cut Pro (X) for editing on Mac.

Panasonic HC-X900 is a full HD camcorder has three separate sensors for red, green and blue light; these help it capture more accurate colours and more detail, while reducing noise, compared to single-chip camcorders. The camera supports 1080 50/60p video as well as 1080i and PAL. The new model adds updated image stabilisation and an auto-stereoscopic screen for glasses-free 3D viewing with the optional 3D adaptor.


Now summer holidays are coming, users prefer to shoot videos or movies with this Panasonic HC-X900 when travelling or do some outdoor activities such as skating or riding a bike. Yes,  HC-X900 camcoder brings the sweet memory back to them, and for better effect they will choose Final Cut Pro to do the editing this 3D mts shootings from HC-X900. But when impoting, they may meet many problems.

Well, something’s wrong for with the unacceptable and incompatible AVCHD video format, so they can’t edit Panasonic HC-X900 3D AVCHD mts file in FCP (X) freely. The best way to deal with the problems is to do some conversion first. FCP (X) best supported video format is Apple ProRes 422 codec MOV format, so if you convert Panasonic HC-X900 3D AVCHD to ProRes 422 format, you can edit Panasonic HC-X900 3D MTS footages in FCP (X) smoothly without rendering.

Below is a guide for you to transcode Panasonic HC-X900 3D AVCHD to FCP (X) ProRes

At first, you need to Download the best 3D AVCHD Converter for Mac from Pavtube. 

This professional app helps you import native 3D stereoscopic AVHCD footage(2D as well) and export Apple ProRes 422 encoded .mov video, which can be imported to Final Cut Pro 7 and X without rendering. You can convert 3D MTS to 2D MOV video, or encode 3D AVCHD footage to Anaglyphic 3D that is also compatible with FCP X. Plus, this Mac MTS Converter also provides optimal presets for iMovie, FCE, Adobe Premiere Pro, Avid Media Composer, etc, ensuring smooth editing with different video editing programs on Mac OS X.

Step 1. Add Panasonic HC-X900 3D AVCHD footage
Install and run the Pavtube Mac 3D MTS to FCP Converter as the best Panasonic AVCHD to FCP (X) Converter, and directly drag and drop Panasonic HC-X900 3D AVCHD videos.


Step 2. Select "Apple ProRes 422" as output video format compatible with FCP (X).
Click the drop-down list in the Format line to get the format box. Then choose the Final Cut Pro -> Apple ProRes 422 (*.mov) for editing HC-X900 full HD 3D AVCHD files.


Step 3. Adjust the output video's parameters as you want.
Click the Setting button after the Format to get the Profile Settings. Change the Size to 1920*1080, the and set frame rate as 30fps.


Step 4. Convert Panasonic HC-X900 3D MTS/M2TS to ProRes for FCP (X) for editing on Mac OS X.
Click the "Convert" button to start convert Panasonic  HC-X900  3D AVCHD MTS/M2TS to ProRes .mov for FCP (X).

With this Panasonic 3D AVCHD to ProRes Converter, you can edit Panasonic HC-X900 3D AVCHD video in FCP 6/7/X smoothly.

Red more Related gudie:

Tuesday, July 9, 2013

Fastly and easily import/edit Canon C300 MXF files in FCP X

The article shows you an easy workaround to import and edit Canon C300 recorded MXF files in FCP X on Mac 10.9 Mavericks along with some help from the best Prores Converter for FCP.

Canon has introduced a new Cinema EOS system, made up of a new interchangeable-lens digital video camcorder, the EOS C300, and seven 4K EF cinema lenses. C300 features a newly developed sensor, dubbed Super 35mm, offering a resolution of 8.29 megapixels.


Canon C300 is a new camcorder which focuses on film recording, it can give us excellent video quality. It uses MPEG-2 codec with an MXF File Wrapper. This codec offers a choice of 50 Mbps 4:2:2 component , 35 Mbps 4:2:0 component, and the standard HDV format of 25 Mbps 4:2:0. But the one thing which frustrate me is that, I can't handle the MXF files from my Canon C300 natively into FCP X. And this will stop me using FCP X. There were some Canon plugins available but the procedure is somwhat complex for me.

While looking for solutions to import Canon C300 MXF to FCP X on Mac, I find a easy workaround- that is to transcode Canon MXF footage to FCP X friendly Apple ProRes codec. It will saving rending time and avoid crashing problem, and thus, editing Canon MXF files in Final Cut Pro will be more easier.

For guys who may find it difficult to import and edit Canon C300 MXF files in FCP X on Mac, here is the fast guide to convert Canon C300 MXF to Prores MOV for FCP X. Along with some help from the 3rd-party software.

Required Software:
Pavtube MXF Converter for Mac is a good tool for you. This professional MXF transcoder for Mac can help you convert C300 MXF files to Final Cut Pro X. I downloaded and tried several converters. Only this MXF to FCP Converter for Mac works for me. I like the batch processing and joining of multiple mxf videos into one file. The editing feature to trim the recorded videos is great, as I can control the content for conversion. Here comes the steps:

1. Download Pavtube MXF to FCP Converter for Mac, it’s a good MXF converter/transfer on Mac.

2. Install and launch this C300 MXF transcoder for Mac, import the C300 MXF files to the converter.


3. Click format column to choose output format, for editing C300 MXF files in Final Cut Pro X, you can choose Final Cut Pro -> Apple ProRes 422 (*.mov).


4. You can click properties to adjust the audio stream ID if you find the C300 MXF no sound. Besides, you can click settings button to adjust the resolution, bitrate, etc. Just customize the parameters to meet your need.


5. Click convert button to start converting C300 MXF files to ProRes for FCP X, what’s more, with this MXF converter you can transfer MXF to QuickTime for playback.

Now you may have known how to convert/transfer canon C300 MXF to FCP X, just follow the steps above and have a try, you can edit C300 MXF footages in Final Cut Pro on Mac easily and fastly.


MXF Related articles:

Wednesday, July 3, 2013

Canon 6D FCP workflow- Transcode Canon EOS 6D 1080p MOV to Final Cut Pro

If you don't know how to edit Canon 6D 1080p MOV video, please read the article below to learn the easy way to import and convert Canon EOS 6D H.264 MOV to ProRes for FCP 67/X editing.  

Less than a week after arch-rival Nikon grabbed headlines with the D600, Canon responded with an announcement of its own price-conscious full frame DSLR, the EOS 6D. The EOS 6D is perhaps best understood as a full frame version of the popular EOS 60D, and it primarily seeks to distinguish itself on the spec sheet with built-in Wi-Fi and GPS. For dedicated Live View users and video shooters, it could result in extra image noise or recording shutting off, since there's bound to be lots of heat generated.

And speaking of videographers, these users are able to record 1080P videos by Canon EOS 6D with full particulars, but they will be disappointed to find that it's impossible to edit Canon 6D 1080P MOV in FCP as below:

I have a Canon DSLR 6D and wanted to edit HD video in FCP. When I insert it on the timeline the settings that it comes to are skipping frames, cuts... I can't even insert Texts. Was I supposed to do something else?

In fact, Final Cut Pro will not accept MOV files from Canon 6D and the reason that the codec of Canon H.264 MOV isn't native with FCP (including both FCP 6/7 and FCP X).

To resolve this issue, you need to simply convert EOS 6D 1080p MOV to ProRes 422 codec MOV format, then you can edit EOS 6D 1080p mov video well in FCP on Mac. You can follow the steps below to convert Canon EOS 6D 1080p mov footages for FCP.

Step 1. Download and install Pavtube Canon Video Converter for Mac. It’s can convert videos between rich video formats, such as converting Canon 1080p MOV to ProRes 422 for FCP X.


Step 2. Drag and drop Canon EOS 6D recorded MOV video to this Mac Canon MOV to FCP Converter.


Step 3. Click "Format" column to choose the best output format for editing in FCP. if you want to edit EOS 6D 1080p MOV video in FCP, you are recommended to choose "Final Cut Pro -> Apple ProRes 422 (*.mov)".


(Optional) - You can click "settings" button to customize the output parameters, such as resolution and bitrate.


(Optional) - Edit function is useful and convenient for you to use. You can trim, crop, adjust effects or add watermark to the video.

Step 4. Click "Convert" button to start transcoding Canon EOS 6D 1080p MOV to ProRes 422 MOV for Final Cut Pro on Mac.

This Canon MOV Converter for FCP can help you convert the video format/codec you need quickly, video and audio quality are best guaranteed. You can also follow this article to import converted videos to final cut pro for editing.

Read Related Articles:

Monday, July 1, 2013

4K workflow in FCP/iMovie-Edit Sony F65 MXF 4K video in Final Cut Pro and iMovie smoothly

Do you have some trouble with the "4K camera Sony F65 MXF editing workflow in Final Cut Pro and iMovie"? If so, just follow this guide to learn about how to import and edit Sony F65 4K .MXF in FCP and iMovie on Mac smoothly.


Sony F65 is a top-end motion picture camera. It features a true step-change in sensor technology, using a 20 Mega pixel 8K CMOS sensor. The F65 runs up to 120Fps, creates HD/2K or genuine 4K resolution images with a huge colour gamut, outstanding dynamic range, and high sensitivity.

Recording 4K(4096* 2160) video is very easy with this Sony F65, there is no need to talk much about the 4K video now. But one thing need to be mentioned, it is not so easy to edit raw 4K videos. for example , this Sony F65 records videos in MXF format, which is not friendly to Mac FCP, iMovie or other editing apps. If you get a F65 and want to edit the footage in FCP and iMovie, you need some third-party apps to convert the Sony F65 4K MXF files to Mac FCP and iMovie compatible formats first. Here is the solution.

Mac 4K MXF Converter - a professional Pavtube MXF to Mac Converter, it can help you to convert Sony PMW F65 MXF to FCP friendly Prores codec and acceptable AIC codec for editing with no quality loss.

According to the specs of FCP X, the latest FCP supports 4K video, and this top MXF Converter introduced here can output 4K videos with ease, that means, it can remain the original 4K resolution after conversion. Now get your program installed and let’s begin!

Convert Sony F65 4K MXF to Prores/AIC MOV for editing in FCP and iMovie on Mac?

Step 1. Install and launch the 4K MXF to Prores/AIC Converter, click ‘add videos’ to load individual videos, or click ‘add from folder’ to load the entire folder.


Step 2. Click "Format" bar to choose the output format.

If you want to edit video in FCP, click and choose Final Cut Pro -> Apple ProRes 422 (*.mov);


For editing in FCE, iMovie, you can choose iMovie/Final Cut Express -> Apple InterMediate Codec (AIC) (*.mov).

OptionalYou can click “settings” to customize the output parameters, adjust the resolution, bitrate as you want. 

Step 3. Click “Convert” and let it go!

After the Sony F65 SR 4K MXF footage into FCP and iMovie conversion, you will be able to get the output files via clicking on Open button effortlessly. Afterwards, you can transfer Sony F65 footages to Final Cut Pro and iMovie freely for further editing without any trouble.


Read More:

Monday, June 24, 2013

Import & Edit Panasonic HC-V720K 1080 60p/50p MTS files in Final Cut Pro X

In this post, you can get the info of Panasonic HC-V720K camcorder and learn how to import and edit Panasonic HC-V720K 1080 60p/50p AVCHD MTS in Final Cut Pro.
 
The Panasonic HC-V720K Live Streaming HD Camcorder features a 1/2.33" MOS sensor for recording Full HD 1080/60p video in the AVCHD format. The 21x zoom lens has a fast f/1.8 max aperture and a 35mm equivalent of 28-729.6mm, and the optical zoom is supplemented by an 50x Intelligent Zoom. Built-in Wi-Fi enables real time broadcasting via Ustream, and Near Field Communication technology allows users to connect a smartphone or tablet in one touch. Other features include a 3" LCD touchscreen monitor, Five Axis Hybrid OIS, 5.1-channel surround sound, and iA Plus Mode.


Panasonic HC-V720K camcorder works great, takes good video, and now I can easily create and share videos instantly from just about anywhere with it. Discover the power of instant sharing with Ustream, the ability to add excitement to your videos with built-in creative effects, and the delight in making high quality HD videos with ease. After making some footage with Panasonic HC-V720K camcorder in 1080 60p/50p AVCHD format, I'd like to edit the video from HC-V720K with Final Cut Pro X and upload the edited video to MySpace, but I was frustrated that HC-V720K 1080 60p/50p .mts file could not be imported into FCP X.

After googling, I was recommended to transcode V720K 1080 50/60p videos to Prores MOV for FCP X along with some help from a 3rd-party Pansonic AVCHD Converter for Mac.

If you looking for a solution for this problem likewise, check out Pavtube's iMedia Converter for Mac which is entitled as a top Panasonic MTS to FCP Converter. It supports encoding all Panasonic 1080p 50/60P AVCHD MTS files to Apple ProRes 422 so that you can easily and smoothly edit Panasonic HC-V720K Camcorder 1080 60p/50p recordings in Final Cut Pro X for editing on Mac. This will help you import the file correctly and saving the rendering time. 

Here is the step-by-step guide for you to import and edit Panasonic HC-V720K 60p/50p MTS to Prores MOV for Final Cut Pro X editing with Mac OS X like Mountain Lion, Lion, Tiger, Leopard, Snow Leopard. 

Step 1: Free Download and install Panasonic 50/60p MTS to FCP Converter to your Mac. It's excellent Panasonic AVCHD Converter which can convert nearly all Panasonic camcorder videos to any formats you need, such as Apple Prores 422 MOV, Apple InterMediate Codec MOV, QuickTime MOV, etc.


Step 2: Click the format bar, and move mouse cursor to "Final Cut Pro > Apple ProRes 422 (*.mov)" as output format for editing in Final Cut Pro X.

Here we recommend the Apple ProRes 422. In the settings you will find Pavtube allows you to keep the original frame rate 50/60fbps in the final ProRes files.


Step 3. Click "Convert" button to start transcoding Panasonic HC-V720K AVCHD 50/60p videos to FCP Apple ProRes on Mac OS.

After a shot conversion, you will be able to import/load Panasonic HC-V720K 1080 50/60p videos into Final Cut Pro X for editing without rendering.

Tips: Before you try to do the conversion, if you are also a FCP X user, please make sure that you have installed the Apple ProRes Codec manually since the FCP X asks users to install it by themselves.

Read More:

Thursday, June 20, 2013

Best workflow for editing Canon EOS 700D/T5i 1080p footage with Final Cut Pro 6/7

With the best Canon MOV to Prores Converter, your Canon 700D/Canon T5i 1080p footage workflow with Final Cut Pro 6/7 will be smmoth and native.

Canon EOS 700D/Rebel T5i is an awesome Digital SLR camera which attributes an 18.0 Megapixel APS-C size CMOS sensor and Dual DIGIC four Image Processors, capturing tremendous pictures at as much as ISO 12800 and speeds of as much as eight.0 fps. Body surface treatment process and key made optimized feel better.


As 650D does, Canon 700D records FULL HD video in a highly compressed video format MOV, which is not an ideal editing format for FCP 6/7. Of cource, you may downloaded the update from Canon, and it is reading the Canon alternatives on FCP, but dragging the mov's into Log & Transfer isn't working. It keeps saying "Can't Read" or "Not Compatible."

So to make it easy to use Canon 700D/T5i 1080p footage in Final Cut Pro 6/7, the conversion between MOV to FCP is necessary. Now Pavtube HD Video Converter for Mac gives you the ability to edit Canon EOS 700D in Final Cut Pro 6/7. Before importing EOS 700D MOV to FCP 6/7, you should transcode Canon MOV videos to FCP preferred movie types: like ProRes .mov, and Apple ProRes is the greatest choice for maintaining the highest quality and performance while requiring less storage space than uncompressed HD video.

Here comes the step-to-step guide to convert Canon T5i/700D footage to ProRes 422 for FCP 6/7.

For the preparation of this conversion, connect your Canon 700D/Canon T5i MOV to iMac or Macbook and transfer MOV video files into hard drive.

Step 1: Load Canon 700D/Canon T5i MOV video files into this program.
Run Pavtube HD Video Converter for Mac as a Canon MOV to FCP Converter, and click the "Add" button to load 700D/T5i.mov footage.


Hints: Batch video files are allowed to be imported,therefore joining several video files into big one is supported by ticking the checkbox of "Merge into one file" under the preview window.

Step 2: Choose Apple ProRes 422 MOV as the output video format and specify the destination folder.
Click on "Format" bar and set a FCP friendly codec in dropdown-list. You are advised to follow "Final Cut Pro" template and choose "Apple ProRes 422 (*.mov)" as an optional format for converting Canon 700D/T5i MOV files to Final Cut Pro 6/7 


Step 3: Edit Canon 70D/Canon T5i MOV video files.(Optional)
Click the big button "Editor" and another interface comes out for you to perfect video files. As it shows, some editing options are provided, and there you are free to crop unwanted video parts, trim video length and add interesting video to original one.

Step 4. Start the process to transcode Canon EOS 700D(T5i) mov files to ProRes 422.
Click the button "Convert", this conversion will begin immediately. And after a few minutes, Prores MOV files are ready for you to edit on Final Cut Pro 6/7.

Hope this guide "Canon 700D 1080p footage workflow with Final Cut Pro 6/7" really do some help, and this Mac Canon H.264 to Prores MOV Converter also supports importing Canon EOS 700D/T5i MOV to iMovie/FCE with AIC MOV Format. It will surely become your ideal assistant in your digital.

Read Related Articles:

Tuesday, June 18, 2013

Easy way for Editing Sony PMW-EX3 XDCAM MP4 clips with Mac

In this post, you can learn the easy way to import .mp4 recorded from Sony PMW-EX3 to Mac in FCP, Avid, iMovie, Premiere Pro, FCE etc.


Sony PMW-EX3 follows on from the successful launch of the new PMW-EX1 and offers all the great features of the PMW-EX1 in a new semi-shoulder design. In addition to this new design the camcorder also features an interchangeable lens system, genlock, timecode and remote control capability for real added flexibility, offering a low-cost HD studio solution. It combines a state-of-the-art, non-linear XDCAM workflow with simply the best HD quality yet seen in a semi-shoulder camcorder.

PMW-EX3 camcorder records 1920 x 1080 HD images using the "MPEG-2 Long GOP" codec, which conforms to the MPEG-2 MP@HL compression standard, and the recordings are made as data files in the "MP4" format. "MPEG-2 Long GOP" is a mature codec which enables users to record stunning-quality HD video and audio with highly efficient, reliable data compression, but it is not an editing codec, so it is a big problem when loading or importing Sony PMW-EX3 mp4 clips into your Mac system.

Question: I recently purchased the Sony PMW EX3 and am loving it. My problem is this. I want to edit my footage. I have Final Cut Studio 1 which is apparently incompatible with the EX3 mp4 clips. I'm looking to make the jump to Avid Media Composer, iMovie and Adobe Premiere, but it doesn't works. Can anybody enlighten me?

The easy Solution: To make it easier for editing Sony PMW-EX3 MP4 videos on Mac, you can need to convert Sony EX3 mp4 clips to FCP, Avid, iMovie, Premiere Pro, FCE preferable format before importing to avoid crashing problem and waiting time. Mac Sony XDCAM EX Video converter is the best choice to do this. It can not only convert Sony PMW EX3 .mp4 videos to Mac compatible codec, but also make iteasy for merge videos.Below is a guide for you.

1. Download and install Pavtube iMedia Converter for Mac. This converter can help you transcode Sony PMW-EX3 mp4 video to FCP, Avid, iMovie, Premiere Pro, FCE.


2. Launch this Sony MP4 to Mac Converter, and import the EX3 recorded mp4 footages.


3. Click format bar to choose the format for output.

For editing EX-3 MP4 video on Mac, you can choose Apple ProRes 422 for FCP, DNxHD for Avid, AIC codec for iMovie, FCE, ProRes/MOVfor Premiere, etc.


4. You can click settings button in the main interface to adjust the output parameters, such as resolution, frame rate, etc, customize the parameters as you want.

5. Click convert button to start.

After Sony MP4 to Mac conversion, Optimize your workflow and save time with the Apple ProRes compression for Final Cut Pro. You can also import the output videos to Final Cut Express (FCE) 4, iMovie 11, Avid Media Composer or Premiere Pro for editing in full HD.

This Sony XDCAM EX Converter for Mac can not only convert Sony PMW-EX3 MP4 clips for FCP,  iMovie, Avid, Premiere Pro, FCE, but also rip your Blu-ray and DVD contents for editing with good quality.

Monday, June 17, 2013

Working Natively with Sony PDW-700 XDCAM HD MXF in Final Cut Pro X

This article shows you the best solution for convertting XDCAM HD MXF files from Sony PDW-700 to a file format that is editable/supported by FCP X.
 
PDW-700 camcorder is a popular member of Sony's XDCAM family, equipped with three 2/3-inch type CCDs – a newly developed "Power HAD FX" progressive CCD with 1920 x 1080 effective pixels. It also offers very high quality HD recording at a data rate of up to 50Mbps using the MPEG-2 4:2:2P@HL compression, and provides multi-format recording flexibility including 1080i, 720P and SD, with HD/SD conversion and cross conversion between 1080i and 720P.


The XDCAM series takes recording to the next level, utilizing non-linear single and dual-layer optical Blue Laser technology. Less time logging, capturing and digitizing footage allows videographers to move seamlessly between acquisition and post-production. However, Sony PDW700 XDCAM camcorders' video format is MXF, using this MXF footage on Mac is a big problem. If you try to import PDW-700 HD MXF footages to Final Cut Pro X for further editing, you may meet some incompatible issues.

Sony has recently released version 2.9 of the XDCAM Transfer Software, which adds additional features including the ability to write back MXF files to the Clips folder with the PDW-U1. You can learn how to import XDCAM Disc footage directly into the Final Cut Pro editing system with XDCAM Transfer here.

Anyway, this MXF file with MPEG HD422 codec is a not standard editing format for FCP X. In case that you have more unexpected problem, you are suggested to convert Sony PDW700 MXF video to FCP X compatible format like ProRes 422 codec. As ProRes codec is a common format developed by Apple, ProRes 422 is intended for non-linear editing with Apple Final Cut Pro. They retain higher quality when you convert Sony PDW700 MXF to FCP X using Apple Prores codec. Below is an easy way for you to import Sony PDW700 XDCAM HD MXF to Final Cut Pro X on Mac.

1.Download Pavtube MXF Converter for Mac. This is excellent software which can help you convert Sony PDW700 XDCAM MXF video to ProRes for FCP X. Besides, it supports many other formats for output.

2.Install and launch this Sony XDCAM MXF to FCP Converter, import the MXF video you want to convert.


3.Choose the best output format for Final Cut Pro . Click on "Format" and choose "Final Cut Pro >>Apple ProRes 422 (*.mov)". It is the best codec and format for editing XDCAM MXF in FCP X.


4.You can click settings to adjust the output parameters, such as resolution, bitrate and frame rate.


5.You can click edit button to edit MXF video, such as deinterlace, denoise, mute, volume up and crop.

6.Click convert button to start transcoding MXF to Apple ProRes for Final Cut Pro X and import the converted video file into FCP X. 

Now you can load and edit Sony PDW700 XDCAM HD MXF footage in FCP X instantly without rendering.

Read Related Articles:

Thursday, June 6, 2013

P2 Card Mac Converter- Convert Panasonic AG-HPX170 P2 MXF to FCP X

As FCP X won't import Panasonic AG-HPX170 P2 MXF footage, so this easy workaround aims to help you to import/edit AJ-HPX170 P2 MXF files into Final Cut Pro X flawlessly.

Panasonic AG-HPX170 is an ultra-mobile P2 HD handheld camcorder featuring full, 4:2:2 independent frame production quality HD and solid-state recording. Its newly enhanced 1/3'' progressive 16:9 3-CCD imager delivers an excellent signal-to-noise ratio, lower noise/smear, and exceptional low-light performance. And HPX170 has two P2 card slots and records in 20 HD and SD formats. Files are saved onto the P2 memory card in MXF format allowing direct data transfer to broadcasting and production system.


After recording some files on the Panasonic AG-HPX170, you may find your Mac FCP X can not recognize the HPX170 P2 .mxf videos as below:

"I have a project has 26 files and a total size of 5.7GB. The camera was the Panasonic AG-HPX170, I found that all the video record by Panasonic P2 camcorder is of .mxf format which Final Cut Pro X don't support. How can I import the P2 MXF project into Final Cut Pro X?"

Panasonic AG-HPX170 records MXF file using AVC-Intra codecs. Due to the unfriendly codec, it is not easy to import such a P2 MXF file directly into FCP X. To edit Panasonic AG-HPX170 P2 MXF footage with Final Cut Pro X smoothly, you have to import AG-HPX170 P2 MXF to FCP X natively with FCP supported video format like MOV in Apple ProRes Codec.

Here we recommend you the best Mac P2 MXF to MOV Converter, which can help you to  easily and losslessly convert Panasonic AG-HPX170 P2 MXF to ProRes 422 for FCP X on Mac. And the latest Mac OS X Mountain Lion 10.8.3 is supported; just feel free to try it!

http://download.pavtube.com/mxf-converter-mac/mxfconvertermac_setup.dmg

How to convert Panasonic AG-HPX170 P2 MXF to ProRes 422 for FCP X on Mac? 
Step 1. Connect your Panasonic  AG-HPX170 P2 Camcorder to Mac with USB cable or use card reader to transfer the P2 MXF files to Apple hard drive disk.


Step 2. Add Panasonic Panasonic  AG-HPX170 P2 MXF videos to MXF Converter for Mac.

Run this MXF to ProRes Converter for Mac, and click the "Add Files" button to load individuals mxf videos; or click "Add from folder" to load the entire folder.


Step 3. Choose FCP X compatible format.

Click the "Format" option and click to choose Final Cut Pro>Apple ProRes 422 for editing HPX-170 P2 MXF in Final Cut Pro X.


Pls note the "merge into one file" box above "Open", you can lossless merge Panasonic MXF footages a few clicks.

Step 4. Now click the big red "Convert" and wait for a while to get the fresh hot converted video. Click Browse the locate them directly.

Launch FCP X, and go to "File > Import > Files…" to import converted P2 footage to FCP X project.


Now you can smoothly import Panasonic AG-HPX170 P2 MXF to FCP X on Mac Mountain Lion.

Read More:

Monday, June 3, 2013

How to get Panasonic AG-HVX200 P2 MXF to Final Cut Pro 6/7

Here it mainly introduce you a top P2 Card MXF Mac Converter so that you transcode Panasonic HVX200 P2 MXF to Apple ProRes MOV for FCP 6/7.


AG-HVX200 is a P2-based camera that answers the demands of nearly any professional videographer. It builds on the overwhelming success of the original AG-HVX200, with the addition of some much sought-after revisions. The most important new feature is an updated sensor, which yields higher sensitivity, creating less noise in low-light situations. With its compact and feature-rich frame, the AG-HVX200 will never disappoint. The unit is compatible with DVCPRO HD, DVCPRO50, DVCPRO25 and consumer DV recording standards.

Have you got this professional P2 camcorder? If so, have you tried to download MXF fotoages from P2 card to FCP 6/7 for further editing? If so, you won't find anything in FCP because FCP 6 and FCP 7 can't recognise MXF format.

Question: How to make it easier for editing Panasonic AG-HVX200 P2 MXF in FCP 6/7?

Answer: Convert Panasonic AG-HVX200 P2 MXF to ProRes for importing to FCP 6/7.

P2 MXF to FCP Converter is the highly recommended here for you to quickly and easily convert/transcode HVX200 P2 MXF to FCP supported Prores .mov format. It supports encoding Panasonic P2 and Canon C300/XF105/XF100/XF300 MXF files to FCP for editing on Mac. This will help you import the file correctly and saving the rendering time. Below is the detailed guide.

Convert and Edit Panasonic AG-HVX200 P2 MXF in FCP 6/7 with Apple Prores codec

Step 1. Free download the Panasonic MXF to FCP Converter for Mac, load your P2 MXF files into the program. As a top P2 MXF Converter, it also supports transcoding MXF to AIC Codec for editing with iMovie 8/9/11.


Step 2. Click the format bar, and move mouse cursor to "Final Cut Pro > Apple ProRes 422 (*.mov)" as output format for editing MXF in FCP 6/7.


Step 3. Click convert button in the main interface to start transcoding AG-HVX200 Panasonic P2 MXF to FCP Prores .MOV on mac.

Some more helpful features of the P2 MXF to Prores Converter for Mac:

1. Settings- click to set video resolution(1920×1080/1440×1080/1280×720/720×480), bitrate(from 1Mbps to 20Mbps), frame rate (24p/30p)

2. Editor (next to "Add" icon)- click to set deinterlace, denoise, mute, volume up, trim, crop, etc.

After the workflow, you can go to the output folder to find the converted video files. Now you are free to load/edit Panasonic AG-HVX200 P2 MXF files in FCP 6/7 under Mac without problems.

Read Related Articles: