Showing posts with label MXF. Show all posts

Tuesday, September 2, 2014

Transcoding Avid MXF Media with DaVinci Resolve Lite

Read this awesome guide, you can learn how to transcode Avid MXF Media with DaVinci Resolve Lite.

With an incredible range of digital film cameras available, DaVinci Resolve includes more native camera file support so you can grade directly from the camera files to get the best results. Let's learn how to transcode Avid MXF with DaVinci Resolve Lite in this article.

A recent projet required the editorial department to transcode dailies using a set-generated LUT for the ARRI Alexa camera. The simplest method to transcode media, apply LUT, and prepare for cutting with Avid Media Composer is using DaVinci Resolve Lite.



Grab your free copy from the DaVinci web site. Ensure the latest version is compatible with your exact version of OS X. For example, we needed to use Resolve Lite version 8.2.1 (betta) with OS X 10.7.4. We ran with a Mac Pro (mid-2010) with 12-core Intel Xeon, 8 GB of RAM, and ATI Radeon 5770 HD graphics card. Resolve would rather have a dedicated GPU such as the Quadro 4000, we found the Radeon to transcode in nearly real-time.

Resolve version 8 will not pass-through audio so the transcoded media will be sans audio. Sync in the Avid.

TRANSCODING 

The following steps will get you going in Resolve and ensure the transcoded media includes metadata for Avid’s Tape column and later conform.

  • Open Resolve. 
  • In Preferences, add your source and destination drives or Resolve won’t see them. Restart Resolve. 
  • In CONFIG panel > Project Tab > choose 32 bit floating point, DaVince YRGB, 1920×1080 square pixel. 
  • In CONFIG panel > Project tab > Timeline Conform options, choose the right timecode speed for the project. 
  • In same tab, check “Embedded in the source clip,” check “Assist…” and check “Source clip file pathname” and use the pattern: */%R.* 
  • Which is star slash percent R period star. Click Apply. 
  • In CONFIG panel > LUTs tab > click “Load 3D Input Lookup Table” menu and select your desired LUT. ClickApply. 
  • In BROWSE panel > Media Storage > select your source drive/folder/clips, right click, and choose “Add Folders and Subfolders to Media Pool.” 
  • In CONFORM panel > Timeline Management > click New (+), and click OK. 
  • In FORMAT panel > scroll through each clip and check HFlip and VFlip as needed to flop/invert clips. 
  • In same panel > click the first clip, click Select All, then menu items Session > Render. 
  • For Render properties, check Use Prefix, Suffix, No. of Digits from Source 
  • For Output Type, select MXF / DNxHD such as DNxHD 36 1080p. 
  • For Rendering Mode, check Source and leave other options unchecked. 
  • For Data Level, select Normally Scaled Legal Video. 
  • Choose a Destination Path and click Render. 

AVID IMPORT 

You can’t directly import MXF media into the Avid. Instead, create a new folder inside Avid MediaFiles/MXF and drag the transcoded MXF files here. Switch back to Avid and the media database will be updated. Create a new bin. Switch back to Finder. Drag the msm.db file into this new bin.

There are alternate methods to use the MediaFiles folder such as an external drive, moving media from a temp folder into a permanent one, etc. Use whatever works but you need to follow the preceding paragraph to ensure the clips are imported.

As the procedure above is too complex, if you want to find an easy way, you can transcode Avid MXF files to someting which can be easily adapted to fit for the video processing in DaVinci Resolve with Pavtube MXF MultiMixer/iMixMXF. Here is the workflow.

Read More:

Monday, January 6, 2014

XDCAM Converter-How Can I Convert PMW-500 XDCAM HD422 MXF to iMovie/FCE?

If you have any problem when importing and editing Sony PMW-500 XDCAM MXF recordings in iMovie or FCE, you can just follow this tutorial to transcode XDCAM MXF to AIC MOV for iMovie/FCE.

The PMW-500 is a new XDCAM EX model that’s capable of 50 mb/s acquisition, making it the first of Sony’s cameras recording to solid-state memory to fulfill broadcasters’ minimum HD requirements.


With the PMW-500, you can record full-HD 422 50-Mbps MXF based on highly developed MPEG-2 Long GOP compression technology.While, if you want to edit the MXF videos Sony PMW-500 recorded, you may find the high quality MXF files are not recognized by most editing software like iMovie or Final Cut Express.

To get a good visual effect and smooth workflow for editing PMW-500 XDCAM HD422 MXF in iMovie/FCE, here is an easy workaround to fix this problem. That is to convert XDCAM files to AIC.mov for iMovie/FCE.

Now give a shot to this powerful Sony PMW-500 XDCAM Converter for Mac. With intuitive interface, you can easily and fast convert your MXF footages to AIC for iMovie/FCE on mac with the help of this professional MXF to AIC Converter. And the latest Mac OS X Mountain Lion 10.8 and Mavericks 10.9 is supported; just feel free to try it!

How to convert Sony PMW-500 XDCAM MXF footage to AIC for iMovie/FCE on mac 

Step 1. Connect your Sony PMW-500 camera to Mac with USB cable or use card reader to transfer the MXF files to Apple hard drive disk.

Step 2. Install and launch this Mac XDCAM MXF Converter, import MXF footages from PMW-500 to the software.


Step 2. Click the "Format" option, select "iMovie and Final Cut Express > Apple InterMediate Codec(AIC)(*mov)" for editing Sony PMW-500 XDCAM MXF in iMovie/FCE.


Step 3. When above steps finished, you can click "Convert" button to start converting Sony PMW-500 XDCAM MXF to AIC MOV for iMovie/FCE with a super fast speed.

With the excellent MXF to AIC Converter, you can also deal with Sony PMW-500 XDCAM MXF footage in iMovie/FCE on Mac with best video and audio quality as you want.

Tips: 

1. This Pavtube MXF Converter for Mac could also convert Sony MXF footages to various formats for nonlinear editing programs such as FCP, iMovie/FCE, Premiere Pro, Avid Media Composer, etc.

2. Get more step-by-step guide of how to work with Sony footages, MXF videos on Mac and FCP.

3. Futhermore, if your MXF files have 2 audio tracks or more, here is a new program named iMixMXF with multi-track preserving and mixing features. You can download the trial version for evaluation!

More Tricks for Editing MXF files on Mac:
Transfer Sony XDCAM to QuickTime MOV on Mac

Friday, December 27, 2013

FAQs & Answers: Canon XF plugins and Final Cut Pro Problem Solved

If you are using a Canon camera and camcorder, and also want to edit on Final Cut Pro 6 or FCP 7/FCP X, you can choose Canon XF plugins. Having problems with plugins? This article will offers you the best solution.


I'm in the process of purchasing a Canon XF Professional camcorder which uses MXF format files. I want to make a short video for my daughter. Next month is her birthday. I am using Apple Final Cut Pro. I always have problems with Canon XF plugins. Is there a place for solving my problems?

Canon developed Canon XF Utility for exclusive use with movies captured with the XF camcorders (XF305/300/105/100) and Cinema EOS C300 camera. The Canon XF Utility offers various options for managing and playing back clips recorded with the camcorder with which the software was supplied. Mainly, Canon XF Utility lets you do the following:

* Checking and playing back clips – Display a list of all the clips recorded on a CF card, search the list and play back clips.

* Saving and writing back clips – Save clips that were recorded on a CF card to the computer, or write back preciously saved clips from the computer onto a CF card.

* Creating and editing User Memo profiles – Create, edit and save User Memo profiles on SD memory cards. Later, you can load a User Memo file from the SD memory card to the camcorder and embed this information with the clips you record.

Canon XF plugin helps users a lot while importing Canon .MXF footage to work with non-linear video editing programs. However, users still have problems one or another when utilizing the software, especially with Final Cut Pro on Mac OS X. We have a collection of frequently asked questions about Canon XF Plugin for Final Cut Pro here, and aim to provide available solutions to these issues.

Problem 1

"We are using FCP 7, and as far as I know it does not read Canon C300 files natively. We tried Canon XF utility, with very limited success, on few different machines. Main problem with that piece of software is that it expects to see compact flash cards straight from the camera and doesn't seem to work very well with folders on an HDD. Is there a recommended workflow for us to move MXF files from an HDD to FCP 7?"

Solution to Problem 1:

It is strongly suggested to convert MXF clips to Apple ProRes 422 using Pavtube Canon MXF Converter software, because FCP 7 needs to have all the footage on a timeline in the single codec, otherwise it needs to render everything and does not preview clips in realtime. The Canon Camera Video Converter tool is able to load MXF files directly from your camera, or read from a folder stored on your computer's HDD or an external hard drive, as well as separate .MXF clips out of the camera's original folder structure. Plus, this solution is particular helpful when you need combine footage coming from different cameras with different video modes. Best of all, it is capable of keeping multiple audio tracks in your source material.

Problem 2

"Hi, I am about to begin editing a film shot on Canon XF100. I have a hard-drive onto which all of the raw files were dumped, and am now trying to find a way of working with the files. As far as I can make out everything was copied as it should be (i.e. with the directory structure intact):


I have installed the Canon XF plugin for FCP. Problems arise when I try to use Log & Transfer to transcode the MXF material. I have tried Native/Pro Res 422/ ProRes LT/in fact all of the options from the drop down destination menu, and keep getting the same problem: namely, that about 80-90 percent of files are only transcoded in part. What I mean is that a 5 minute clip ends up as only 10 seconds. I have FCP 7.0.3 and the relevant Canon XF plugins...Now I'm at a loss as to what to do... Anyone have any suggestions as to how I can start editing this film on FCP?"

Solution to Problem 2:

It seems that Canon XF utility somehow messed up when rendering the MXF media for use in Final Cut Pro 7. We heard people have troubles with EOS plugin of similar nature. Can we L&T footage without utilizing Canon plugin? Actually, there are a large number of Canon MXF converter programs claiming to be good at transferring MXF media files to Apple ProRes 422 for FCP. The thing is that it's difficult to make audio and video always in sync in the generated ProRes MOV files. As for video and audio synchronization, Pavtube Canon MXF Converter does a good job. So, it's wise to use this software for MXF to FCP ProRes codec conversion.

Problem 3

"I especially get confused when I need to download the plug-ins from the Canon site, which is a real mess! I have MXF footage shot on the Canon C300 and I'm trying to convert it from true 24p to ProRes 422(HQ) 23.976. Does anyone know an easy-to-use converter to do this?"

Solution to Problem 3:

Pavtube Canon Video Converter
will shed you some light on this problem. More than encoding true 24p C300 MXF files to ProRes 422(HQ) 23.976, it can also rewrap MXF to PrpRes 422, ProRes LT, ProRes Proxy, and ProRes 4444 to fit different FCP use.

Problem 4
"I've run into a problem with a project. I copied the entire card file structure of XF305 onto a hard drive, installed all the right codecs...and it's telling me the file structure is invalid."

Solution to Problem 4:

Final Cut Pro users often meet unknown errors when editing Canon MXF clips. Fortunately, we always have workaround to deal with these incompatible issues. Simple convert MXF files recorded by a Canon camera to Apple ProRes 422 via using a Canon MXF Converter, this is the simplest solution.

Basically, with the versatile Canon Camera Video Converter, it will be possible to let Final Cut Pro touch MXF material shot on a Canon XF305/300/105/100 and C300 camera even without utilizing Canon XF plugin.

Read Related Articles:

Wednesday, September 11, 2013

Rewrap XDCAM MXF to Quicktime MOV for playing back on Mac

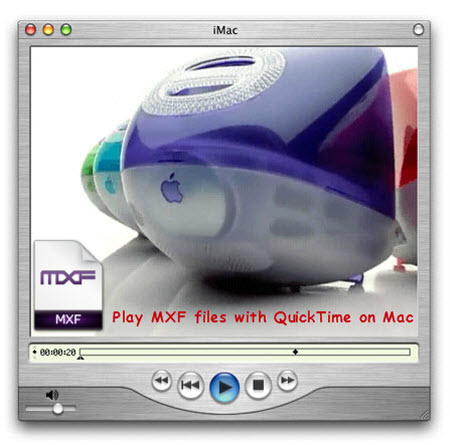
This article aims to help users transcode Sony XDCAM MXF to compatible format with QuickTime Player. With this easy-to-use Sony XDCAM Converter for Mac, you can easily convert your MXF to QuickTime MOV for playback.


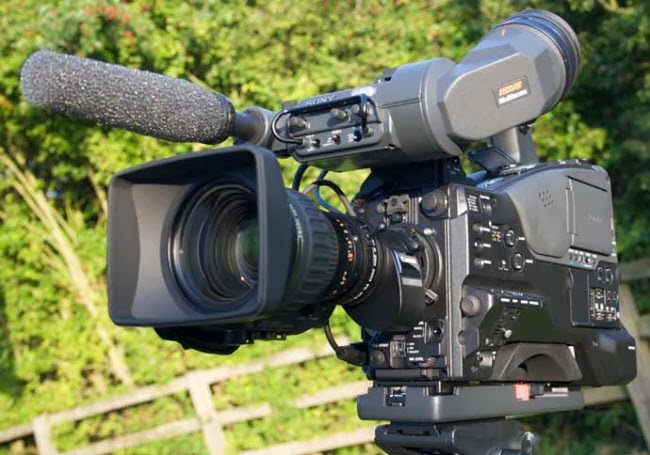
XDCAM is a series of products for digital recording using random access solid-state memory media, introduced by Sony in 2003. Four different product lines — the XDCAM SD, XDCAM HD, XDCAM EX and XDCAM HD422 — differ in types of encoder used, frame size, container type and in recording media. The XDCAM format uses multiple video compression methods and media container formats. However, when you want to share your XDCAM MXF videos with friends using QuickTime player, you'll feel frustrated because QuickTime can't play XDCAM MXF files.  

So is there any way to enjoy your favourite XDCAM MXF videos with QuickTime? Of course yes! The best solution is to rewrap those XDCAM MXF to a QuickTime-friendly format. Only comes with some help from third-party software, it can be done effortlessly.

If you're looking for an ease-to-use software application, don't mind spending $29, I've had success using Pavtube MXF Converter for Mac to Sony XDCAM recording MXF videos to QuickTime playable MOV format on Mac quickly. I've found the quality to be excellent, and see no difference from the original. Fully support Sony XDCAM camcorders like PDW-F800, PDW-700, PDW-F355L, etc. Below are the detailed steps.

Guide on how to transcode Sony XDCAM MXF to MOV for freely playing on Mac

Part I: Import XDCAM MXF videos to Mac

Connect your Sony XDCAM camcorder to Mac and transfer MXF video files to your Mac for converting.

Part II: Convert Sony XDCAM MXF to QuickTime MOV

Step 1. Load XDCAM MXF footage.

Drag and drop individual .mxf file or XDCAM MXF file structure to the best Sony XDCAM MXF Converter.


Step 2. Select output format.

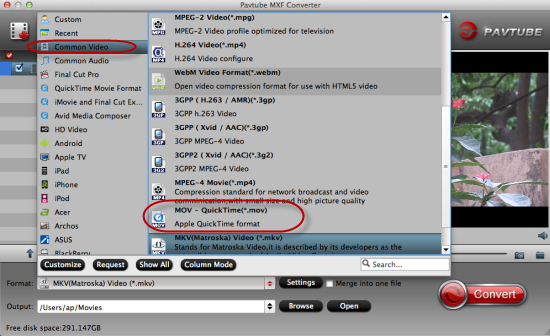
Click on the dropdown menu of “Format” and select “Common Video -> MOV – QuickTime (*.mov)” as target format. This format is specially designed for QuickTime playback. You can also choose format as you need in the format column, such as AVI, MKV, MP4, etc.


Step 3. Adjust video and audio parameters.

Click “Settings” button to customize the output video and audio settings by yourself. You can also use the default parameters, they will ensure you a good balance between file size and image quality basically. You can change the resolution, bitrate, frame rate as you need. 


Step 4. Start Sony XDCAM MXF to MOV conversion.

Click convert button to start to convert Sony XDCAM MXF file to QuickTime MOV on Mac with this best Mac XDCAM Converter.

After you converting Sony XDCAM MXF files to MOV for Mac, you can freely enjoy and play the converted footages smoothly with QuickTime Player on Mac.

Read More:

Tuesday, September 10, 2013

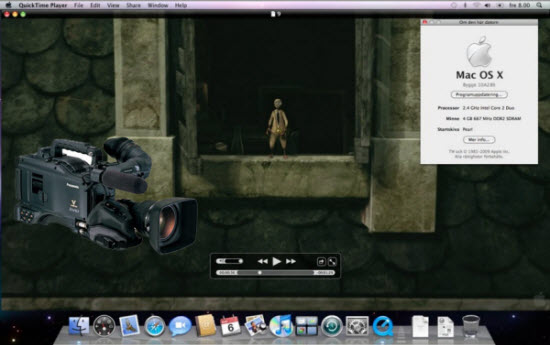
Convert MXF files to QuickTime MOV for playing on your Mac

In this article, you can learn the easy way to convert recorded MXF files to QuickTime MOV, and it will help you solve the playback issues with MXF and QuickTime Player on Mac.
 

QuickTime is a multimedia framework developed by Apple Inc., capable of handling various formats of digital video, picture, sound, panoramic images, and interactivity. As an excellent movie player, it is widely used by most of Mac users. But according to users' feedback, they usually have trouble with locating the Quicktime files once openning the MXF files.

What's the reason? As we know, MXF clips comes from like Panasonic HVX200/HPX300, Canon XF300/XF305, Sony EX camera, etc. It is not compatible with media players just like Apple QuickTime. So to get QuickTime Player natively accept MXF files, converting MXF file to Quicktime mov video is a necessary step if you want watch your MXF video on Mac with QuickTime Player.

Ane then what you need is a professional MXF to MOV Converter for Mac. Here I suppose you to use the top MXF Converter for Mac from Pavtube, it is just designed to convert MXF files to QT best supported MOV format so that you can freely enjoy MXF files with QuickTime on Mac.

Overall, this MXF to QuickTime Converter is very easy to use and can do MXF to MOV conversion fastly with preserving the original video quality perfectly. 
Just download this powerful Mac MXF to QuickTime Converter, and follow the guide as below.

Step by step guide to help you convert MXF file to QuickTime .mov for playing on Mac

Step 1:Add mxf file into Mac MXF to MOV Converter

Install and run the program, click "Add" or "Add from folder" button to load your MXF video clips. You are allowed to add multiple files to convert at a time.


Step 2:Set Output format for QuickTime.

Click on the dropdown list of "Format" and select "Common Video -> MOV – QuickTime (*.mov)" as target format. This format is specially designed for QuickTime playback.


Step 3.Adjust video and audio parameters. (Optional)

Click "Settings" button to customize the output video and audio settings by yourself. You can also use the default parameters, they will ensure you a good balance between file size and image quality basically.


Step 4:Start Conversion

Click the "Convert" button to convert mxf file to QuickTime .mov on Mac.

After a few seconds or minutes (according to the length of source MXF file), you can finish the MXF to QuickTime Conversion. In this way, you can freely enjoy the output MOV file with QuickTime Player on Mac. Also you can edit the MOV file with Final Cut Pro.

Read More:

Wednesday, August 21, 2013

Sony PMW-200 XDCAM MXF to Apple Final Cut Pro 6/7 or Aperture 3

This guide shows you how to convert/transcode Sony PMW-200 XDCAM MXF file to Final Cut Pro/Aperture 3 supported files with Pavtube MXF Converter for Mac.


Sony PMW-200 camcorder features a broadcast-friendly 50Mbps data rate drawing from three half-inch CMOS sensors -- bigger than any other broadcast handheld cam, according to Sony -- though that size is still a far cry from its own super-35 filmmaking cams and others on the market.

50Mbps HD422 Recording
In the UDF/MXF recording mode, you can record Full HD video (1920x1080) at up to 50Mbps using MPEG HD422 compression technology and enjoy the benefits of proven, high-speed and intuitive XDCAM HD422 workflow. With the PMW-200, you can also record video in MPEG HD (420) or DVCAM™ format. (Note: Proxy video is not available with the PMW-200).

Import XDCAM MXF recordings to FCP 6/7 or Aperture 3. 

Q: Hi! I was wondering if the FCP 6/7 works with mxf footages natively. Aperture 3 seems not work with these mxf recordings. I have some .mxf video from Sony PMW-200 to edit for group work, and it would be great if anyone could help me with the importing workflow. Thanks!

A: If you want to edit Sony PMW-200  XDCAM MXF in Final Cut Pro 6/7 or Apple Aperture 3, you first need to convert the XDCAM MXF video to compatible format like ProRes 422 codec. This is a common format developed by Apple. Below are some useful tips.

Solution: Transcode Sony PMW-200 XDCAM MXF to FCP 6/7 or Aperture 3 with Apple ProRes 422 codec.

Step 1: Download Pavtube MXF Converter for Mac. This is excellent software which can help you convert Sony PMW-200 XDCAM MXF video to ProRes for FCP 6/7 or Aperture 3. Besides, it supports many other formats for output.Install and launch the Sony Mac XDCAM MXF Converter, import the MXF video from Sony PMW-200 by clicking "Add video" button.


Step 2: Choose the best output format for Final Cut Pro 6/7 or Aperture 3. Click on "Format" and choose "Final Cut Pro >>Apple ProRes 422 (*.mov)" as output format.


Step 3: You can click "Settings" to adjust the output parameters, such as resolution, bitrate and frame rate.

Step 4: You can click "Edit" button to edit MXF video, such as deinterlace, denoise, mute, volume up and crop.

Step 5: Click "Convert" button to start Sony MXF to ProRes conversion. It will transcode Sony PMW-200 MXF to Apple ProRes codec MOV format flawlessly.

After converting, you can import converted video files to FCP 6/7 or Aperture 3 instantly without rendering. More output formats are supported.

Read Related Articles:

Monday, August 12, 2013

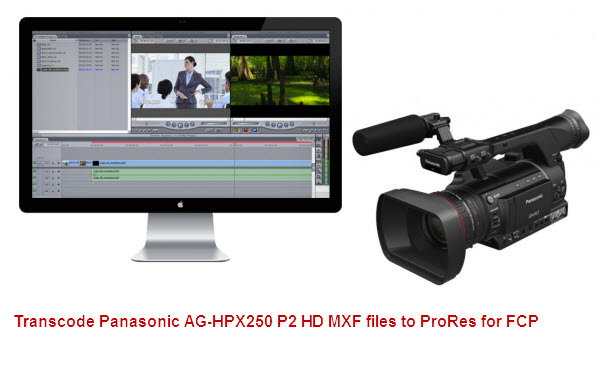
Convert and Import Panasonic AG-HPX250 AVC-Intra 100 MXF to Final Cut Pro

Want to import Panasonic AG-HPX250 MXF files to Final Cut Pro? First you need to encode Panasonic AG-HPX250 MXF footage to ProRes codec.

Panasonic has just announced the AG-HPX250, a camera that can be positioned as the successor to the HPX170 and a compact version of the HPX370. Built using the 1/3″ 3-MOS sensors of the HPX370, the HPX250 records to P2 media in AVC-Intra 100/50, as well as DVCPRO HD, DVCPRO50, DVCPRO and DV. This is the first time that AVC-Intra 100 has been made available in a small form factor, so the ability to record a full 10-bit 4:2:2 I-frame image in a compact, 5.5 pound package makes the HPX250 truly unique.


Panasonic AG-HPX250 MXF files to FCP solution:

"I have a Panasonic AG-HPX250 camcorder, this camcorder record in AVCintra or DVCPRO HD codec in MXF format. I just want to import the MXF recordings to Final Cut Pro for editing, but the FCP doesn't accept it. So what can I do? Is there an easier and effective way? And how to import incomplete folder files or single MXF files to FCP?"

As we know, FCP best codec is Apple ProRes 422, this codec in MOV format is native for importing and editing, original P2 MXF footages is not good for editing as you may find the video is not processed smoothly.

And here, you are suggested to try a third party converter: the professional Mac P2 MXF Converter from Pavtube to help you to transcode Panasonic P2 mxf cilps to ProRes for FCP with best video quality. It enables editing before conversion and you can check the deinterlacing option. Below I will provide a brief guide for you.

Steps: Transcode Panasonic AG-HPX250 P2 MXF to Apple ProRes for Final Cut Pro editing

1.Download Pavtube MXF converter for Mac. It's the best Panasonic MXF Converter for Mac, an user-friendly software can help you convert MXF to rich formats, such as Apple ProRes, AIC, Avid DNxHD, or MP4, AVI, MKV, etc, then you can make MXF files compatible with iMovie, FCP 6/7, FCP X, FCE, Avid Media Composer and so on.


2.Install and launch, and import Panasonic P2 AG-HPX250 MXF videos to the MXF converter for Mac.


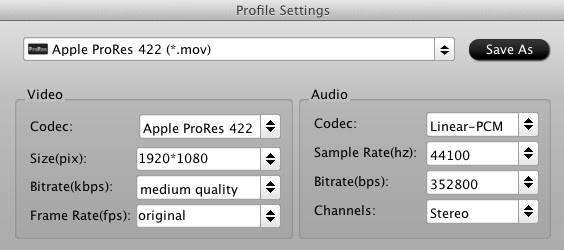
3.Click format bar to choose the best video format for output. You are recommended to choose Final Cut Pro -> Apple ProRes 422 (*.mov) for native FCP editing.


4.You can click settings button to adjust the output video's parameters, such as resolution, bitrate, etc. 


5.Edit function is easy and useful, you can trim, crop, or add watermark to the video.

6.Click convert button to start converting Panasonic AG-HPX250 P2 MXF to Apple ProRes for FCP on Mac.

All folders and single files are supported, after conversion you can import converted MOV files to FCP without rendering, it can deal with all the MXF files, such as Panasonic P2 series, Canon XF series, Sony XDCAM series, etc.

Tips:

If you want to convert MXF video clips with multiple audio channels, Pavtube iMixMXF - an ideal P2 MXF to FCP Converter that can ouput multi-track Apple Prores MOV for further editing in Final Cut Pro, it will definitely helps you.

Read More:

Thursday, July 18, 2013

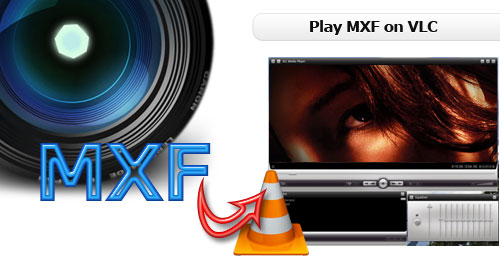
Batch script to transcode MXF video files for using with VLC Player

In this article, we aim to offer you an easy way to help you play MXF with VLC media player freely.


  • What is MXF?
MXF is abbreviation for Material eXchange Format, it is a "container" or "wrapper" for professional digital video and audio media defined by a set of SMPTE standards. MXF files are mainly from professional High Definition camcorders/cameras like Panasonic P2 camcorders AG-AC130EJ, AJ-HPX370, Canon XF series camcorder XF300, XF305, and Sony EX camera , etc.
  • The basic way to get MXF files played:
Find a media player that can support playing .mxf files as well as be compatible with the Mac or Windows OS.
VLC player is a powerful media player for viewing movies or videos on Mac and Windows. Playing MXF files on VLC is by using the Mainconcept Reference codec, by installing this codec you can directly run your MXF files on the VLC media player.
  • The Playback problems:
While, there are still groups of people complain of the imported with low video quality or incapability of video playback.

Q1: I read that VLC can easily play MXF but it's not working on mine. I have the latet VLC player. Any solutions? Thank you.

Q2Hey guys. I need some help.I am using a Canon camera to record rugby games. All of my previous stuff was saved on a desktop and all of my movies and videos are saved as MXF. I use a free program to convert MXF to MPEG-4 format for playing on my VLC player. The 1st file goes well but then appears to stop converting. Is the files too large to handle? What do I have to do? 

Q3:
I can play the MXF files from my XF-100 in VLC, but the audio is choppy or non-existant…The video plays without a hitch. But no audio. Any fixes for this problem, or am I the only one?
  • An quick workaround to solve the MXF playback issues with VLC Player 
Nothing is absolute, if there are some special MXF can't be played by VLC or other Video Player, you can convert the MXF files to common formats (like AVI, MOV, MPEG, MP4, etc) to fit the local VLC media player with iMedia Converter for Mac from Pavtube.

This top MXF to Mac Converter which works successfully in MXF to MP4 conversion even you have a bunch of large MXF files. I have tried it to encode MXF to MP4, it turns out playing Canon, Sony, Panasonic MXF on Mac smoothly and at original quality.

It’s the best software application for Mac users. What’s more, this converter also supports many of other video formats like MOV,MKV, AVI, WMV, FLV, MPG, etc on Mac. Below is easy steps for you, you can convert MXF to VLC player compatible formats for watching in few steps.

Step 1: Add mxf video files

Run iMedia Converter for Mac on your Mac computer. Transfer the individual .mxf file or MXF file structure (P2 MXF, XDCAM MXF, Canon XF) to HDD first, and then click "Add Video" to import the MXF files to the converter.


Step 2: Choose H.264 MP4 as output format.

In “Format” drop down list box, you may select best video format for plaing on Mac. To convert MXF to MP4 format, if you want to get common MP4 files for playback, you can choose Common Video -> H.264 Video (*.mp4); if you want to get HD MP4 files to use, you can choose HD Video -> H.264 HD Video (*.mp4).


Step 3: Start Convert

Click “Convert” in the main interface to start transcoding MXF to Mac H.264 MP4.

After conversion, you can use converted MP4 files for playback easiliy and smoothly. You can also refer to the MXF to Quicktime MOV, MXF to AVI guide, and have a try.

Tips: 

If you are Windows users, you can try Pavtube Video Converter Ultimate. It you can easily import the MXF video and the audios for playing and editing.

Read More:

Monday, July 15, 2013

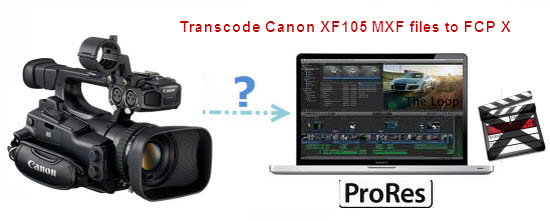
XF105 workflow- How to import .mxf files from Canon XF105 to Final Cut Pro X?

Here it mainly shows an easy way to transcode Canon XF105 MXF to Apple ProRes MOV on Mac so that you can smoothly import and edit Canon XF105 recorded MXF footage in Final Cut Pro X without rendering.   


Q1: I love photography and take pictures and have a Canon XF105 and shoot the videos recently, it supports Full HD 1920×1080 resolution with Canon XF codec, up to 50Mbps bit rate and 4:2:2 color sampling. After shooting some .mxf videos with Canon XF105, I want to join various mxf files into one and edit Canon xf105 mxf in FCP X. But I find the problem that Fianl Cut Pro X does not recognize the .mxf videos? What happened?

Q2:I've run into a problem with a project. I copied the entire card file structure of XF105 onto a hard drive, installed all the right codecs...and it's telling me the file structure is invalid. My question is, can I still have all the videos and work them in FCP X?

Q3:I am using the Canon XF105 camcorder. The format is MXF from a memory card. It's kind of obnoxious at the moment since FCP X won't work natively with MXF files, which isn't the end of the world, but is a pain.

So the Question is : How to Import Canon XF105 MXF files to FCP X on Mac 

AnswerConvert MXF to Apple Prores for Final Cut Pro X Editing on Mac OS X 

By Google search, I found a professional HD Video Converter for Mac , which is a best OS X Lion/Mountain Lion MXF Converter for Mac Software. It can not only convert Canon XF105 MXF videos to Prores MOV, but also join videos into one.

Transcode/Convert Canon XF105 recordings to Apple ProRes 422 for FCP X 

Step 1: Connect Canon camcorder to iMac with USB 2.0 cable, run the top MXF to FCP Converter for Mac as the best Canon MXF to MOV converter on Mac. Click the “Add” button to import Canon XF105 camcorder .mxf files.

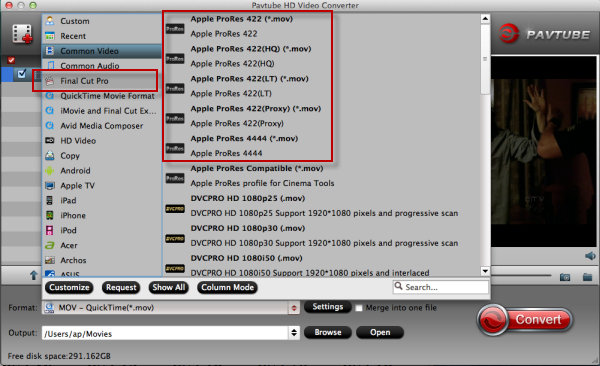
Step 2. Click on "Format" and choose "Final Cut Pro > Apple ProRes 422 (*.mov)".


Step 3. Click "Convert" to start transcoding the Canon XF105 MPEG2 MXF recordings to Apple ProRes / converting .mxf to .mov videos. After conversion click "Open" to find .mov videos.  

Some more helpful features of the app: 

1. Settings- click to set video resolution(1920x1080/1440x1080/1280x720/720x480), bitrate(from 1Mbps to 20Mbps), frame rate (24p/30p) 

2. Editor (next to "Add" icon)- click to set deinterlace, denoise, mute, volume up, trim, crop, etc. 

Load/Import converted Canon XF105 footage to Final Cut Pro X 


Step 1. Start up Final Cut Pro X, follow "File > Import > Files". 

Step 2. Browse to the converted .mov video in the "Import Files" window. Press "Open" at the right bottom. 

Now you can import Canon XF105 footage to FCP X successfully and get down to video editing. 

MXF Related articles: 


Read More:

Thursday, July 11, 2013

Transcode Panasonic AJ-HPX2700 P2 MXF to QuickTime MOV on Windows and Mac

Follow this article you will know the easiest method to convert Panasonic AJ-HPX2700 P2 MXF to QuickTime MOV on Windows and Mac for watching freely.

With P2 technology, Panasonic AJ-HPX2700 VariCam 2700 now records variable frame rates natively. AJ-HPX2700 is a high-end professional camera meant to replicate the warm and natural look and texture of film. Its native effective resolution is 1280 x 720, but shooting is possible in a range of formats from 1080/60i to 720/25p due to the 3x 2/3" 1MP CCD sensors. Recording is possible in AVC-Intra 100, AVC-Intra 50, and DVCPRO HD; 4:2:2 full raster sampling is supported in the AC-Intra 100 format.


The media files from Panasonic AJ-HPX2700 are stored in P2 card in MXF format which claimed to be acceptable with VLC media player. So if you would like to play Panasonic AJ-HPX2700 MXF file, VLC is should be your first choice. However, if you prefer to play P2 MXF in QuickTime on Windows or Mac. You may be frustrated with the problem that QuickTime became greyed when importing Panasonic AJ-HPX2700 P2 MXF footage. It is unlucky that the P2 MXF file is not playable with QuickTime.

Then, what should you do? At first, you'd better convert Panasonic AJ-HPX2700 P2 MXF to QT-supported file format, like QuickTime MOV along with a third party tool.

Here is the best P2 MXF to QuickTime Converter- Pavtube MXF Converter for Mac which provides you a simple-to-use interface and barely several clicks are enough for all the job. In this way you don't need to spend time fighting against MXF codec. What's more, this powerful Mac MXF Converter can also help you to do some practical editing jobs like MXF video trimming, merging MXF files, MXF file editing and so forth.

Free download the P2 MXF Converter for Mac The MXF Converter for Mac program can run on the Mac OSX, including Mountain Lion, Lion, Snow Leopard, etc. 

Supposed you are using Windows OS like Windows 7, XP, please refer to the PC version of MXF Converter for QuickTime. 


Step-by-step Tutorial- Convert Panasonic AJ-HPX2700 P2 MXF to QuickTime MOV 

Step 1: Launch the program and load P2 .mxf video(s)
When fully installed Pavtube MXF Converter for Mac (or MXF Converter if you are Windows user), just run it. In the main interface, click "Add File" to load one or several .mxf file(s) from Panasonic AJ-HPX2700 P2 card into the program.


2.Select output format.
Click on the dropdown menu of "Format" and select "Common Video -> MOV – QuickTime (*.mov)" as target format.

This format is specially designed for QuickTime playback. You can also choose format as you need in the format column, such as AVI, MKV, MP4, etc.

3.Adjust video and audio parameters.
Click "Settings" button to customize the output video and audio settings by yourself. You can also use the default parameters, they will ensure you a good balance between file size and image quality basically. You can change the resolution, bitrate, frame rate as you need.


4.Click convert button to start to convert Panasonic AJ-HPX2700 P2 MXF file to QuickTime MOV on Mac with this best P2 MXF Mac converter.

After you converting AVC-Intra P2 MXF to MOV for QuickTime, you can play the converted footages smoothly on Mac. The windows workfow is as the same.

With the P2 MXF to MOV converter, you can easily convert Panasonic AJ-HPX2700 P2 MXF file on Windows and Mac with QuickTime, you can also convert P2 card MXF file to other formats with best video and audio quality, like P2 MXF to iMovie/FCE and P2 MXF to FCP.

Read More:

Tuesday, July 9, 2013

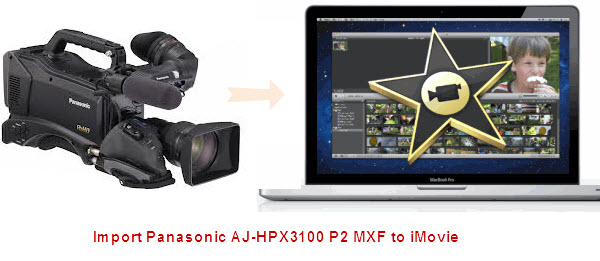
How to Import Panasonic AJ-HPX3100 P2 MXF footages into iMovie 11/9/8 on Mac

This article will help you to solve PanasonicAJ-HPX3100 MXF to iMovie importing problem, with a top MXF to iMovie Converter for Mac.

The AJ-HPX3100 may just change the way you view high-end broadcast camera recorders. Featuring three 2/3" high density 2.2 million pixel CCDs, the Panasonic HPX3100 acquires full-raster 1920 x 1080 resolution imaging with 4:2:2 10-bit sampling using the advanced AVC-Intra codec and its record video format is in MXF format.


After recording some files on the Panasonic AJ-HPX3100, and wanna edit Panasonic AJ-HPX3100 P2 MXF files in iMovie 11/9/8, you may meet some problems. The problems lie in that iMovie cannot support the original MXF files footages from AJ-HPX3100.

It is a common sense that the most compatible format for iMovie is Apple Intermediate Codec(AIC)(*.mov). So the first problem you have to solve this problem is to transcode  Panasonic AJ-HPX3100 AVCHD to AIC codec which is specially designed for editing in iMovie.

Here we recommend you to choose a top MXF Converter for Mac to help you convert panasonic AJ HPX3100 MXF to iMovie AIC .mov, with several simple clicks, and then edit  Panasonic AJ-HPX3100 P2 MXF with iMovie 11/9/8. The powerful P2 MXF Converter for Mac also can convert Panasonic AJ-HPX3100 P2 MXF for editing in FCP, FCE, Avid, Premiere Pro, etc on Mac for editing. Please just free download and try the easy-to-use Panasonic MXF Converter for Mac now!

Step by step guide to help you convert Panasonic AJ-HPX3100 P2 mxf file to AIC for editing in iMovie 11/9/8 

Step 1. Free download the Panasonic MXF to iMovie Converter for Mac, load your P2 MXF files into the program. As a top P2 MXF Converter, it also supports transcoding MXF to Apple ProRes Codec for editing with Final Cut Pro 6/7 and FCP X.


Step 2. Click the format bar, and move mouse cursor to "iMovie and Final Cut Express > Apple Intermediate Codec(AIC) (*.mov)" as output format.


Step 3. Click convert button in the main interface to start transcoding Panasonic AJ-HPX3100 P2 MXF to iMovie AIC MOV on mac.

Some more helpful features of the P2 MXF to iMovie Converter for Mac:

1. Settings- click to set video resolution(1920×1080/1440×1080/1280×720/720×480), bitrate(from 1Mbps to 20Mbps), frame rate (24p/30p)

2. Editor (next to "Add" icon)- click to set deinterlace, denoise, mute, volume up, trim, crop, etc.

After the workflow, you can go to the output folder to find the converted video files. Now you are free to load/edit Panasonic AJ-PHPX3100 P2 MXF files in iMovie 11/9/8 under Mac without problems.

Read More:

Fastly and easily import/edit Canon C300 MXF files in FCP X

The article shows you an easy workaround to import and edit Canon C300 recorded MXF files in FCP X on Mac 10.9 Mavericks along with some help from the best Prores Converter for FCP.

Canon has introduced a new Cinema EOS system, made up of a new interchangeable-lens digital video camcorder, the EOS C300, and seven 4K EF cinema lenses. C300 features a newly developed sensor, dubbed Super 35mm, offering a resolution of 8.29 megapixels.


Canon C300 is a new camcorder which focuses on film recording, it can give us excellent video quality. It uses MPEG-2 codec with an MXF File Wrapper. This codec offers a choice of 50 Mbps 4:2:2 component , 35 Mbps 4:2:0 component, and the standard HDV format of 25 Mbps 4:2:0. But the one thing which frustrate me is that, I can't handle the MXF files from my Canon C300 natively into FCP X. And this will stop me using FCP X. There were some Canon plugins available but the procedure is somwhat complex for me.

While looking for solutions to import Canon C300 MXF to FCP X on Mac, I find a easy workaround- that is to transcode Canon MXF footage to FCP X friendly Apple ProRes codec. It will saving rending time and avoid crashing problem, and thus, editing Canon MXF files in Final Cut Pro will be more easier.

For guys who may find it difficult to import and edit Canon C300 MXF files in FCP X on Mac, here is the fast guide to convert Canon C300 MXF to Prores MOV for FCP X. Along with some help from the 3rd-party software.

Required Software:
Pavtube MXF Converter for Mac is a good tool for you. This professional MXF transcoder for Mac can help you convert C300 MXF files to Final Cut Pro X. I downloaded and tried several converters. Only this MXF to FCP Converter for Mac works for me. I like the batch processing and joining of multiple mxf videos into one file. The editing feature to trim the recorded videos is great, as I can control the content for conversion. Here comes the steps:

1. Download Pavtube MXF to FCP Converter for Mac, it’s a good MXF converter/transfer on Mac.

2. Install and launch this C300 MXF transcoder for Mac, import the C300 MXF files to the converter.


3. Click format column to choose output format, for editing C300 MXF files in Final Cut Pro X, you can choose Final Cut Pro -> Apple ProRes 422 (*.mov).


4. You can click properties to adjust the audio stream ID if you find the C300 MXF no sound. Besides, you can click settings button to adjust the resolution, bitrate, etc. Just customize the parameters to meet your need.


5. Click convert button to start converting C300 MXF files to ProRes for FCP X, what’s more, with this MXF converter you can transfer MXF to QuickTime for playback.

Now you may have known how to convert/transfer canon C300 MXF to FCP X, just follow the steps above and have a try, you can edit C300 MXF footages in Final Cut Pro on Mac easily and fastly.


MXF Related articles:

Tuesday, July 2, 2013

Convert Canon XF305 MXF file to MOV for playback with QuickTime on Mac

Follow this article you will know the easiest and fastest method to convert Canon XF305 MXF to QuickTime MOV on Mac for watching freely.

Speaking of the professional camcorder, how can we ever miss the fantastic Canon XF305 Camcorder, which represents Canon's entry into professional solid state video acquisition. Following on the heels of its widely respected XH line of tape-based camcorders, XF305 takes advantage of the latest HD technology–along with Canon's newly developed MPEG-2 4:2:2 codec–to record Full HD video to widely available Compact Flash cards.
However, users of these camcorders may always come across video formats compatible problems. Canon XF305 record videos in .MXF format which are not compatible with most of the media players on Mac like QuickTime, which is a multimedia framework released by Apple.

So how to make QuickTime to accept Canon XF305 MXF files? The easy way is convert MXF to Quicktime supported video formats like MOV, etc. At this time, you need a software applicationwhich called Pavtube MXF Converter for Mac to help you convert Canon XF305 MXF to Quicktime mov on Mac. 

Just in few steps, you can finish the MXF to QuickTime conversion.  If you want to edit your MXF files, the MXF to Quicktime MOV Converter Mac is your best choice. You can crop videos, add watermark, trim videos, merge videos. What's more, you can convert Canon XF305 MXF files to other friendly video formats like MP3, AVI, WMV, FLV, MPG, 3GP etc on Mac. The following guides shows you how to convert Canon XF305 MXF to Quicktime MOV for playback on Mac. 

Steps: Convert  Canon XF305  MXF to MOV for playing with QuickTime on Mac 

1.Download, install and launch Pavtube MXF to QuickTime Converter for Mac.

Once launched the program, click "Add" or "Add from folder" button to load your Canon XF305 MXF clips. You are allowed to add multiple files to convert at a time.


2.Select output format.

Click on the dropdown menu of "Format" and select "Common Video -> MOV – QuickTime (*.mov)" as target format. This format is specially designed for QuickTime playback. You can also choose format as you need in the format column, such as AVI, MKV, MP4, etc.


3.Adjust video and audio parameters.

Click "Settings" button to customize the output video and audio settings by yourself. You can also use the default parameters, they will ensure you a good balance between file size and image quality basically. You can change the resolution, bitrate, frame rate as you need.


4.Click convert button to start to convert Canon XF305 MXF file to QuickTime MOV on Mac with this best Mac MXF Converter.

After you converting Canon XF305 MXF files to MOV for QuickTime, you can enjoy and play the converted footages smoothly on Mac with QuickTime Player. 

Monday, July 1, 2013

4K workflow in FCP/iMovie-Edit Sony F65 MXF 4K video in Final Cut Pro and iMovie smoothly

Do you have some trouble with the "4K camera Sony F65 MXF editing workflow in Final Cut Pro and iMovie"? If so, just follow this guide to learn about how to import and edit Sony F65 4K .MXF in FCP and iMovie on Mac smoothly.


Sony F65 is a top-end motion picture camera. It features a true step-change in sensor technology, using a 20 Mega pixel 8K CMOS sensor. The F65 runs up to 120Fps, creates HD/2K or genuine 4K resolution images with a huge colour gamut, outstanding dynamic range, and high sensitivity.

Recording 4K(4096* 2160) video is very easy with this Sony F65, there is no need to talk much about the 4K video now. But one thing need to be mentioned, it is not so easy to edit raw 4K videos. for example , this Sony F65 records videos in MXF format, which is not friendly to Mac FCP, iMovie or other editing apps. If you get a F65 and want to edit the footage in FCP and iMovie, you need some third-party apps to convert the Sony F65 4K MXF files to Mac FCP and iMovie compatible formats first. Here is the solution.

Mac 4K MXF Converter - a professional Pavtube MXF to Mac Converter, it can help you to convert Sony PMW F65 MXF to FCP friendly Prores codec and acceptable AIC codec for editing with no quality loss.

According to the specs of FCP X, the latest FCP supports 4K video, and this top MXF Converter introduced here can output 4K videos with ease, that means, it can remain the original 4K resolution after conversion. Now get your program installed and let’s begin!

Convert Sony F65 4K MXF to Prores/AIC MOV for editing in FCP and iMovie on Mac?

Step 1. Install and launch the 4K MXF to Prores/AIC Converter, click ‘add videos’ to load individual videos, or click ‘add from folder’ to load the entire folder.


Step 2. Click "Format" bar to choose the output format.

If you want to edit video in FCP, click and choose Final Cut Pro -> Apple ProRes 422 (*.mov);


For editing in FCE, iMovie, you can choose iMovie/Final Cut Express -> Apple InterMediate Codec (AIC) (*.mov).

OptionalYou can click “settings” to customize the output parameters, adjust the resolution, bitrate as you want. 

Step 3. Click “Convert” and let it go!

After the Sony F65 SR 4K MXF footage into FCP and iMovie conversion, you will be able to get the output files via clicking on Open button effortlessly. Afterwards, you can transfer Sony F65 footages to Final Cut Pro and iMovie freely for further editing without any trouble.


Read More:

Sunday, June 23, 2013

Fast and Easy way to Convert Panasonic AG-HPX300 MXF to Apple Aperture 3

In order to edit Panasonic AG-HPX300 MXF clips in Apple Aperture 3 smoothly without codec problems,, you can follow this post to laern the best and easy way.  

Panasonic AG-HPX300 is a 1/3″ CMOS camera featuring full resolution 1920×1080 chips. The camera’s ENG frame comes equipped with a Fujinon 17x lens, making it the most affordable full-sized shoulder mounted camera available. The HPX300 has a feature-set including timecode, genlock and HD-SDI, which is usually found only on more expensive cameras. More importantly, the HPX300 can record Panasonic’s premiererecording format, AVC-Intra. When shooting in AVC-Intra mode the camera has the ability to shoot full-raster 1080p footage at 10-bit 4:2:2 color, something unheard of at this price-point.


The HD Camcorder shoots recordings in MXF file format. After make some footage on the Panasonic AJ-HPX3700, you may find your Apple Aperture 3 can't support Panasonic AJ-HPX3700 footages well. Then you have to look for the easy and fast workaround for editing Panasonic AJ-HPX3700 MXF files in Aperture 3 on Mac OS X Lion.

After google search, I find Pavtube MXF Converter for Mac which is the best professional MXF Converter for Mac software tool to make the Panasonic AJ-HPX3700 videos compatible to le Aperture 3. It would Convert Panasonic AJ-HPX 300 P2 .mxf files to Apple Aperture best supported video formats, such as Apple ProRes codec MOV, so that I can import onic AJ-HPX3700 MXF to Aperture 3 smoothly,  then you can edit the AJ-HPX3700 video in Apple Aperture without any crashing problem ank keep the original quality.

Now, you can follow the easy step by step tutorial, you will get to know how to convert Panasonic HPX300 MXF to Aperture 3 on Mac OS X Lion by yourself.

Step 1: Download Pavtube Mac MXF to Aperture Converter and import your HPX300 .mxf file.


Step 2: Click format column and choose the output format. You are recommended to choose Final Cut Pro -> Apple ProRes 422 (*.mov), it's great for editing in Apple Aperture.


Step 3: Click settings button to adjust the output video's parameters, such as bitrate, resolution, etc.


Step 4: Start converting Panasonic AJ-HPX3700 1080p MXF videos to ProRes codec for Apple Aperture 3.

After converting, you can load Panasonic AJ-HPX3700 footage to Apple Aperture for editing as you want, now you can have a try. Good luck!

See also: 

Thursday, June 6, 2013

P2 Card Mac Converter- Convert Panasonic AG-HPX170 P2 MXF to FCP X

As FCP X won't import Panasonic AG-HPX170 P2 MXF footage, so this easy workaround aims to help you to import/edit AJ-HPX170 P2 MXF files into Final Cut Pro X flawlessly.

Panasonic AG-HPX170 is an ultra-mobile P2 HD handheld camcorder featuring full, 4:2:2 independent frame production quality HD and solid-state recording. Its newly enhanced 1/3'' progressive 16:9 3-CCD imager delivers an excellent signal-to-noise ratio, lower noise/smear, and exceptional low-light performance. And HPX170 has two P2 card slots and records in 20 HD and SD formats. Files are saved onto the P2 memory card in MXF format allowing direct data transfer to broadcasting and production system.


After recording some files on the Panasonic AG-HPX170, you may find your Mac FCP X can not recognize the HPX170 P2 .mxf videos as below:

"I have a project has 26 files and a total size of 5.7GB. The camera was the Panasonic AG-HPX170, I found that all the video record by Panasonic P2 camcorder is of .mxf format which Final Cut Pro X don't support. How can I import the P2 MXF project into Final Cut Pro X?"

Panasonic AG-HPX170 records MXF file using AVC-Intra codecs. Due to the unfriendly codec, it is not easy to import such a P2 MXF file directly into FCP X. To edit Panasonic AG-HPX170 P2 MXF footage with Final Cut Pro X smoothly, you have to import AG-HPX170 P2 MXF to FCP X natively with FCP supported video format like MOV in Apple ProRes Codec.

Here we recommend you the best Mac P2 MXF to MOV Converter, which can help you to  easily and losslessly convert Panasonic AG-HPX170 P2 MXF to ProRes 422 for FCP X on Mac. And the latest Mac OS X Mountain Lion 10.8.3 is supported; just feel free to try it!

http://download.pavtube.com/mxf-converter-mac/mxfconvertermac_setup.dmg

How to convert Panasonic AG-HPX170 P2 MXF to ProRes 422 for FCP X on Mac? 
Step 1. Connect your Panasonic  AG-HPX170 P2 Camcorder to Mac with USB cable or use card reader to transfer the P2 MXF files to Apple hard drive disk.


Step 2. Add Panasonic Panasonic  AG-HPX170 P2 MXF videos to MXF Converter for Mac.

Run this MXF to ProRes Converter for Mac, and click the "Add Files" button to load individuals mxf videos; or click "Add from folder" to load the entire folder.


Step 3. Choose FCP X compatible format.

Click the "Format" option and click to choose Final Cut Pro>Apple ProRes 422 for editing HPX-170 P2 MXF in Final Cut Pro X.


Pls note the "merge into one file" box above "Open", you can lossless merge Panasonic MXF footages a few clicks.

Step 4. Now click the big red "Convert" and wait for a while to get the fresh hot converted video. Click Browse the locate them directly.

Launch FCP X, and go to "File > Import > Files…" to import converted P2 footage to FCP X project.


Now you can smoothly import Panasonic AG-HPX170 P2 MXF to FCP X on Mac Mountain Lion.

Read More: