Showing posts with label Avid Media Composer. Show all posts

Saturday, October 18, 2014

How to Import Video into Avid Media Composer?

This article outlines the recommended workflow for importing all kinds of videos and codecs into your Avid Media Composer.  

Follow the detailed instructions to get started importing all your media files into Avid Media Composer. (Whether you're new to Avid's popular non-linear editor, or are a seasoned digital video professional, you're sure to enjoy this free tutorial)
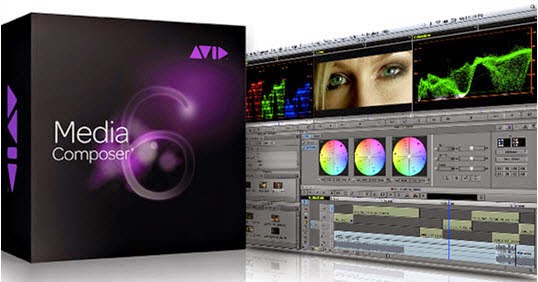


How to Import video into Avid Media Composer 
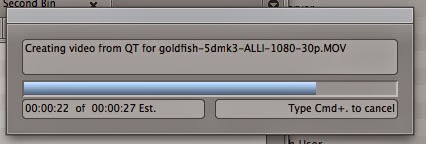
First, make sure the right bin or folder is selected, otherwise the ‘Import…’ option might be greyed out. Then, go to File > Import…. You will be prompted to select the video or stills you want to import. You must choose a transcode format if you are using this method. I recommend DNxHD while you’re in Avid:

AvidTranscodeBox


These files are found in the ‘Avid MediaFiles’ folder. There is also a *.pmr file which lists all the online media files.

However, many would prefer to use AMA to avoid transcoding to any intermediary codec. In this case, you must first open AMA by going to File > AMA Link…:

AvidAMAImportBox


Only the codecs you have installed individually will show up. Avid puts this down to the ease with which they can update plug-ins when necessary, but that’s just them being lazy. I think they should consider your convenience above their own.

Once you select the video file, it will show up in the selected bin, in its native format and wrapper. You can also create a new Import setting by going to your Project panel and choosing Settings. Right click on Import and select Duplicate. You can customize this import setting and use that to drag and drop files into bins directly. Import processes can be automated to make life faster.

While importing, it is a good idea to keep the Console panel open. It will show you if there are any errors while importing, and is great for troubleshooting problems:

AvidConsoleErrors


Avid Supported Codecs

There are many codecs and container options out there. Just when you think you have a handle on things, a new codec is announced. It’s a way of life, which is unlikely to be ‘corrected’ soon.

H.264

H.264 is the ubiquitous codec, and it looks like it will stay for quite some time. AvidMedia Composer supports H.264 natively, via AMA as mentioned above. TheQuicktime plug-ins are installed by default. For MXF plugins, use this link.

AVCHD

AVCHD is a ‘version’ of the MPEG-4 AVC specification, or H.264, and Avid Media Composer supports AVCHD natively with the default plug-in (only in the MOV wrapper), via AMA as mentioned above. Avid says you’ll need to perform a one-time-only free activation of the Dolby AC-3 codec to use the plug-in, which happens in the background if you have an active Internet connection.

For AVCHD not in MOV wrappers, you’ll need to download the specific plug-in here.

XDCAM

Avid Media Composer treats XDCAM with kid gloves, so to speak. XDCAM and XDCAM HD follow the MXF OP1a standard, and need to be converted to MXF OP Atom. Similarly, XDCAM EX is MP4, and needs to be converted to the same. Use this link to download the XDCAM plug-ins.

The utility that can do this is Sony Content Browser (The manual incorrectly still recommends the XDCAM viewer, which has been phased out).

XDCAM codecs are supported at native resolutions only. For videos on the XDCAM and Avid Media Composerworkflow, click here. For a detailed workflow guide, click here (PDF).

XAVC

At the time of this writing, there isn’t a plug-in for 4K XAVC, though XAVC Intra 100 is supported within Media Composer.

CANON XF (MXF)

This applies to files from both the XF series cameras as well as the Cinema EOS line (Cxxx). You’ll need to install the Canon XF and MXF plug-in from this link.

Once that is installed, restart Avid Media Composer. You can then import it natively via AMA as mentioned above.

HDV and DV

HDV is still supported natively, in both transport stream form as well as wrapped as MOV, etc. The video file is rewrapped as MXF, but is used natively.

Of course, you can also Capture HDV from a camera or tape deck directly. For DV and HDV, this method is preferable over Import… since you will also get important metadata and timecode this way (if the camera supplies it).

MPEG-4

Like H.264, Avid Media Composer supports MPEG-4 natively, via AMA as mentioned above. The Quicktime plug-ins are installed by default. For MXF plugins, use this link.

X.264

X.264 is not supported by Avid Media Composer unless you rewrap it into a MOV container.

The Quicktime plug-ins are installed by default.

PRORES

Prores works natively via the Quicktime plug-ins. If you use the AMA method, you can edit natively in MOV wrappers. If you want to use the other Import method, Avid rewraps the video into an MXF wrapper (codec is still Prores).

Here’s a good video that explains how to get your Prores workflow going:

DNxHD

This is Avid’s baby. All kinds of DNxHD are supported natively via either of the import methods mentioned above.

Now have a clear idea of how to import video into Avid Media Composer, right?

Still have issues? How to edit video from a camera that Avid Media Composer doesn’t recognize ?


As most of the video codecs, formats are not natively supported by Avid, plug-in is always needed. However, it would be a complex process to download, install a pile of video codecs and plug-ins. So here offers some easy and fast way to turn your unsupported videos to formats that Avid MC likes.

a.  Convert AVCHD video files into Avid Media Composer native DNxHD .mov.

b. Encode P2 MXF files and Avid MXF to Avid Media Composer for editing.

c. If your MXF files have 2 audio tracks or more, here is a program named iMixMXF with multi-track preserving and mixing features. You can download the trial version for evaluation!

d. Futhermore, you can transcode your MOV, XAVC and XDCAM video to DNxHD .mov before importing to Avid Media Composer.
Thursday, October 9, 2014

Transcode Canon MXF footage for importing to Davinci Resolve on Mac

This article shares the way to import Canon MXF files into Davinci Resolve for film-making by converting MXF to Davinci native DNxHD mov video. 

DaVinci Resolve is the world's most advanced color grading system. With an incredible range of digital film cameras available, Resolve includes more native camera file support. According to Blackmagicdesign official website, it can support Cineform, Cineform 3D, Phantom, GoPro, Canon C300, C500 and 1D, 5D, 7D and Sony F65/F55/F5 RAW. (Learn DaVinci Resolve Workflows- Tutorial on how to use Resolve 9)

import Canon MXF files into Davinci Resolve

As you can see, the MXF files is not listed as a supported media. And you may always encounter problems when ingesting MXF footage to DaVinci Resolve. Then how to get DaVinci Resolve to recognize Canon recorded MXF files?

Rejoice, mates, Rejoice. For there’s finally being a solution that does what it says it’s supposed to do. Come and meet Pavtube iMixMXF which would be a vital part of your workflow. It can transcode Canon MXF shootings to easily adapted to DaVinci Resolve. What's more, it can do some little editing some simple editing features, such as merging several videos into one file, deinterlacing the original footages, cropping video size, trimming video clips, adding special effects and text/image/video watermarks to output videos.

And if you are also interested in how to convert Canon .mxf files into DaVinci Resolve preferred video on Windows PC, Pavtube MXF MultiMixer if you best choice. Guys, follow this link to order a license directly, or free download a trial version.

How to import Canon MXF video to DaVinci Resolve for editing without rendering?

Step 1: Connect your Canon MXF camcorder to your Apple with USB2.0.

Free Download the best Mac MXF to DaVinci Resolve Converter. Install and run it on you Mac. Click “Add videos” to load individual videos, or click “Add from folder” to load the whole folder.

Tips:

1. If your MXF files have already been transferred to your Apple hard drive, you can easily drag them to the best MXF to DaVinci Resolve Converter.

2. If you have multiple mxf files, you can select the “Merge into one file” box to merge the mxf files into one single file for DaVinci Resolve so that you can play these files without interruption.

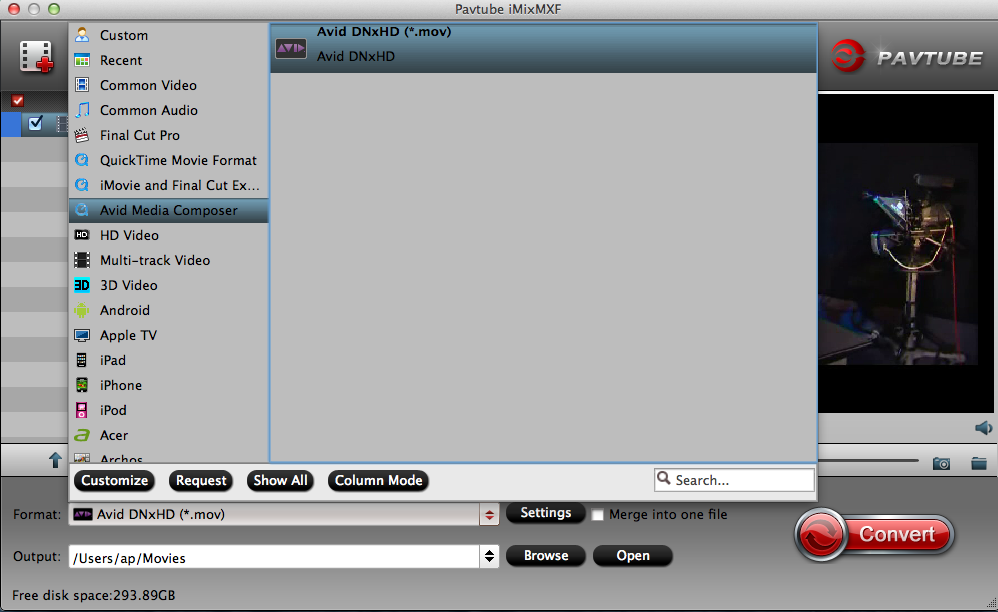
Step 2. Click on the “Format” and get the dropdown menu, then move you pointer to “Avid Media Composer”. Here we recommend the Avid DNxHD (*.mov)” for as best video format for editing Canon MXF footage in DaVinci Resolve. Then you can set the output folder by clicking “Browse” icon.

best video format for editing in DaVinci Resolve

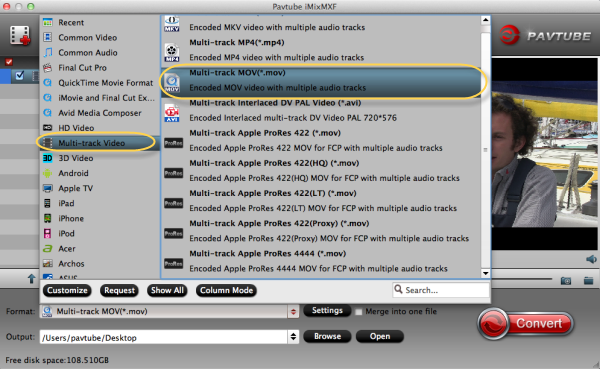
What's more, the most important feature of Pavtube iMixMXF is that it allows you to preserve multiple audio tracks by outputting multi-track formats. Just follow the “Multi-track Video” and choose what you want.

Multi-track MOV format

Step 3. Click the “Settings” icon and you will go into a new interface named “Profile Settings”. You’d better set the video frame rate as 30fps, video size as 1920*1080 to keep the best quality for editing in DaVinci Resolve . If you want to have a smaller file size but keep the good quality, you can change the video size to 1440*1080.

Step 4: Click the “Convert” button; it will convert Canon MXF to DNxHD for DaVinci Resolve editing on Mac immediately.

3..2..1..Bingo! After the workflow, you can go to the output folder to find the converted video files. Now you are free to import the DNxHD MOV to DaVinci Resolve under Mac without rendering.

Also also learn how to rip feature documentary footage, convert Avid MXF and other video files like MKV/MTS/AVI/MP4/FLV in DaVinci Resolve.

Read More:

Monday, August 25, 2014

Avid Everywhere—Delivering on Our Vision for the Media Industry

Avid Company shares “Avid Everywhere,” its strategic vision for creating the most fluid end-to-end, distributed media production environment in the industry.

At IBC, Avid shed some light on the its new strategic vision "Avid Everywhere" with a news conference and the release of a white paper.

Avid Everywhere

What is Avid Everywhere

At first glance, I assumed that Avid Everywhere was an Adobe Anywhere inspired rebranding of InterPlay Central and InterPlay Sphere. I was wrong, Avid Everywhere is about more than collaborative video editing.

Vision and strategy

Avid Technology is a company with a diverse range of hardware and software products, covering content creation (video, audio, graphics, news), asset management, audio/video hardware i/o, consoles and control surfaces, storage and servers.

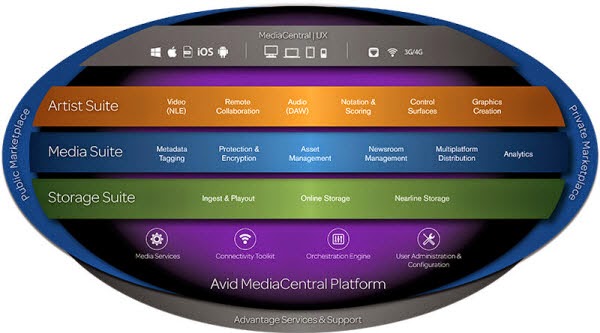
The Avid Everywhere event was less about specific product details and more about defining the direction of the company. The centerpiece of the vision is a common services platform called Avid MediaCentral.

Avid MediaCentral

Most users who are editing and audio professionals will mainly associate Avid with the Artist Suite tier. This is the layer of content creation tools, including Media Composer, Pro Tools, Sibelius and the control surfaces that came out of Digidesign and Euphonix, including the Artist panels. If you are a single user of Media Composer, Pro Tools or Sibelius and own no other Avid infrastructure, like ISIS or Interplay, then the entire Avid Everywhere media platform doesn’t touch you very much for now.

The top layer of the platform chart is MediaCentral | UX, which was formerly known as Interplay Central. This is a web front-end that allows you to browse, log and notate Interplay assets from a desktop computer, laptop or mobile device.

Surrounding the entire structure are support services (tech support and professional integration services) plus a private and public marketplace. Media Composer software has included a Marketplace menu item for a few versions. Until now, this has been a web portal to buy plug-ins and stock footage. The updated vision for this is more along the lines of services like SoundCloud, Adobe’s Behance service or the files section of Creative Cloud.  To make this work, the Avid MediaCentral Platform includes things like proper security to enable such transactions.

All clouds are not the same

I started this post with the comment that I feel many editors confuse Adobe Anywhere and Avid Everywhere. I believe that’s because they mistakenly interpret Avid Everywhere as the specific version of the Media Composer product that enables remote-access editing. As I’ve explained above, Everywhere is a concept and vision, not a product. That specific Media Composer product (formerly Interplay Sphere) is now branded as Media Composer | Cloud. As a product, it most closely approximates Adobe Anywhere, but there are key differences.

Media Composer Cloud

Adobe Anywhere is a system that requires a centralized server and storage. Any computer with Premiere Pro CC or CC 2014 can remotely access the assets on this system, which streams proxy media back to that computer. All the “heavy lifting” is done at the central site and the editor’s Premiere Pro is effectively working only as a local front-end.

In contrast, Media Composer | Cloud is primarily a plug-in that works with an otherwise standard version of the Media Composer software. In order for it to function, the “home base” facility must have an appropriate Interplay/ISIS infrastructure so that Media Composer | Cloud can talk to it. In Avid marketing parlance “you’ve got to get on the platform” for some of these things to work.

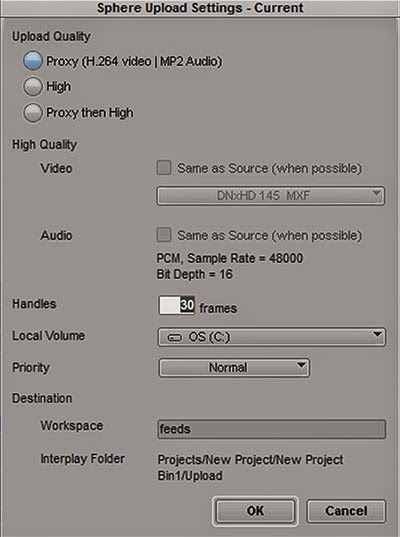
Sphere Upload Settings

Media Composer | Cloud permits hybrid editing. For example, a news videographer in the field can be editing at the proverbial Starbucks using local assets. Maybe part of the story requires access to past b-roll footage that lives back at the station on its newsroom storage. Through Media Composer | Cloud and Interplay, the videographer can access those files as proxies and integrate them into the piece. Meanwhile, local assets can be uploaded back to the station.

While not everything about Avid Everywhere has been fully implemented, yet, it certainly is an aggressive strategy. It is an attempt to move the company as a whole into areas beyond just editing software, while still allowing users and owners to leverage their Avid assets into other opportunities.

How to Import video into Avid Media Composer?

First, make sure the right bin or folder is selected, otherwise the ‘Import…’ option might be greyed out. Then, go to File > Import…. You will be prompted to select the video or stills you want to import.

Important Note: You must choose a transcode format if you are using this method. I recommend DNxHD while you’re in Avid. That means if you want to transfer unsupported files into Avid Media Composer including 108060p AVCHD .MTS, MXF, Sony XDCAM, 4K XAVC, MPG, MKV, MP4 or VOB etc, you’d better transcode them to Avid most likely format DNxHD .mov. To get it done, Pavtube HD Video Converter (or the Mac) version is highly recommended to you.

More info:

Saturday, January 18, 2014

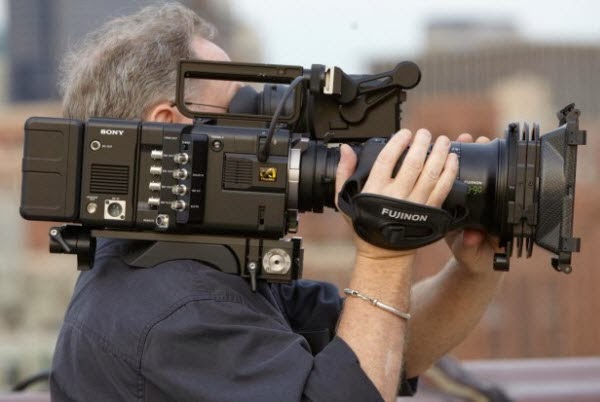
Sony F5 XAVC codec and Avid Media Composer Workflow

If you fail to import Sony F5 XAVC videos to Avid Media Composer, you can refer to the following guide to easily convert XAVC to Avid DNxHD codec for native editing.

Sony developed XAVC to handle the higher data rates of high-speed and 4k. Thus, many experienced Avid users may wonder about the XAVC codec and Avid Media Composer workflow:


I'm a producer and editor. We do a lot of broadcast programming for a sports network, I shoot some videos from Sony F5 to record the opening sequences for a few college football games. But I'm hoping to find out the way to edit the F5 in Avid Media Composer.

Did a google search for my issue and 
Sony XAVC Converter for Avid came up. It is easy to use and pretty fast as well. This program can transcode Sony F5 XAVC files to Avid DNxHD files, including converting the frame rate keeping the XAVC orginal qualityIt did sort of choke when more than 2 streams were working at once, so as long as I kept it set for 2, it was good.  Besides Avid, this software can also export Prores for FCP, AIC for iMovie and FCE, MOV for Adobe Premiere and more NLE systems for native editing. 

How to import and edit Sony F5 XAVC file with Avid Media Composer

Step 1. Install and launch this Sony XAVC Converter for Mac, click top left two icons to load individual videos or load the entire folder from Sony F5 camcorder.


Step 2. Click Format and choose Avid Media Composer >Avid DNxHD (*.mov) as the best video format for editing in Avid Media Composer on Mac.


Click Settings to change the video bitrate, frame rate, size, etc. all according to your needs.

Step 3. Click the big red circle at the bottom right to start converting Sony F5 XAVC footage to Avid Media Composer on mac. Wait for a while; you can load the fresh hot converted video to AMC now.

Tip:

You can trim out a few clips before converting XAVC to Avid.

Now click the pencil-like icon (Edit) and locate the Trim icon. Drag the small triangle icons to locate the opening and ending

See also:


Thursday, December 12, 2013

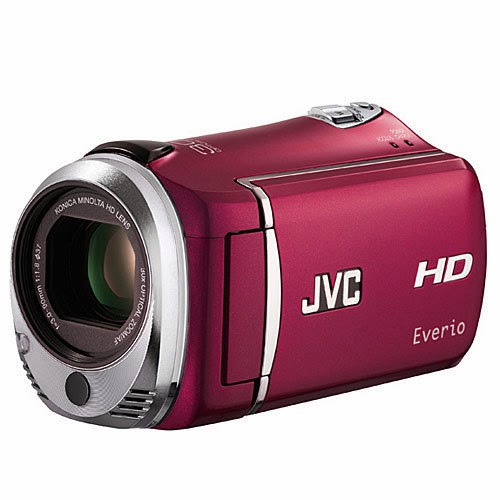
Convert .mts files from JVC Everio GZ-HM330SAA in iMovie/FCE/FCP/Avid MC

Here is the quick tutorial for you that will show you the simplicity of JVC Everio GZ-HM330SAA workflow for importing MTS files in FCP, iMovie, Premiere Pro, Avid for editing by transcoding JVC MTS to Mac editable format (Mavericks 10.9 included).

I work at at CyberNet Evolution, and below is a question from one of my friends: 


I purchased a JVC Video recorder, the model is GZ-HM330SAA and I shot some footage about my kids basketball games. I am not sure I just converted the video and gave it to my daughter who edited it on her Apple Mac for me. Just keeping the videos as a record. But I find I couldn’t convert the software to copy to a DVD. I made a mistake purchasing this camera not realisied how difficult it was. I contacted JVC and they were no help at all. 


So I took his camera to my local Tech guy and I couldn’t help much at all either but I start to surf the net and see if I could find something. While searching for solutions, I find some plug-in for Mac can do some work. But the importing way is a tedious process, which needs you patience. Fortunately, I found Pavtube web site and its software, and there is an alternative easy way to fix the issue. 

The easy workaround is to convert JVC Everio GZ-HM330SAA mts files to Mac native editable format along with some help from a third-party tool. Well, if you make the recordings editable before taking to the program, the incompatible error won’t happen any more. Keep reading for a brief how-to below. 

Convert JVC Everio GZ-HM330SAA MTS files for editing in Avid, FCP (X), iMovie, Premiere 

Now go to find Pavtube HD Video Converter for Mac. Lots of users are impressed by this converter since it is powerful enough to convert camcorder videos to multiple video formats for iOS/Android/Windows Tablets & Phones and HD Media Players as well as video editing software including Avid Media Composer, Final Cut Pro (X), iMovie, Premiere and more. And you can enjoy the powerful edit function, like trim, crop, watermark for text, image and video, subtitles and so on. 

The following guide will show you how to transcode/convert JVC HM330SAA mts files for editing on Mac. Download it and follow below steps. 

Step 1. Load HM330SAA MTS files. 

You can choose "add video" directly to add the mts files. 


Step 2. Select output format for video editing software. 

Click "Format" menu you will find various video formats listed by different devices. Choosing the editing software option directly will help you to take less time to find a more preferable video format. 

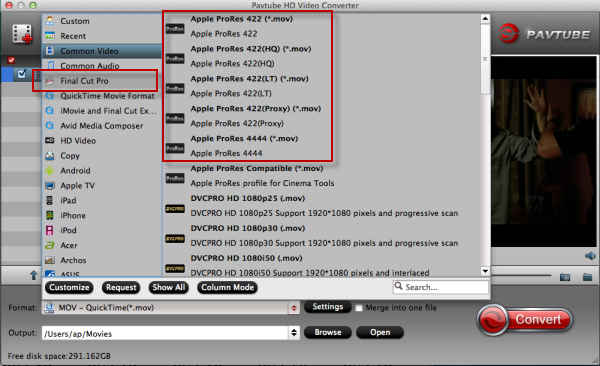
You can choose Final Cut Pro -> Apple ProRes 422 (*.mov), this codec is optimized for FCP editing; 


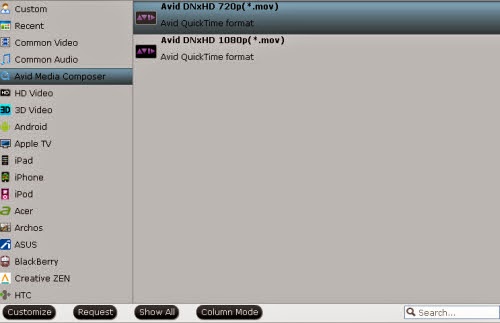
For Avid Media Composer, choose "Avid Media Composer -> Avid DNxHD 1080p (*.mov)"; 

For iMovie, choose "iMovie and Final Cut Express > Apple intermediate Codec (AIC) (*.mov)"; 

For Adobe Premiere, just choose "Adobe Premiere/Sony Vegas > WMV (VC-1) (*.wmv)". 

Step 3. Edit loaded JVC HM330SAA MTS video files. 

Click "Edit" button and you are allowed to trim, crop, add text/image/video watermark or some effect to your output video for making it perfect. Here the function of adding subtitles to output files will contribute to make your own videos. You can use free software Subtitle Edit to edit your subtitle content then add it to output videos. 

Tips: Click "Settings" on the interface and you can adjust the parameters including size, bitrate, frame rate, etc. to get a high quality of output files. And keep the settings the same as original video recordings will provide you the least loss of video quality. 

Step 4. Start conversion. 

Click the "Convert" button to start conversion. When it completed, click the "Open" button to get the generated videos for your editing software. 

More features about it: 

1. Rip and convert Blu-ray and DVD including 1:1 backup Blu-ray/DVD movies to Mac hard device for future needs. 

2. Directly Copy feature will save 100% intact .M2TS main movie from original BD disc. 

It is an integration of BDMagic for MacDVDAidfor Mac and Video Converter for Mac and it will meet almost all your requirements about converting videos. 

Now get ready for importing and editing JVC Everio GZ-HM330SAA AVCHD mts videos in FCP/iMovie/Avid MC for editing easily without any problem. Enjoy your editing workflow! 

Learn more JVC video tips: 

Get mts Videos from JVC Everio GZ-HM330SAA into FCP
Transcode GZ-R70 mts clips to iMovie/FCE
How to edit JVC GY-HM650U MXF, MOV, AVCHD, MP4 on Mac?

Sunday, November 10, 2013

Ingesting Canon Vixia HF G30 footage to Avid Media Composer/Premiere Pro

Canon HF G30 Avid MC/Premiere Pro solution: Step by step guide showing you how to importCanon Vixia HF G30 AVCHD/MP4 to Avid MC/Premiere Pro for further editing.

The Canon VIXIA HF G30 is a prosumer camera?that shoots 1920 x 1080 Full HD video in either AVCHD or web-friendly MP4 format. It also supports Native 24p Progressive Mode recording, which will give your footage a more cinematic look.?Videos are shot in AVCHD up to 35 Mbps and recorded in full HD 1080 60p, which is not supported by most editing programs. Hence it could be a problem when Mac users need to ingest the Canon Vixia HF G30 AVCHD/MP4 video in Adobe Premiere Pro, Avid Media Composer smoothly. 


To edit Canon Vixia HF G30 AVCHD in Adobe Premiere Pro, Avid Media Composer on Mac, you are suggested to convert the AVCHD MTS to Adobe preferred H.264 MOV or DNxHD for Avid. To accomplish this, I recommend this Mac Canon Video Converter, a powerful and professional AVCHD converting program which support outputting various videos formats for different usage.. 

Now follow these steps to quick convert Canon Vixia HF G30 AVCHD into DNxHD or AVC MOV

Free download Pavtube HD Video Converter for Mac, get it installed. 


Step 1: Connect your camcorder to Mac and Load recorded files. 

Connect your camcorder to Mac, and you can see all recorded AVCHD/MP4 files as soon as this program has detected the device. Now, you can untick the files you don't want, and then click the "Add" button to load the files you want to this AVCHD/MP4 to MOV Converter for Mac, or drag and drop your videos into it directly. Batch conversion is offered. 


For Windows user: Connect an HD video camera/camcorders to your PC with a USB cable. Once connected and powered on, the camcorder should appear on the desktop as a new disk. It is desirable that you copy the videos to your PC's hard-drive before converting or editing them. 

Step 2. Choose proper video format. 

Open the "Format" list then choose "MOV" under "Avid Media Composer" section as output format for editing Canon Vixia HF G30 AVCHD/MP4 files in Avid Media Composer. 


choose "MOV"/"MPEG-2" under "Adobe Premiere/Sony Vegas" section or "Apple ProRes 422(*.mov)" under "Final Cut Pro" section as output format for editing Canon Vixia HF G30 AVCHD/MP4 files in Adobe Premiere Pro.  

In fact, if you are about to play the AVCHD/MP4 video files on iPhone, iPod, iPad, Android, Windows 8 devices or edit in iMovie, Final Cut Pro X, FCE etc., you can choose the optimized preset for the device or app offered. 

Step 3. Customize video size, bitrate, frame rate, and other settings. 

Tips: 

* For 1080 50p AVCHD files, you can set the video size as 1920*1080, and set the video frame rate as 25fps. 
* For 1080 60p AVCHD videos, set the video size as 1920*1080; while, set the video frame rate as 30fps. 

FYI: Tf you want to trim, crop the videos before transcoding, you can click Edit like this: 


Pavtube AVCHD Converter for Mac also support deinterlacing, editing audio and adding sutitles. 

Step 4. Start conversion. 

Click the "Convert" button to start converting Canon Vixia HF G30 AVCHD/MP4 to MOV for Avid MC, converting to MOV/MPEG-2/Apple ProRes for Adobe Premiere Pro. 

After this Top HD Video Converter for Mac finishes the conversion process, you can click "Open Folder" to find out where you saved the converted files. 

Now let's click the "Convert" to start this conversion easily. Wait for a while and you can click the "Open" to locate the converted video easily. 

Learn more:

Tuesday, October 1, 2013

How do I import .mov file from Canon T4i/650D into Avid Media Composer

After learning this following guide, you will know how to import and convert Canon T4i/650D H.264 MOV footages to Avid Media Composer on Mac OS X and edit the 1080p mov video with DNxHD codec easily.


The Canon EOS Rebel T4i Digital Camera is an ideal camera for any level photographer. T4i features incredible image quality with an 18 Megapixel CMOS (APS-C) sensor, Canon DIGIC 5 Image Processor that helps capture all the action with high-speed continuous shooting of up to five frames per second and an extended ISO range of 100-12800 (expandable to 25600 in H mode) that gives digital photographers the opportunities to take the Canon EOS Rebel T4i into more shooting situations than ever before.

Canon T4i uses the same workflow as the Canon EOS series of cameras which includes the 550D (T2i), 600D (T3i), and 1000D (XS), because it records in the same H.264 MOV format. Although the tools for importing the footage have been updated by Canon, it seems not working well when ingesting T4i footage to Avid Media Composer. Below, I will throw a quick tutorial up on how to import videos from Canon T4i/650D into Avid MC without the EOS Movie Plugin-E1.

As H.264 codec is not good for editing, the H.264 compression format requires that files be transcoded into a format better suited to editing, effects, and color grading. To successfully put your Canon T4i footage into Avid Media Composer for smoothly editing on Mac, you're suggested to transcode Canon T4i mov to DNxHD, which perfectly supported by Avid software. Along with some help from a third-party software.

Pavtube HD Video Converter for Mac is a well known professional converter which can deal nearly all kinds of MOV videos, it can convert Canon T4i H.264 MOV files to DNxHD codec MOV natively for Avid Media Composer on Mac, and then you can edit Canon T4i MOV files natively in Avid MC.
Just download a free trial and take a look at the brief guide below.

Transcoding/Importing Canon T4i H.264 footage to Avid Media Composer


1. Run the top Mac Canon H.264 MOV Converter and load T4i H.264 MOV clips to the program.  You can click either “Add Video” button or “Add from folder” button to load source MOV files.


P.S. If you want to combine the loaded MOV clips into one file, simply tick off the checkbox before “Merge into one file”.

2. Click “Format” bar to determine output format.

You are recommended to choose Avid Media Composer -> Avid DNxHD (*.mov), this format is best for Avid MC editing.


Tip: By clicking “Settings” button, you are able to enter the “Profile Settings” panel to adjust video and audio parameters for your Canon T4i MOV source files, including video size, bit rate, frame rate and more.  (Optional)

3. Click “Convert” to start.

The best H264 to DNxHD Converter can help you to convert Canon T4i MOV video to Avid Media Composer natively for editing. Once the process completes, you are able to import/ingest Canon T4i footage to Avid Media Composer for further editing on Mac as you want.

You can read more guides as below:

Thursday, August 22, 2013

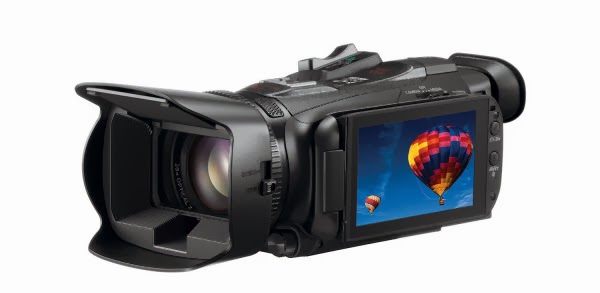
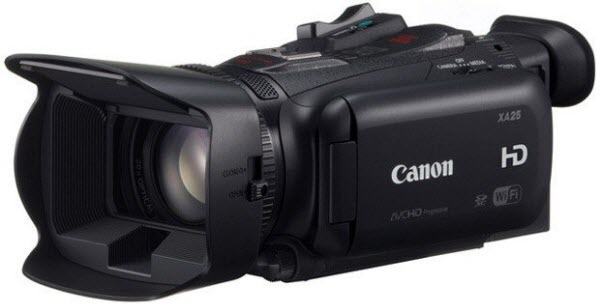
Correct way to import Canon XA25 AVCHD MTS into Avid Media Composer and Xpress Pro

If you need to better edit Canon XA25 AVCHD footages in Avid Media Composer and Xpress Pro on Mac, just follow the guide to know the best way to convert Canon AVCHD to Avid DNxHD codec.


I am in school for broadcast journalism. I am stills photographer leaving print media behind. I'm think that it would be best for me to learn how to shoot video and tell unscripted stories using a small chip camera like the Canon XA25. I need to film on the go and get great footage, this is the camera I planned to buy.

And I have an iMac and installed Avid Media Composer 5; the question is whether Avid Media Composer or Xpress Pro works with mts videos for XA25? So it would be great if someone could provide me some timely advice.


The XA25 camcorder combines outstanding image quality with dual-format recording and HD-SDI output in a compact form factor, making it ideal for professional broadcast and web-based content capture.

Canon XA25 recording file is AVCHD ( MTS/M2TS ) video format. Now the latest Avid MC is version 7, though it added many new features, but it can't support XA25 AVCHD footages well. And thus you can't easily import Canon X25 AVCHD MTS into Avid Media Composer and Xpress Pro. But things can be different if you get help wih a top third AVCHD Converter Tool.

Thiis MTS/M2TS Converter for Mac is an ideal converting program from Pavtube. I have used this tools for some time and it works perfectly in transcoding Canon XA25 AVCHD to DNxHD codec, which is best natively supported by Avid MC and Xpress Pro. After converting, you can edit your Canon XA25 AVCHD MTS files in Avid as well as Xpress Pro natively. Just take a look at the brief guide below.


(If you are a Windows user, try this MTS/M2TS Converter)

1. Connect your Canon XA25 to your Apple with USB2.0.

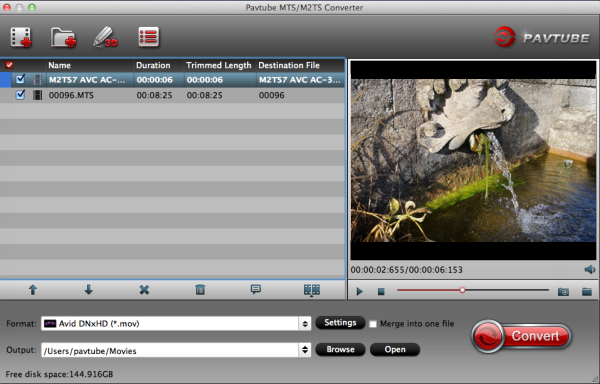
Install and launch MTS to Avid Converter on Mac. Drag and drop Canon XA25 AVCHD video files into file list. If it is necessary, you can double click the each file to have a preview.


Tip: If you have multiple 1080/50p MTS/M2TS files, you can tick the “Merge into one” box to merge the files into one single file so that you can edit Canon XA25 1080/50p AVCHD in Avid Media Composer and Xpress Pro on Mac without interruption.

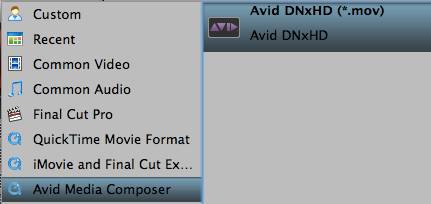
2. Click on “Format” and you will get a dropdown menu, then move you pointer to Avid Media Composer -> Avid DNxHD (*.mov). The Avid DNxHD .mov format is the native format for Avid Media Composer and Xpress Pro. Then you can set the output folder by clicking “Browse” icon as you need.


3. If you would like to customize the video and audio parameters, you can click "settings", adjust the parameters as you want, like Video Codec, aspect ratio, bit rate, frame rate, Audio codec, sampling rate, bit rate, channels.


4. Click "Convert" botton, it will convert Canon XA10 mts footage to DNxHD for Avid Media Composer and Xpress Pro on Mac OS immediately.

After converting, you can follow this guide how to import media files to Avid Media Composer to know the importing process. Now you you will be able to import Canon XA25 AVCHD 1080p files to Avid Media Composer and Xpress Pro effortlessly.

Read More:

Thursday, August 8, 2013

Get an effective way to edit XAVC file with Avid Media Composer

If you fail to import Sony XAVC videos to Avid Media Composer, you can refer to the following guide to easily convert Sony XAVC to Avid DNxHD codec for native editing.


XAVC is an open format that will be licensed to companies that want to make XAVC products. XAVC uses level 5.2 of H.264/MPEG-4 AVC which is the highest level supported by that video standard. Sony developed XAVC to handle the higher data rates of high-speed and 4k. Thus, many experienced Avid users may wonder about the XAVC codec and Avid Media Composer workflow, and some will search for the best XAVC/XDCAM Plug-in for Avid. Here let's see what users discuss in the forum.

Q1: Hi, We've got some material from Sony's new XAVC codec and using MC 6.5.2 and the newest AMA plugin 2.31. We can AMA link and getting all the footage from the XDROOT directory and then transcode everything EXCEPT the clips that is 20 minutes and more, they cannot be transcoded...I do think this is a Sony_PDZK-MA2_v2.31 AMA plugin issue and used my contacts at Sony to get some feedback.

Q2: Hello, I've been researching possible workflows for a doc we'll be shooting soon. The team is interested in the Sony F55 and I am trying to find specifics about a workflow through AVID, as I will be the one working with the footage. My knowledge is mostly with FCP, and I know the camera and the codec have yet to be released, but I'm hoping to find out more about this camera and AVID workflows.Thank you in advance.

Now you can see many Sony F5/F55 users are talk about how to get XAVC files to work with Avid Media Composer. In fact, Avid Media Composer/Symphony 6/6.5 has native support of 2k XAVC and 4K Raw (not 4k XAVC). Requires the appropriate AMA plugin available from the Avid or Sony download site. Sony said in July 2013: "with the v7 release of Avid Media Composer we will release the updated plugin supporting 4K XAVC editing".

Since you will have problem for import Sony XAVC videos into Avid MC even with the XAVC/XDCAM Plug-in, to make things easier, you had better to transcode Sony F5/F55 XAVC footage to a more editing-friendly format, such a Avid Media Composer's DNxHD.

First all of, you need to get Sony XAVC Converter for Avid, a powerful Sony XAVC to Converter for Mac which can help you effortlessly transcode Sony's new XAVC codec to DNxHD encoded MOV files, which will create an Avid MC friendly file format keeping the XAVC orginal quality. Besides Avid, this software can also export Proes for FCP, AIC for iMovie and FCE, MOV for Adobe Premiere and more NLE systems for native editing. 

How to import and edit Sony XAVC file with Avid Media Composer

Step 1. Install and launch this Pavtube HD Video Converter for Mac, click top left two icons to load individual videos or load the entire folder.


Step 2. Click Format and choose Avid Media Composer>Avid DNxHD (*.mov) as the best video format for editing in Avid Media Composer on Mac.


Click Settings to change the video bitrate, frame rate, size, etc. all according to your needs.

Step 3. Click the big red circle at the bottom right to start converting Sony XAVC footage to Avid Media Composer on mac. Wait for a while; you can load the fresh hot converted video to AMC now.

Read More:

Thursday, August 1, 2013

Easily import Sony XDCAM EX Footage to Avid, Premiere, Sony Vegas, Pinnacle, CyberLink, Windows Movie Maker

Summary: This article offers a brief guide about how to transcode and transfer Sony XDCAM EX footages to Windows editing programs like Avid, Premiere, Sony Vegas, Pinnacle, CyberLink, Windows Movie Maker for editing. 

Sony XDCAM EX series camcorders, like like PMW-EX3, PMW-200, PMW-EX1, PMW 150, etc, are high-end professional camcorders which can capture high definition shootings, they can offer very high quality HD recording at a data rate of up to 50Mbps wrapped with MP4 format. While enjoying the stunning videos recorded of HD image quality, many users are having problems when trying to edit Sony XDCAM EX videos on Windows editing software, like Avid, Premiere, Sony Vegas, Pinnacle, CyberLink and Windows Movie Maker,etc. 

Hot search: Sony XDCAM to MPEG-2 for Sony Vegas Pro | Sony XDCAM HD IMX Files on Mac NLEs | Sony XDCAM HD422 to Final Cut Pro X | Sony XDCAM in MOV on Mac Yosemite | Sony XDCAM EX for Avid, FCP, DaVinci Resolve, etc 
 

The reason that we can't successfully import Sony XDCAM EX MP4 recordings to Windows Platform for editing is because of the format compatibility. Since the XDCAM EX MP4 footage is a peripheral non-standard format which is not supported by editors on Windows PC. 

In order to import Sony XDCAM MP4 footage into Avid, Premiere, Sony Vegas, Pinnacle, CyberLink and Windows Movie Maker for smoothly editing, we can render to the third-party software to help convert XDCAM EX MP4 to AVI/MOV/WMV/MPG– native format for Avid, Premiere, Sony Vegas, Pinnacle, CyberLink and Windows Movie Maker. This is the best way to help XDCAM users to edit Sony XDCAM EX MP4 on Window PC smoothly..To achieve our goal, the quickest and easiest way is to use the easy-to-use yet professional software called Pavtube Video Converter , with which, we can effortlessly and flawlessly transcode Sony EX MP4 footage to AVI/MOV/WMV/MPG for Avid, Premiere, Sony Vegas, Pinnacle, CyberLink and Windows Movie Maker editing. It is safe to install and easy to use. And you can enjoy the powerful edit function, like trim, crop, watermark for text, image and video, 3D effect, subtitles and so on. Below will show you how to 


Other Download: 
- Pavtube old official address: http://www.pavtube.com/video_converter/ 
- Amazon Download: http://download.cnet.com/Pavtube-Video-Converter/3000-2194_4-75734821.html 
- Cnet Download: http://download.cnet.com/Pavtube-Video-Converter/3000-2194_4-75734821.html 


Free download and follow below step to convert Sony XDCAM EX MP4 for Windows . 

Step 1. Load Sony XDCAM EX MP4 files.You can choose "add video" directly to add the whole folder. 


Step 2. Select output format for video editing software. 

Click "Format" menu and choose "Adobe Premiere/Sony Vegas -> MPEG-2 HD Video (*.mpg)",or select WMV/MOV/MPEG-2, you can also choose "HD Video -> AVI HD Video (*.avi)". Finally, click the file icon beside output bar, and choose a destination folder for saving output files. 


Step 3. Edit loaded Sony XDCAM EX MP4 files. 

Click "Edit" button and you are allowed to trim, crop, add text/image/video watermark or some effect to your output video for making it perfect. Here the function of adding subtitles to output files will contribute to make your own videos. 

Tips: Click "Settings" on the interface and you can adjust the parameters including size, bitrate, frame rate, etc. to get a high quality of output files. And keep the settings the same as original video recordings will provide you the least loss of video quality. 

Step 4. Start conversion. 

Click the "Convert" button to start transcoding Sony XDCAM EX MP4 footage for editing in Avid, Premiere, Sony Vegas, Pinnacle, CyberLink and Windows Movie Maker. When it completed, click the "Open" button to get the generated videos for your editing software. 

More related tips: 

Tuesday, June 18, 2013

Easy way for Editing Sony PMW-EX3 XDCAM MP4 clips with Mac

In this post, you can learn the easy way to import .mp4 recorded from Sony PMW-EX3 to Mac in FCP, Avid, iMovie, Premiere Pro, FCE etc.


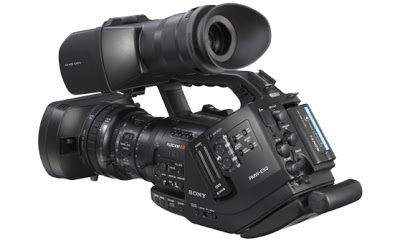
Sony PMW-EX3 follows on from the successful launch of the new PMW-EX1 and offers all the great features of the PMW-EX1 in a new semi-shoulder design. In addition to this new design the camcorder also features an interchangeable lens system, genlock, timecode and remote control capability for real added flexibility, offering a low-cost HD studio solution. It combines a state-of-the-art, non-linear XDCAM workflow with simply the best HD quality yet seen in a semi-shoulder camcorder.

PMW-EX3 camcorder records 1920 x 1080 HD images using the "MPEG-2 Long GOP" codec, which conforms to the MPEG-2 MP@HL compression standard, and the recordings are made as data files in the "MP4" format. "MPEG-2 Long GOP" is a mature codec which enables users to record stunning-quality HD video and audio with highly efficient, reliable data compression, but it is not an editing codec, so it is a big problem when loading or importing Sony PMW-EX3 mp4 clips into your Mac system.

Question: I recently purchased the Sony PMW EX3 and am loving it. My problem is this. I want to edit my footage. I have Final Cut Studio 1 which is apparently incompatible with the EX3 mp4 clips. I'm looking to make the jump to Avid Media Composer, iMovie and Adobe Premiere, but it doesn't works. Can anybody enlighten me?

The easy Solution: To make it easier for editing Sony PMW-EX3 MP4 videos on Mac, you can need to convert Sony EX3 mp4 clips to FCP, Avid, iMovie, Premiere Pro, FCE preferable format before importing to avoid crashing problem and waiting time. Mac Sony XDCAM EX Video converter is the best choice to do this. It can not only convert Sony PMW EX3 .mp4 videos to Mac compatible codec, but also make iteasy for merge videos.Below is a guide for you.

1. Download and install Pavtube iMedia Converter for Mac. This converter can help you transcode Sony PMW-EX3 mp4 video to FCP, Avid, iMovie, Premiere Pro, FCE.


2. Launch this Sony MP4 to Mac Converter, and import the EX3 recorded mp4 footages.


3. Click format bar to choose the format for output.

For editing EX-3 MP4 video on Mac, you can choose Apple ProRes 422 for FCP, DNxHD for Avid, AIC codec for iMovie, FCE, ProRes/MOVfor Premiere, etc.


4. You can click settings button in the main interface to adjust the output parameters, such as resolution, frame rate, etc, customize the parameters as you want.

5. Click convert button to start.

After Sony MP4 to Mac conversion, Optimize your workflow and save time with the Apple ProRes compression for Final Cut Pro. You can also import the output videos to Final Cut Express (FCE) 4, iMovie 11, Avid Media Composer or Premiere Pro for editing in full HD.

This Sony XDCAM EX Converter for Mac can not only convert Sony PMW-EX3 MP4 clips for FCP,  iMovie, Avid, Premiere Pro, FCE, but also rip your Blu-ray and DVD contents for editing with good quality.

Wednesday, June 5, 2013

Make Sony CX550V AVCHD video workable with Avid, Premiere, Sony Vegas Pro, Windows Movie Maker, Pinnacle

If you are Facing the problem with importing Sony CX550V MTS to Windows PC in Avid, Premiere, Sony Vegas Pro, Windows Movie Maker, Pinnacle, you can fix the issues via transcoding AVCHD video to Windows compatible format first.


Sony's flagship 2010 model, the HDR-CX550V, is a larger camcorder than its predecessor. With a $1049 price tag, the CX550 is also one of the cheaper high-end models on the market and it marks the first instance of Sony offering a 24Mbps bitrate for recording AVCHD video on a consumer camcorder.

Sony CX550V Windows solutions:

"I have just bought a CX550V camcorder, this device records AVCHD.MTS video format, now I would like to import these projects to my computer. What I want is to edit my 1920 * 1080, 24Mbps AVCHD video files smoothly without codec problems, what video codec should I use on Windows platform? Can you recommend some software which can help me import and convert Sony CX550V AVCHD videos for editing smoothly?"

As above, editing Sony CX550V MTS files on Windows PC is not an easy job as we thought. As Windows editing software like Avid, Premiere, Sony Vegas Pro, Windows Movie Maker and Pinnacle are not friendly with AVCHD format and did not handle large AVCHD videos with great stability. Plus, there are so many limits you are facing like the System Requirements: Intel Core 2 Quad 2.66 gHz or higher required for 1920x1080 AVCHD editing, 2GB system memory required for AVCHD and more.

To make Sony CX550V AVCHD MTS/M2TS video workable with  Avid, Premiere, Sony Vegas Pro, Windows Movie Maker and Pinnacle, you only need to convert MTS to AVI/WMV/MPEG-2, the most suitable video format for editing.

Software Requirement:

Sony AVCHD MTS Converter
 is mainly used to transcode Sony CX550V AVCHD MTS/M2TS files for editing in Avid, Premiere, Sony Vegas Pro, Windows Movie Maker and Pinnacle.


Features: 

  • Helping you to convert Sony AVCHD MTS files to AVI/WMV/MPEG-2 with original quality. Also it supports other popular used format like MP4, DV, FLV, 3GP etc for playing back.
  • Thanks to its adoption of NVIDIA CUDA & AMD APP(ATI Stream) acceleration technology, the conversion process has been accelerated up to 5 times the speed of other converters.
  • With this MTS Converter, you can edit the video clips with trimming videos, deinterlacing 1080i videos, adding text/image/video as watermarks to your original files, replacing audios, adjusting brightness/contast/saturation of the imported files, etc. 

Guide to edit Sony CX550V MTS files in Pinnacle Studio, Sony Vegas and Adobe Premiere

Step 1: Free download the best MTS to Windows PC Converter and run it to add the AVCHD footages from Sony CX550V.


Step 2: Hit the Format box and select “HD Video” option on the dropdown menu and you can choose “AVI/WMV/MPEG-2” as output format for editing with Avid, Premiere, Sony Vegas Pro, Windows Movie Maker and Pinnacle . Besides, you can also choose “H.264 HD Video (*.mp4) “for playing back.


Step 3: Adjust video and audio parameters, including the Bitrate of Video and Audio, the Codec of Video and Audio, Video Size, Sample Rate, Frame Rate, Audio Channels, etc., by clicking the “Settings” button on the main interface for getting the best quality.

Step 4: Click the “Convert” button on the main interface to start transcoding Sony AVCHD footages to AVI/WMV/MPEG-2 for editing in Avid, Premiere, Sony Vegas Pro, Windows Movie Maker and Pinnacle.

When the conversion is completed, click “Open” in the main interface and get the converted files for importing and further editing.

With this Pavtube Sony MTS Converter, it becomes easy for you to convert Sony CX550V MTS video to Windows editing software compatible file formats. Now transferring and editing Sony CX550V AVCHD in  Avid, Premiere, Sony Vegas Pro, Windows Movie Maker and Pinnacle is smooth and without any problem.

Tuesday, May 28, 2013

Best MXF to Avid MC Converter- Bringing .MXF files into Avid Media Composer

This guide shows how to transcode MXF files natively for use in Avid Media Composer with best Mac MXF to Avid converter.

MXF, a container format, is created by the high-definition camcorders like Sony XDCAM, Panasonic P2 502, HVX200 and Canon XF300/XF305 to store video, audio, and programmed data. The recording video is high definition and keeps the high quality.


When importing and editing these MXF videos in Avid Media Composer, uses always encounter video and audio problems, as the Avid Media Composer doesn't support HD videos well due to the codec. Most of the editors I've talked to say they generally link to the H.264 MXF files via AMA, then transcode in Media Composer. But many of them have met unexpected problems. We'd like to find something we can run on a few Mac Pros that would allow us to transcode the MXF media ahead of time, so we can avoid transcoding on import.

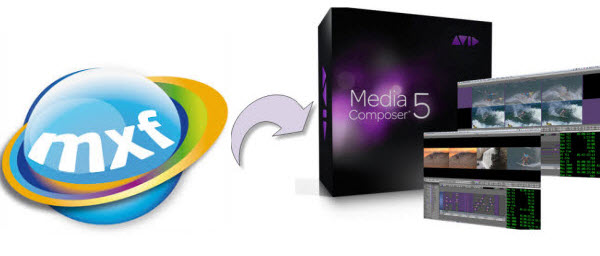
So if you want to edit your MXF files on the Avid Media Composer, you need to convert it to Avid DNxHD video format first, so you can import it for the further editing. This article will show you the easy way to import MXF recordings into Avid Media Composer, including v5/v5.5/v6/v6.5..

Here we would like to introduce an all-in-one iMedia Converter for Mac - a professional Pavtube MXF to Avid Converter for Mac, it's not only able to convert Canon,Sony, Panasonic MXF to Avid DNxHD MOV for Avid Media Composer, but also can convert various MXF files from different camcorder to suitable format for FCP (X), iMovie, Adobe Premiere Pro, Android/Apple iOS/Windows portable devices and so on.

FYI:

1. It also provides try-before-purchase service, click here to download a free trial version;
2. A windows version is available for windows users: MXF to Avid Converter.

Now get your program installed and let’s begin!

How to Convert MXF to Avid DNxHD MOV on Mac?

Step 1. Install and launch the Mac MXF to Avid Converter, click ‘add videos’ to load individual videos, or click ‘add from folder’ to load the entire folder.


Step 2. Click “Format” and choose Avid Media Composer -> Avid DNxHD (*.mov) as the best output format for editing MXF video files in Avid MC.


Optional: You can also click “Settings” – which is marked as step 3 in screenshot – to set up frame rate, video quality, bitrate and check the generated file size.


Step 3. Click “Convert” and let it go! It will help to shut down computer if you have many videos to convert.

3..2..1..bingo! Ok now you can click “Open” to locate your converted MXF videos and load it to Avid Media Composer.

- Trim, combine, de-interlace MXF footage, capture MXF frame.

Trim MXF clips: Click "Edit" to enter video editor, by default the "Trim" tab is activated, so just set start time and end time to include the duration you want to remain, cutting others out.

Combine/Join MXF files: If you would like to join several files together, just select these files and check the Merge into one box.

De-interlace MXF footage: Some footage may be saved as interlaced video with Juggled edges and ghosting. In that case you can set deinterlace effect to eliminate the combing. Follow "Edit"-> "Effect"-> "Deinterlacing".

Capture frame from MXF recordings: To thumbnail video frame, you may click the "Snapshoot" button when it plays to your favorable frame.


Read More: