Sunday, September 15, 2013

Import Sony PDW-F800 XDCAM MXF files into FCP 6/7 keeping all the audio tracks

If you need to edit Sony PDW-F800 MXF footages in Final Cut Pro 6/7 on Mac, you can follow this article to convert XDCAM MXF to FCP native Prores codec and edit without rendering.

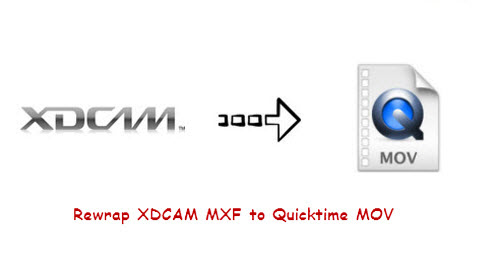
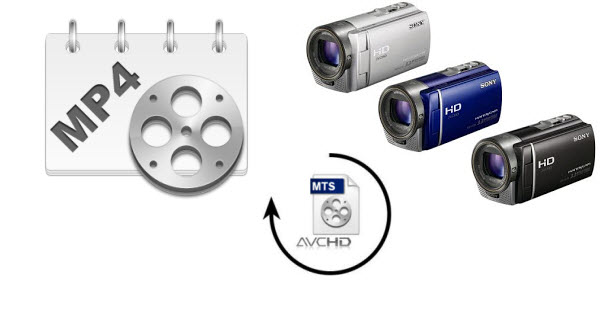
The PDW-F800 camcorder is the newest member of the XDCAM family. On top of the exceptional technology, the PDW-F800 offers very high quality HD recording at a data rate of up to 50Mbps using the MPEG-2 4:2:2P@HL compression. Sony PDW-F800 XDCAM camcorders' video format is MXF, but many users will find using these XDCAM MXF files on Mac is really a nightmare.


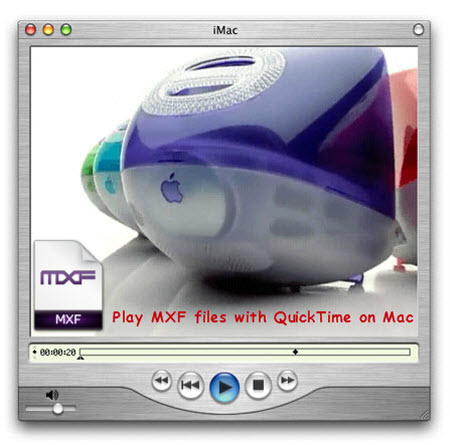
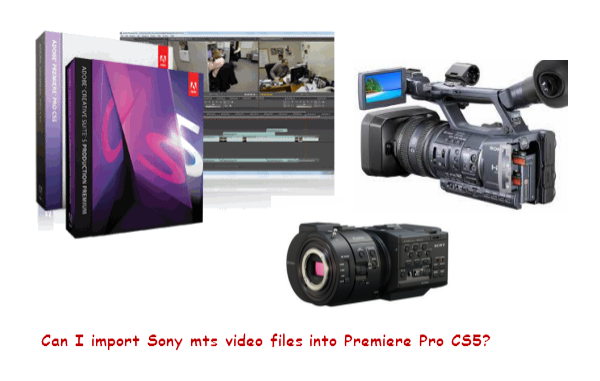
As MXF is not compatible with Mac Editors like Final Cut Pro 6/7, you can't direcly log & transfer your MXF videos from Sony PDW-F800 in FCP 6/7 sommothly. Even with the Plu-gin installed, some users would still meet the trouble due to its complex procedures. We also searched the solution, we find out there is an easy way to fix this issue, that is to convert Sony XDCAM MXF files to Apple ProRes, which is natively suported by Final Cut Pro. 

In addition, in case that your Sony PDW-F800 XDCM MXF files may have several video streams or audio tracks. For people who want to edit them in FCP 6/7, is there anyway to keep all the multiple audio/video track separately as original?

Fortunately, Pavtube iMixMXF can help you to get it done. With it you are allowed to preserve all or any audio tracks for output Prores .MOV and mix the multiple audio tracks into one if you need.

Below, we give you the step-by-step guide to convert Sony PDW-F800 XDCAM HD422 MXF files to Prores .MOV with multiple audio tracks for FCP 6/7.

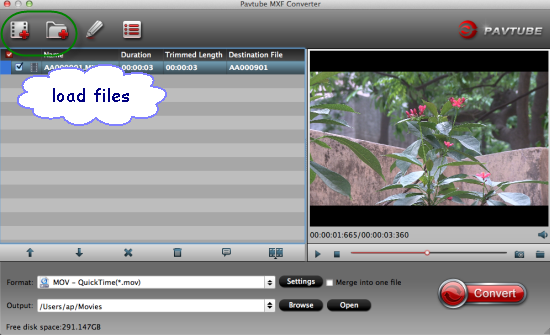
Step 1. Get this Mac multi-track MXF Converter installed, click  to load individual mxf videos; or click    to load the entire folder. It will recognize all the audio channels.


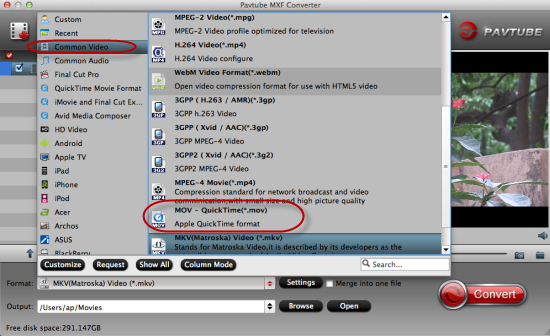
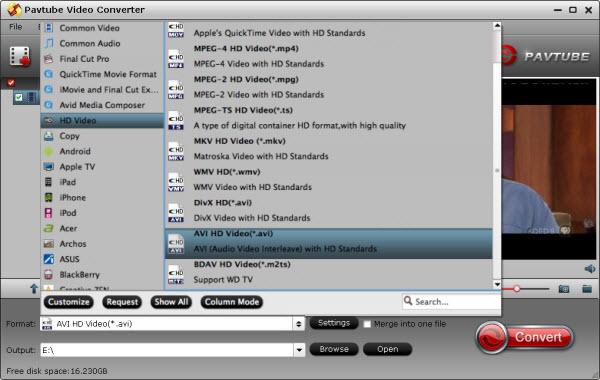
Step 2. Click "Format" and choose Multi-track Video>Multi-track Apple Prores 422 (*.mov) for importing in to FCP 6/7.


Step 3. Click "Settings" to customize your video size, bitrate, frame rate and other specs; and check video channels that you want to keep. (Optional)

Notes:

1. Follow the bottom left icon to "mix into one channel"; or that it will keep all the audio tracks apart.


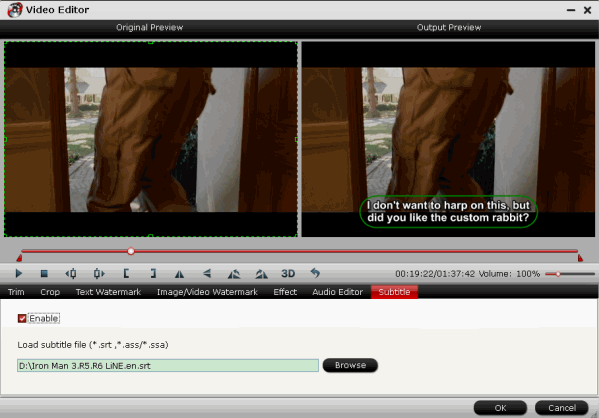
2. With this Pavtube iMixMXF program, you can also add some personal subtitles in it like this which makes the play backing much easier:

Step 4. Click "Convert" to start converting Sony PDW-F800 multi-track MXF to multi-track MOV for playback or editing on Mac Mavericks.

Tips:For users don“t need to deal with multi-track thing, just simple want to convert MXF to other formats, the MXF Converter for Mac (only $29) is highly recommended.

See more XDCAM MXF other tips:

Wednesday, September 11, 2013

Rewrap XDCAM MXF to Quicktime MOV for playing back on Mac

This article aims to help users transcode Sony XDCAM MXF to compatible format with QuickTime Player. With this easy-to-use Sony XDCAM Converter for Mac, you can easily convert your MXF to QuickTime MOV for playback.


XDCAM is a series of products for digital recording using random access solid-state memory media, introduced by Sony in 2003. Four different product lines — the XDCAM SD, XDCAM HD, XDCAM EX and XDCAM HD422 — differ in types of encoder used, frame size, container type and in recording media. The XDCAM format uses multiple video compression methods and media container formats. However, when you want to share your XDCAM MXF videos with friends using QuickTime player, you'll feel frustrated because QuickTime can't play XDCAM MXF files.  

So is there any way to enjoy your favourite XDCAM MXF videos with QuickTime? Of course yes! The best solution is to rewrap those XDCAM MXF to a QuickTime-friendly format. Only comes with some help from third-party software, it can be done effortlessly.

If you're looking for an ease-to-use software application, don't mind spending $29, I've had success using Pavtube MXF Converter for Mac to Sony XDCAM recording MXF videos to QuickTime playable MOV format on Mac quickly. I've found the quality to be excellent, and see no difference from the original. Fully support Sony XDCAM camcorders like PDW-F800, PDW-700, PDW-F355L, etc. Below are the detailed steps.

Guide on how to transcode Sony XDCAM MXF to MOV for freely playing on Mac

Part I: Import XDCAM MXF videos to Mac

Connect your Sony XDCAM camcorder to Mac and transfer MXF video files to your Mac for converting.

Part II: Convert Sony XDCAM MXF to QuickTime MOV

Step 1. Load XDCAM MXF footage.

Drag and drop individual .mxf file or XDCAM MXF file structure to the best Sony XDCAM MXF Converter.


Step 2. Select output format.

Click on the dropdown menu of “Format” and select “Common Video -> MOV – QuickTime (*.mov)” as target format. This format is specially designed for QuickTime playback. You can also choose format as you need in the format column, such as AVI, MKV, MP4, etc.


Step 3. Adjust video and audio parameters.

Click “Settings” button to customize the output video and audio settings by yourself. You can also use the default parameters, they will ensure you a good balance between file size and image quality basically. You can change the resolution, bitrate, frame rate as you need. 


Step 4. Start Sony XDCAM MXF to MOV conversion.

Click convert button to start to convert Sony XDCAM MXF file to QuickTime MOV on Mac with this best Mac XDCAM Converter.

After you converting Sony XDCAM MXF files to MOV for Mac, you can freely enjoy and play the converted footages smoothly with QuickTime Player on Mac.

Read More:

Tuesday, September 10, 2013

Convert MXF files to QuickTime MOV for playing on your Mac

In this article, you can learn the easy way to convert recorded MXF files to QuickTime MOV, and it will help you solve the playback issues with MXF and QuickTime Player on Mac.
 

QuickTime is a multimedia framework developed by Apple Inc., capable of handling various formats of digital video, picture, sound, panoramic images, and interactivity. As an excellent movie player, it is widely used by most of Mac users. But according to users' feedback, they usually have trouble with locating the Quicktime files once openning the MXF files.

What's the reason? As we know, MXF clips comes from like Panasonic HVX200/HPX300, Canon XF300/XF305, Sony EX camera, etc. It is not compatible with media players just like Apple QuickTime. So to get QuickTime Player natively accept MXF files, converting MXF file to Quicktime mov video is a necessary step if you want watch your MXF video on Mac with QuickTime Player.

Ane then what you need is a professional MXF to MOV Converter for Mac. Here I suppose you to use the top MXF Converter for Mac from Pavtube, it is just designed to convert MXF files to QT best supported MOV format so that you can freely enjoy MXF files with QuickTime on Mac.

Overall, this MXF to QuickTime Converter is very easy to use and can do MXF to MOV conversion fastly with preserving the original video quality perfectly. 
Just download this powerful Mac MXF to QuickTime Converter, and follow the guide as below.

Step by step guide to help you convert MXF file to QuickTime .mov for playing on Mac

Step 1:Add mxf file into Mac MXF to MOV Converter

Install and run the program, click "Add" or "Add from folder" button to load your MXF video clips. You are allowed to add multiple files to convert at a time.


Step 2:Set Output format for QuickTime.

Click on the dropdown list of "Format" and select "Common Video -> MOV – QuickTime (*.mov)" as target format. This format is specially designed for QuickTime playback.


Step 3.Adjust video and audio parameters. (Optional)

Click "Settings" button to customize the output video and audio settings by yourself. You can also use the default parameters, they will ensure you a good balance between file size and image quality basically.


Step 4:Start Conversion

Click the "Convert" button to convert mxf file to QuickTime .mov on Mac.

After a few seconds or minutes (according to the length of source MXF file), you can finish the MXF to QuickTime Conversion. In this way, you can freely enjoy the output MOV file with QuickTime Player on Mac. Also you can edit the MOV file with Final Cut Pro.

Read More:

Monday, September 9, 2013

Re-encode Sony FS700 AVCHD to ProRes for freely importing in FCP

Sony FS700 users often meet the problem that they cannot edit AVCHD MTS files made by Sony high definition camcorder in FCP. The following will tell how to use FCP to edit Sony FS700 AVCHD MTS, which is not a Mac friendly format.


I've just got a bunch of CF cards in from a shoot from yesterday. I believe the camera used for the interview was a Sony FS700 On the CF cards, I have 2 folders: }CLP{ and then a }STT{ file, but FCP L&T doesn't like that structure so I can't use that. The files here are QT movs (M-PEG2) and I need to convert to ProRes 422. Not using MPEG since they don't keep source TC, so I'm using Compressor but it's taking EXTREMELY long, even for a 2 minute clip. Is there a quicker way to do these batches because I have to get all this footage over to the editor, but fear at this rate it will take all day!

  
The FS700 shoots AVCHD. And with any tapeless workflow, you need to copy the ENTIRE card structure to a hard drive. (refer to the guide). If you don't like the complex workflow as above, here hands down the best and easiest way we've found, that is to convert to Prores from a FS700 for importing. You should know that the FCP's native format is Apple ProRes, so after converting you can avoid the headache "FS700 and FCP incompatibility importing problem". Here is a simple tip for you how to make Sony FS700 AVCHD editable in FCP.

If you are planning to edit FS700 MTS clips with FCP, you'd better give the app a try. Here Pavtube MTS/M2TS Converter for Mac is recommended. It is an easy-to-use MTS to FCP Converter for Mac program with clean interface. And it is good at converting Sony FS700 MTS files to Mac native format for editing. You can try the free trial version to test the functions at first.

Guide: Re-encode Sony FS700 AVCHD to ProRes for freely editing with FCP on Mac OS X

Step 1. Download and install the best MTS to ProRes Converter and connet FS700 cam to Mac, or insert the SD or Memor card into the computer.


Step 2. Open the encoder and click "Add File" or "Add from folder" to load .mts from FS700.

Note: If necessary, you can click "Edit" to edit the file- trim, crop and add special effects to the file.

Step 3. Click on "Format" bar, you will see the "Final Cut Pro" menu. The menu has several formats for choosing as the best output format. You'd better choose Apple proRes 422(HQ)(*.mov) to keep the original video qaulity.

Tip: If your source file is 1080p, you'd better keep the video frame rate as 30fps, video size as 1920*1080.


Step 4. Start ticking "Convert" button to convert Sony FS700 MTS file for editing in Final Cut Pro.

As soon as the conversion ends, you can clcik "Open" to get the converted file. Now, you can directly drag and drop the ProRes MOV file to Finla Cut Pro for further editing on your Mac OS X.

PS:

With the top MTS Converter for FCP, you also can transocde AVCHD/MTS/M2TS clips to compatible formats for editing with iMovie, Adobe PPro, Avid MC, FCE, ect. Mac OS X editors.

Read Related Articles:

Wednesday, September 4, 2013

How to transfer mvi file to edit in Pinnacle Studio 12

Just get a video file with MVI format like MVI_xxx.avi, MVI_xxx.mov or xxx.mvi?The article will show you the easy way to transfer mvi file to edit in Pinnacle Studio 12.


What's MVI?


MVI stands for Musical Video Interactive, also a DVD-based means of packing audio, video and interactive visual content onto one disk, and the audio content is provided in multiple formats, including a high-definition version and and MP3 version for copying to portable audio players. The video content is compatible with DVD video, and can also optionally include high-definition video. 

How to transfer mvi file to Pinnacle Studio 12

Some digital video cameras like Canon Powershot will save the movie in MVI format; however, you will some codec problem for editing MVI file in Pinnacle Studio as the version of Pinnacle Studio 12 can not support this MVI format. And this is the reason why you need to convert MVI to Pinnacle Studio 12 supported format.

According to the Pinnacle Studio website, Pinnacle Studio 12 can read AVI format best. So to get full use of this MVI file on Windows applications, you can get help with this professional MVI Converter from Pavtube, which can convert MVI to Pinnacle Studio readable AVI with perfect quality and fast conversion speed.

What's more, it is the ideal conversion tool that offers several editing functions like cropping video dimension, trimming file length, adjust playing effects, etc. If you also wanna make your MVI footages editable in Winsdows Movie Maker, Sony Vegas Pro, Avid Media Composer, Adobe Premiere etc. I also strongly suggest you to try this , you'll make it!

Part I: Transcode MVI to Pinnacle Studio readable AVI format for editing

1. Load MVI files.

Run Pavtube Video Converter as the best Mac MVI to AVI Converter. Click "Add Video" or "Add from folder" icon to load MVI media files.


2. Select output format for video editing software.

Click "Format" menu and choose "AVI HD Video (*.avi)" as target format from "HD Video" option for editing natively in Pinnacle Studio 12.

3. Edit loaded MVI files.

Click "Edit" button and you are allowed to trim, crop, add text/image/video watermark or some effect to your output video for making it perfect. Here the function of adding subtitles to output files will contribute to make your own videos. You can use free software Subtitle Edit to edit your subtitle content then add it to output videos.


Tips: Click "Settings" on the interface and you can adjust the parameters including size, bitrate, frame rate, etc. to get a high quality of output files. And keep the settings the same as original video recordings will provide you the least loss of video quality.

4. Start conversion.

Click the "Convert" button to start conversion. When it completed, click the "Open" button to get the generated videos for Pinnacle Studio 12.

Part II: Import converted HD AVI for editing in Pinnacle Studio 12

Launch Pinnacle Studio 12 and follow "Import"> "IMPORT FROM"> "Other devices"> "the folder stored the converted AVI files"> "Start Import”,import or transfer your hd .avi files to edit in Pinnacle Studio 12. 


MOV Related Guide:

Tuesday, September 3, 2013

Convert Sony Handycam video to MP4 format for playback,backup and sharing

Do you have got one Sony Handycam camcorder? In this article, you will get the best solution to convert Sony Handycam mts video to MP4 format for playback,backup and sharing.

Sony Handycam is a high-definition camcorder with hybrid video recording capability. With extraordinary imaging quality, Sony Handycam has all the capabilities of being a professional choice and acceptable by users to record videos with good clarity.


After 
celebrating your son’s birthday and recording videos of that moment using Sony Handycam, you may busy with looking for a way to backup, play or share your Sony Handycam videos with friends and family.

As the videos from Sony Handycam are recorded with AVCHD format which is not support by many device, like iPad, iPhone, Galaxy Tab, Nexus 7, etc, Media Players like Windows Media Player, QuickTime, VLC player, and some video sharing website, such as Youtube, Viemo and Facebook. Converting Sony handycam video to the compatible mp4 format on Windows and Mac is the best solution.

Here a professional app for converting MTS to H.264 is strongly recommended, that is Pavtube MTS/M2TS Converter for Windows/Mac. It is an easy-to-use MTS/M2TS to H.264 Mac app for completing the task to convert sony hanycaom video to MP4 format on window and mac. You can totally depend on it. 

Now begin to operate the Sony Handycam MTS to H.264 MP4 Mac app.

1. Add Sony Hanycam MTS files to the application

Install and run the best Sony Handycam Video Converter, import the mts videos from Sony Hanycam by clicking "Add video" or "Add from folder",you can also directly drag and drop MTS files to the program.


2. Choose the output format

Now you should choose MP4 as the output format, H.264 as the video codec. This is the best and native format for storage, playback and sharing.


3. You can click settings to adjust the parameters


4. Start the Sony Handycam MTS to H.264 HD mp4 Mac Conversion

Click the "Convert" button to get the Mac conversion done.

Just in a few minutes, you can transfer or put HD mp4 videos on iPad, iPhone and other tablets or samrtphones for watching, backup the mp4 video on your Mac, or upload the video for sharing .

With Pavtube MTS/M2TS Converter for Win/Mac, you can convert Sony Handycam mts video to H.264 MP4 format easily.

Read more:

Sunday, September 1, 2013

How to import Sony AVCHD mts video files dans premiere pro cs5

Have some .mts files from Sony camcorder and want to import/edit AVCHD .mts footages in Adobe Premiere CS5 without rendering; check out the guide to learn how to convert Sony AVCDH MTS to Adobe Premiere Pro CS5 compatible MOV/MPEG-2 video format.


Recently, we have a France client who has the question that "How to importer video mts sony dans premiere pro cs5". So I searched Sony MTS and Adobe Premiere Pro on Google, and found there are other users who are also facing the importing problems:

Q1: The videos are from Sony NEX-5N and the format shows AVCHD Video (.MTS) - into Adobe Premiere. Can someone explain the best way to get my video into the editing software?

Q2: I have a Sony FS700, when I wanna edit those AVCHD MTS footage in Adobe Premiere, I met problems: the Premiere handled with the mts files so slowly, and I couldn't edit my videos smoothly. What's the problem?

Q3: I'm getting a failure error "... unsupported compression format" when importing video from Sony NX5U AVCHD camera (which has MTS files) into CS5.5 Adobe Premiere Pro. Never had this problem with CS5. The video was shot at 1080i/24fps. I tried to convert it into AVI format but lost image quality. I will appreciate assistance from anyone with solution. Thanks.

In fact, we have used many AVCHD camcorders but only met the similar trouble many times. I know the main reason is that AVCHD is a compressed format, and not fit for editing. The best method to solve those problems is to transcode Sony AVCHD .mts to Adobe Premiere Pro CS5 most compatible format, like MOV or MPEG-2 format.

At this time, you need a Mac Sony MTS to Premiere Pro Converter, Pavtube MTS/M2TS Converter for Mac can help you, it can transcode Sony MTS to MPG/MOV for Premiere Pro CS5 native editing on Mac with maintaining the original effect, below is a brief guide for you to convert Sony AVCHD mts video to Premiere CS5 on Mac.

Steps to transcode Sony MTS video files for importing into Adobe Premiere Pro CS5

1. Download and install Pavtube Mac AVCHD to Premiere Converter. It's an excellent software which can convert Sony AVCHD for Premiere Pro, more output formats are also supported, such as MKV, AVI, MP4, MOV, WMV, FLV, etc.

2. Import the Sony AVCHD MTS video to the best MTS/M2TS Converter for Mac.


3. Click "Format" column to choose the best video format for editing in Adobe Premiere Pro CS5 on Mac. Click and choose Adobe Premiere/Sony Vegas -> MOV or MPEG-2 for output. You can also choose Final Cut Pro  -> Apple ProRes 422 MOV for editing in Premiere Pro CS5.


4. You can customize output parameters as you want. Adjust the resolution, bitrate, etc according to your need; you can also keep the parameters as original.

After these steps above, click convert button to start converting Sony AVCHD MTS to MOV/MPEG-2 for Premiere Pro CS5.

With this best Sony MTS/M2TS Converter for Premiere Pro CS5, you can convert you mts videos with best quality, supported devices include Sony HDR-CX160, CX130, TD10, PJ760V, HDR-CX11E, CX155, CX150, CX100, SR1, etc. Now just have a try, and then you can get quick and smooth Sony AVCHD editing workflow in Adobe Premiere Pro CS5 as you want with no codec problems.

If you want to import or edit your Sony camera video files on FCP 6/7, FCP X, iMovie, FCE, Avid, Song Vegas, Pinnacle, Windows Movie Maker, etc., you can check out "Sony Camcorder/Camera Video Tips or MTS Tools" to get your solutions.

Read More: