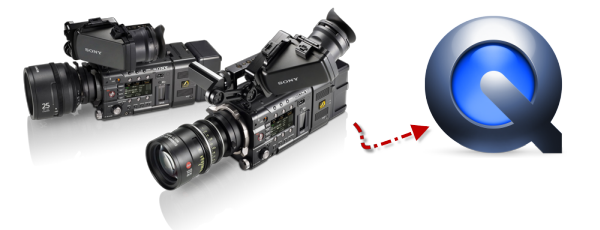
The best and easiest Windows/Mac solution to get MXF files readable by Premiere Pro CS6.
MXF, is a container format and can hold almost all knid of video and
audio codecs. As reported, almost all the camera generated MXF files are editable in the
latest Adobe Premiere CS6. However, the way you get the MXF recordings makes them different from the
originals, still many users have "MXF to Premiere Pro CS6 importing issues" :
I have some wonderful underwater footage shot in Tonga of whales. Only problem is I can't seem to read them in Premiere. FCP 7 is reading them in log and transfer just fine. Click on contents and there they are. In Premiere the same folders are there but not opening as thumbs in media browser. Any ideas?
I'm running Premiere CS6 on Macs, v. 6.0.2. And I shoot some .mxf files and while importing .mxf into Premiere CS 6, I always got the error message. I tried everything and had to intall Canopus.HQ.CODEC.v6.0.7 but nothing changes. I don't understand why? Give some suggestons?
I can't import any mxf file into Premiere CS6. I'm using Adobe Premiere and trying to import an MXF-File of 25 GB into Premiere. I read allready a lot of posts in different forums but didn't find the right tool to do the job.
Up to now, Adobe Premiere Pro CS6 seems to work fine if you import your MXF footages directly from cameras, but if you have already copied MXF recordings to your HDD or you download them from somewhere, the importing error may jump out.
If you accidentally meet with the problem, you can follow the guide here to convert MXF to H.264 codec MOV format for using MXF files in Adobe Premiere CS6, this is the best solution to import and edit MXF footage in Premiere Pro CS6.


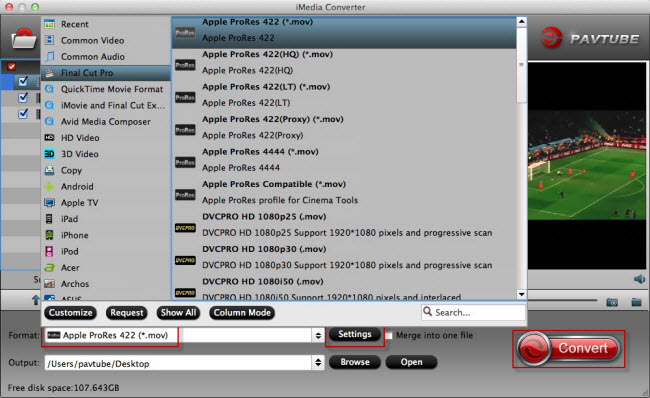
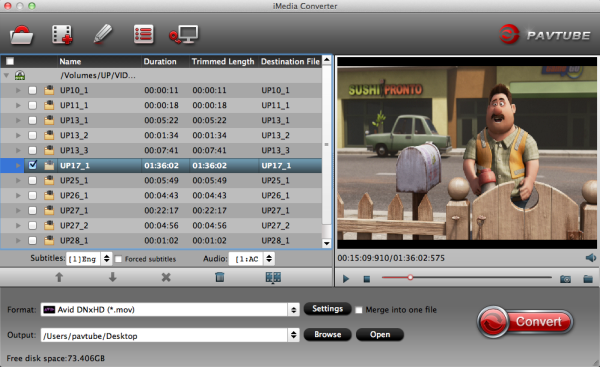
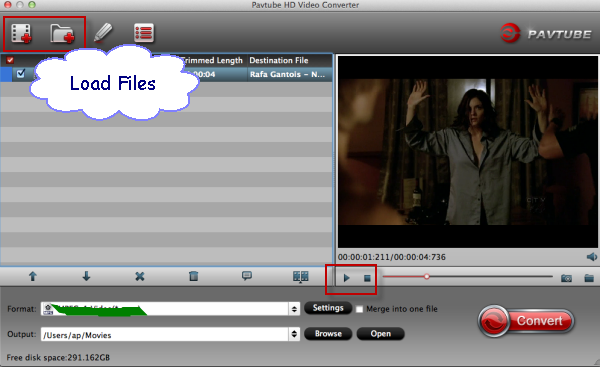
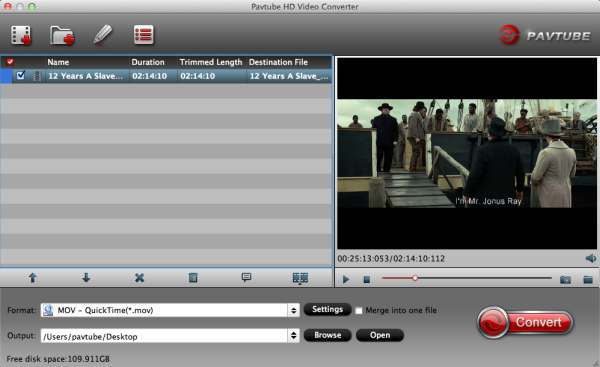
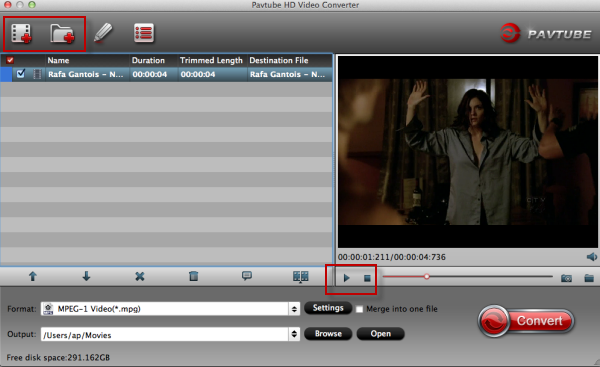
Step 1. After downloading, install and run this MXF to Premiere Pro Converter, just copy the MXF files from the CF cards right to your hard drive, import the files to the software.
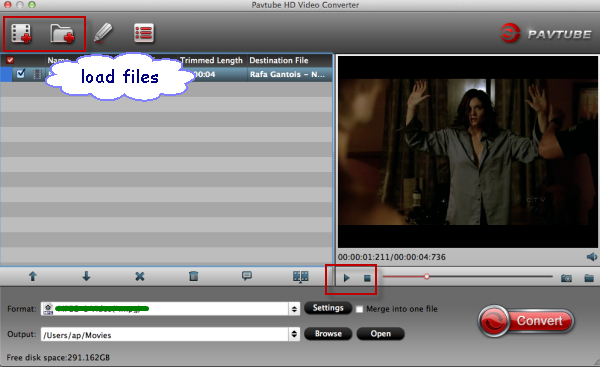
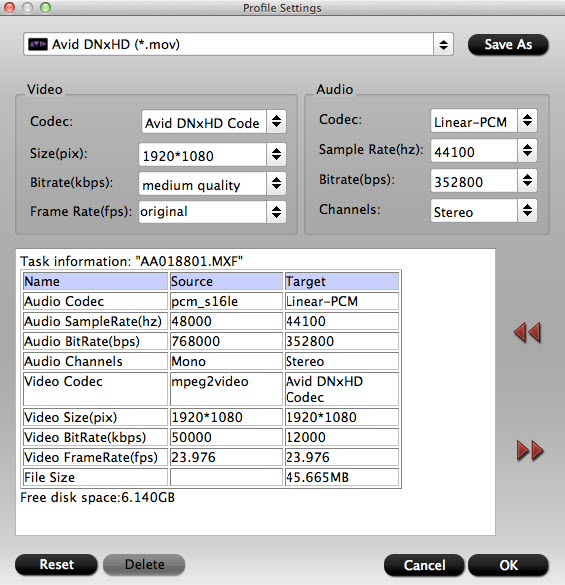
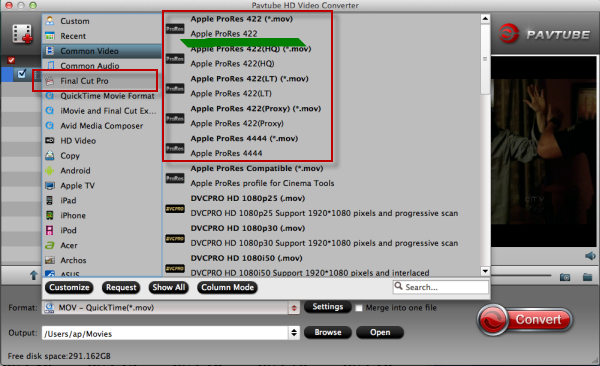
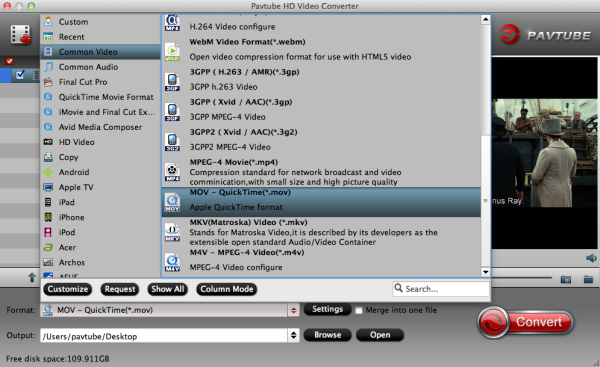
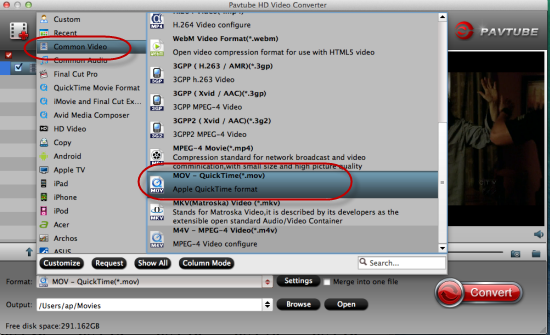
Step 2. Click “Format” bar to choose the output format. You can choose “Format > Adobe Premiere/Sony Vegas > MOV (AVC)(*.mov) or MPEG-2 Video (*.mpg)” as output format for editing MXF files in Adobe Premiere Pro CS6.

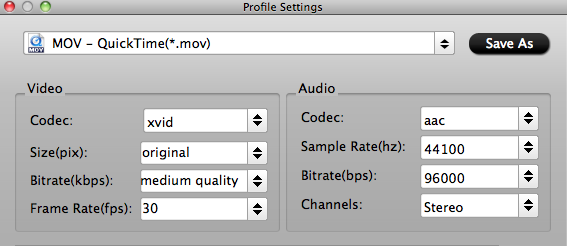
Step 3. You can click “Settings” button to adjust the parameters, such as resolution, bitrate, etc.
Step 4. Click “Convert” button to start converting MXF to MOV/MPG for importing to Premiere Pro CS6 on Mac. The Mac MXF Converter for Premiere Pro will convert MXF videos to MOV/MPG with the original video resolution.
After the conversion is finished, just run Adobe Premiere Pro CS6 and import the .mpg or .mov files for editing. You will find the output video work perfectly on Adobe Premiere Pro CS6.
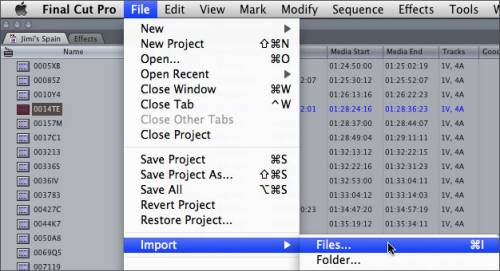
PS. If you do not know how to import video to Adobe, please reference the following guide:
Adobe Premiere Pro workflow: How to import Media Files to Premiere Pro on Mac
To thanks for your continued support all along our previous site and the new www.multipelife.com, we are holding a 'New Site Special' with fantastic discounts up to 40% off. You can get 20% off BDMagic, 30% off ByteCopy, 40% off DVDAid and 20% off Video Converter Ultimate on Windows/Mac platform:
https://www.facebook.com/pavtubefans/app_209569249055691
Read more:
http://pc-mac-compatibility-issues.blogspot.com/2014/05/pavtube-new-site-release.html
Read More:
- MXF & FCP X Workflow: Help Importing MXF into FCP X
- Video Solution: Edit XDCAM MXF in Adobe Premiere Pro CC
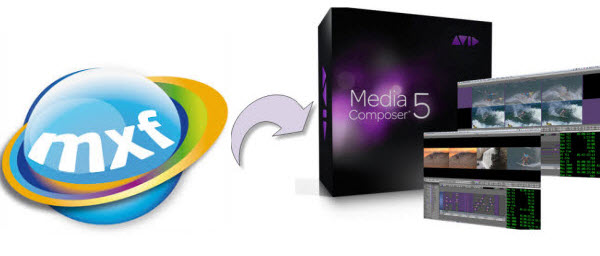
- Import Panasonic HVX2000A MXF Files to Avid MC for Editing
- Import Canon C300 Mark II 4K MXF to iMovie on Mac
- Convert Panasonic AJ-HPX2700 P2 MXF to Avid/Premiere/Sony Vegas Pro
- How to Convert Camcorders MXF to any formats on Mac (macOS 10.12 Sierra included)
- How to Convert and Compress 4K MXF for Windows Movie Maker Editing?
- Can LG Ultra HD 4K TV say yes to 4K .MXF shootings?