Showing posts with label JVC. Show all posts

Monday, February 10, 2014

JVC 60p AVCHD Editing Tips- Transcode GZ-R70 mts clips to iMovie/FCE

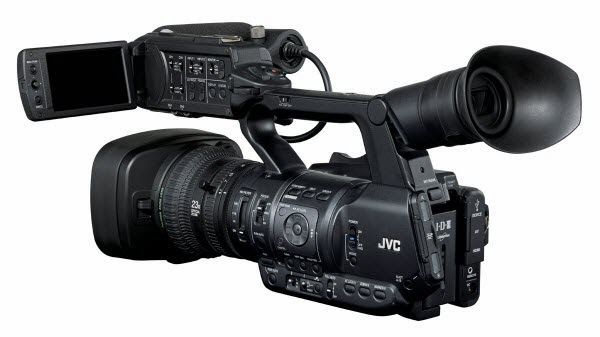
If you want to edit 60p AVCHD .mts files shot by JVC GZ-R70 smoothly in iMovie/FCE, here is right for you. Go to following article to get the instruction.

JVCs two new cameras GZ-R70 and GZ-R10 bring action-camera-durability to the traditional camera form factor. Like the aging action star, these show promise of no excuse good video. The two models both are dust-proof, water resistant to 5 m (16.4 ft), drop-proof from a height of 1.5 m (4.9 ft) and freeze-proof to temperatures as low as -10° C (14° F), which are designed for professional photographer.


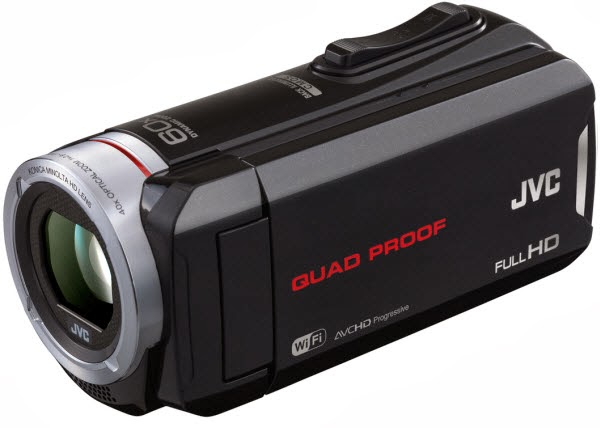
For the GZ-R70 is capable of recording 1920x1080/60p high definition recording, which is hard for iMovie/FCE to recognize or read well. In order to make the AVCHD videos from JVC GZ-R70 compatible with Mac, the easy workaround is to convert the 60p mts files. For this purpose, this article mainly shows you how to transcode JVC GZ-R70 60p MTS videos for editing in iMovie/FCE in detail. Mac Mavericks 10.9 supported.

At first, we recommend you to choose a top MTS to AIC Converter for mac that is specific on converting 1080/60p mts/m2ts files from JVC GZ-R70 for iMovie or FCE editing. Pavtube MTS/M2TS Converter for Mac works as the companion for your camcorder AVCHD videos to convert any kinds of .mts/.m2t videos to your Mac Editor, like FCP, iMovie, FCE, Avid Media Composer, Premiere Pro, etc for editing. Just try Mac JVC MTS converter and follow the guide below.

Steps for transcoding JVC GZ-R70 1080/60p MTS clips to iMovie/FCE

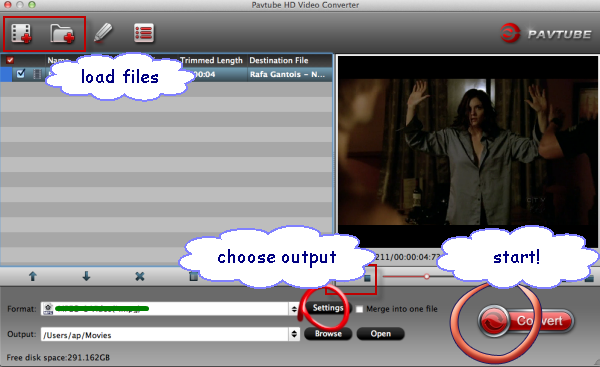
Step 1: Install the top MTS/M2TS Converter for Mac on your Mac OS X, and run it to import your JVC GZ-R70 1080/60p MTS footages to it.


Tip: If you want to combine the files together, please tick the box "Merge into one" on the main interface.

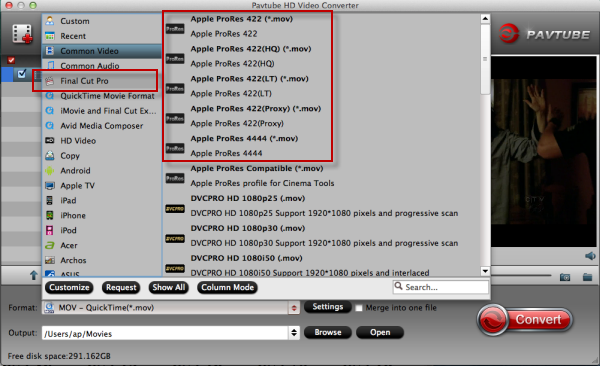
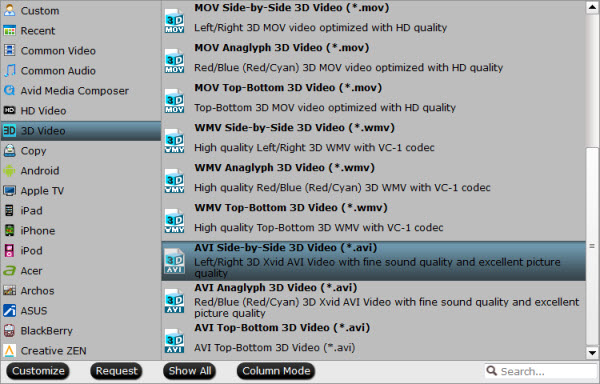
Step 2: Click the Format box and select best output format on the dropdown list. You are advised to choose Apple Intermediate Codec(AIC)(*.mov) as the export.


Step 3: Click the “Settings” icon on the main interface and you’d better set the video size as 1920*1080, video frame rate as 30fps(or 25fps PAL) for importing JVC GZ-R70 1080/60p MTS to iMovie/FCE with the best quality.

Step 4: Click the "Convert" button on main interface to start converting JVC GZ-R70 1080/60p MTS clips to AIC video immediately.

After the JVC MTS to AIC Converter finished transcoding, you can run the iMovie/FCE to import the converted files and you can edit JVC GZ-R70 1080/60p MTS in iMovie/FCE without any rendering or incompatibility problem.

Related articles:
Quickly Edit JVC GZ-R70 60P AVCHD Progressive in Avid MC
Import Panasonic HC-X900 3D AVCHD to Final Cut Pro (X)

Monday, December 30, 2013

How to edit JVC GY-HM650U MXF, MOV, AVCHD, MP4 on Mac?

Here is the quick tutorial for you that will show you the simplicity of JVC GY-HM650U workflow for importing MXF, MOV, AVCHD, MP4 files in FCP, iMovie, Premiere Pro, Avid for editing by transcoding JVC MTS to Mac editable format (Mavericks 10.9 included). 

Mobile Newsgathering is now faster and better then ever with the introduction of JVC's GY-HM650. It supports

Multiple encoding formats:

HD MPEG2 (35/25/19Mbps)
AVCHD 1920x1080 60i
SD H.264
480x270 H.264 (web)
960x540 H.264 mode

—NEW! (eff. May 2013)


Wide media format compatibility:

.MXF with rich Metadata (optimized for asset management)
.MOV (Final Cut Pro)
.MP4 (XDCAM EX™)
AVCHD with additional lower bitrate AVCHD modes

—IMPROVED! (eff. May 2013)


JVC GY-HM650U is good enough to most photographers, however, using the HM650U MXF/MOV/AVCHD/MP4 footage on Mac is not an easy job without some other apps’ help.

As a Mac user, to easily play JVC GY-HM650U video files on QuickTime and edit these  MXF/MOV/AVCHD/MP4 footage in FCP, FCE, iMovie, Avid MC and Premiere Pro on Mac, here, I will recommend you a smart JVC Video Converter for Mac- Pavtube HD Video Converter for Mac to help you get it done.

It will not only transcode JVC GY-HM650U video to MOV for native editing and playing on Mac, but also keeping audio and video synchronization on Windows and Mac (including Mountain Lion/Mavericks). Overall, With the program, you can transcode MXF/MOV/AVCHD/MP4 files at 1080i, 1080p, and 720p to proper format for:
  • Editing on FCP, iMovie, FCE, Avid, Premiere, iPhoto and more;
  • Playing on portable devices (iPad, iPhone, iPod, Nexus 4, Nexus 7, Galaxy S4, S3, Tab 3, Tab 2, HTC One and so on); or Media Players (QuickTime, VLC Player)
What's more, the Ultimate Converter for Win/Mac supports adding .srt, .ass, .ssa subtitle to your videos or movies.
At first, you can download a free trail version of this iMedia Converter for Mac.

Step 1. Add MXF, MOV, AVCHD, MP4 files to the converter.

Launch the Mac JVC Video Converter. Click "Add Video" or "Add from folder" button to load your source clips from JVC GY-HM650U.


Tip: If you want lossless merge multiple video files, pleas check the "Merge into one file" box.

Step 2. Choose Mac native foramt as output.

You can choose Final Cut Pro -> Apple ProRes 422 (*.mov), this codec is optimized for FCP editing;


You can also choose Avid Media Composer -> Avid DNxHD (*.mov), it's for Avid editing;


For playback, you can choose HD Video -> QuickTime MOV;

For sharing on website like YouTube or portable devices, you can choose MP4 format for output.

P.S. If you wanna edit the video/audio parameters, you need to go to "Settings" window.

Click the "Convert" button under the preview window, and the best JVC Video Converter will start converting JVC GY-HM650U MXF, MOV, AVCHD, MP4 clips to Mac compatible mov format.

When the conversion is done, you will be directed to open the folder where you saved the converted files, and then you can import output video files for editing and playing on Mac. Please take a try now, hope it will do a great favor for you.

Find more related guides:

Tuesday, September 24, 2013

Best 3D MTS Converter- How to Convert 3D AVCHD MTS files to 3D AVI format

With a top 3D AVCHD Converter, you can easily convert 3D AVCHD MTS files to playable and editable AVI format for Windows or Mac.


Nowadays, more and more people will prefer a 3D camcorder to record vivid 3D images. It's great to have a 3D camcorder like Sony HDR-TD10/DEV-5, JVC Everio GS-TD1/GY-HMZ1U, Panasonic HDC-SDT750/AG-3DA1 which will give us unprecedented 3D video enjoyment.

If you have got a 3D camcorder and recorded lots of 3D MTS files, you may want to watch the recorded 3D videos on HD TV, portable devices or just want to import these 3D AVCHD files in Adobe Premiere, Sony Vegas, Pinnacle Stuido for editing. However, the 3D AVCHD MTS footage is not that easy to handle, you will have problem when editing and playing them.

To find a easier way to get 3D AVCHD MTS footage editable and playable, you need to seek help from the best 3D AVCHD Converter to Windows/Mac compatible AVI format.

Here Pavtube Video Converter Ultimate and iMedia Converter for Mac is the ideal conversion tool that not only freely and easily converts 3d MTS files to 3d AVI with perfect quality and fast conversion speed, but also offers several editing functions like cropping video dimension, trimming file length, adjust playing effects, etc. The converted AVI videos are well supported by mobile phones, different portable devices and many editng programs.  Batch conversion features supported by the software will definitely make the conversion easier and faster.

Becides 3D AVI format, this 3D AVCHD Converter for Mac has added other 3D profiles in Format menu. (Side-by-Side, Top-Bottom, or Anaglyph 3D in MKV/MP4/MOV/WMV). Now download and install it and follow the steps to start the conversion of 3D MTS to 3D AVI. (Here provides the Mac workflow, if you are a Windows user, the process is as the same)

Step 1: Import the 3D MTS file.

Run Pavtube 3D AVCHD Converter for Mac as the best Mac 3D MTS to 3d AVI Converter. Click "Add Video" icon to load 3d .mts video clips.


Step 2. Choose 3D AVI as the output format

Choose " AVI Side-by-Side 3D Video" or "AVI Anaglyph 3D Video" or "AVI Top-Bottom 3D Video(*.avi)" as target format from "3D Video" option.


Step 3: Settings (Optional)
  
You can click "Settings" button and enter "Profile Settings" panel to adjust video and audio settings if necessary. Users are free to reset codec, bit rate, frame rate, sample rate, and audio channels.

Step 4.  Click “Convert” button to start transcoding 3D MTS files to 3D AVI fomat.

The Mac 3D MTS to 3D AVI Converter can help you convert recorded 3D mts video files with high video quality, video and audio synchronization are perfectly guaranteed. Just have a try now!

Read more:

View Blu-ray movies (ISO image files) on projector
Rip 2D/3D Blu-ray with 3D effect on Windows 8.1/8
Rip 3D Blu-ray disc to 3D SBS MP4 format