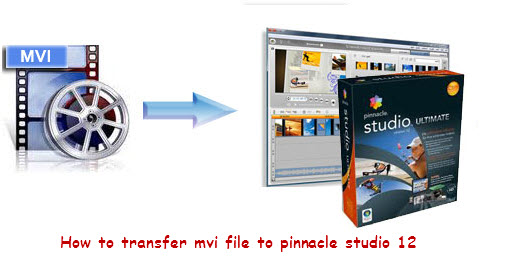
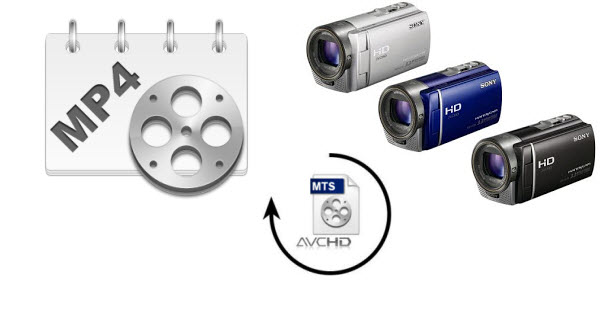
Just get a video file with MVI format like MVI_xxx.avi, MVI_xxx.mov or xxx.mvi?The article will show you the easy way to transfer mvi file to edit in Pinnacle Studio 12.
What's MVI?
MVI stands for Musical Video Interactive, also a
DVD-based means of packing audio, video and interactive visual content onto one
disk, and the audio content is provided in multiple formats, including a
high-definition version and and MP3 version for copying to portable audio
players. The video content is compatible with DVD video, and can also optionally
include high-definition video.
How to transfer mvi file to Pinnacle
Studio 12
Some digital video cameras like Canon Powershot will save the movie in MVI
format; however, you will some codec problem for editing MVI file in Pinnacle
Studio as the version of Pinnacle Studio 12 can not support this MVI
format. And this is the reason why you need to convert MVI to Pinnacle Studio 12
supported format.
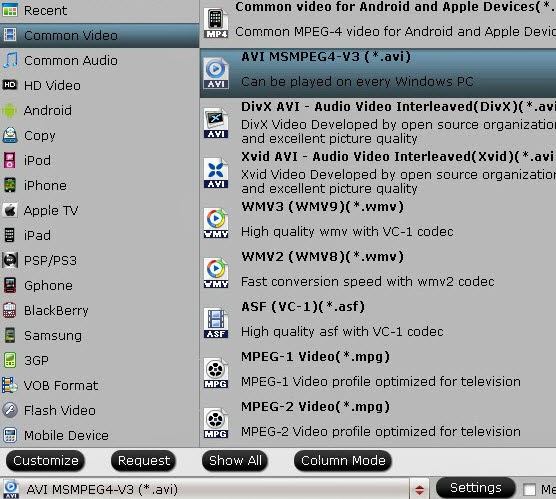
According to the Pinnacle Studio website, Pinnacle Studio 12 can read AVI
format best. So to get full use of this MVI file on Windows applications, you can get help with this
professional
MVI Converter from
Pavtube, which can convert MVI to
Pinnacle Studio readable AVI with perfect quality and fast conversion speed.
What's more, it is the ideal conversion tool that offers several editing
functions like cropping video dimension, trimming file length, adjust playing
effects, etc. If you also wanna make your MVI footages editable in Winsdows
Movie Maker, Sony Vegas Pro, Avid Media Composer, Adobe Premiere etc. I also
strongly suggest you to try this , you'll make it!
Part I: Transcode MVI to Pinnacle Studio readable AVI format
for editing
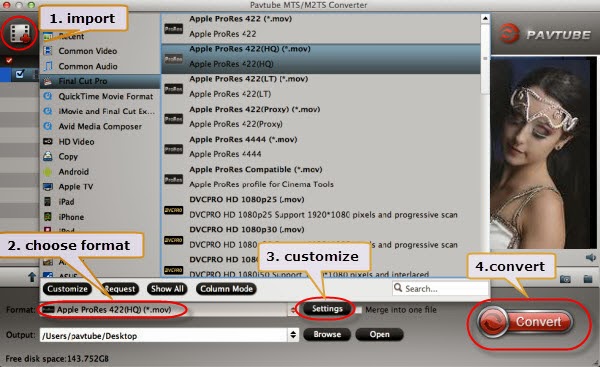
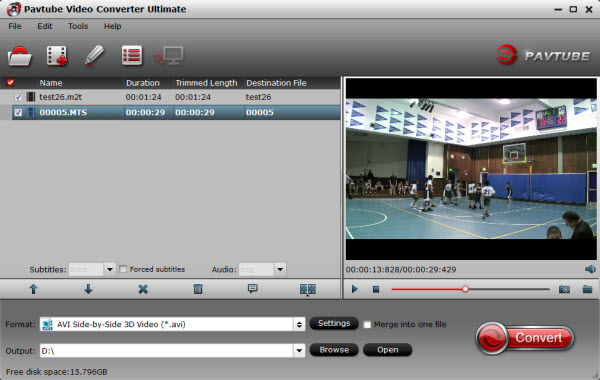
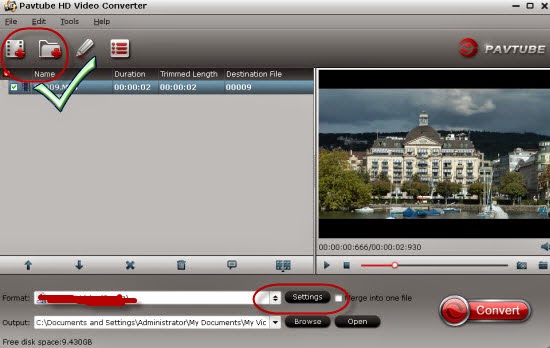
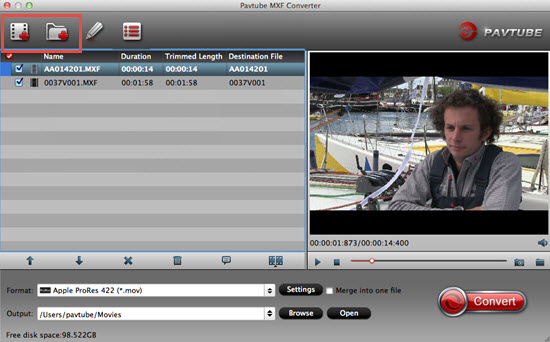
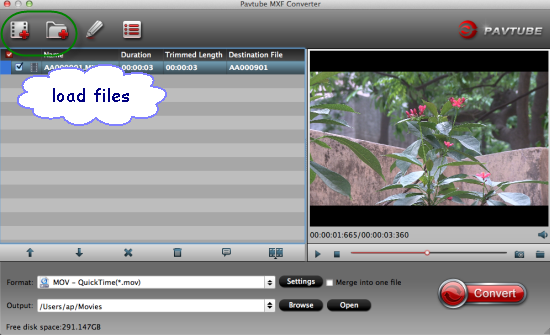
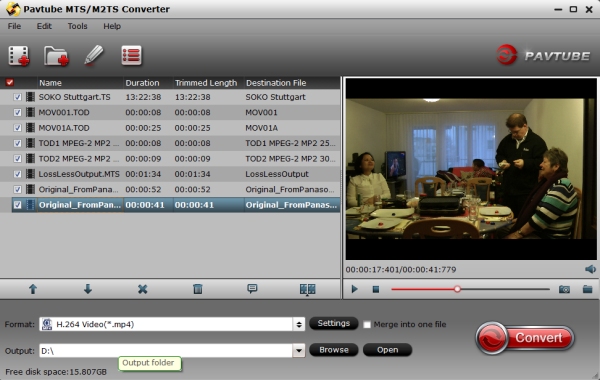
1. Load MVI files.
Run Pavtube Video Converter as the best
Mac MVI
to AVI Converter. Click "Add Video" or "Add from folder" icon to load MVI
media files.
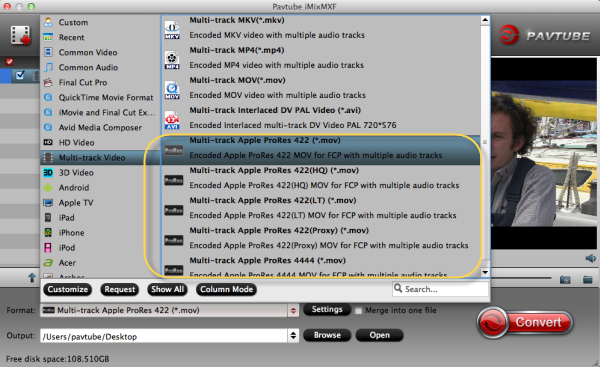
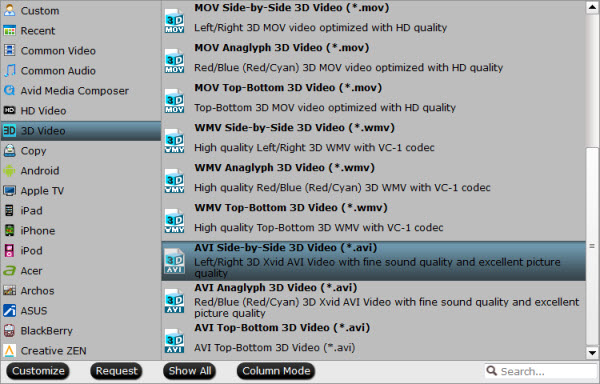
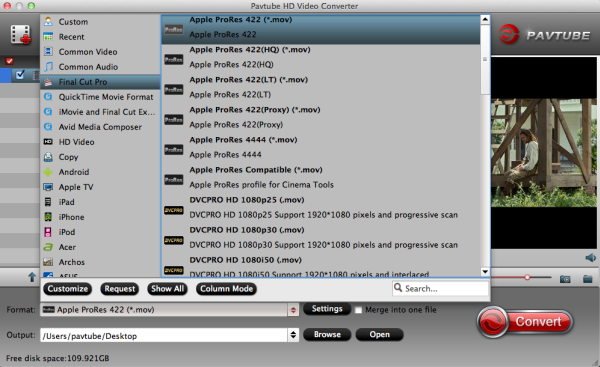
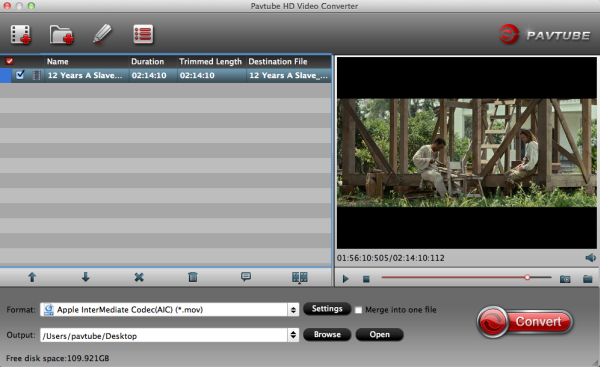
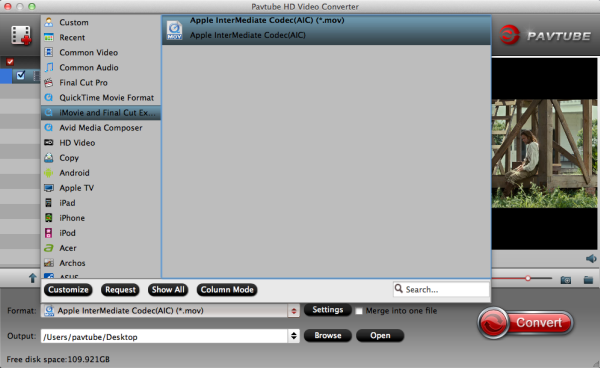
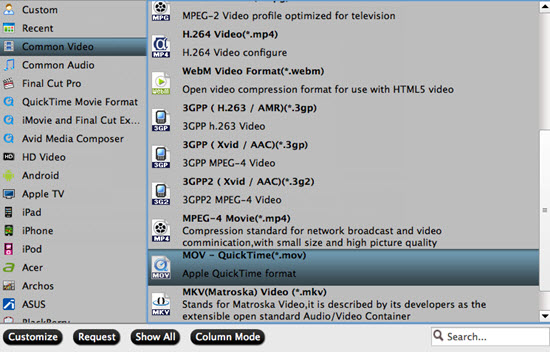
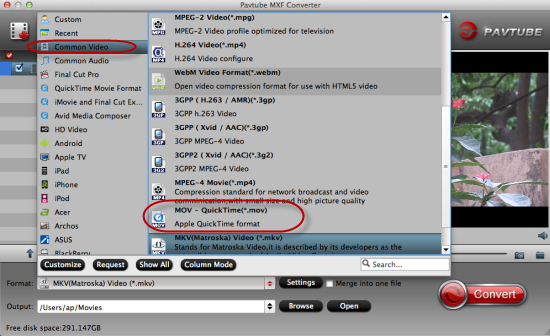
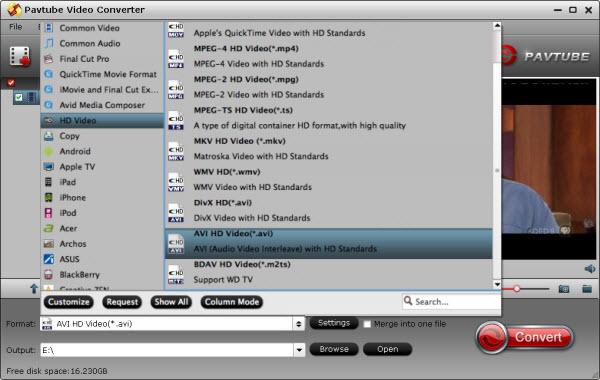
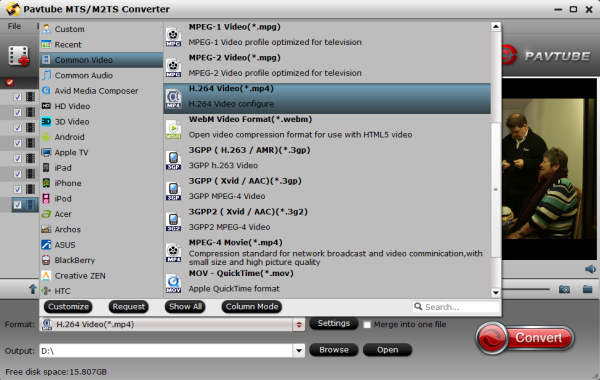
2. Select output format for video editing
software.
Click "Format" menu and choose "AVI HD Video (*.avi)" as target format from "HD
Video" option for editing natively in Pinnacle Studio 12.
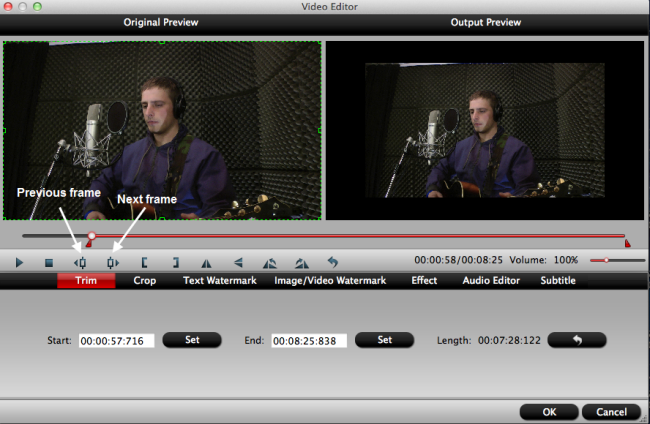
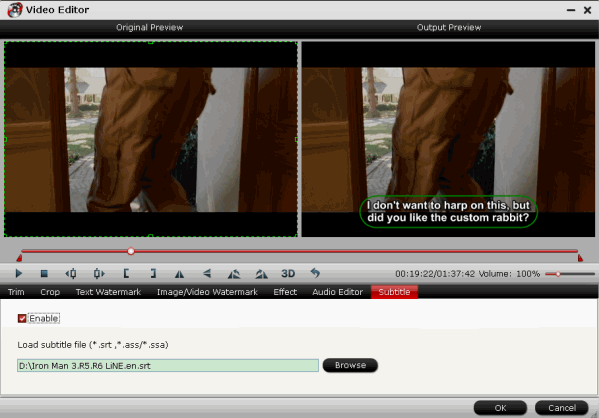
3.
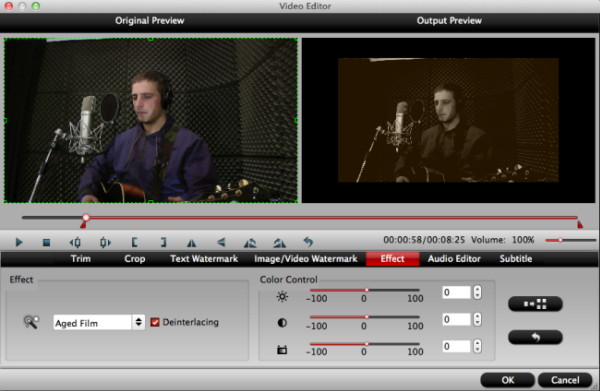
Edit loaded MVI files.
Click "Edit" button and you are allowed to trim,
crop, add text/image/video watermark or some effect to your output video for
making it perfect. Here the function of adding subtitles to output files will
contribute to make your own videos. You can use free software
Subtitle Edit to edit
your subtitle content then add it to output videos.
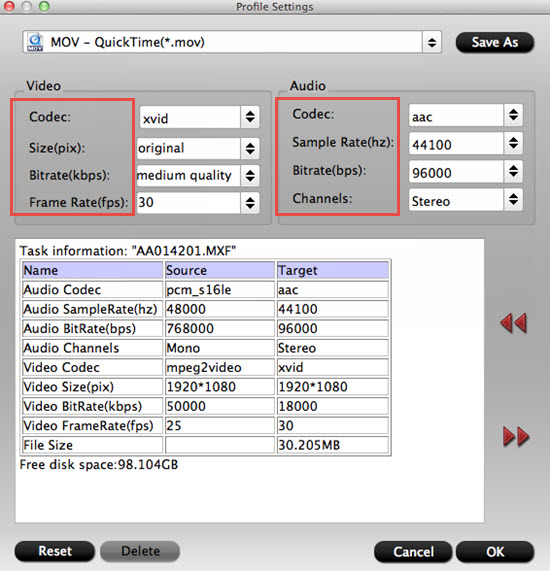
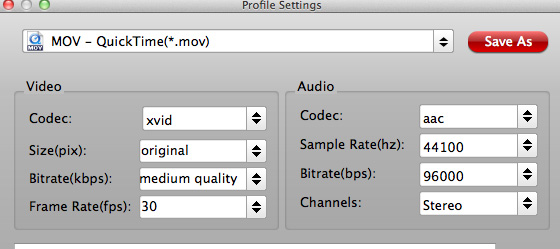
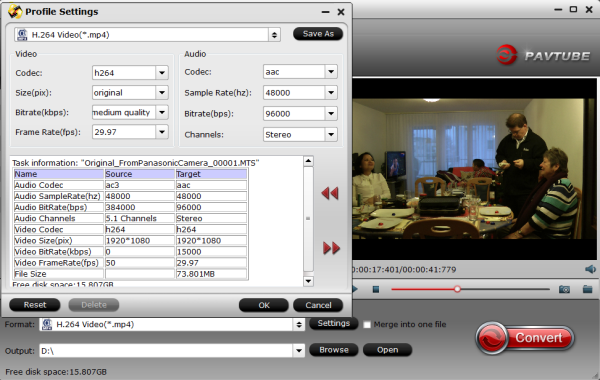
 Tips:
Tips: Click
"Settings" on the interface and you can adjust the parameters including size,
bitrate, frame rate, etc. to get a high quality of output files. And keep the
settings the same as original video recordings will provide you the least loss
of video quality.
4. Start conversion.
Click the "Convert"
button to start conversion. When it completed, click the "Open" button to get
the generated videos for Pinnacle Studio 12.
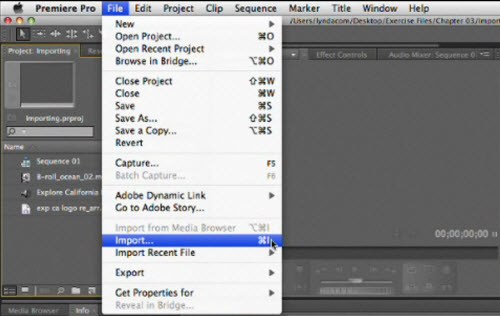
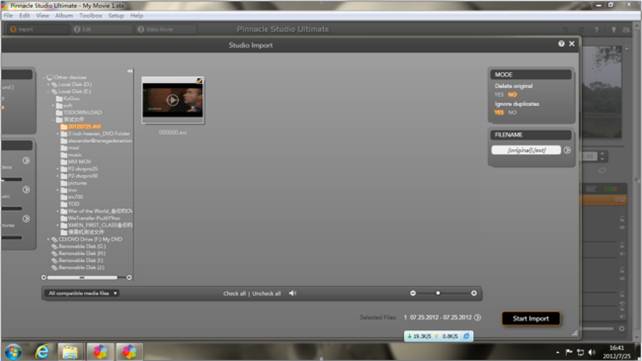
Part II: Import
converted HD AVI for editing in Pinnacle Studio 12
Launch
Pinnacle Studio 12 and
follow "Import"> "IMPORT FROM"> "Other devices"> "the folder stored the
converted AVI files"> "Start Import”
,import or transfer your hd .avi files to edit in Pinnacle Studio 12.
MOV Related Guide: