Thursday, May 28, 2015

Work Alpha 77 Mark II AVCHD MTS with FCP X

Summary: “Has anyone worked with AVCHD MTS files from the Sony Alpha 77 Mark II camera? Looking for some tips regarding post workflow and getting the recorded AVCHD to FCP X for further editing. I have 1080p AVCHD of the footage which doesn’t always get along with FCP X. Any and all advice is welcome and appreciated.”


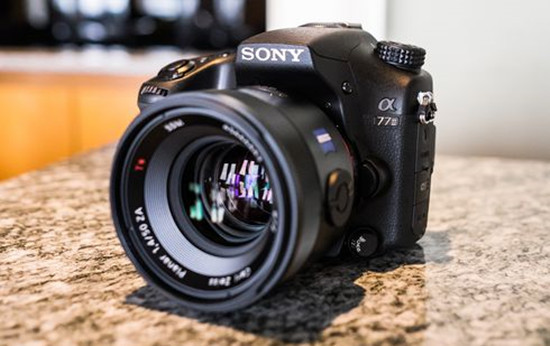
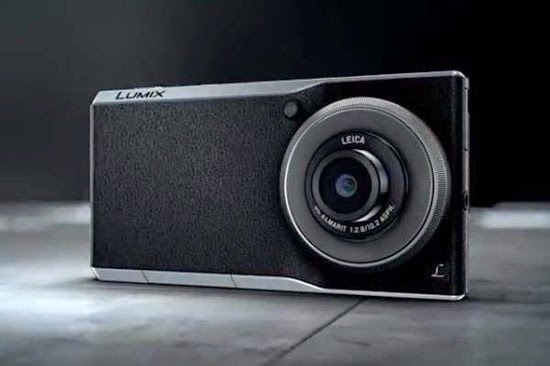
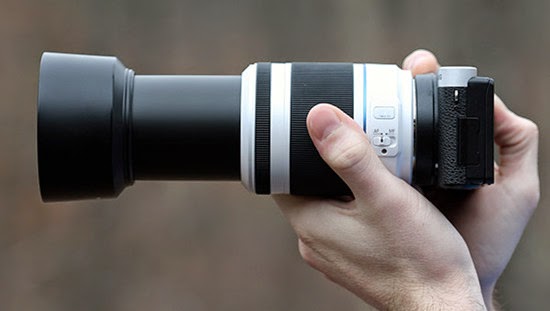
The Sony Alpha 77 Mark II is an extraordinary high spec enthusiast / semi-pro digital SLR camera. Designed to ensure you never miss the moment in also has 12fps continuous shooting for amazing action sequences, and 79 AF points for a very sophisticated and accurate focus. The BIONZ X image processor makes sure even with all this information the camera never gets flustered.

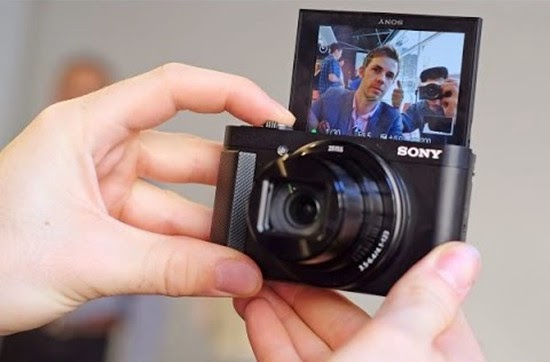
Sony Alpha 77 Mark II captures spectacular HD movies in your choice of super-smooth 60p, standard 60i or cinematic 24p, all at Full HD 1920*1080 resolution. AVCHD codec delivers stunning picture quality. MP4 codec offers smaller files for easier upload to the web. But the HD experience also brings a problem to the users who want to edit Sony A77 Mark II AVCHD MTS footages in FCP X as we mentioned at the very beginning.

Here recommended the best Sony A77 Mark II 1080/60p AVCHD MTS to FCP X Converter- Pavtube MTS/M2TS Converter for Mac. It can not only do the conversion from Sony A77 Mark II 1080/60p AVCHD MTS to Apple ProRes, native supported by FCP X, but also is equipped with some simple editing features, such as merging several Sony Alpha 77 Mark II videos into one file, deinterlacing the original footages, cropping video size, trimming video clips, adding special effects and text/image/video watermarks to output videos, thus it will be on the top of your list. If you have the same problem about editing Sony A77 Mark II AVCHD MTS in FCP X, check out the brief guide below.


How to edit Alpha 77 Mark II AVCHD MTS in FCP X?

Step 1: Connect your Sony Alpha 77 Mark II camcorder to Mac via USB cable and find the AVCHD MTS files from the camera folder. Then copy and transfer the AVCHD MTS files from Alpha 77 Mark II to the Apple hard drive disk.

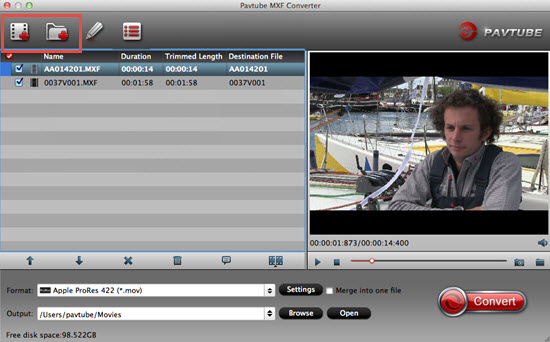
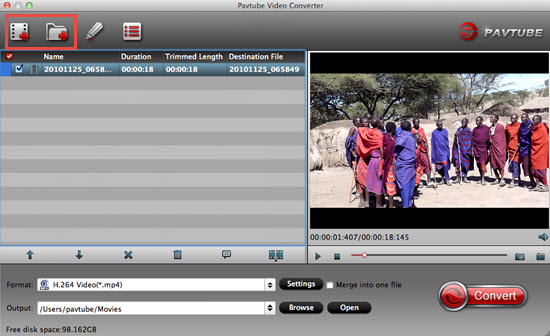
Step 2: Import Alpha 77 Mark II AVCHD MTS files to Mac MTS Converter. Run it as the best Mac MTS Converter, and click the “Add video” button to load AVCHD MTS files. You may also directly drag and drop AVCHD MTS videos to application UI for importing files.


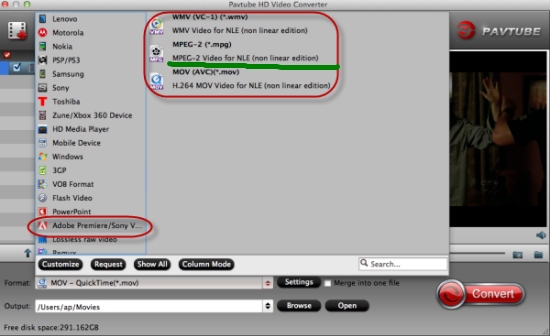
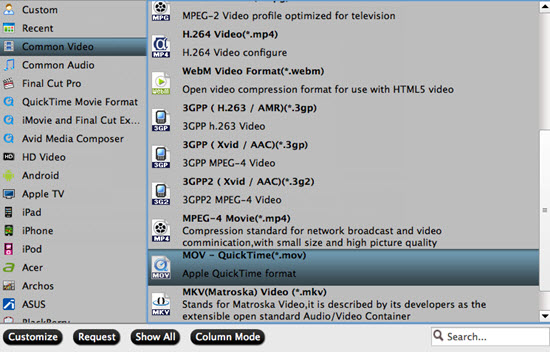
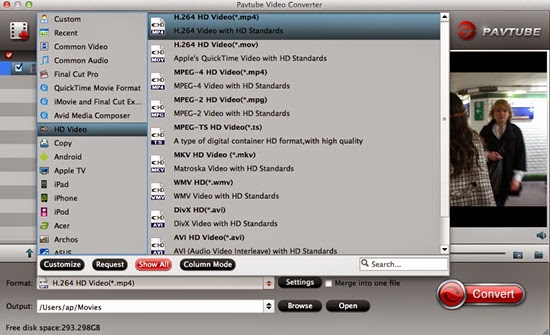
Step 3: Click the “Format” option and navigate the mouse cursor to “Final Cut Pro>>Apple ProRes 422 (*.mov)” as output format.


Step 4: When everything is ready, click “Convert” to start converting Alpha 77 Mark II AVCHD MTS to ProRes. This Mac MTS/M2TS Converter supports batch conversion so you may load multiple files and convert them at one time.

Conclusion: Now, you can edit Alpha 77 Mark II AVCHD MTS files in FCP X freely. Good news! During May 29th to June 1st, you can get our part products 40% off. Why not take a close look at our event and have a try? Happy weekend!

Further Reading:

Tuesday, May 26, 2015

Encode/Decode PXW-X70 XAVC-L MXF to Avid MC 8 on Mac

Summary: Meet troubles when importing XAVC-L MXF to Avid MC 8 on Mac? This article I’ll concentrate on how to encode/decode X70 XAVC-L MXF to Avid MC. If you are planning to add some XAVC-L MXF clips to Avid MC 8 for further editing on Mac, just read on.


Whatever for Mac users or Windows users, some popular editing software may be taken as good assistants if you are a professional video editor. As Windows users have Windows Movie Maker, Mac users always take the Final Cut Pro X/7/6 as their favorite. For Avid Media Composer, it’s suitable for both Windows users and Mac users. With hundreds of features worthy of listing, some problems or unwanted gaps may appear when editing. For example, Sony PXW-X70 XAVC-L MXF files to Avid MC 8 importing issues.

To be frank, recently on some recording forums there are a few of Sony PXW-X70 users complained that Avid Media Composer can’t recognize X70 recorded XAVC-L MXF files: “Just got the Sony PXW-X70 and I can’t seem to open its XAVC-L MXF or even successfully transcode the video files into something that can be read by Avid MC. I downloaded Brorsoft Video Converter for Mac and the Acrok Video Converters and neither of them works. Very frustrated here, any advice?” “I have purchased Sony PXW-X70 camcorder last week. I have recorded several 1080p videos with Sony PXW-X70 and the recordings are in two video formats. One is XAVC-L and another is AVCHD, when I try to import the XAVC-L MXF files to Avid MC 8, it says the video formats are not supported to import.”
Tips: Avid Media Composer Supported Video Formats

Many users of Sony PXW-X70 camera may all face these problems once or twice, which is the video shot under the XAVC-L code can’t be natively imported to Avid MC 8. Or the raw video X70 XAVC-L MXF can’t be well used on Mac. You got the most fascinating high definition videos recorded by your camera but you can’t do anything on them.

Since DNxHD is friendly with Avid MC, after searching high and low, I got a really easy way to resolve the issue. In fact, this XAVC-L from X70 is wrapped in an MXF file that won’t be imported to Avid MC. To edit XAVC-L MXF in Avid MC 8, a suggestion is to use Pavtube MXF Converter for Mac (Review) to convert XAVC-L MXF to DNxHD MOV- ensuring maximum editing quality and efficiency when working with Avid MC 8. It's the best Mac MXF Converter on the market. In our MXF Converter for Mac review process, the Pavtube Mac MXF Converter can convert all the MXF video files we have, including Panasonic P2 MXF, Sony XDCAM MXF, Canon XF MXF, JVC MXF, BlackMagic MXF, 4K XAVC MXF, etc. are all well supported. Latest popular MXF camcorders are also supported, such as Canon XC10, Sony PXW-X70, Sony PXW-Z100, Sony PXW-X180, Sony PMW-F55, Canon XF200, XF205, etc.


Some specific steps of converting XAVC-L MXF to compatible ones of Avid MC 8 on Mac are allowed here:

Step 1: When you download and install the MXF Mac Converter, open the main interface and choose the “Add video” to load you files in. For the multiple video clips we can hit the “Add from folder” button.


Step 2: Click the “Format” drop-down list, and choose “Avid Media Composer>>Avid DNxHD (*.mov)” as output format.


Step 3: Most of you guys must have the desire of a further editing with your output videos, right? On the main interface, “Edit” is waiting for you. “Trim” to decide where to start and where to end, “Crop” to cut some unwanted clips, “Subtitles” to add some explanations to your audience.

Step 4: Click the “Convert” button under the preview window and the MXF Mac Converter starts converting.

Conclusion: After converting, you can click the “Open” button to find your converted files. Now, you can edit X70 XAVC-L MXF in Avid MC 8 on Mac without any worries! What are you waiting for? Just go ahead and have a try! Enjoy it!

Further Reading:

Monday, May 25, 2015

Edit Sony DSC-WX500 XAVC S in DaVinci Resolve Lite

Summary: Have no idea of importing WX500 XAVC S to DaVinci Resolve Lite for advanced editing? This post intends to elaborate how to convert XAVC S to Avid DNxHD for working in DaVinci Resolve Lite with optimal performance.


Q1: Why our users love Sony WX500 camera so much?
Like the HX90, the WX500 is designed to meet the requirements of novice photographers and offers a collection of automatic shooting options, but there are also exposure modes to suit more experienced photographers: shutter priority, aperture priority and manual. Videos, however, can be shot in Full-HD at 8 bit and 4:2:0 at up to 50Mbps in AVCHD, MP4 or the new XAVC S format at 50/60p.

Q2: Causes of XAVC S files cannot be suitable for DaVinci Resolve Lite?
Granted, DaVinci Resolve Lite can handle (usually) 4K XAVC S files without much problem, but it is extremely hardware intensive. Thankfully you probably don’t have to buy a new computer, but you do need to convert XAVC S to DaVinci Resolve Lite using Avid DNxHD as primary delivery format. As same as the issues appeared in other NLEs like FCP, or iMovie/FCE, so let’s find the solutions below.

Q3: Any good professional converting tools can offered to us?
For me, of course, I don’t like convert my source videos, because the quality loss (even you can’t tell from your eyes), but if you have been driven crazy by this problem, then you may like to have a try. What I’ve tried is to convert XAVC S to Avid DNxHD for DaVinci Resolve Lite with the help of Pavtube HD Video Converter for Mac. For Windows users, Pavtube HD Video Converter is the alternative choice. Since Mac version has upgraded to 4.8.5.1, it can also encode/decode H.265/HEVC videos so nicely.


Step-by-step on how to import Sony WX500 XAVC S to DaVinci Resolve Lite for editing:

Step 1: Download, install and launch the smart Mac HD Video Converter. Click “Add video” or “Add from folder” button to load XAVC S clips from Sony WX500 to the program. You can also directly drag the files to the main interface.


Step 2: Here, you need to choose what you want the output to be. Click “Format” drop-down list, and then select “Avid Media Composer>>Avid DNxHD (*.mov)” as output format for editing in DaVinci Resolve Lite.


Step 3: It’s optional to edit video files before converting. If you want to do some edit work, just hit the clip first, and then click “Edit selected task” button. As it’s shown to us, the edit function is sufficient for you to make your videos wonderful.

Step 4: Now everything has been settled, and don’t forget to set the file location. Click “Convert” button to start the conversion work and click “Open” when you finish your conversion to check your converted files.

Conclusion: Video and audio qualities are both guaranteed by this WX500 XAVC S converter. When the conversion is finished, you can import converted videos to DaVinci Resolve Lite and edit smoothly.

Further Reading:

Thursday, May 21, 2015

Convert Panasonic CM1 4K MP4 to MPEG-2 for Premiere Pro CC on Mac

Summary: Having troubles while editing CM1 4K MP4 in Premiere Pro CC? Don’t know how to convert 4K MP4 to Premiere Pro CC? Luckily, you come to the right place! Find the best 4K MP4 to Premiere workaround below.


If you are considering a new 4K camcorder, Panasonic DMC-CM1 should be on your list. It features a large 1-inch MOS sensor and is capable of 4K video recording at 15fps, as well as Full HD recording at 30fps. Well, no matter you’re using or going to have Panasonic CM1, you may wanna know the compatibility of CM1 4K MP4 footage and Premiere Pro CC.

Premiere Pro CC will work with some MP4 files, but not all. The problem is that they are not the same, which may contain different codecs and various video frame rates. The 4K MP4 footage from Panasonic CM1 seems not to be an ideal editing format for Premiere Pro CC. What’s more, editing 4K in Premiere Pro CC is extremely hardware intensive. It’s not so easy to work CM1 4K MP4 with Premiere Pro CC.

The quick workaround is to use the easy-to-use yet professional app called Pavtube HD Video Converter for Mac, which can be used as a Mac 4K MP4 to MPEG-2 Converter under OS X Yosemite, Mavericks, Mountain Lion. It’s free, clean and safe to install and use. With it, you can effortlessly transcode CM1 4K MP4 to MPEG-2 for Premiere Pro CC, and it works well and converts flawlessly. Meanwhile, this HD Video Converter for Mac can create files compatible with various NLEs like Avid, iMovie/FCE and etc.


A detailed guide about importing Panasonic DMC-CM1 4K MP4 to MPEG-2 for Premiere Pro CC editing:

Step 1: Download Mac HD Video Converter, and follow the prompts to install the program. When the installation is complete, the best DMC-CM1 MP4 Converter will launch automatically.

Step 2: Click “Add video” button to load Panasonic DMC-CM1 4K MP4 recordings or directly drag the files into file list. By default, the files are selected. You can delete files which you don’t want to import to.


Step 3: Click “Format” bar to determine output format. For best image quality, click the format bar and choose “Adobe Premiere/Sony Vegas>>MPEG-2 (*.mpg)” as output format.


Step 4: Click “Settings” button to customize the output video and audio settings by yourself. But if you are not good at it, you’d better use the default parameters, they will ensure you a good balance between file size and image quality basically. You can change the resolution, bit rate, frame rate as you need.

Step 5: You can preview to check the final result. Once you are satisfied with it, click the “Convert” button to start converting Panasonic CM1 4K MP4 to MPEG-2 for editing in Premiere Pro CC flawlessly. It will take you a little while.

Conclusion: Once the conversion process is complete, you can click “Open Folder” button to get the generated files for editing CM1 4K MP4 in Premiere Pro CC with optimum performance. During May 22nd to May 25th, we have special offer for you. You can get 40% off at appointed goods. Why not take a close look and have a try?

Further Reading:

Tuesday, May 19, 2015

Ingest NX500 4K H.265/HEVC to QuickTime for Playing

Summary: If you are looking for ways about how to watch NX500 4K HEVC on QuickTime, you may wish to read this post. It introduces an easy-to-use and affordable application to accomplish ingesting 4K H.265 to QuickTime with excellent quality.


What kinds of camcorders can now shot the 4K and UHD recordings on the market? Samsung NX500 4K camcorder can be the right answer! While for playing NX500 4K H.265 on QuickTime with best supported formats, any troubles there you have ever met?

How do I play NX500 4K H.265 on QuickTime?
“Hi, there, when will Apple add support for 4K H.265/HEVC in QuickTime player on Mac? I got a bundle of NX500 4K H.265 files and would like to play them back on QuickTime. Unfortunately, QuickTime seems not to work with H.265 codec. Any suggestions to clear up my issue? I would really appreciate any help. Thanks.”

To be honest, the built-in H.265/HEVC codec, the most advanced compression technology available, brings efficiency to the storage of video clips by compressing high quality video to half the size and the bit rate of H.264 footage without any compromise on quality. While as the latest codec, H.265 is not supported by almost every editing software, media player and etc. To make NX500 4K H.265/HEVC widely supported, we here introduce you a strong functional H.265/HEVC decoder for all of you.

Pavtube Video Converter for Mac (Windows version), this is the best solution we would like to highly recommend. With the recent upgraded version 4.8.5.1, it can encode/decode H.265/HEVC videos so nicely. What’s more? Not only can you convert NX500 4K H.265/HEVC to MP4, AVI, WMV, MOV, FLV for easily playing, but also you can convert H.265/HEVC files to the editing tools with professional codec, like MPEG-2 for Adobe Premiere Pro/Sony Vegas, DNxHD for Avid Media Composer, AIC MOV for iMovie, Apple ProRes for FCP X/7/6 and etc. Besides, the built-in video editor allows you to modify your videos by trimming, cropping, adjusting video effects and more. By the way, this H.265 converting application also enables you to convert videos from almost any SD/HD input (M2TS, MTS, MKV, H.264, MP4, AVI, WMV, MOV, MXF, MPEG, etc.) to H.265/HEVC codec up to 4K.


How to ingest NX500 4K H.265/HEVC to QuickTime for playing?

Step 1: Download and install the program. Click “Add video” button on the top side to open the file browser window and pick your Samsung NX500 4K H.265/HEVC video. You can also drag and drop files to the main interface of this best H.265/HEVC converter.
Tips: You can add multiple files to the queue and convert them all at one time.


Step 2: Click on “Format” bar and select output format from the drop-down list. To play NX500 4K H.265/HEVC on QuickTime beautifully, you’d better choose “Common Video>>MOV-QuickTime (*.mov)” as best output format.


Step 3: Click “Settings” button to customize the output video and audio settings by yourself. But if you are not good at it, you’d better use the default parameters, they will ensure you a good balance between file size and image quality basically. You can change the resolution, bit rate, frame rate as you need.

Step 4: Click “Convert” button on the bottom of the screen to start NX500 4K H.265/HEVC video conversion process. The amount of time it takes will vary based on your system’s hardware and the quality settings you selected.

Conclusion: When the conversion is done, you can click “Open” button to get the generated video files. Now, you can play NX500 4K H.265/HEVC on QuickTime without any hassles.

Further Reading:

Sunday, May 17, 2015

Best HX90/HX90V XAVC S Video Converter for PC/Mac

Summary: Looking for ways to make Sony HX90/HX90V XAVC S files editable and playable on PC/Mac? In the post, you’ll find a top HX90/HX90V XAVC S video converter and import files to PC/Mac beautifully.


The Sony HX90/HX90V is, at the time of its release, the world’s smallest superzoom camera. The HX90/HX90V can record video at 1080/60p using the XAVC S codec, which allows for bit rates up to 50MBps. However, the problem that filmmaker considered is that how to make these outstanding XAVC S videos from Sony HX90/HX90V to NLEs for editing flawlessly or to media players for playing smoothly.

XAVC S format is efficient, but simply isn’t engineered to maintain quality during complex post production effects processing. Uncompressed HD format delivers superior image quality, but data rates and file sizes can stop a workflow dead in its tracks. On the contrary, best suitable format delivers both efficiency and quality without compromises. So, before editing or playing HX90/HX90V XAVC S files on PC/Mac, you’d better convert HX90/HX90V XAVC S files to the most accepted format on Windows/Mac first with a powerful third party program.

Here I highly recommended Pavtube Video Converter for Mac (Windows version), which is a professional XAVC S converter with simple and efficient Sony XAVC S conversion workflow. It’s a good camcorder assistant for Sony XAVC S camcorder users, support Avid/Blackmagic Design edited Sony XAVC S files; adopt advanced audio and video sync technology. The HX90/HX90V XAVC S converter for Mac (for Windows) is good at converting HX90/HX90V XAVC S files to compatible video codec for NLEs on PC/Mac, such as Apple ProRes, Avid DNxHD, Apple InterMediate Codec, DVCPRO, MOV, MKV, MP4, AVI, WMV, MPG, M4V, etc. for editing Sony XAVC/XAVC-S in Final Cut Pro, iMovie, FCE, Avid Media Composer, Adobe Premiere Pro, Sony Vegas Pro, Windows Movie Maker, Apple Aperture 3, Kdenlive, Keynote, Avid Xpress Pro, Adobe Creative Suite 6, Adobe After Effects, DaVinci Resolve, iPhoto as well as QuickTime MOV.

Pavtube XAVC S Video Converter for Mac (Windows version) also works well with the latest Apple iPhone/iPad/iPod and Apple TV; Android tablets; Windows 8/8.1 devices etc.; well support XBox 360/Xbox 720, PS3/PS4, etc. What’s more, the program supports adding .srt, .ass or .ssa subtitle into video file.

Mac download & buy:


Windows download & buy:


How to convert HX90/HX90V XAVC S files via Sony XAVC S Video Converter for Mac (for Windows)?

Step 1: Download and install the corresponding program. Click “Add video” button on the top side to open the file browser window and pick your Sony HX90/HX90V XAVC S files. You can also drag and drop files to the main interface of this best XAVC S video converter.
Tips: You can add multiple files to the queue and convert them all at one time.


Step 2: Here, you need to choose what you want the output to be. Click “Format” drop-down list, and then select output video format from the powerful XAVC S video converter.


Step 3: It’s optional to edit video files before converting. If you want to do some edit work, just hit the clip first, and then click “Edit selected task” button. As it’s shown to us, the edit function is sufficient for you to make your videos wonderful.

Step 4: Click “Settings” button to customize the output video and audio settings by yourself. But if you are not good at it, you’d better use the default parameters, they will ensure you a good balance between file size and image quality basically. You can change the resolution, bit rate, frame rate as you need.

Step 5: Click “Convert” button on the bottom of the screen to start HX90/HX90V XAVC S conversion process on PC/Mac. The amount of time it takes will vary based on your system’s hardware and the quality settings you selected.

Conclusion: When the conversion is done, you can click “Open” button to get the generated video files. Now, you can edit and play HX90/HX90V XAVC S files on PC/Mac freely. If you think this article is helpful, you can share it with your friend.

Further Reading:

Tuesday, May 12, 2015

XAVC S to MOV- Convert/Transcode Sony WX500 XAVC S to MOV on PC/Mac

Summary: Facing problems when converting WX500 XAVC S to MOV on PC/Mac? Find out an all-in-one XAVC S to MOV video converter in this post and it will help you transcode WX500 XAVC S to MOV nicely.


“Hey, there, I’m wondering if you can help. I have a bundle of XAVC S files taken with a Sony WX500 which I want to convert XAVC S to MOV. I have already  downloaded and installed the XAVC S Plug-in from the Sony Creative Software Download page. Unfortunately, it says I can’t use it because it is not supported on my computers architecture. Before I downloaded it I made sure it met my system requirements. What should I possibly do to solve my issue? I really appreciate any help. ”

Well, Sony WX500 is a brilliant camera! Many videographers love it as a great all around tool. But, is there a way that allows easy convert WX500 recorded XAVC S files to MOV format for using, without having to use or open Sony’s lousy Content Browser or other complex plug-ins? I’m seeking WX500 XAVC S to MOV best workflow.

XAVC S codec is a new one and it’s not widely supported. So the existing common used editing software, media players and etc. may not handle it very well, such as WX500 XAVC S to iMovie incompatible issues. To achieve your XAVC S to MOV conversion goal, the quickest and easiest way is to use the easy-to-use yet professional software Pavtube Video Converter for Mac. With the recent upgraded version 4.8.5.1, it can also encode/decode H.265/HEVC videos so nicely. If you are running on Windows, you can refer to the equivalent version Pavtube Video Converter.


Convert WX500 XAVC S to MOV on PC/Mac steps:

Step 1: Download and install the corresponding program from the website or click the free trial icon. Then, launch the best XAVC S to MOV video converter and load your original XAVC S files from Sony WX500 to the main interface with “Add video” or “Add from folder” button. Directly drag files in is also available.


Step 2: Choose the right output format. To convert WX500 XAVC S to MOV, we would like to introduce you to select the “HD Video>>H.264 HD Video (*.mov)” as your best choice. Surely you can choose other suitable ones as you like.


Step 3: The built-in editing function provided by the program is something worth trying. To trim the video, add artistic effects, adjust audio, add watermark, customize video parameters and so on. You can get the work done splendidly. Of course, if you don’t think it’s a necessary to do, you can skip it and move onto the next step directly.

Step 4: Click the “Convert” button on the main interface if you have done all the preparation work. You can get the generated files by clicking “Open” button.

Conclusion: OK, everything is ready, and you can instantly convert/transcode Sony WX500 XAVC S to MOV on PC/Mac. By the way, we have promoted money saving bundles & deals activity. It really saves a lot! Why not take a look and have a try about high quality products with attractive price?

Further Reading:

Monday, May 11, 2015

How to Play Sony AX30 4K XAVC S Files on QuickTime?

Summary: To most people, they may not familiar with the 4K XAVC S format, and don’t know how to play Sony AX30 4K XAVC S files on QuickTime smoothly. In this article you will know how to convert 4K XAVC S files to QuickTime best supported format for playing easily and freely.


Over 30% smaller and 20% lighter than the preceding FDR-AX100, the FDR-AX30 is the most mobile 4K camcorder on the market. Boasting extensive manual controls for customized video settings, it is also intuitive and simple to operate, so you will never have to fiddle with complicated controls.

“A problem arose when I tried to import 4K XAVC S files to QuickTime for playing. It won’t work at all. I’ve done some tests looking for a (free) conversion software for XAVC S to QuickTime MOV. I tried some native Mac apps like Compressor, MPEG Streamclip, and Toast. None worked. The sample I did my test was from the Sony AX30. Anyone have any other solutions?”

The reason QuickTime does not allow importation of Sony AX30 4K XAVC S files for playing is that QuickTime does not support 4K XAVC S files format. Consequently, for native importation of Sony AX30 4K XAVC S files to QuickTime, it is highly advisable to first convert 4K XAVC S files to Mac with appropriate codec QuickTime MOV for editing application with Pavtube Video Converter for Mac. With the recent upgraded version 4.8.5.1, it can encode/decode H.265/HEVC videos so nicely.


How to play Sony AX30 4K XAVC S files on QuickTime?

Step 1: Click “Add video” button on the top side to open the file browser window and pick your Sony AX30 4K XAVC S files. You can also drag and drop files to the main interface of this best program.
Tips: You can add multiple files to the queue and convert them all at one time.


Step 2: Here, you need to choose what you want the output to be. Click “Format” drop-down list, and then select “Common Video>>MOV-QuickTime (*.mov)” as output format for playing on QuickTime Player.


Step 3: It’s optional to edit video files before converting. If you want to do some edit work, just hit the clip first, and then click “Edit selected task” button. As it’s shown to us, the edit function is sufficient for you to make your videos wonderful.

Step 4: Click “Convert” button on the bottom of the screen to start 4K XAVC S to MOV conversion process in Mac Yosemite. The amount of time it takes will vary based on your system’s hardware and the quality settings you selected.

Conclusion: Do you follow the step and successfully put Sony AX30 4K XAVC S files on QuickTime Player? I believe it solves your headache problem. Enjoy shooting lived moments with your Sony AX30 and sharing splendid events with the person you love.

Further Reading:

Sunday, May 10, 2015

Bring OBS Recorded 1080/60p Videos to Premiere Pro CC on Mac


Summary: 
Have you ever recorded some 1080/60p videos with OBS (Open Broadcaster Software)? Generally OBS saves files as MP4 or FLV. The files can be uploaded straight to YouTube or other video hosting site just fine. However, when you bring OBS recorded 1080/60p videos to Premiere Pro CC for editing goal, you may come across problems.


As we all know, Open Broadcaster Software is a great platform to broadcast live streams, so a lot of people have an idea of recording some game or match footages to their Mac as FLV files. After that they can do some changes to make them perfect through some professional editing software, such as Adobe Premiere Pro CC. But it seems that Premiere Pro CC and FLV files are not friendly to each other, this situation generally brings us bad emotion, right?

However for some reasons when I try to import OBS recorded videos to Premiere Pro CC, the video comes up black and will not function with the program. Do a Google search for “OBS recorded videos to Premiere”, some guys have offered their solutions, for example some plugins. And in this page, I will quickly walk you through the guide to bring OBS recorded 1080/60p videos to Premiere Pro CC for smooth editing and share with my experience.

To bring OBS recorded 1080/60p videos to Premiere Pro CC on Mac, the quick workaround is to transcode OBS FLV files to Premiere Pro CC natively supported formats with Pavtube HD Video Converter for Mac, which is an all-in-one OBS file converter and is the first and best choice for you.


Step-by-step guide on bringing OBS recorded 1080/60p videos to Premiere Pro CC on Mac:

Step 1: Download, install and launch the smart Mac HD Video Converter. Click “Add video” or “Add from folder” button to load OBS recorded 1080/60p videos to the program. You can also directly drag the files to the main interface.


Step 2: Here, you need to choose what you want the output to be. Click “Format” drop-down list, and then select “Adobe Premiere/Sony Vegas>>MPEG-2 (*.mpg)” as best output format.


Step 3: Click “Settings” button to customize the output video and audio settings by yourself. But if you are not good at it, you’d better use the default parameters, they will ensure you a good balance between file size and image quality basically. You can change the resolution, bit rate, frame rate as you need.

Step 4: Now everything has been settled, and don’t forget to set the file location. Click “Convert” button to start the conversion work and click “Open” when you finish your conversion to check your converted files.

Conclusion: Now, you can bring OBS recorded 1080/60p videos to Premiere Pro CC freely on Mac. Why not enjoy editing OBS recorded videos in Premiere Pro CC on Mac right now? During May 7th to May 14th, like our Facebook page you can get Pavtube HD Video Converter (Mac version) 50% off.

Further Reading:

Thursday, May 7, 2015

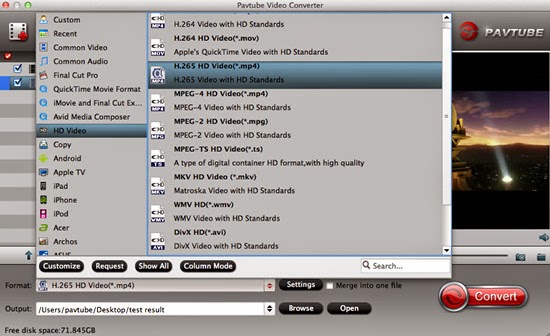
Encode H.264 MP4 to H.265/HEVC MP4 on Mac Yosemite/Mavericks


If you want to get started to convert H.264 MP4 to H.265 MP4 on Mac Yosemite/Mavericks but don't have any idea about where to begin, we are here to help you. Just read further to know what things you can do to successfully transcode H.264 MP4 to H.265 MP4 format.


H.264/MPEG-4 Part 10 or AVC (Advanced Video Coding) is a standard for video compression. The intent of the H.264/AVC project was to create a standard capable of providing good video quality at substantially lower bit rates than previous standards (e.g. half or less the bit rate of MPEG-2, H.263, or MPEG-4 Part 2), without increasing the complexity of design so much that it would be impractical or excessively expensive to implement.

High Efficiency Video Coding (HEVC) or also called H.265 is a new video codec that compresses video files to 50% with the most proficient encoding format today, MPEG-4, or also known as the H.264. That will be 1/4 the size of a file compressed with MPEG 2 codec which many of cable television companies are still using. More significantly, H.265 is being used to compress video files that have 4K resolution — and conceivably even 8K resolution files sooner or later — therefore it could be resourcefully delivered.

A lot of people want to encode H.264 MP4 to H.265 MP4 since it's the best format for video experience. In order to convert H.264 MP4 to H.265 MP4, you will need to have a reliable video converter to do the job. Overall, Pavtube Video Converter for Mac is considered to be the best choice for you. With the recent upgraded version 4.8.5.1, it can encode/decode H.265/HEVC videos so nicely. If you are running on Windows, you can refer to the equivalent version Pavtube Video Converter.


How to encode H.264 MP4 to H.265/HEVC MP4 on Mac Yosemite/Mavericks?

Step 1: Download, install and launch the smart Mac Video Converter. Click “Add video” or “Add from folder” button to load H.264 MP4 files to the program. You can also directly drag the files to the main interface.


Step 2: To encode H.264 MP4 to H.265/HEVC MP4 on Mac Yosemite/Mavericks, you’d better hit the “Format” button to choose “HD Video>>H.265 HD Video (*.mp4)” as the best output format.


Step 3: Click “Settings” button to customize the output video and audio settings by yourself. But if you are not good at it, you’d better use the default parameters, they will ensure you a good balance between file size and image quality basically. You can change the resolution, bit rate, frame rate as you need.

Step 4: Now everything has been settled, and don’t forget to set the file location. Click “Convert” button to start the conversion work and click “Open” when you finish your conversion to check your converted files.

Conclusion: Now, you can enjoy encoding and decoding H.264 MP4 to H.265/HEVC MP4 on Mac Yosemite/Mavericks flawlessly. Good news for all! Pavtube Big Deal for Mom (Mother’s Day Only): 40% off discount we can enjoy if we get into the official promotion page and give the comments below: “What do you want say to your mom”. All of us can get the big coupon with the best Pavtube HD Video Converter for Windows/Mac, which is a professional converter to transcode all video formats nicely for any NLEs or media devices with a high quality preserved.

Further Reading: