Showing posts with label Panasonic. Show all posts

Thursday, January 9, 2014

How to import AVCHD video from Panasonic HDC-MDH1 to iMovie 11 on Mavericks 10.9

Follow this article to learn how to edit Panasonic HDC-MDH1 AVCHD in iMovie 11 on Mac. The latest Mavericks is also supported!

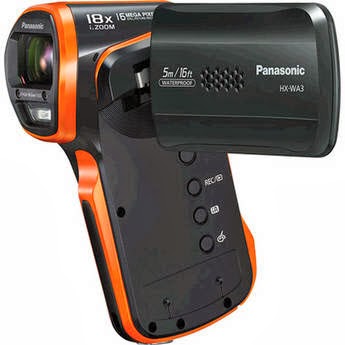
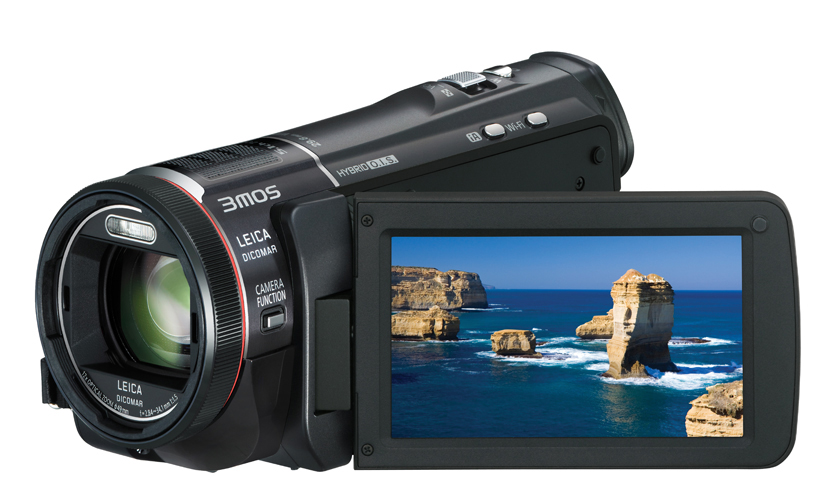
Panasonic's HDC-MDH1 AVCHD Camcorder (PAL) is a shoulder-mount HD camera with a pro-style form factor that gives you added comfort and stability during long handheld shoots. Capable of capturing full HD 1920 x 1080 or downconverted standard-definition 576i video, the camera provides the versatility and convenience necessary for getting your shots the way you want them.


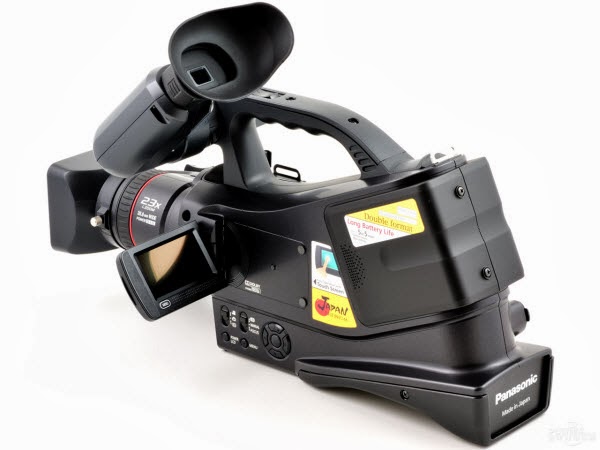
I bought this camera for using it with 2 other professional cameras to edit a life recording of a concert, musical or theatre performance. Regarding the camcorder Panasonic HDC-MDH1 AVCHD Camcorder PAL, I wonder if it allows me import mts video from my my camcorder easily into iMovie 11 on Mavericks 10.9 to do editing for post-productionnly. Can anyone to answer this please, because I plan to buy it. Thanks for your answer!
Best Answer:
AVCHD format is not well supported by iMovie 11 on Mac OS X 10.9. As we all know, iMovie favorable video format is Apple Intermediate Code(AIC). If you want to edit Panasonic HDC-MDH1 AVCHD in iMovie 11, you need to convert MTS to iMovie best supported AIC .mov format.

In that case, a third party AVCHD to AIC Converter is needed. And Pavtube MTS to AIC Converter for Mac comes to help you out. You can follow the steps below and learn how to transcode Panasonic HDC-MDH1 MTS videos to AIC codec for iMovie 11 on Mac OS X 10.9 for editing smoothly.

How to handle your Panasonic HDC-MDH1 AVCHD in iMovie 11 effortlessly

Free download a free version before purchase and let’e move on!

1. Keep your HDC-MDH1 on and connect it to Mac, your camcorder will show as a hard drive on desktop which means your mac recognized it now.

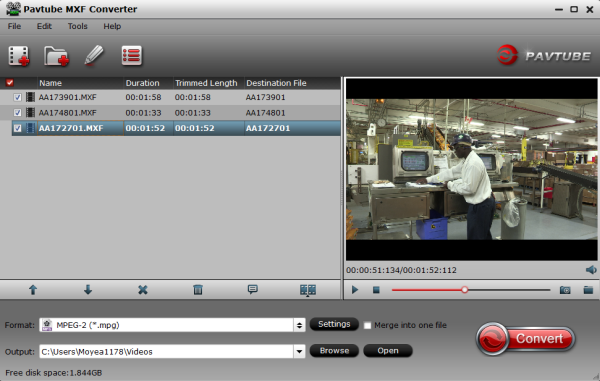
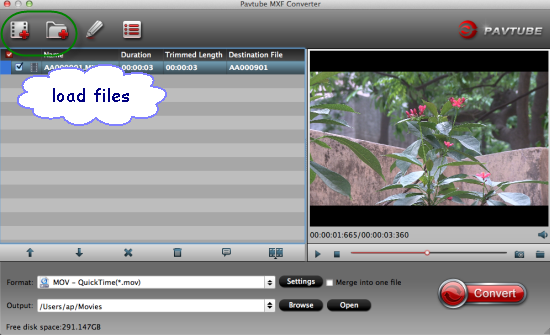
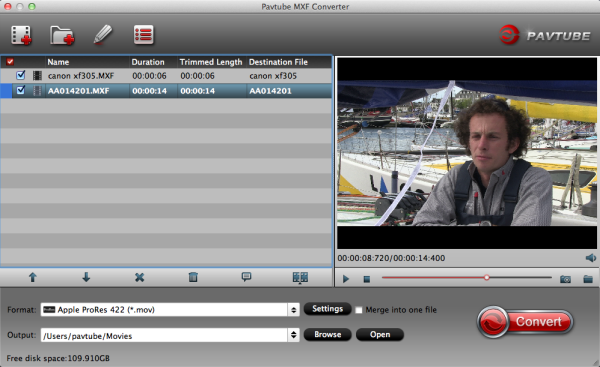
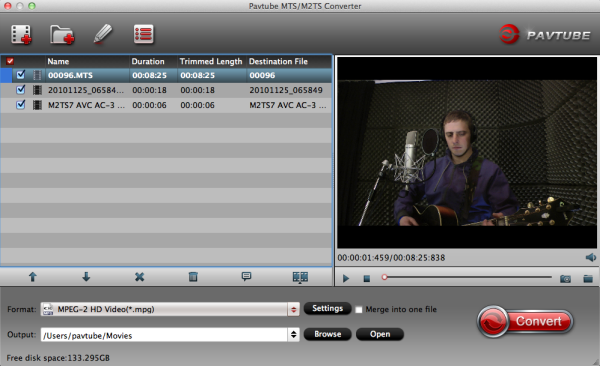
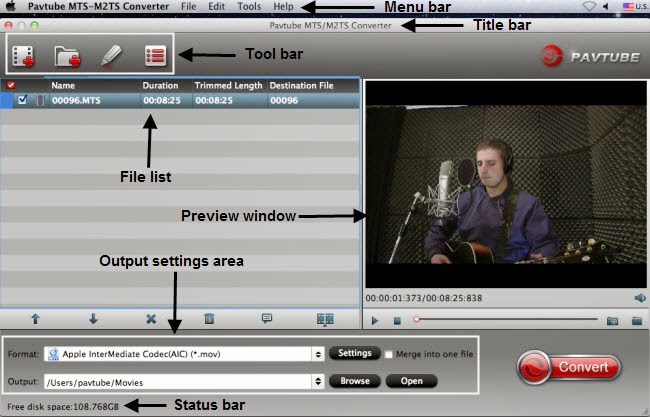
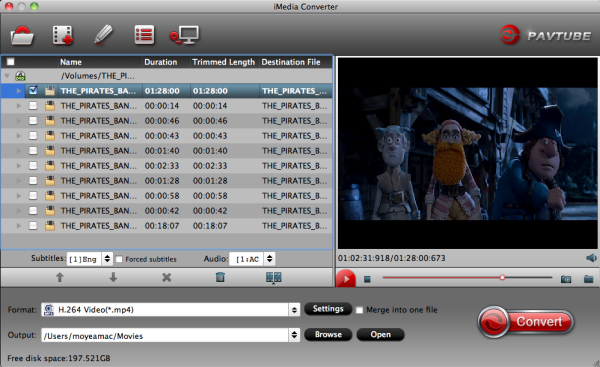
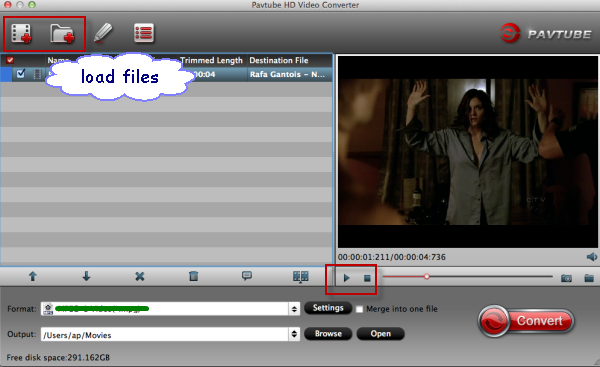
Launch this MTS to iMovie Converter.

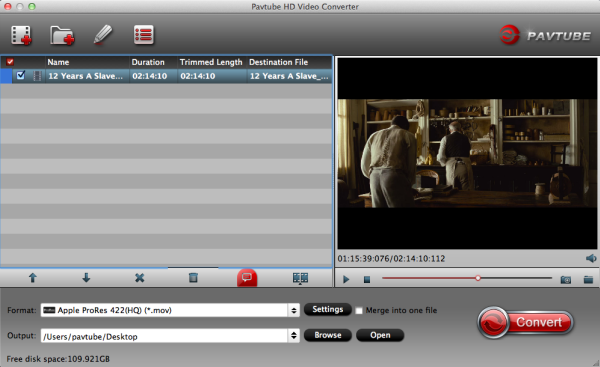
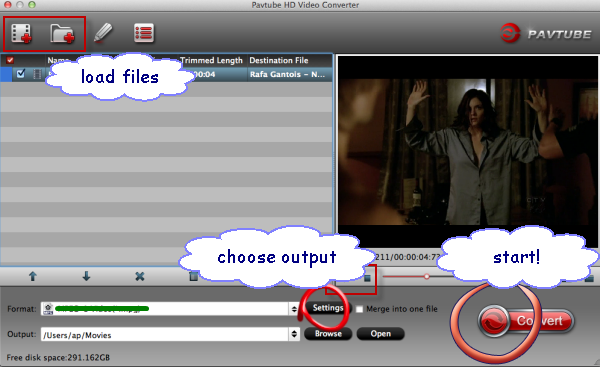
Click top left icon “Add videos” to load individual mts files, or try the second one “Add from folder” to load the entire folder.


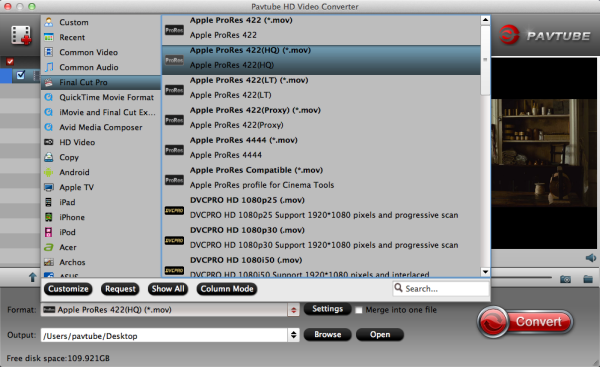
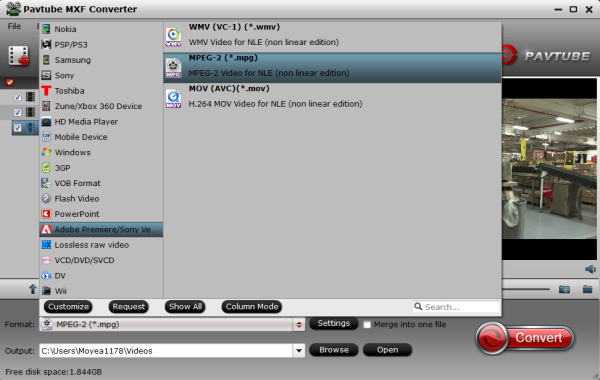
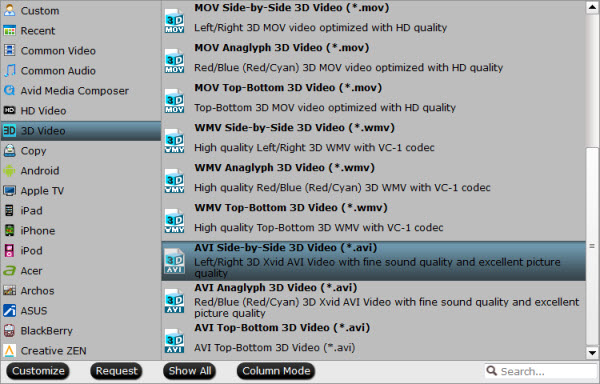
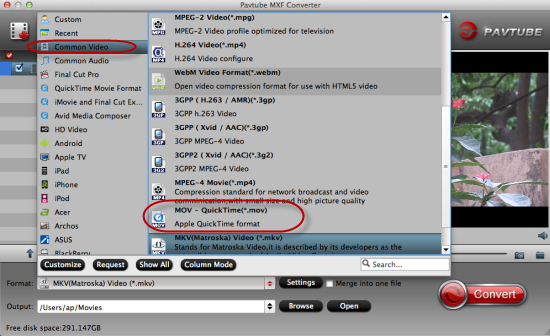
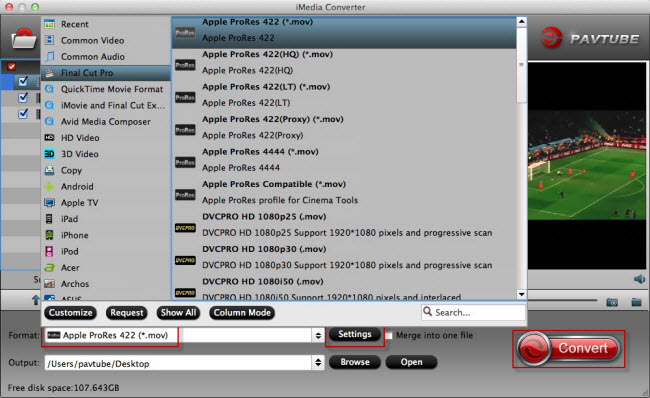
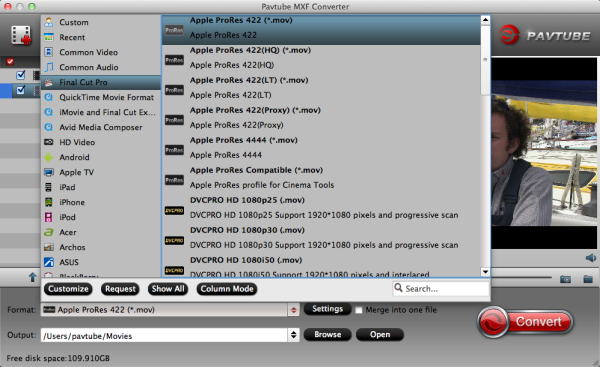
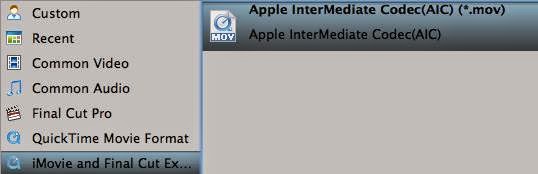
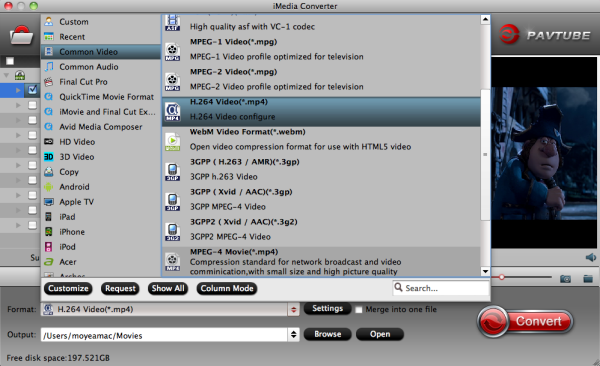
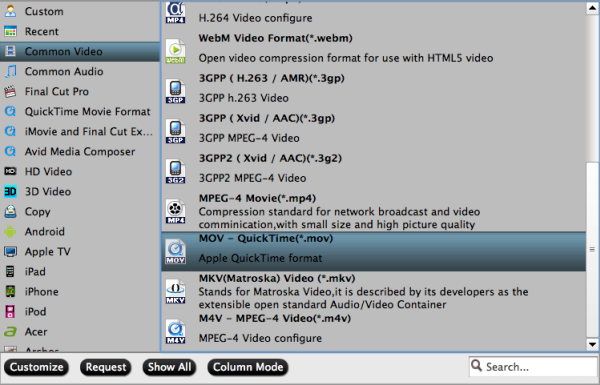
2. You can find many presets in “Format” drop-down list. Choose “iMovie and Final Cut Express > Apple InterMediate Codec(AIC)(*.mov)” as the output video format.


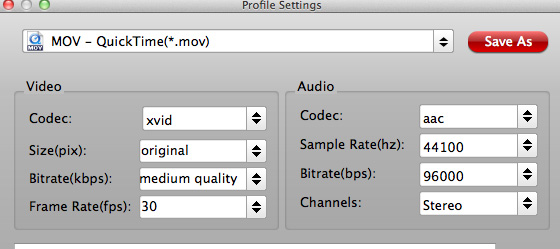
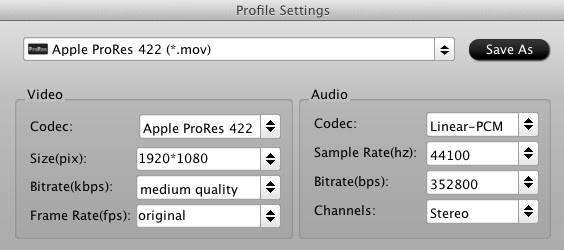
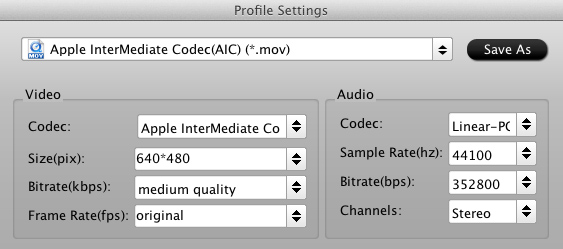
3. Click “Settings”, you can find some other settings such as Size, Bitrate, Frame Rate and son on. The video quality is corresponding to bitrate, the higher bitrate you choose the better video quality you will get. You can check the file size easily here.

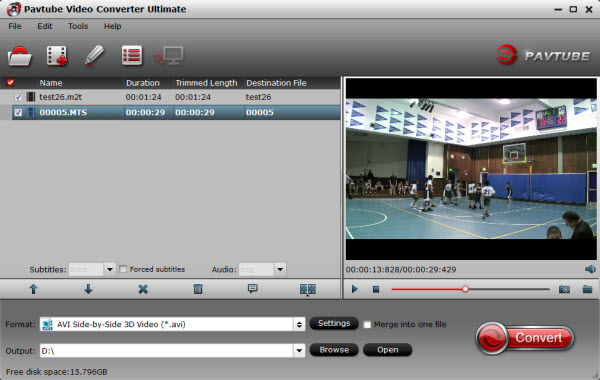
4. Start converting Panasonic HDC-MDH1 AVCHD to AIC for iMovie 11

Click the red convert icon at right bottom and start to convert Panasonic HDC-MDH1 AVCHD to AIC MOV for iMovie 11. You can check Shut down computer after conversion if you are doing a batch conversion and do not want to wait on the front of computer.

Wait for some time, now you get the converted videos for importing/editing in iMovie.

More details can be found here

Importing Panasonic HC-X900M MTS to FCP X
Convert Panasonic records for upload to YouTube
Workflow for Panasonic HX-WA03 MP4 and Premiere Pro

Thursday, December 26, 2013

Panasonic GM1 and iMovie - Convert Lumix GM1 MTS for Editing in iMovie 11/9/8

Summary: Encountered problems when importing Panasonic Lumix GM1 AVCHD mts clips in iMovie 11, iMovie 9 & iMovie 8 for further editing? Just follow this article to find the best solution here.

The Panasonic Lumix DMC-GM1 is the company's latest Micro Four Thirds interchangeable lens camera (ILC), and the first in its new GM series. This new range of ILCs focuses on cameras that are compact, and sure enough, the GM1 is the company's smallest yet, measuring just 98.5 x 54.9 x 23.5mm.

I like the high quality video in AVCHD recorded with GM1. I'm a Mac user and shoot many 60i AVCHD videos with my Panasonic Lumix GM1, I find that the AVCHD is a wonderful codec for playback but not so good for editing in iMovie, no matter the version 11/9/8.


I googled and find the reason that I can’t successfully ingest those recorded AVCHD footages to iMovie is limited by the iMovie itself. Currently AVCHD is a very non-standard format and it’s unsupported in iMovie even the lastest iMovie 11. In order to import Panasonic Lumix GM1 AVCHD footage into iMovie 11, iMovie 9 & iMovie 8 for smoothly editing, you can use 3rd-party software to re-wrap and convert MTS to Apple Intermediate Codec first, which is a native format for iMovie. It’s a great way to achieve your goal smoothly. For this purose, this article will show you how to transcode Panasonic Lumix GM1 MTS to AIC MOV in detail.

At first, here suggest you to try Panasonic AVCHD to AIC Converter for Mac. It is an ideal tool which can be used as a Panasonic AVCHD MTS Converter under Mac OS X 10.9 Mavericks, 10.8 Mountain Lion, 10.7 Lion, Snow Leopard 10.6, Leopard 10.5. It is free, clean and safe to install and use. With it, you can effortlessly transcode MTS to Apple Intermediate Codec, ProRes and DNxHD with ease and high video quality kept for working with iMovie, Final Cut Pro, Adobe Premiere, Avid Media Composer etc. non-linear editing systems. Below are the steps.

Guide on how to convert Panasonic Lumix GM1 AVCHD mts videos to iMovie 11, iMovie 9 & iMovie 8 

Step 1. Download Pavtube iMedia Converter for Mac. This professional MTS to AIC Converter can help you convert Panasonic AVCHD MTS files to rich formats for use on Mac (Mountain Lion 10.8 and Mavericks 10.9 included).

Step 2. Install and launch this Panasonic AVCHD MTS Converter. Import Lumix GM1 MTS footage to the Mac converter.


Step 3. Click "Format" bar to choose the output format. If you want to edit Panasonic Lumix GM1 MTS in iMovie/FCE, please choose iMovie and Final Cut Express -> Apple InterMediate Codec(AIC) (*.mov). This is best format for iMovie 11, iMovie 9 & iMovie 8 editing on Mac, once converted, you won't need to render.


Step 4. You can click “settings” to customize the output parameters, adjust the resolution, bitrate as you want.

Step 5. Click convert button to start converting Panasonic Lumix GM1 AVCHD MTS to AIC MOV for iMovie 11, iMovie 9 & iMovie 8 editing.

When the conversion finished, you can directly import the output AIC MOV files to iMovie or Final Cut Express for editing and make your movies. The importing needn’t any rendering because the AIC MOV isone of the compatible video formats in iMovie 11, iMovie 9 & iMovie 8 on Mac OS X (Mavericks 10.9 included).

More related:

Wednesday, December 18, 2013

Convert MP4 to ProRes 422 (HQ) from Panasonic HX-WA03 to work with FCP

Follow this guide you will know how to import Panasonic HX-WA03 1080P video to FCP 7/X for editing with the best Panasonic MP4 to Prores Converter.

Panasonic HX-WA03 is the perfect travel companion for your next outdoor adventure or journey. This active lifestyle camcorder will work as hard as you and is ready to go anywhere. The HX-WA03 is waterproof, freezeproof, dustproof and is designed to fit firmly in your hand to deliver exceptional performance. Capture the tiniest details in 16-megapixel high-resolution still pictures and even 2-megapixel still images while recording a video by simply pressing the Photo Shooting Button.


The HX-WA03 renders images in breathtaking Full-HD (1920 x 1080)* beauty, so you can save your memories in stunning image quality and watch them on a big screen TV. It can shoot MP4 video with 1920 x 1080 pixels refers to video recordings with 1920 pixels in the horizontal direction and 1080 pixels in the vertical direction. It's great for us to take high quality images and record vivid full HD videos.

If you have got the WA03 and use it to record 1080P video, you may have the need to edit WA03 MP4 in Final Cut Pro on Mac before sharing the videos with others. However, to tell you the truth, MP4 format is not easy to edit, many Mac users complained that they cannot load WA03 recorded MP4 videos in FCP smoothly, the main reason is the H.264 codec and MPEG-4 codec, which is not well accepted.

FCP best supported video format is Apple ProRes 422 codec MOV format. To solve the incompatibility problem, the best method is to convert Panasonic WA03 MP4 footage to ProRes for editing in Final Cut Pro, now you can follow the steps below to transcode WA20 MP4 to FCP X for editing.

To achieve this goal, Pavtube HD Video Converter for Mac is a program my friends recommended to me last year. I am working well with it, and you can try it yourself. With it, you are able to ingest Panasonic HX-WA03 mp4 videos into Final Cut Pro by encoding the MP4 to Apple ProRes 422 (HQ) codec, which is naturally supported by Final Cut Pro 6/7 and FCP X.

Step 1. Add Source Videos

Launch the professional MP4 to Prores Converter, and then click “Add video” button to browse and load your source files. If you need to import an entire file folder directly, simply click “Add from folder” tab.


Step 2. Choose Output format
Go to “Format” menu and choose “Apple ProRes 422 (*.mov)” or "Apple Prores 422(HQ)(*.mov)" as target format from “Final Cut Pro” option to work fine with FCP 7/X.


Learn more Apple ProRes, please refer to Types of Apple ProRes Codecs

Tip:
If you want to set some parameters for the output profile, you could click the “Settings” button to set the output bitrate, encode, frame rate, resolution, sample rate, channels, etc.

Step 3. Start Panasonic HX-WA03 MP4 to FCP Conversion


When the former steps finished, you can press “Convert” button to start rewrapping MP4 files from Panasonic WA03 to Apple ProRes MOV for FCP. Once the conversion process is done, click “Open” button to get the generated MOV files.

NOTE:
The FCP X does not install the QuickTime Codecs automatically, so you need download and install the codec manually from here.

Step 4. Import the converted footages to FCP project


In this way, you can effortlessly import and edit Panasonic WA03 MP4 files in Final Cut Pro smoothly.

P.S.

Need to convert more various formats besides MP4, or convert DVD and blu-ray movies for backup or further playback? Pavtube HD Video Converter for Mac can help you to accomplish both of them. It is integrated software for converting different videos, DVDs and blu-ray discs. 

Tuesday, November 12, 2013

Get your Movie Studio Platinum 12 working beautifully with MXF from Panasonic AG-HPX171E

The Sony Movie Studio Platinum 12 won't import P2 MXF files from Panasonic AG-HPX171E. The easy workaround is to transcode MXF to Movie Studio friendly format.

Sony Movie Studio Platinum 12 is a powerful 64-bit video editor at a reasonable price. Among consumer-level video-editin applications, it is one of the most capable, offering more features than most of its competitors do. Even with a user-friendly interface,  Sony's Movie Studio Platinum offers many features customizable options. However, users find it's difficult to import P2 MXF clips from HPX171E to Movie Studio.


My camera is 171e-Panasonic (p2 cards). Actually I am new one in all this story about video .I have a material and before I start to make editing in Movie Studio Platinum 12.00 (sony) and I would like to give to my friend to have “first look" on my computer or TV. I ask some friends and they told me to make P2 MXF to MPEG-2 conversion. What i can do? Thank you.
In fact, MXF is a self-container format which is unacceptable by various non-linear editing systems (NLE), like Pinnacle Studio, Sony Vegas, Avid Media Composer, Premiere, Movie Studio Platinum 12 etc. So to import the MXF files from Panasonic AG-HPX171E P2 camera to Movie Studio Platinum 12 for editing, the easy workaround is to transcode MXF files to Movie Studio compatible video formats.

For converting Panasonic AG-HPX171E MXF video into Movie Studio editing friendly format, the best recommendation is Pavtube MXF Converter. This is a smart tool specially designed for MXF users to preview and convert MXF recordings to your wanted video and audio formats, so as to smoothly add them into Movie Studio Platinum 12, Sony Vegas, Adobe Premiere, Windows Movie Maker, Magix Movie Edit Pro, Ulead DVD MovieFactory, Pinnacle Studio and more other video editing software to do further editing. It naturally support converting MXF recordings shot by a Panasonic P2 camcorders and Canon XF camcorders.

To help those who wanna edit Panasonic AG-HPX171E MXF files in Movie Studio Platinum 12 without problems, here I share with you a simple guide on how to convert MXF files from HPX171E to edit in Movie Studio Platinum 12.

Part I: Transcode AG-HPX171E MXF to MPEG-2 – native editing format for Movie Studio Platinum 12

1. Backup Panasonic AG-HPX171E camcorder MXF videos from P2 HD card to local HDD with full P2 directory preserved, as both the video and audio are saved separately as .mxf files.

Notes:  If your are a P2 MXF camcorder user, you will find from the P2 MXF recording, video audio files are separated in different folders. Also, it’s no difficult to find one video will have four audio tracks. For archiving, you need to keep the whole structure of video and audio.   

2. Run Pavtube MXF Converter. Click "Add Video" or "Add from folder" icon to load MXF files from AG-HPX171E.


3. Choose "MPEG-2 (*.mpg)" as target format from "Adobe Premiere/Sony Vegas" option. 


4. Click "Settings" button and enter "Profile Settings" panel to adjust video and audio settings if necessary. Users are free to reset codec, bit rate, frame rate, sample rate, and audio channels.

5. Click the big button "Convert" to start Converting AG-HPX171E to MPEG-2 for Sony Movie Studio Platinum 12.

6. Locate converted P2 recordings (in .mpg format) by clicking on "Open" button.

Part 2: Import converted .MPG to Movie Studio Platinum 12 for editing.

Now your Panasonic  AG-HPX171E .MXF footage are converted into Movie Studio Platinum 12 natively supported format. Launch Movie Studio Platinum 12, and follow "Import" > "IMPORT FROM" > "Other devices" > "the folder stored the converted .mpg files" > "Start Import" to get P2 footage into Movie Studio Platinum 12.


Personally I am very pleased with the product. As I have only used the product a few times so far it is difficult to give any constructive comments at this stage but all my conversions were done successfully with stunning image quality – I can hardly tell any quality difference.

Read More:

Tuesday, September 24, 2013

Best 3D MTS Converter- How to Convert 3D AVCHD MTS files to 3D AVI format

With a top 3D AVCHD Converter, you can easily convert 3D AVCHD MTS files to playable and editable AVI format for Windows or Mac.


Nowadays, more and more people will prefer a 3D camcorder to record vivid 3D images. It's great to have a 3D camcorder like Sony HDR-TD10/DEV-5, JVC Everio GS-TD1/GY-HMZ1U, Panasonic HDC-SDT750/AG-3DA1 which will give us unprecedented 3D video enjoyment.

If you have got a 3D camcorder and recorded lots of 3D MTS files, you may want to watch the recorded 3D videos on HD TV, portable devices or just want to import these 3D AVCHD files in Adobe Premiere, Sony Vegas, Pinnacle Stuido for editing. However, the 3D AVCHD MTS footage is not that easy to handle, you will have problem when editing and playing them.

To find a easier way to get 3D AVCHD MTS footage editable and playable, you need to seek help from the best 3D AVCHD Converter to Windows/Mac compatible AVI format.

Here Pavtube Video Converter Ultimate and iMedia Converter for Mac is the ideal conversion tool that not only freely and easily converts 3d MTS files to 3d AVI with perfect quality and fast conversion speed, but also offers several editing functions like cropping video dimension, trimming file length, adjust playing effects, etc. The converted AVI videos are well supported by mobile phones, different portable devices and many editng programs.  Batch conversion features supported by the software will definitely make the conversion easier and faster.

Becides 3D AVI format, this 3D AVCHD Converter for Mac has added other 3D profiles in Format menu. (Side-by-Side, Top-Bottom, or Anaglyph 3D in MKV/MP4/MOV/WMV). Now download and install it and follow the steps to start the conversion of 3D MTS to 3D AVI. (Here provides the Mac workflow, if you are a Windows user, the process is as the same)

Step 1: Import the 3D MTS file.

Run Pavtube 3D AVCHD Converter for Mac as the best Mac 3D MTS to 3d AVI Converter. Click "Add Video" icon to load 3d .mts video clips.


Step 2. Choose 3D AVI as the output format

Choose " AVI Side-by-Side 3D Video" or "AVI Anaglyph 3D Video" or "AVI Top-Bottom 3D Video(*.avi)" as target format from "3D Video" option.


Step 3: Settings (Optional)
  
You can click "Settings" button and enter "Profile Settings" panel to adjust video and audio settings if necessary. Users are free to reset codec, bit rate, frame rate, sample rate, and audio channels.

Step 4.  Click “Convert” button to start transcoding 3D MTS files to 3D AVI fomat.

The Mac 3D MTS to 3D AVI Converter can help you convert recorded 3D mts video files with high video quality, video and audio synchronization are perfectly guaranteed. Just have a try now!

Read more:

View Blu-ray movies (ISO image files) on projector
Rip 2D/3D Blu-ray with 3D effect on Windows 8.1/8
Rip 3D Blu-ray disc to 3D SBS MP4 format

Tuesday, September 10, 2013

Convert MXF files to QuickTime MOV for playing on your Mac

In this article, you can learn the easy way to convert recorded MXF files to QuickTime MOV, and it will help you solve the playback issues with MXF and QuickTime Player on Mac.
 

QuickTime is a multimedia framework developed by Apple Inc., capable of handling various formats of digital video, picture, sound, panoramic images, and interactivity. As an excellent movie player, it is widely used by most of Mac users. But according to users' feedback, they usually have trouble with locating the Quicktime files once openning the MXF files.

What's the reason? As we know, MXF clips comes from like Panasonic HVX200/HPX300, Canon XF300/XF305, Sony EX camera, etc. It is not compatible with media players just like Apple QuickTime. So to get QuickTime Player natively accept MXF files, converting MXF file to Quicktime mov video is a necessary step if you want watch your MXF video on Mac with QuickTime Player.

Ane then what you need is a professional MXF to MOV Converter for Mac. Here I suppose you to use the top MXF Converter for Mac from Pavtube, it is just designed to convert MXF files to QT best supported MOV format so that you can freely enjoy MXF files with QuickTime on Mac.

Overall, this MXF to QuickTime Converter is very easy to use and can do MXF to MOV conversion fastly with preserving the original video quality perfectly. 
Just download this powerful Mac MXF to QuickTime Converter, and follow the guide as below.

Step by step guide to help you convert MXF file to QuickTime .mov for playing on Mac

Step 1:Add mxf file into Mac MXF to MOV Converter

Install and run the program, click "Add" or "Add from folder" button to load your MXF video clips. You are allowed to add multiple files to convert at a time.


Step 2:Set Output format for QuickTime.

Click on the dropdown list of "Format" and select "Common Video -> MOV – QuickTime (*.mov)" as target format. This format is specially designed for QuickTime playback.


Step 3.Adjust video and audio parameters. (Optional)

Click "Settings" button to customize the output video and audio settings by yourself. You can also use the default parameters, they will ensure you a good balance between file size and image quality basically.


Step 4:Start Conversion

Click the "Convert" button to convert mxf file to QuickTime .mov on Mac.

After a few seconds or minutes (according to the length of source MXF file), you can finish the MXF to QuickTime Conversion. In this way, you can freely enjoy the output MOV file with QuickTime Player on Mac. Also you can edit the MOV file with Final Cut Pro.

Read More:

Monday, August 26, 2013

I can't import HD videos from Panasonic into Final Cut Pro 6

Facing issues when importing Panasonic HD media files to Final Cut Pro 6 for editing? The easy workaround is to convert Panasonic 1080p videos to ProRes codec. Below is how.
Panasonic offers wide choices in professional and high-quality camcorders to meet virtually any application, from Full HD 3D and P2 HD to AVCCAM and SD.
I have a Panasonic camcorder which records some 1080p video files, and I use L&T to load the footage to FCP 6 on my iMac. FCP 6 crashed while opening. When I open the program agiain, find out they are not readable? What’s that? I am sure the videos are playable on camera. So strange. Any insight here how can I import these files into FCP 6? Thanks for help.

Many users are facing some frustrating result when importing Panasonic HD videos into Final Cut Pro 6 as above. The basic reason is that MXF is not a fully supported format by Final Cut Pro. So how can you get/import your 1080p recordings to FCP 6 easily for editing? At first, you’d better to transcode Panasonic HD videos to Apple ProRes first, as it is the best codec for Final Cut Pro editing.

Below is the simple step-by-step guide for Panasonic camcorder users: using Pavtube HD Video Converter for Mac to convert Panasonic HD videos to ProRes 422 for FCP on iMac/MacBook Pro with Mac OS X, Leopard, Snow Leopard, Lion, Mountain Lion and Mavericks 10.9. Download it and get the full guide below to have a smooth editing with the Panasonic HD footage in Final Cut Pro 6.

Easily importing and editing Panasonic HD videos in Final Cut Pro 6

Step 1. Get this Mac Panasonic Video Converter installed and load your footages. Click top left icon to load individual 1080p videos files; or click the second one to import the whole folder.


Step 2. Choose proper format for editing in Final Cut Pro 6.

Click Format drop-down list, choose Final Cut Pro>Apple ProRes 422(HQ)(*.mov), as it’s FCPX’s most compatible codec.


The Apple ProRes 422 (HQ) codec offers the utmost possible quality for 4:2:2 or 4:2:0 sources (without an alpha channel) and provides the following:
  • Target data rate of approximately 220 Mbps (1920 x 1080 at 60i)
  • Higher quality than Apple ProRes 422
More options:
Step 3. Fix the output ProRes video settings for FCP 6.

Click Settings at the bottom, you can fix the video size, bitrate, frame rate, etc. The video quality is related with video bitrate, the higher you choose, the larger output file size will be.


Step 4. Start conversion.

Ok now click the "Convert" botton to start converting Panasonic HD footage to ProRes for FCP 6 on Mac. Wait for while, or you can choose to shut down computer after conversion done.

Thursday, August 15, 2013

Working with Panasonic HC-X920M 1080/50p mts Footage in FCE and FCP 6

Is there anyway we can injest MTS Files shot on canon Panasonic HC-X920M into FCE and FCP 6? Keep on reading to learn.

I'm the owner and publisher of Australian Videocamera. My media experience can be dating back to 1979 when I first got involved with photojournalism in motorsport. Recently we have got this Panasonic HC-X920M.


Reviews:

I am more than impressed with the HC-X920M. At this stage of the game, if anyone asked me what camcorder to buy sub $2K, this would unquestionably be it. It has all the functions you will ever need, and I'd almost call it a game changer. If there is camcorder to sway the pro away from the larger models as used in "run and gun"shooting for current affairs, short documentaries or films etc, then at the moment this is it.

All the necessaries are there; top lens, manual programmable focus ring, face detection, manual or auto controls for contrast, shutter speed etc and of course superb imaging. And for future proofing, the HC-X920 also supports the optional 3D lens.

Recordings:

Panasonic HC-X920M can provide us 1080p Full HD. We live in Australia - so we are PAL.


Recording Format: [AVCHD] AVCHD 3D / Progressive / [iFrame] MP4

Compression Method: [2D] MPEG-4 AVC/H.264 / [3D] MPEG-4 MVC/H.264


Asks:

Now we are doing some editing work. We make some 1080/50p AVCHD videos from Panasonic HC-X920M, working on Final Cut Express and also FCP 6, but when loading into the FCE and FCP 6, the .mts files need rendering and everytime I touch them they again need to be rendered. Hoping anyone can help - rendering takes so much time... 

Answers: 

At last, I have figured out Pavtube HD Video Converter for Mac. Having used it as the best Panasonic AVCHD Converter and now I have successfully converted the Panasonic HC-X920M 1080/50p mts video files from the camera to AIC/Prores .mov which is native for editing in FCE and FCP 6. It works great and wonderful video quality.

Detailed instructions: 

In case that you may have the same issue with importing Panasonic HC-X920M 1080/50p mts footage into FCE and FCP 6, here offers you a step by step guide:

Convert Panasonic HC-X920M 1080/50p AVCHD MTS to AIC/Prores MOV format

Step 1. Add .mts files to the Mac MTS to MOV Converter.

Launch the MTS/M2TS to AIC/Prores Converter for Mac. Click "Add Video" or "Add from folder" button to load your source 1080/50p .mts or .m2ts files from Panasonic HC-X920M.


Tip: If you want lossless merge multiple MTS, M2TS files, pleas check the "Merge into one file" box.

Step 2. Choose FCE and FCP 6 compatible foramt as output.

For FCE, click "Format > iMovie/Final Cut Express", choose "Apple Intermediate Codec(AIC) .mov" as the best output format.


For editing in FCP 6, you can choose Final Cut Pro -> Apple ProRes 422 (*.mov).


Tip: If you wanna edit the video/audio parameters, you need to go to "Settings" window.

Step 3. Start MTS to FCE 6/FCP Conversion.

Click the "Convert" button under the preview window, and the best Mac MTS to MOV Converter will start converting Panasonic HC-X920M 1080/50p MTS clips to FCE and FCP 6 compatible AIC/Prores mov format on Mac OS X.

When the conversion is done, you will be directed to open the folder where you saved the converted files, and then you can import output video files to FCE or import converted videos to fcp to edit.

More Tips for you:

Monday, August 12, 2013

Convert and Import Panasonic AG-HPX250 AVC-Intra 100 MXF to Final Cut Pro

Want to import Panasonic AG-HPX250 MXF files to Final Cut Pro? First you need to encode Panasonic AG-HPX250 MXF footage to ProRes codec.

Panasonic has just announced the AG-HPX250, a camera that can be positioned as the successor to the HPX170 and a compact version of the HPX370. Built using the 1/3″ 3-MOS sensors of the HPX370, the HPX250 records to P2 media in AVC-Intra 100/50, as well as DVCPRO HD, DVCPRO50, DVCPRO and DV. This is the first time that AVC-Intra 100 has been made available in a small form factor, so the ability to record a full 10-bit 4:2:2 I-frame image in a compact, 5.5 pound package makes the HPX250 truly unique.


Panasonic AG-HPX250 MXF files to FCP solution:

"I have a Panasonic AG-HPX250 camcorder, this camcorder record in AVCintra or DVCPRO HD codec in MXF format. I just want to import the MXF recordings to Final Cut Pro for editing, but the FCP doesn't accept it. So what can I do? Is there an easier and effective way? And how to import incomplete folder files or single MXF files to FCP?"

As we know, FCP best codec is Apple ProRes 422, this codec in MOV format is native for importing and editing, original P2 MXF footages is not good for editing as you may find the video is not processed smoothly.

And here, you are suggested to try a third party converter: the professional Mac P2 MXF Converter from Pavtube to help you to transcode Panasonic P2 mxf cilps to ProRes for FCP with best video quality. It enables editing before conversion and you can check the deinterlacing option. Below I will provide a brief guide for you.

Steps: Transcode Panasonic AG-HPX250 P2 MXF to Apple ProRes for Final Cut Pro editing

1.Download Pavtube MXF converter for Mac. It's the best Panasonic MXF Converter for Mac, an user-friendly software can help you convert MXF to rich formats, such as Apple ProRes, AIC, Avid DNxHD, or MP4, AVI, MKV, etc, then you can make MXF files compatible with iMovie, FCP 6/7, FCP X, FCE, Avid Media Composer and so on.


2.Install and launch, and import Panasonic P2 AG-HPX250 MXF videos to the MXF converter for Mac.


3.Click format bar to choose the best video format for output. You are recommended to choose Final Cut Pro -> Apple ProRes 422 (*.mov) for native FCP editing.


4.You can click settings button to adjust the output video's parameters, such as resolution, bitrate, etc. 


5.Edit function is easy and useful, you can trim, crop, or add watermark to the video.

6.Click convert button to start converting Panasonic AG-HPX250 P2 MXF to Apple ProRes for FCP on Mac.

All folders and single files are supported, after conversion you can import converted MOV files to FCP without rendering, it can deal with all the MXF files, such as Panasonic P2 series, Canon XF series, Sony XDCAM series, etc.

Tips:

If you want to convert MXF video clips with multiple audio channels, Pavtube iMixMXF - an ideal P2 MXF to FCP Converter that can ouput multi-track Apple Prores MOV for further editing in Final Cut Pro, it will definitely helps you.

Read More:

Flawlessly Convert Panasonic AG-HMC150P AVCCAM MTS to MP4 and burn into DVD

In this article, you will get to know how to transcode Panasonic AG-HMC150P AVCHD videos to MP4 format and burn Panasonic AG-HMC150P mts recordings to DVD for sharing, storing or managing on Mac.


The AG-HMC150 handheld is Panasonic's exciting new introduction to the AVCCAM series. Representing a major step forward in affordable HD video capture, the HMC150 utilizes highly efficient AVCHD recording, the industry's new long GOP standard based on MPEG-4, to provide stunning image quality and longer record time. The new handheld incorporates three 1/3-inch progressive CCD imagers to produce stunning 1920 x 1080 resolution picture quality far exceeding older Long GOP formats like HDV.

"The camera I have is a Panasonic AG-HMC150P. Having shot many AVCHD high definition recordings with it, it's as easy to use as a digital still camera. What I want is to present the 1080p full HD videos on my portable device for playbak or create into DVD for wathing? Then my video can be shared with my family and my dear friends. So hope to find the best workaround here. Thanks.”

If you love photographing, AG-HMC150 is a very nice choice. As above, to successfull enjoy and share the exciting AVCHD footages from Panasonic AG-HMC150 with your friends, you just need to do Panasonic AVCHD to MP4 convertion and DVD burning on Mac.

To do this, Pavtube MTS/M2TS Converter for Mac and DVD Creator for Mac come out to help you. Easy-to-use and time-saving as they are, they are ideal tools for AVCHD converting and DVD burning.

Now please follow the easy steps below to encode Panasonic AG-HMC150 1080p AVCHD video to playable MP4 format and write the mts footage into DVD on Mac.

Part 1: Convert Panasonic AG-HMC150 AVCHD MTS to MP4 

1. Download Pavtube MTS to MP4 for Mac. Install and launch and import Panasonic AG-HMC150 recorded mts footage to the converter.


2. Click format bar to choose the output format. Click and choose HD Video -> H.264 HD Video (*.mp4).

3. You can click “settings” to customize the output parameters, adjust the resolution, bitrate as you want. Besides, you can use this software to edit your recordings, you can trim, crop, add watermark or adjust effect to the video, just need to click the “edit” button. 


4. Click convert button to start.

Pavtube AVCHD Converter for Mac will convert Panasonic AG-HMC150P 1080p mts videos to MP4 with best video and audio quality.

After converting, you can enjoy and play the Panasonic AG-HMC150P mts footage on your smartphone or talbet as you want. Of course, you can also take it for storage on Mac.

Part 2: Burn Panasonic AG-HMC150P mts to DVD on Mac 

1.Please download and install Pavtube DVD Creator for Mac, import  1080p MTS files from Panasonic AG-HMC150P to the software.


2.Click the import button to load your HD footages, you can click Add title button to add more titles.

3.Switch to Menu pane. Double-click a DVD menu beneath the Menu Template to apply it to your DVD. You can customize the background video/image, background music, text, title thumbnail and more for your DVD menu.


4.Click the Burn button to start making Panasonic AG-HMC150P mts movies into DVD on Mac. You can choose to burn Panasonic AG-HMC150P recorded MTS file to DVD disc, save as ISO file, or Generate videos to DVD Folder.

Now just have a try! You can not only convert Panasonic AG-HMC150P MTS to MP4 for playbak or storage and burn the MTS recordings into DVD for sharing, but also downscale or retain the 1080p/1080i/720p videos to resolution 720p/1080p which is supported by most players. That means you can play with the highest video quaility! It is definitely the best workaound for you!

Read More:

Wednesday, August 7, 2013

Convert Panasonic HC-V707 1080/50p MTS to iMovie in a correct way

Follow this guide below you will get to know the 50p MTS to iMovie solution. Now keep on reading the info about how to import Panasonic HC-V707 1080/50p AVCHD to iMovie for editing without rendering.

The Panasonic HC-V707 looks remarkably compact and shines in the test environment, especially with their manual functions. It offers the best manual control and Full HD recordings running at 50 progressive frames per second. 

  
I started the video project last year (with an old DV Camera that soon became defective) and since february this year I work with the Panasonic V707. I am working on a spiritual movie, that will be presented on my homepage only. After importing my 1080 50p/60p AVCHD films from V707 into iMovie, I get failed many times.

After a long search (google, forums) I understand the reason. For imovie editing workflow, the first clip you add to the project has a different frame rate from the project, iMovie prompts you to adjust the project frame rate to match. Therefore, the video clip from your Panasonic 1080 50p or 1080 60p camcorder doesn't match the project frame rate and as a result, imovie will not support my 1080/50p mts footage by my Panasonic V707. So the best workaround is to converPanasonic V707 50p Videos to iMovie in a correct way.

At first, I’ve been working with Xilisoft HD Video Converter, but my camera produces 1080/50p slow motion videos, which are not converted completely with Xilisoft. Fortunately, I find this professional Mac 1080/50p MTS Converter from Pavtube at last

With it, I have successfully converted 1080/50p AVCHD clips to compatible AIC .mov format with iMovie, and then I can import without rendering. In fact, I know this Pansonic AVCHD Converter for Mac still has a lot of functions, such as many optimized output formats for editing software or playable devices as well as its editing functions. In a word, I'm pleased with the software, very satisfied. 

If you have the same problem with importing Panasonic HC-V707 1080/50p AVCHD to iMovie, you can follow the step-by-step guide below to transcode 1080/50p Slow Motion Video from the  HC-V707 (MTS-File) to  MOV-File with AIC codec to use in iMovie.

1. Download Pavtube Panasonic AVCHD Converter for iMovie. Install and run to import your 1080/50p MTS footage from V707 to it.


2. Click format column to choose the output format for iMovie. Click and choose iMovie and Final Cut Express -> Apple InterMediate Codec (AIC) (*.mov), it's the best format for editing 1080/50p mts in iMovie.


3. You can click settings button to adjust output parameters, such as resolution and bitrate.


4. Click convert button to start.

The Mac 50p mts to iMovie Converter will convert Panasonic HC-V707 1080/50p AVCHD to iMovie compatible format quickly. After conversion, you can edit the converted video in iMovie as you want.

Pavtube MTS/M2TS Converter for Mac works as the companion for your Panasonic HC-V707 camcorder to convert 1080/50p AVCHD videos to AIC for editing in iMovie flawlessly. It keeps better color than compressor. What’s more, it can keep 50fps and 60fps in MOV, now you can have a try.  

Thursday, July 18, 2013

Batch script to transcode MXF video files for using with VLC Player

In this article, we aim to offer you an easy way to help you play MXF with VLC media player freely.


  • What is MXF?
MXF is abbreviation for Material eXchange Format, it is a "container" or "wrapper" for professional digital video and audio media defined by a set of SMPTE standards. MXF files are mainly from professional High Definition camcorders/cameras like Panasonic P2 camcorders AG-AC130EJ, AJ-HPX370, Canon XF series camcorder XF300, XF305, and Sony EX camera , etc.
  • The basic way to get MXF files played:
Find a media player that can support playing .mxf files as well as be compatible with the Mac or Windows OS.
VLC player is a powerful media player for viewing movies or videos on Mac and Windows. Playing MXF files on VLC is by using the Mainconcept Reference codec, by installing this codec you can directly run your MXF files on the VLC media player.
  • The Playback problems:
While, there are still groups of people complain of the imported with low video quality or incapability of video playback.

Q1: I read that VLC can easily play MXF but it's not working on mine. I have the latet VLC player. Any solutions? Thank you.

Q2Hey guys. I need some help.I am using a Canon camera to record rugby games. All of my previous stuff was saved on a desktop and all of my movies and videos are saved as MXF. I use a free program to convert MXF to MPEG-4 format for playing on my VLC player. The 1st file goes well but then appears to stop converting. Is the files too large to handle? What do I have to do? 

Q3:
I can play the MXF files from my XF-100 in VLC, but the audio is choppy or non-existant…The video plays without a hitch. But no audio. Any fixes for this problem, or am I the only one?
  • An quick workaround to solve the MXF playback issues with VLC Player 
Nothing is absolute, if there are some special MXF can't be played by VLC or other Video Player, you can convert the MXF files to common formats (like AVI, MOV, MPEG, MP4, etc) to fit the local VLC media player with iMedia Converter for Mac from Pavtube.

This top MXF to Mac Converter which works successfully in MXF to MP4 conversion even you have a bunch of large MXF files. I have tried it to encode MXF to MP4, it turns out playing Canon, Sony, Panasonic MXF on Mac smoothly and at original quality.

It’s the best software application for Mac users. What’s more, this converter also supports many of other video formats like MOV,MKV, AVI, WMV, FLV, MPG, etc on Mac. Below is easy steps for you, you can convert MXF to VLC player compatible formats for watching in few steps.

Step 1: Add mxf video files

Run iMedia Converter for Mac on your Mac computer. Transfer the individual .mxf file or MXF file structure (P2 MXF, XDCAM MXF, Canon XF) to HDD first, and then click "Add Video" to import the MXF files to the converter.


Step 2: Choose H.264 MP4 as output format.

In “Format” drop down list box, you may select best video format for plaing on Mac. To convert MXF to MP4 format, if you want to get common MP4 files for playback, you can choose Common Video -> H.264 Video (*.mp4); if you want to get HD MP4 files to use, you can choose HD Video -> H.264 HD Video (*.mp4).


Step 3: Start Convert

Click “Convert” in the main interface to start transcoding MXF to Mac H.264 MP4.

After conversion, you can use converted MP4 files for playback easiliy and smoothly. You can also refer to the MXF to Quicktime MOV, MXF to AVI guide, and have a try.

Tips: 

If you are Windows users, you can try Pavtube Video Converter Ultimate. It you can easily import the MXF video and the audios for playing and editing.

Read More:

Monday, July 15, 2013

Best .mts to Quicktime .mov converter for QuickTime Player

In this is AVCHD to MOV conversion guide, you will learn the best solution to play AVCHD .mts footages with QuickTime Player on your mac easily.

Q: I have a number of clips I downloaded onto my Win7 machine from a Canon HF S11 which are AVCHD .mts files, and tried to send them to someone with a Mac, but she couldn't open them. I'd like to convert them from .mts to Quicktime .mov and then resend them so she can open them. Once she opens them, she'll be doing some editing for me so I'd like to send her the highest quality resolution. What's the best .mts to QT .mov converter for that?

A: Usitng the best mts to Quicktime .mov Converter to do AVCHD to MOV conversion for QuickTimr Player on Mac.
            
.MTS file format is an AVCHD file (Advanced Video Codec High Definition), a video file format created specifically for high-definition (HD) digital camcorders, like Sony HDR-SR-1,Panasonic HDC-SD1, Canon, JVC and Sanyo video camcorders. AVCHD video is MPEG-4 AVC/H.264 video compression, that allows the large data files created by HD video recording to be captured and saved on digital media such as hard disk drives and flash memory cards, or DVD disc.

QuickTime
is a multimedia framework developed by Apple Computer Inc. that consists of a QuickTime player, the QuickTime framework which provides a common set of APIs for encoding and decoding audio and video and the QuickTime movie file format .MOV.

AVCHD (MTS/M2TS/TS) video usually can not accepted by QuickTime. If you want to enjoy MTS files with QuickTime Players, you need to convert mts file to QuickTime supported .mov format.

Here, this Mac MTS to QuickTime Converter as the best .mts to Quicktime .mov converter, can easily help you convert mts file to mov for QuickTime easily with reliable efficiency and simple frank interface; no jitter, no slitter, you will have regardless HD video quality lost after converting. Come and download the powerful AVCHD Converter and let's start! 

Fast Convert AVCHD .mts videos to QuickTime MOV format

Step 1. Copy your AVCHD file to mac and keep it on. Launch Pavtube iMedia Converter for Mac; click the top left two icons to load your footages individually or in batch correspondingly.


Step 2. Click Format, choose "Common Video > MOV-QuickTime(*.mov)" as the best video format for QuickTime Player.


You can also click the Setting which is marked as 3 above, choose the output video size, video bitrate, frame rate, etc. all according to your needs.

Step 3. Now click the big red circle at the right bottom to start converting AVCHD .mts file to QuickTime preferred mov format. This program will help you to stream the converted video to home shared network so that you can playback the on another mac directly.

More Tips about QuickTime Player:

Thursday, July 11, 2013

Transcode Panasonic AJ-HPX2700 P2 MXF to QuickTime MOV on Windows and Mac

Follow this article you will know the easiest method to convert Panasonic AJ-HPX2700 P2 MXF to QuickTime MOV on Windows and Mac for watching freely.

With P2 technology, Panasonic AJ-HPX2700 VariCam 2700 now records variable frame rates natively. AJ-HPX2700 is a high-end professional camera meant to replicate the warm and natural look and texture of film. Its native effective resolution is 1280 x 720, but shooting is possible in a range of formats from 1080/60i to 720/25p due to the 3x 2/3" 1MP CCD sensors. Recording is possible in AVC-Intra 100, AVC-Intra 50, and DVCPRO HD; 4:2:2 full raster sampling is supported in the AC-Intra 100 format.


The media files from Panasonic AJ-HPX2700 are stored in P2 card in MXF format which claimed to be acceptable with VLC media player. So if you would like to play Panasonic AJ-HPX2700 MXF file, VLC is should be your first choice. However, if you prefer to play P2 MXF in QuickTime on Windows or Mac. You may be frustrated with the problem that QuickTime became greyed when importing Panasonic AJ-HPX2700 P2 MXF footage. It is unlucky that the P2 MXF file is not playable with QuickTime.

Then, what should you do? At first, you'd better convert Panasonic AJ-HPX2700 P2 MXF to QT-supported file format, like QuickTime MOV along with a third party tool.

Here is the best P2 MXF to QuickTime Converter- Pavtube MXF Converter for Mac which provides you a simple-to-use interface and barely several clicks are enough for all the job. In this way you don't need to spend time fighting against MXF codec. What's more, this powerful Mac MXF Converter can also help you to do some practical editing jobs like MXF video trimming, merging MXF files, MXF file editing and so forth.

Free download the P2 MXF Converter for Mac The MXF Converter for Mac program can run on the Mac OSX, including Mountain Lion, Lion, Snow Leopard, etc. 

Supposed you are using Windows OS like Windows 7, XP, please refer to the PC version of MXF Converter for QuickTime. 


Step-by-step Tutorial- Convert Panasonic AJ-HPX2700 P2 MXF to QuickTime MOV 

Step 1: Launch the program and load P2 .mxf video(s)
When fully installed Pavtube MXF Converter for Mac (or MXF Converter if you are Windows user), just run it. In the main interface, click "Add File" to load one or several .mxf file(s) from Panasonic AJ-HPX2700 P2 card into the program.


2.Select output format.
Click on the dropdown menu of "Format" and select "Common Video -> MOV – QuickTime (*.mov)" as target format.

This format is specially designed for QuickTime playback. You can also choose format as you need in the format column, such as AVI, MKV, MP4, etc.

3.Adjust video and audio parameters.
Click "Settings" button to customize the output video and audio settings by yourself. You can also use the default parameters, they will ensure you a good balance between file size and image quality basically. You can change the resolution, bitrate, frame rate as you need.


4.Click convert button to start to convert Panasonic AJ-HPX2700 P2 MXF file to QuickTime MOV on Mac with this best P2 MXF Mac converter.

After you converting AVC-Intra P2 MXF to MOV for QuickTime, you can play the converted footages smoothly on Mac. The windows workfow is as the same.

With the P2 MXF to MOV converter, you can easily convert Panasonic AJ-HPX2700 P2 MXF file on Windows and Mac with QuickTime, you can also convert P2 card MXF file to other formats with best video and audio quality, like P2 MXF to iMovie/FCE and P2 MXF to FCP.

Read More: