Tuesday, January 31, 2017

How Do I Convert YouTube video to MP4 on Windows or Mac

If you are a video/movie lover, you may like uploading videos from Youtube. Torrent format also develops good connections between different computers making it possible for people to track each other. Is there any need to convert YouTube to MP4? Yes, there is and top on the list is improved compatibility. With your YouTube files on MP4, you can playback on different platforms and enjoy to the fullest.

Simplest Way to Convert YouTube video Files to MP4

Never overlook Pavtube Video Converter when converting YouTube files to MP4 because it is well suited. To very many people, it’s the best and only solution available for managing the conversion process. There are some unique features that make it standout and you should be on the lookout to enjoy their service. Media browser is one of them and it helps to access all files in the computer for importing to the timeline. Mac user can get Mac version - Pavtube Video Converter for Mac.

Best YouTube to MP4 Video Converter - Pavtube Video Converter

-It supports to convert videos to 150+ video/audio formats, including MP4, AVI, MOV, TOD, WMV, MKV, MOD, DV, HD MOD, WMA, M4B, MP3, M4A, OGG, M4R, WAV, etc.
-With this video converter you can perform basic video editing such as trimming, rotating, splitting, merging, cropping, adjusting brightness, contrast and saturation.
-It is built to convert media files to support different devices like Gear VR, PSP, PS3, PS4, XBOX, Apple TV, TV, Samsung Phones, Android Generic phones, iPhone, iPad, Blackberry LG and other phones.
-It supports Windows XP, Vista, 7, 8, 10 and macOS 10.7 and above to the latest macOS 10.12 Sierra.

Free download the Youtube to MP4 Video Converter

Other Download:
- Pavtube old official address: http://www.pavtube.com/video_converter/
- Cnet Download: http://download.cnet.com/Pavtube-Video-Converter/3000-2194_4-75734821.html
- Softonic Download: http://pavtube-video-converter.en.softonic.com/

Step-by-step Guide on How to Convert YouTube to MP4

Step 1: Import YouTube Files

When you launch the program, click on “Files” and then choose “Add Video” from the menu bar and you will easily add the files that you want to work on. With that option, it’s easy adding multiple files at the same time. There is the easier alternative of dragging and dropping the files.

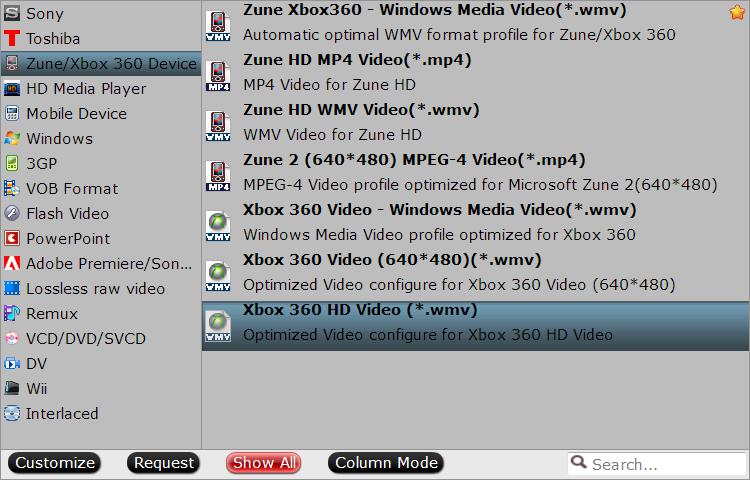
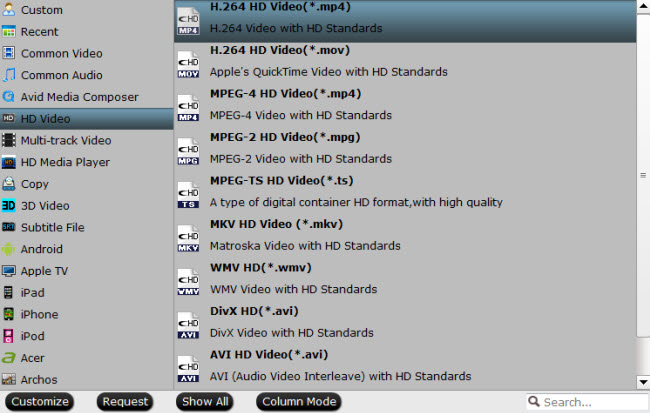
Step 2: Choose ouput format

Set right output format. Click "Format" bar, and select .mp4 from "Common video" or "HD video" according to your needs.

Step 3: Start Converting YouTube to MP4

There is a button marked “Convert” which you should click to begin the conversion process. It might be very fast if the file is short but if it’s long, you will have to wait for some time.

Read More:

Source: http://mediaconverting.blogspot.com/2017/02/convert-youtube-to-mp4.html

Friday, January 27, 2017

Transcode MP4 to Xbox One S friendly format for smooth playback

Slimline consoles are nothing new, but Microsoft really mixed things up with its Xbox One S. While the original Xbox One maxed out at 1080p, the new Xbox One S takes it all the way to 2160p, otherwise known as 4K. Thouh Xbox One S supports 4K video playback, it does not support all videos like MP4 video. When playing MP4 on Xbox One S, many people just encounter various problems, such as no audio when playing video, and Xbox One S can’t read some of MP4 files, etc.

xbox one s mp4 solution

So if you can’t play your MP4 video, here is no other ways but to convert MP4 to Xbox One S supported MP4 for successfully playback.

Best Xbox One S Video Converter: Transcode MP4 to Xbox One S Supported Format

To help fix Xbox One S MP4 playback issue and watch MP4 on Xbox One S without any problems, Pavtube Video Converter for Mac, the best Xbox One S video converter, is highly recommended to convert any video to the format accepted by Xbox One S, such as convert MP4 to Xbox One S, AVI to Xbox One S, MKV to Xbox One S, WMV to Xbox One S, MOV to Xbox One S, H.265 to Xbox One S etc. Besides, it also can encode MP4 in 4K/HD/SD resolution video to other PS3, PS4, Xbox One, Xbox 360 supported video formats for better playing. Windows user can get Pavtube Video Converter to convert MP4 to Xbox One S playable format on Windows.

Now free download this MP4 to Xbox One S converter here, install and run it on your Mac. It has a perfect compatibility with macOS Sierra, Mac OS X 10.11 El Capitan, 10.10 Yosemite, 10.9 Mavericks, 10.8, 10.7, 10.6, 10.5. (Read review)

Other Download:

- Pavtube old official address: http://www.pavtube.com/video-converter-mac/
- Cnet Download: http://download.cnet.com/Pavtube-Video-Converter/3000-2194_4-76179460.html
- Top4download.com: http://www.top4download.com/pavtube-video-converter-for-mac/iujpttsg.html

User guide on Converting unsupported MP4 Videos to Xbox One S friendly format

Step 1: Add MP4 files

Download the MP4 video converter on your computer, install and run the program. Then add .mp4 videos. You can choose to import videos or the entire folder by clicking the top left two icons.

Step 2: Choose Xbox One compatible formats

Click on the drop down menu of the Format, select "Zune/Xbox 360 Device"> "Xbox 360 HD Video (*.wmv)" as the target format. It fits on Xbox One S as well.

Tip: If the default video/parameters can't meet your needs, just click Settings icon to adjust the video codec, bitrate, frame rate, audio sample rate, etc to get a decent video as you want. In principle, the larger input values, the better output quality, but the corresponding larger file size.

Step 3: Start converting MP4 to Xbox One S

After all necessary settings, you can hit the "Convert" to start converting MP4 to Xbox One S friendly format with best video settings.

Once the conversion finished, click "Open" in main interface to quick locate the converted video. Then, you can stream the converted MP4 movies to Xbox One S via DLNA or USB freely. Enjoy!

If you are a Windows user, you can get Pavtube Video Converter to convert MP4 to Xbox One S Supported Format on Windows (10).

Free download MP4 to Xbox One S Video Converter for Windows

Other Download:
- Pavtube old official address: http://www.pavtube.com/video_converter/
- Cnet Download: http://download.cnet.com/Pavtube-Video-Converter/3000-2194_4-75734821.html
- Softonic Download: http://pavtube-video-converter.en.softonic.com/

Related Articles:

Source: http://iappsnow.com/2017/01/play-mp4-on-xbox-one-s/

Tuesday, January 24, 2017

How to Importt HD MP4, 4K MP4 to Camtasia Studio 9/8/7?

Camtasia Studio is a very popular application when it comes to editing/record videos on your computer, but unfortunately a lot of users have encountered problems from time to time, most of them related to problems regarding importing a quite hot file extension - MP4 in Camtasia Studio. So what's the matter? To get better videos or more wonderful video editing workflow, how to get Camtasia Studio to accept all your MP4 files? Refer to the following paragraph.

As we know, MP4 is a widely used format which can be ripped from Blu-ray/DVD, downloded from video sharing sites such as YouTube and Fox or captured from a GoPro camera. MP4 is a widely used format which means, you may download MP4 videos from video sharing sites such as YouTube and Fox, shared some MP4 videos from others, or captured MP4 videos from a GoPro camera.

While Camtasia Studio only accepts some MP4 video codecs:

Video File Format Supported by Camtasia Studio 8.4 and later

AVI
WMV
MPEG-1
MP3
WAV
WMA
MP4 (AVC/h.264 at no more than 30 frames per second)
MOV (QuickTime for Windows must be installed for MOV import.)  See here for more information.
MTS and M2TS files. (Version 8.4 and later) You will need the AC-3 Filter if running Windows 7 or Winodws 8.0.

Best MP4 Video Converter for Camtasia Studio to get all MP4 into Camtasia Studio 9/8/7

For unsupported MP4 file formats, you can record the playback in a desktop player or web browser window with Camtasia Recorder to create a .TREC file and import that into your project. You can also convert MP4 video formats to allow importing. But for the video footage from various cameras, the quick workaround is to convert or re-encode them into one of Camtasia Studio supporting formats, like AVI, mp4/h.264 (AVC) or WMV formats. And Pavtube Video Converter (Mac version), one of best MP4 video to Camstasia Studio converter for importing, is highly recommended here for you.

What Pavtube Video Converter can do for you?

The program is an easy-to-use Camstasia Studio converter, which can help you effortlessly transcode MP4 videos for smoothly editing in Camtasia Studio with zero quality loss, so that you can easily merge, split, trim, crop, edit and create MP4 videos with Camtasia. What's more, it can help you to convert H.265, MKV, MOV, AVI, WMV, MPEG-2, VOB, TiVo, MTS, MXF, XAVC to Camtasia studio editable formats as you need.

Hot search: MXF to Camstasia Studio ǀ MOV to Camstasia Studio ǀ AVCHD to Camstasia Studio

Even necessary, it can generates more optimal editing formats/codecs for you to use in different NLE apps, such as Adobe After Effects, Adobe Premiere Pro, Sony Vegas Pro, Pinnacle Studio, DaVinci Resolve, Windows Movie Maker and more. Now follow the step by step guide set out below to convert MP4 to Camtasia Studio and any video to Camtasia Studio.

Other Download:
- Pavtube old official address: http://www.pavtube.com/video_converter/
- Cnet Download: http://download.cnet.com/Pavtube-Video-Converter/3000-2194_4-75734821.html
- Softonic Download: http://pavtube-video-converter.en.softonic.com/

Follow the guide to Convert MP4 to Camtasia Studio supported video format

Step 1. Add MP4 video files

Run the Camtasia converter program and click "File" button to load the MP4 files which are needed to convert and import to Camtasia Studio. As you can see, you can also drag and drop the media to the program's main interface.

Step 2. Choose output format for compatible with Camtasia

Click "Format" button to select one Camtasia Studio supporting format, AVI, mp4/h.264 (AVC) or WMV formats are recommended.

Tip: if necessary, you can click the “Setting” button and customize proper video/audio parameters to get your desired video size, bitrate and fame rate.

Step 3. Start the conversion to Camtasia Studio

Click the "Convert" button to start transcoding MP4 video for Camtasia Studio. After the process completes, click "Open" button to find the generated videos, and then you can transfer and edit the video in Camtasia Studio 9/8/7/6 easily and quickly.

After conversion, now you can keep everything you use to edit and enhance your footages and videos project (Camtasia video and audio recordings, images/PowerPoint slides, music files). Enjoy now.

Read More:

Source: http://mp4gear.over-blog.com/2017/01/edit-mp4-in-camtasia-studio

Tuesday, January 17, 2017

3 Methods of Playing MKV on Windows Media Player

Can Windows Media Player Play MKV files?

Since MKV becomes a popular video format, many people have been wondering "Windows Media Player 11 won't play files with mkv extension even when the appropriate codec is installed??"

According to Microsoft support website, Windows Media Player still won't support MKV files. Though we can make WMP play MKV video by install some codec, sometime we still encounter can't play MKV in Windows Media Player issue. MKV is a container format which may contain multiple video and audio streams. And the video and audio stream can be encoded any of several ways. If the MKV video or audio codec is not WMP installed codec supported one, Windows Media Player won't play MKV video of this kind.

Here we recommend you 3 ways to play all MKV on Windows media Player

Method 1: Install Windows Media Player codec package

Just try to install the Combined Community Codec Pack (short for CCCP). The CCCP is a a codec pack specifically developed for playing videos including MKV. When you've installed it, you can smoothly play MKV files with Windows Media Player or Media Classic Player.

Method 2: Try another media player

If you don't like installing codecs for Windows Media Player, or the codec doesn't work for some unknown reasons, you can try to use another media player. You may know of VLC player. Yeah, VLC is a great open-source cross-platform multimedia player. And it can play most multimedia file formats like MKV, AVI, MP4, FLV, WMV, etc, as well as discs.

Method 3: Converting MKV to Windows Media Player playable format for smooth playing

Serving as a high-class MKV to Windows Media Player Converter, Pavtube Video Converter can batch convert MKV to Windows Media Player recognizable formats like WMV, AVI, ASF, etc to solve "Windows Media Player won't play MKV files". Furthermore, Pavtube Video Converter does support converting nearly all video formats like MP4, AVI, H.265, MOV, MTS, WTV, MKV, FLV, 3GP, WebM, MXF, XAVC, RMVB, etc to WMP compatible formats to play MOV, WTV, MKV, FLV, 3GP, etc in Windows Media Player.

Even more amazing, this MKV to Windows Media Player Converter has the feature of converting almost all video formats to Windows Media Player supported audio formats like WMA, MP3, WAV, AU, and AIFF so that you can only enjoy audio in WMP if you don't like the image of the video.

Besides, it is not only a video to WMP Converter but also an audio to WMP Converter. By using it, you can fast convert various kinds of audio formats like FLAC, APE, 3GA, M4A, VOC, M4R, OGG, DTS, RA, etc to Windows Media Player popular audio formats in order to play these audio in WMP.

Free download the Video Converter for converting MKV to Windows Media Player

Other Download:
- Pavtube old official address: http://www.pavtube.com/video_converter/
- Cnet Download: http://download.cnet.com/Pavtube-Video-Converter/3000-2194_4-75734821.html
- Softonic Download: http://pavtube-video-converter.en.softonic.com/

Start converting MKV to Windows Media Player Compatible format

Step 1. Click the "File" button to import the MKV files to this MKV WMP Converter. Or simply drag and drop the MKV video to the main window of this program.

Step 2. Click the “Format” bar to get the drop-down menu and you can get “Common Video -> WMV3 (WMV9) (*.wmv)” or go to “HD Video” > “HD WMV” as the best output format for playing in Windows Media Player (12).

Step 3. The built-in editing function provided by MKV Video Converter is something worth trying. To trim the video, add artistic effects, adjust audio, add watermark, customize video parameters and so on. You can get the work done splendidly. Of course, if you don’t think it’s a necessary to do, you can skip it and move onto the next step directly.

Step 4. Press the “Convert” button on the bottom-right corner of this MKV Video Converter to start doing video conversion. The larger the MKV files are, the more conversion time should be taken.

Play MKV in Windows Media Player

Playing MKV in Windows Media Player will become a piece of cake with the help of the ideal MKV to Windows Media Player Converter and the above step by step guide. Then never worry about the following Windows Media Player won't play MP4 files troubleshooting:

  • When I try to play MKV in Windows Media Player, it won't play my .mkv files -- no video, just sound, and Media Player will hang trying to exit.
  • I downloaded a video of the MKV format from keepvid and when it went to Windows Media Player it did not work since and could not play and I got a message saying that windows media player cannot play mkv files.
  • My Windows Media Player 11 won't play files with .mkv extension even when the appropriate codec is installed: my windows media player just won't play anything that has an .mp4 extension; it keeps saying "Windows Media Player cannot play the file. The Player might not support the file type or might not support the codec that was used to compress the file."
  • When try to add the MKV to Windows Media Player 12 for playing, the MKV file type isn't recognized by the Media Player and therefore isn't added to the Media Library.
  • Some of my MP4 video can play in WMP, while other of my MP4 won't play in Windows Media Player 12.

Read More:


Friday, January 13, 2017

How can I open DVD files on Windows?

Many people will meet the problem that open DVD movie on Windows, there is too many ways to do. Following will provided some ways to solve it.

Windows supported media formats is based on file types supported by system-attached Windows Media Player. You can use Windows Media Player to open your DVD files. Most of us to open DVD files on Windows Media Player like this:

1. Insert the disc you want to play into the drive.

2. Open Windows Media Player, and then, in the Player Library, select the disc name in the navigation pane.

However, sometimes it shows an error message as below. Because DVD protection schemes/region codes or on Windows without requiring additional DVD codes. You can download a DVD decoder to solve it.


Maybe you don’t want to install any decoders and also just can decode DVD online. In view of its low security and easily affected by network speed when you are decoding a huge DVD file, it’s not a wise choice.

A third software: VLC Media Player (Windows 10&Windows8)

The easiest way to play DVDs in Windows 8 or Windows 10 is by installing a third-party DVD player. Like VLC media player. It’s free, and after you install it, you’ll be able to play DVDs in VLC. You just need to choose your Disc and open it.


From above ways, Microsoft makes playing DVDs a little confusing, as some versions of Windows include support, while other versions do not. Finding a Professional software which can support any DVDs to play on any Windows versions or any players on Windows. this confusion will be solved by Pavtube ByteCopy, It will be your good assistant.

Play DVD on Windows with Pavtube ByteCopy
 
Pavtube ByteCopy is easy to operate with an friendly interface. You just need to open it, then click the ‘File’to choose your DVD, DVD will be imported into it, you can enjoy your DVD at the ByteCopy right window directly.

I’ve always used Pavtube ByteCopy to deal with issues about DVD for a long time.There is many reasons for me to choose it. I want to share Pavtube ByteCopy with you.

Firstly. Some uses may have used online decoder and found some video or audio parameters which are needed to choose by yourself. If you don’t know which parameters is best for a video or audio, how to do? ByteCopy can help you. It automatically can rip and decode any protection DVD with 100% audio and video quality. You just need to click with your mouse, a perfect video will be ready smoothly. ByteCopy is very comprehensive. It also provides numerous video and audio parameter settings for you to alter video or audio parameters by yourself if you want to edit it. You can be the master of video or audio.

Secondly. It allows you to select multiple video, audio of the DVD to be converted into the MKV, MP4, MOV, and AVI container formats for playing on popular Windows players, such as Windows Media player, RealPlayer, VLC Media Player, Quicktime, KMPlayer and so on or other devices.  

Thirdly. ByteCopy can not only convert files from your hard drive to almost any format, you can also convert abundant DVDs at the same time with fast speed and stability. You must can’t wait to know this powerful software, click here to bring you to the ByteCopy world.

Free download and buy ByteCopy

Here is the top 5 popular Windows players list for your reference. As Windows Media player for example to show you the ByteCopy operation.


How to Rip and Convert DVD to WMV Video Format

Step 1. Import your DVD files 

First, you will insert your DVV to your PC driver, then open ByteCopy (If you download the free version, please click ‘’Trial’’), Then click ‘’File’’, choose ‘’Load From disc,’’ the software can automatically detect the main title of the DVD. And before the conversion, you can choose desired subtitle and forced subtitle.

 load DVD

Step 2. Choose output format and location

Click ‘’Format’’ to choose video format: WMV, then click ‘’Browse’’ to choose save location. 


As we said above, you click ‘’Setting’’ can set the video and audio parameters. For example, you want to alter the’’ Size’ to ‘’1280*720’’ or alter ‘’Channels’’ to ‘’stereo’’.

Step 3. Click the ‘’Convert’’ button to start converting. Waiting for a moment, when it shows 100%, you can click ‘’Open output folder’’ to find your DVD, then enjoy DVD on Windows.  

Further Reading

Thursday, January 12, 2017

How to Fix VLC Player won’t play DJI Inspire 2 4K ProRes/H.265 videos?

To enjoy super image quality, people tend to play DJI Inspire 2 4K videos on their devices. However, DJI Inspire 2 video play problem can happen at any time. Here is an example.

"Recently, I have recorded a very high quality DJI Inspire 2 4K video . I couldn't play the DJI Inspire 2 4K video on my Windows 7 PC using VLC player. Please help!"

So, how to fix such kind of error? All feasible solutions will be introduced in the following part.

Why can't I play DJI Inspire 2 4K on VLC Media Player?

Using DJI Inspire 2 4K, you can easily record Apple ProRes, H.265, H.264 codec. The new H.265 codec and special ProRes is not friendly with VLC. And 4K video resolution is also not friendly with VLC player. And another reason for can’t play DJI Inspire 2 4K on VLC is your 4k files are corrupt. Play them on other players and devices to check if this is the reason.

How to Solve "VLC Won't Play DJI Phantom 4 Pro 4K" Issue?

To make VLC support DJI Inspire 2 4K H.265 format, On this situation, converting your DJI Inspire 2 4K to VLC natively supported format is the fastest solution. Serving as a high-class 4K Video Converter, Pavtube Video Converter has the feature of easily converting all kinds of DJI Inspire 2 4K files to VLC recognized format with zero quality loss. And it supporting compress DJI Inspire 2 4K to 1080p for smooth playing on VLC Player.

Better still, this Converter is also an all-in-one video and audio converter. It supports converting nearly all video and audio formats like MP4, MOV, VOB, MKV, FLV, MTS, MXF, WebM, AVCHD, etc and MP3, WAV, DTS, APE, AIFF, FLAC, etc. for the purposes of playing, editing and sharing.Then playing DJI Inspire 2 video files in almost all players and devices like iDevice, Android, BlackBerry, Xbox, Sumsung, QuickTime, VLC, and PowerPoint becomes more and more easily and quickly. And you will be able to edit your files on programs like Windows Movie Maker and Sony Vegas while sharing is possible with sites like Facebook and YouTube. The other thing you will like about this software is speeds at which it converts videos. It is super fast and has the guarantee of maintaining originality of video quality. For mac users, here is the mac version.

Free Download DJI Inspire 2 4K Video Converter for VLC

Other Download:
- Pavtube old official address: http://www.pavtube.com/video_converter/
- Cnet Download: http://download.cnet.com/Pavtube-Video-Converter/3000-2194_4-75734821.html
- Softonic Download: http://pavtube-video-converter.en.softonic.com/

Start converting DJI Inspire 2 4K to VLC supported format for better playing

1. Load 4K Videos Launch the best 4K Video Converter; click “File” and load your DJI Inspire 2 files. Or directly drag and drip your DJI Inspire 2 4K source to the program.

2. Click "Select Format "drop-down button to select "MP4" from "Common Video" or "HD Video" category under "Format". You also can choose other VLC popular formats form "Common Video" or "HD Video" category, H.265 MP4 is OK for the latest version of VLC.

Tip: Click “Settings” button; you can adjust video and audio settings, including codec, aspect ratio, bit rate, frame rate, sample rate, and audio channel. To downsacle DJI Inspire 2 4K to 1080p, do remember adjusting video size to 1920*1080. If you want to downsize 4k to 2k, you are advised to set video size as 2048×1080.

3. Hit “Convert” button to start encoding your DJI Inspire 2 4K movies. After conversion, check the generated video and it would be much easier to playback and edit your DJI Inspire 2 video clips.

Related Posts

Wednesday, January 4, 2017

Load Canon EOS 5D Mark IV 4K to Cyberlink PowerDirector for editing

The Canon 5D Mark IV is the world's most universal DSLR. It is competitive for sports and action as well as for wedding, nature, portrait, landscape and product photography. It can record 4K MOV video and HD MP4 video:

Video

MOV files

4,096×2,160 (Digital Cinema Initiative 4K) at 29.97, 24.00 or 23.976 FPS. These 4,096-wide images are ideal for 'scope (2:40:1) shooting.

1,920×1,080 at 59.94, 29.97, 24.00 or 23.976 FPS.

1,280×720 at 119.88 FPS.

Motion JPEG (4K) or MPEG-4 AVC/H.264 (HD) video.

Linear PCM audio.

MP4 files

1,920×1,080 at 59.94, 29.97, 24.00 or 23.976 FPS.

MPEG-4 AVC/H.264 video.

AAC audio.

After recording 4K MOV or HD MP4 videos from Canon 5D Mark IV, you may want to edit them in PowerDirector. But it is not easy to import Canon 5D Mark IV 4K MOV video to PowerDirector. Look at some Canon EOS 5D Mark IV 4K MOV to Cyberlink PowerDirector importing/editing issues:

Q1: Canon 5D Mark IV MOV FILE NOT WORKING CYBERLINK POWER DIRECTOR 13

"I just upgraded from cyberlink power director 12 to 13 and now all my Canon 5D Mark IV camera footage ".mov files" wont work in either versions. I've contacted customer support they said the files are no good,but i had them working in 12 before...? Can i convert them to another file type if so what would suit?"

Q2: No audio with some Canon 5D Mark IV .mov files in PowerDirector

"I imported some video files to test and I found that with some of the files the audio is not recognized by PD10. Files imported included .avi (worked fine) and .mov (some worked but others had no audio).

Get the Canon 5D Mark IV 4K to Cyberlink PowerDirector Video Converter

As you seen, PowerDirector dosn not support Canon 5D Mark IV 4K MOV video. The quick workaround is to convert or re-encode them into one ofCyberlink PowerDirector supporting formats, like MPEG-2 format. And Pavtube Video Converter(Mac version available as well), one of best video to Camstasia Studio converter for importing, is highly recommended here for you.

The program is an easy-to-use Cyberlink PowerDirector converter, which can help you effortlessly transcode Canon 5D Mark IV 4K MOV videos for smoothly editing in Cyberlink PowerDirector with zero quality loss, so that you can easily merge, split, trim, crop, edit and create suitable videos with Cyberlink PowerDirector. What's more, it can help you to convert MOV, AVI, WMV, MPEG-2, VOB, TiVo, MTS, MXF, XAVC to PowerDirector editable formats as you need. Even necessary, it can generates more optimal editing formats/codecs for you to use in different NLE apps, such as Adobe After Effects, Adobe Premiere Pro, Sony Vegas Pro, Pinnacle Studio, Windows Movie Maker and more.

 
Hot search
 

Now follow the step by step guide set out below to convert Canon EOS 5D Mark IV 4K MOV to PowerDirector. Firstly download this best video converter for PowerDirector.

Other Download:
- Pavtube old official address: http://www.pavtube.com/video_converter/
- Cnet Download: http://download.cnet.com/Pavtube-Video-Converter/3000-2194_4-75734821.html
- Softonic Download: http://pavtube-video-converter.en.softonic.com/

Convert Canon EOS 5D Mark IV 4K MOV to PowerDirector Editable format

Step 1: Launch Pavtube Video Converter, then click the Add button to load Canon EOS 5D Mark IV 4K MOV files to the program from your computer. You can also directly drag the video files into the program directly. Batch conversion is supported, so you can load more than one file to save time.

Step 2: Click "Format" menu firstly and then follow "Adobe Premiere/Sony Vegas" > "MPEG-2 (*.mpg)" as the output format. MPEG-4, WMV are also the proper choices.

Tip: Before conversion, you can click the "Settings" icon to customize the video/audio settings Bitrate of Video and Audio, the Codec of Video and Audio, Video Size, Sample Rate, Frame Rate, Audio Channels, etc. for PowerDirector.

Step 3: Click the Convert icon under the preview window, and the program will start transcode Canon EOS 5D Mark IV 4K to MPEG-2 for PowerDirector 10/11/12/13/14.

When the conversion is finished, you can click "Open" button to get the generated .mpg files effortlessly. Afterwards, you can import converted video clips into PowerDirector for further editing.

Related Posts