Today, I sat down and tried to record gameplay. When I was done recording, I compressed the video file using the XVid Codec. This is when the problem starts. When I open up Premiere Elements and try to import the file it won't work.
The error is: "This type of file is not supported, or the required codec is not installed".
Is there a different codec I should install or should I try another professional video editing software? I'm not sure why a payware like Premiere Elements wouldn't read it.
AVI is a container also called wrapper, it is the codec that is inside that determines whether or not it will be supported. Well, it comes down to codec, various codec’s play a role in almost every AV file. You may noticed that, AVI can play pretty well in Windows Media Player, VLC Player or QuickTime Player, but can not work with Adobe Premiere Elements.
Adobe Premiere Elements is built around a DV-AVI workflow. (DV-AVIs are AVI files that use the DV codec.) This means that DV-AVIs flow easily through it and place the least strain on Premiere Elements. Unfortunately, not all AVIs use the DV codec, just like you record gameplay with XVid Codec, and many (such as video from still cameras) can cause real problems for Adobe Premiere Elements.
If you get AVI files in other codec other than DV codec, it is sad to say that you are refused to import AVI to Adobe Premiere Pro for editing unless you convert AVI videos to Adobe Premiere Elements supported videos.
To solve all of the Premiere Elements and AVI issues and save your time to understand these complicated codecs and download them for video editing in Adobe Premiere Elements, a simple workaround is to convert AVI to Adobe Premiere Elements edit-friendly format.
You can use Pavtube Video Converter (Review) to get rid of trouble effortlessly. This video app can help you convert AVI into Premiere Elements compatible format(.mov, .wmv, .mpg) with least quality loss. Plus, with the built-in video editor, you can also choose to trim, crop, add watermark to your original videos.
If you running on Mac OS, please get the Mac Version (10.11 El Capitan included). Now just download its free trail version and follow the below guide to convert AVI for editing in Adobe Premiere Elements.
Hot Search: Play AVI on QuickTime | VOB & IFO files to AVI | Copy DVD to AVI
The trail-before-purchase is supported, just feel free to try it:


Tips: The conversion speed is very fast because it supports batch conversion and NVIDIA CUDA & ATI Stream (AMD APP) acceleration technologies. It converts multiple video clips at the same time, moreover it can shut down computer after the process is complete, so run the app overnight and you could enjoy the created videos next morning when you are up.
How to Convert AVI Files to MPEG-2 for Premiere Elements 13/12
Download and install Pavtube Video Converter on your PC (compatible with Windows 10, Windows 8, Windows 7, Windows XP, Windows Vista, and Windows 2000).
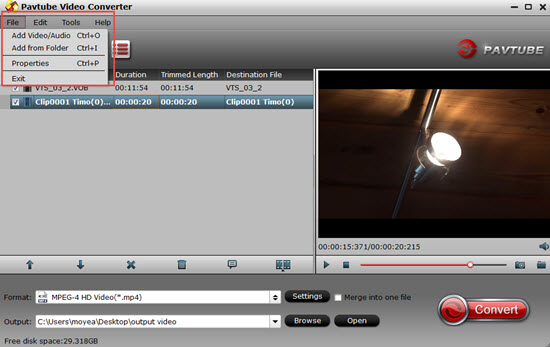
Run this program, you will find the interface is very brief, this program is very easy to use.
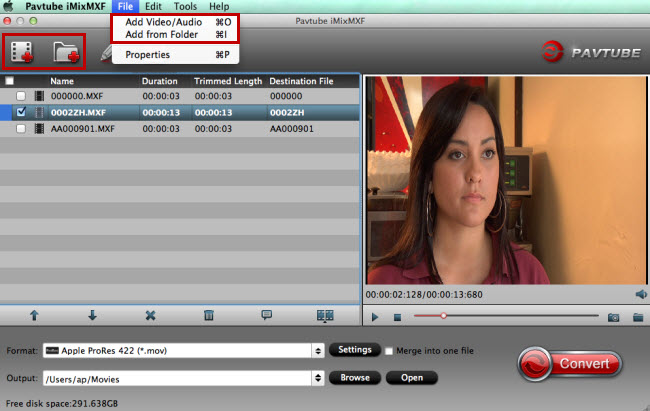
Step 1: Add AVI files to the program
Click the “Add File” button to select the AVI videos from your hard drive to this program. To save your time, this program supports batch conversion so you can add multiple files at a time.
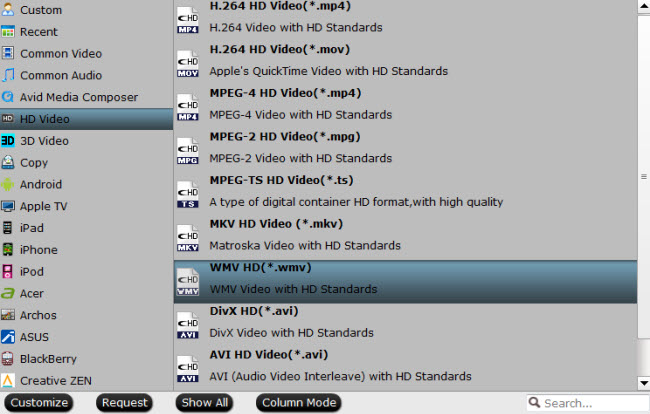
Step 2: Choose output format and specify output folder
Choose output format for your specific usage. For example in this case, click “Format” options to select the best format. It is recommended to select “Adobe Premiere/Sony Vegas MOV (AVC)(*.mov) or “Adobe Premiere/Sony Vegas MPEG-2 (*.mpg)” for best output format.. If you select all files and click Merge, you can join all imported AVI files to one output video.

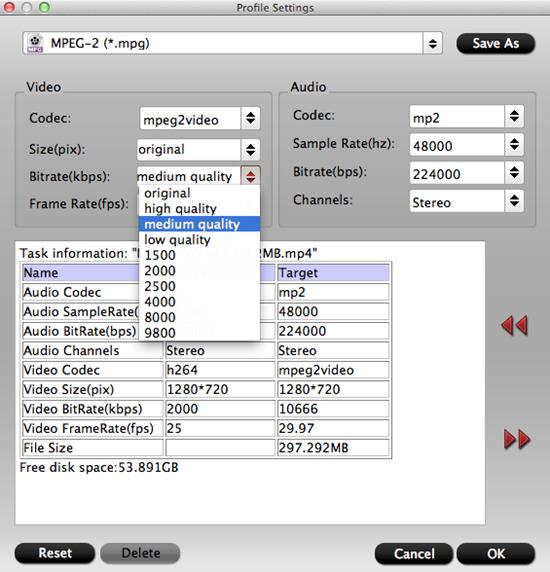
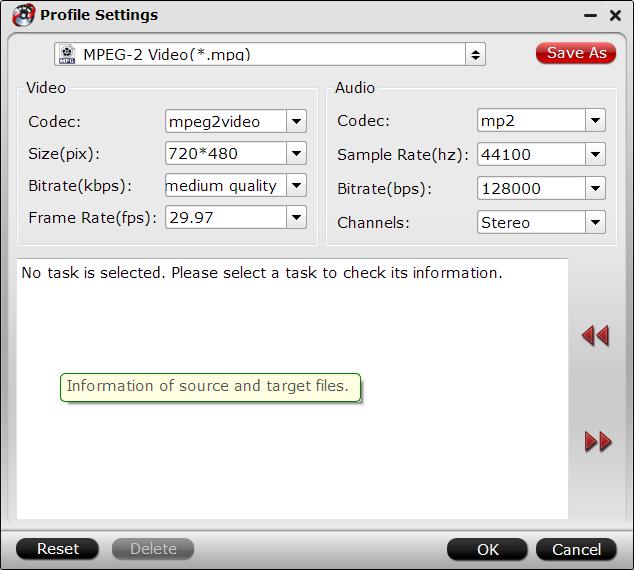
Tip: If you like, adjust video and audio parameters, including the Bitrate of Video and Audio, the Codec of Video and Audio, Video Size, Sample Rate, Frame Rate, Audio Channels, etc., by clicking the Settings button on the main interface for getting the best quality.
Step 3: Convert
Click “Convert” button to start conversion immediately. Few minutes later, you will get output video in your destination folder.
After converting AVI to Adobe Premiere Elements 12/13. workable formats you can easily import them to your Adobe Premiere Elements 12/13 for editing. Hope you have a good editing experience.
Read More:
The error is: "This type of file is not supported, or the required codec is not installed".
Is there a different codec I should install or should I try another professional video editing software? I'm not sure why a payware like Premiere Elements wouldn't read it.
AVI is a container also called wrapper, it is the codec that is inside that determines whether or not it will be supported. Well, it comes down to codec, various codec’s play a role in almost every AV file. You may noticed that, AVI can play pretty well in Windows Media Player, VLC Player or QuickTime Player, but can not work with Adobe Premiere Elements.
Adobe Premiere Elements is built around a DV-AVI workflow. (DV-AVIs are AVI files that use the DV codec.) This means that DV-AVIs flow easily through it and place the least strain on Premiere Elements. Unfortunately, not all AVIs use the DV codec, just like you record gameplay with XVid Codec, and many (such as video from still cameras) can cause real problems for Adobe Premiere Elements.
If you get AVI files in other codec other than DV codec, it is sad to say that you are refused to import AVI to Adobe Premiere Pro for editing unless you convert AVI videos to Adobe Premiere Elements supported videos.
To solve all of the Premiere Elements and AVI issues and save your time to understand these complicated codecs and download them for video editing in Adobe Premiere Elements, a simple workaround is to convert AVI to Adobe Premiere Elements edit-friendly format.
You can use Pavtube Video Converter (Review) to get rid of trouble effortlessly. This video app can help you convert AVI into Premiere Elements compatible format(.mov, .wmv, .mpg) with least quality loss. Plus, with the built-in video editor, you can also choose to trim, crop, add watermark to your original videos.
If you running on Mac OS, please get the Mac Version (10.11 El Capitan included). Now just download its free trail version and follow the below guide to convert AVI for editing in Adobe Premiere Elements.
Hot Search: Play AVI on QuickTime | VOB & IFO files to AVI | Copy DVD to AVI
The trail-before-purchase is supported, just feel free to try it:
Tips: The conversion speed is very fast because it supports batch conversion and NVIDIA CUDA & ATI Stream (AMD APP) acceleration technologies. It converts multiple video clips at the same time, moreover it can shut down computer after the process is complete, so run the app overnight and you could enjoy the created videos next morning when you are up.
How to Convert AVI Files to MPEG-2 for Premiere Elements 13/12
Download and install Pavtube Video Converter on your PC (compatible with Windows 10, Windows 8, Windows 7, Windows XP, Windows Vista, and Windows 2000).
Run this program, you will find the interface is very brief, this program is very easy to use.
Step 1: Add AVI files to the program
Click the “Add File” button to select the AVI videos from your hard drive to this program. To save your time, this program supports batch conversion so you can add multiple files at a time.
Step 2: Choose output format and specify output folder
Choose output format for your specific usage. For example in this case, click “Format” options to select the best format. It is recommended to select “Adobe Premiere/Sony Vegas MOV (AVC)(*.mov) or “Adobe Premiere/Sony Vegas MPEG-2 (*.mpg)” for best output format.. If you select all files and click Merge, you can join all imported AVI files to one output video.
Tip: If you like, adjust video and audio parameters, including the Bitrate of Video and Audio, the Codec of Video and Audio, Video Size, Sample Rate, Frame Rate, Audio Channels, etc., by clicking the Settings button on the main interface for getting the best quality.
Step 3: Convert
Click “Convert” button to start conversion immediately. Few minutes later, you will get output video in your destination folder.
After converting AVI to Adobe Premiere Elements 12/13. workable formats you can easily import them to your Adobe Premiere Elements 12/13 for editing. Hope you have a good editing experience.
Read More: