Cyberlink PowerDirector video editing software provides easy-to-use and powerful tools for high quality video productions. Once you have finished editing your video production, you can save it as a video file so that you can conveniently upload and share your great editing work on social networking web sites, transfer and play on portable devices, stream to TV via home media servers or burn to a disc. Cyberlink PowerDirector allows you to export video in both 2D or 3D in various different file formats listed below.
Supported exported file formats by Cyberlink PowerDirector
Video Formats |
2D Video: 3GPP2, AVI, MPEG-2, H.264 AVC, Windows Media Video (WMV), MPEG-4, QuickTime(MOV), Matroska (MKV), XAVC-S (MP4), H.265/HEVC (MP4/MKV/M2TS) |
Audio Formats |
WMA, WAV, M4A |
From above lists, we can see that the exported file formats by Cyberlink PowerDirector is limited to few container file formats or file codec. If you wish to export other popular video file formats such as MPEG-1, FLV, M4V, ASF, etc or audio file formats like MP3, AAC, AC3, AIFF, FLAC, MKA, etc, for YouTube sharing, iTunes playback or music players listening, then you will need the assistance of a third-party Cyberlink PowerDirector video converter.
Convert Cyberlink PowerDirector video to more digital formats
Export Cyberlink PowerDirector projector to digital video
Before converting Cyberlink PowerDirector projector to other digital file formats, you will first need to export Cyberlink PowerDirector projector to a digital video with the following steps:
1. In PowerDirector, navigate to the Produce Tab.
2. Select your preferred video format, and then select the Profile name/ Quality for the created video file.
3. Click the ellipsis button (marked in red) to set the output folder, i.e. where the created 2D video will be located.
4. Enter a file name and then click Save.
5. Click the start button to output your video production.
Then feel free to download Pavtube Video Converter, which can assist you to batch load multiple Cyberlink PowerDirector video and then convert any of your desired SD/HD/2K/SD file formats with the container file format of AVI/WMV/MP4/MOV/MKV/FLV/3GP/3GPP/3GPP2/ASF or codec like H.264, H.265, Xvid, Divx, DV, Apple Prores, MPEG-1, MPEG-2, MPEG-4, MPEG-TS, etc.
Besides the plain digital file formats, you can also use this program to convert Cyberlink PowerDirector video to hot devices and program preset profile formats or other editing program like Vegas Pro, Movie Studio Platinum, Premiere Pro, After Effects, Davinci Resolve, Avid Media Composer specially optimized editing codec.
Pavtube Video Converter is available on both Windows 10/8.1/8/7, it is also accompanied by an up-to-date Mac version - Pavtube Video Converter for Mac for macOS Sierra or macOS Sierra
The program is very easy to use, no matter experienced user or fresh could handle it very well. What's more, the results produced by the program are pretty high quality, you can't tell the difference between the converted video and the original Cyberlink PowerDirector video.


Get Pavtube Video Converter with 20% off discount, coupon codec: 45K2D47GJH |
Step by Step to Cyberlink PowerDirector Video to MP4, MKV, MOV, AVI
Step 1: Load Cyberlink PowerDirector Video.
Download the free trial version of the program. Launch it on your computer. Click "File" menu and select "Add Video/Audio" or click the "Add Video" button on the top tool bar to import Cyberlink PowerDirector video into the program.

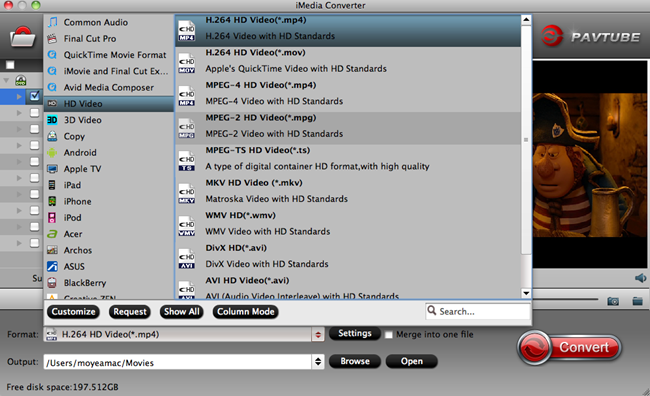
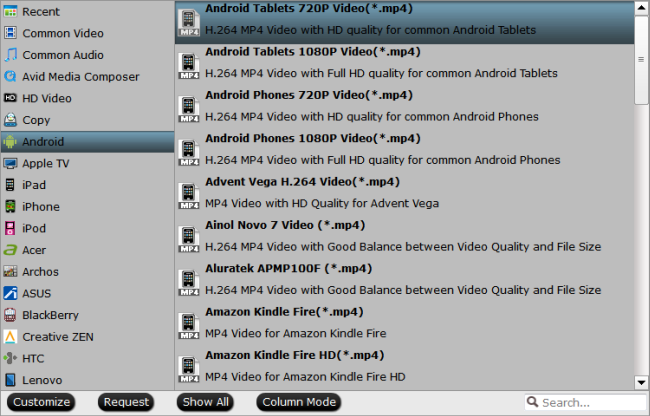
Step 2: Define the output format.
Clicking the Format bar, from its drop-down list, select one of your desired digital file format or devices and program preset profile formats that can't be exported from Cyberlink PowerDirector.
Step 3: Start the conversion process.
Clicking the Convert button on main interface to pop out a PowerDirect video to MP4, AVI, MOV Conversion window with conversion information such as Time elapsed, Time left, Generated size, and Estimated size.
After the conversion, you can click "Open output folder" to popup output directory with the converted files. Then feel free to play, share and edit the PowerDirector video as you like.
Related Articles
Any Product-related questions?support@pavtube.com