Sony has just announced its latest flagship point-and-shoot camera the RX10 IV to extend its Cyber-Shot line-up. With the camera, you can shoot UHD 4K video at 30/24 fps with exceptional clarity. The advanced XAVC S format also assists you to record at a high bit rates up to 100 Mbps. For Mac users, when the shooting work is completed, you can import Sony RX10 IV 4K XAVC S to Final Cut Pro - Apple's signature professional video editing software for doing some doing some precise and intuitive timeline editing. The following article will talk about the workflow of RX10 IV 4K XAVC S with FCP.
Can FCP natively import RX10 4K XAVC S video?
The previous version of FCP, version 7, is not compatible with XAVC or XAVC S. Only the latest version - Final Cut Pro 10.1 (Final Cut Pro X) adds general QuickTime support for XAVC. For Mac OS X 10.9 and later users, you can download a special plug-in (PDZK-LT2 V.1.2) created by Sony for faster and fluid workflow of XAVC S footage with Final Cut Pro X 10.1 and later.
To install the plug-in and ingest XAVC S material into FCP X:
- Insure that the version of FCP supports the chosen XAVC mode
- Install the XAVC/XDCAM plug-in for FCP (PDZK-LT2 V.1.2).
- Click the Import button on the left-hand side of Project.
- Locate the footage from card (SxS, XQD or SD) in Devices.
- Click on any of the clips and choose Import Selected.
- Confirm in the new window to:
Copy files in Final Cut Events folder (to work with native XAVC files)
Best workflow of RX10 IV 4K XAVC S with FCP 7
For users who are still using FCP 7 or previous version which lacks the ability to directly ingest XAVC S, you will need to perform a format transcoding process. Here, you can get the job easily done with our best Mac XAVC S Converter - Pavtube Video Converter for Mac. Which can assist you to easily transcode RX10 IV 4K XAVC S to FCP 7 best favorable editing codec - Apple Prores, which is intended for using during video editing. This intermediate codec retains high quality then end-user codec while still requiring much less expensive disk systems compared to uncompressed video.
In addition, as 4K video editing is only available for Final Cut Pro X 10.1 via HDMI on certain Mac computers. Therefore, to get a smooth workflow of 4K video with FCP 7, it would be much ideal for you to compress 4K to 1080p by changing the output file resolution as "1980*1020" in the program's "Profile Settings" window.


How to to Convert and Compress X10 IV 4K XAVC S to 1080p Prores for FCP Editing?
Step 1: Load RX10 IV 4K XAVC S video.
Download the free trial version of the program. Launch it on your computer. Click "File" menu and select "Add Video/Audio" or click the "Add Video" button on the top tool bar to import RX10 IV 4K XAVC S video files into the program.

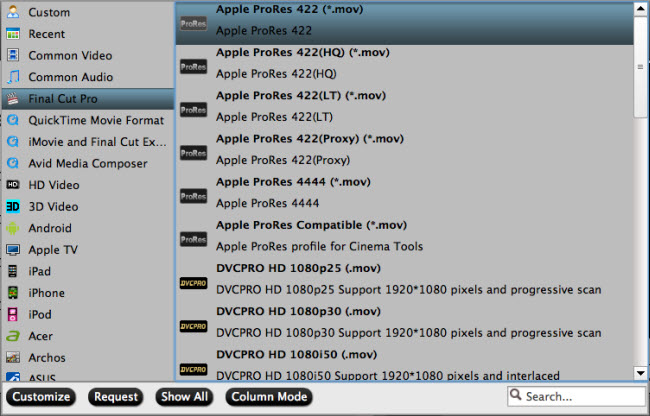
Step 2: Define the output format.
Clicking the Format bar, from its drop-down list, select Final Cut Pro 7 native compatible editing codec "Apple Prores 422(*.mov)" under "Final Cut Pro" main category.
Step 3: Compress 4K to 1080p.
Click "Settings" on the main interface to open "Profile Settings" window, from "Size(pix)" drop-down list, select "1980*1020" to compress 4K to 1080p.

Step 4: Start the final conversion process.
After all setting is completed, hit the "Convert" button at the right bottom of the main interface to begin to transcode and compress Sony RX10 IV 4K XAVC S to FCP 7 smooth editing 1080p Apple Prores format.
When the conversion is finished, click "Open Output Folder" icon on the main interface to open the folder with generated files. Then feel free to import video to Final Cut Pro for the further professional post editing workflow.
Related Articles
Any Product-related questions?support@pavtube.com