Searching online, we find a general tutorial of moving FCP projects to Premiere Pro CC/CS6—XML.You can import entire projects, selected clips, or selected sequences that you export from Final Cut Pro as XML files. In Premiere Pro, bins and clips have the same hierarchies and names that they have in the Final Cut Pro source projects. Also, Premiere Pro retains the sequence markers, sequence settings, track layout, locked tracks, and sequence timecode start points of Final Cut Pro source projects. Premiere Pro imports text from the Final Cut Pro Text generators into Premiere Pro titles.
It’s worthy mentioning that you cannot import native Final Cut Pro project files, only XML files exported from Final Cut Pro. You can export Final Cut Pro XML files from Premiere Pro. The effects that are trAanslated from Premiere Pro are the same as those that are imported from a Final Cut Pro XML file. However, the least of perfection is complex operation. Are there any easier steps instead of complex workflow?
Here we can introduce you a professional FCP to Premiere Converter which can smoothly migrate FCP projects between NLEs softly. Pavtube HD Video Converter for Mac is such the best one we would like to introduce to you, which has the ability of transcoding FCP projects with the original high quality preserved. Even for the latest Mac OS X Yosemite, this program can also work well. With the recent upgraded version 4.8.5.1, it can also decode and encode the H.265/HEVC videos so nicely.


How to migrate FCP projects to Premiere Pro CC/CS6 for editing?
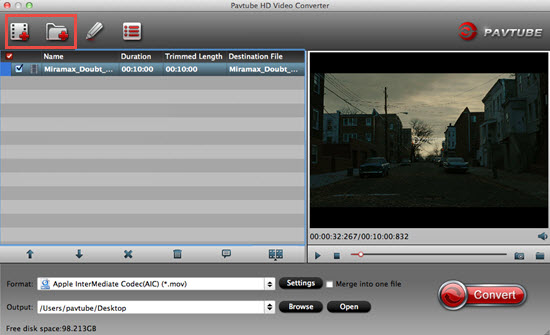
Step 1: The only difference between the trail version and the retail version is the watermark “Pavtube” in the middle of the converted files by trail version. After the installation, click “Add video” button to load your original FCP projects to the program. You can also load several files at once thanks to “Add from folder” button. You can highlight it for a preview.
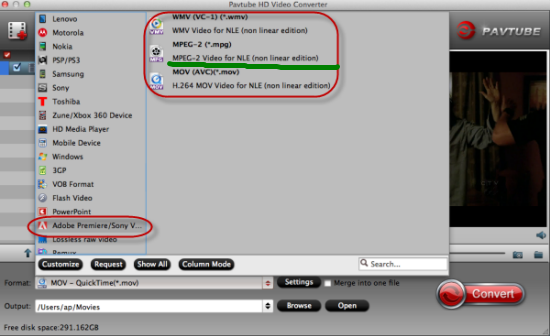
Step 2: For editing FCP projects in Premiere Pro CC/CS6, you can hit the “Format” bar to choose “Adobe Premiere/Sony Vegas>>MPEG-2 (*.mpg)” as best output format.
Step 3: Click “Settings” button to customize the output video and audio settings by yourself. But if you are not good at it, you’d better use the default parameters, they will ensure you a good balance between file size and image quality basically. You can change the resolution, bit rate, frame rate as you need.
Step 4: Now everything has been settled, and don’t forget to set the file location. Click “Convert” button to start the conversion work and click “Open” when you finish your conversion to check your converted files.
Conclusion: When you finished transferring FCP projects to Premiere Pro CC/CS6, we can enjoy editing the videos so nicely. Good news! All users can enjoy 30% discount from May 4th to May 6th after the upgraded days! Come on!
Further Reading:
- Import Sony XAVC MXF to Premiere Pro CC on Mac Yosemite: XAVC is a recording format that was introduced by Sony. XAVC can support 4K resolution (4096 x 2160 and 3840 x 2160) at up to 60 frames per second.
- Convert BDMV Files for QuickTime, iMovie, FCP on Mac Perfectly: In the following article, it can offer us the best way to work for BDMV folder from AVCH camcorder and Blu-ray movies with MTS/M2TS extension files.
- Easily Convert XviD/Divx to Apple TV on Mac OS X Yosemite: Fond of enjoying movies on Apple TV with the high resolution on the latest Mac operation system OS X Yosemite?