The DJI Zenmuse X4S is a powerful camera featuring a 20 megapixel 1-inch sensor and a maximum ISO of 12,800. Its 84° FOV, high resolution lens makes the Zenmuse X4S as powerful during aerial imaging as it is on the ground. Combined withCineCore 2.0, the Inspire 2’s powerful image processing system, it can record 4K/60 H.264 and 4K/30 H.265 videos at a 100Mbps bitrate, and oversample 5.2K video into 4K video in real-time, capturing fine image details. With such perfect 4K camera in hands, you may want to edit DJI Zenmuse X4S 4K video in Premiere Pro/Elements/After Effects for adding some effects. In fact, 4K movies are limited to edited in Premiere Pro/Elements/After Effects.
Generally, the DJI Zenmuse X4S captures 4K video in MP4 or MOV (H.264 or H.265 codec) format, which is not native support formats by Premiere Pro/Elements/After Effects. To resolve DJI Zenmuse X4S 4K video and Premiere Pro/Elements/After Effects issues, the quick and easy workaround is to transcode the 4K videos to Premiere Pro/Elements/After Effects compatible videos and even downscale 4K to 1080p if necessary. The process is surprisingly easy and can be done with the help of Pavtube Video Converter for Mac.
Overall, this program is the best 4K video converter for handling 4K videos. With this program, you can effortlessly transcode 4K video to MPEG-2 , which will create an After Effects/ Premiere Pro/ Premiere Elements friendly file format keeping the 4K original quality. Except for transcoding DJI Zenmuse X4S 4K video to MPEG-2 format for Premiere Pro/Elements/After Effects, this 4K Video Converter also able to export DNxHD for Avid Media Composer, Apple ProRes for Final Cut Pro, Apple InterMediate Codec for iMovie and more NLE systems for native editing.
Free Download Pavtube Video Converter for Mac:


If you are a Windows user, and in need of edit DJI Zenmuse X4S 4K video in Premiere Pro/Elements/After Effects, etc. Please turn to Pavtube Video Converter.
How to transcode and import DJI Zenmuse X4S 4K video to Premiere Pro/Elements/After Effects?
Step 1: Load the DJI Zenmuse X4S 4K video to the converter
Install and run the 4K Video Converter, and then import the source 4K videos to it. To do so, you can directly drag & drop the files onto the main interface, or you can click the “Add File” icon to locate the videos from your local disk.

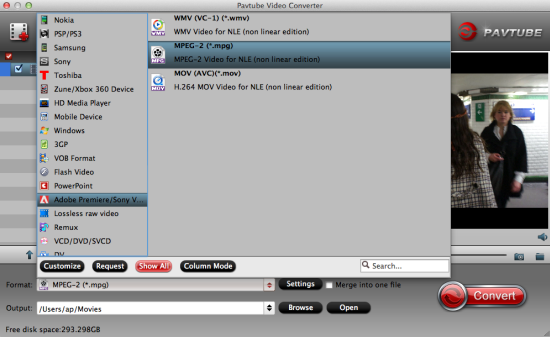
Step 2: Choose Premiere Pro/Elements/After Effects native format - MPEG-2
Since we have known the best format for Premiere Pro/Elements/After Effects, just go to the output format list where you need to follow “Adobe Premiere/Sony Ve…”> “MPEG-2 (*.mpg).”
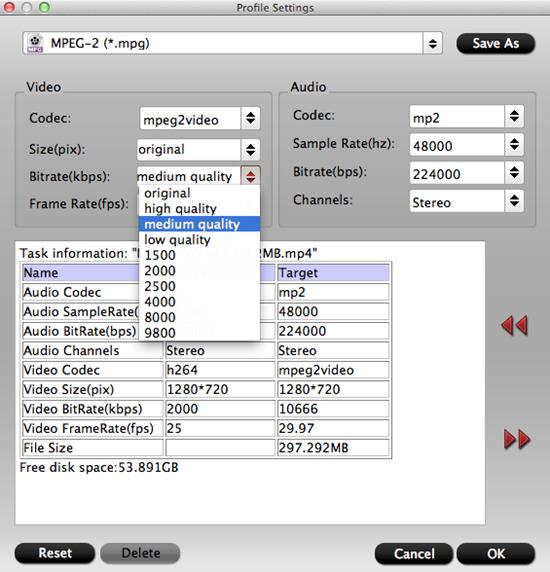
Step 3: Advanced Settings (Optional)
If you’d like to customize advanced audio and video parameters like Video Codec, aspect ratio, bit rate, frame rate, Audio codec, sample rate, audio channels, please turn to “Settings” page. If you are using After Effects CS6/CS5/CS4 which does not fully support native 4K files, 1080p would be the best settings. You can downscale 4K to 1080p here.
Step 4. Start the conversion
Finally, simply hig the big Convert button to start converting DJI Zenmuse X4S 4K video to Premiere Pro/Elements/After Effects friendly video formats.
Within several minutes, you can find the converted file on your computer by clicking the "Open" button. And then you can import the converted files to Premiere Pro/Elements/After Effects for editing smoothly.