The true fact is that QuickTime 7 is not compatible with Windows 10. It can affects lots of people’s experience with Windows 10 if QuickTime cannot be installed in Windows 10. Some online video sties require QuickTime installed for playing movies in internet browser; some free editing or player applications rely on the QuickTime framework, such as Adobe After Effects, Adobe Audition, Adobe Premiere Elements, GoPro Studio.
Though QuickTime 7 is incompatible with Windows 10, there are workarounds of installing QuickTime in Windows 10.
Solution 1 – Install the older version of QuickTime v7.7.6
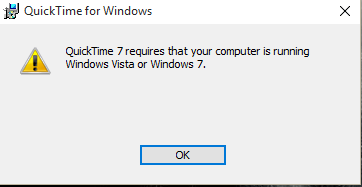
If you are using Windows 10 and see an alert message saying that it’s impossible to install QuickTime on your system, please try QuickTime 7.7.6 instead.
Solution 2 – Install the latest QuickTime v7.7.8 by tricks
1. Create a new folder like C:\QT or something similarly easy. All the content in this folder can deleted after QuickTime v7.7.8 is finished installation.
2. Download the latest QuickTime 7.7.8 from the official QuickTime for Windows page. And save it to C:\QT.
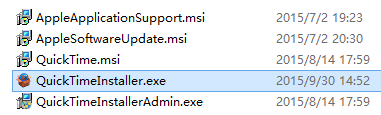
Extract QuickTimeInstaller.exe.
3. Right-click on the file QuickTimeInstaller.exe and choose “Extract here”. If you cannot see options of extraction, download and install WinRAR or 7Zip, then try to extract.
4. You should now have a folder that looks something like this, under C:\QT or whichever folder you chose.
Extract QuickTime
5. install the easy prerequisites:
a. Double-click the AppleSoftwareUpdate.msi file and click “OK”, “I accept” etc. until the install finishes.
b. Do the same with AppleApplicationSupport.msi.
c. Ignore the file called QuickTimeInstallerAdmin.exe as we won’t be needing it!
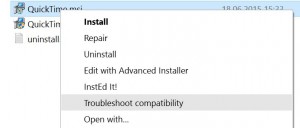
6. Right-click the QuickTime.msi file:
a. Select “Troubleshoot compatibility”.
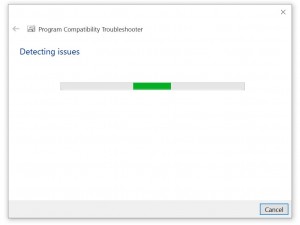
b. Wait for the wizard to scan the QuickTime.msi file for possible culprits (which we already know to be the Windows version check).
c. It should say that it has applied a “Skip Version Check” workaround to enable the QuickTime.msi installer to run.
d. Click “Test the program” and run the installation. Then click “Next” and complete the installation.
e. If it worked without error, you’re now done! If not, or if all else fails, continue to refer to point 7 to point 11.
7. Download this TRANSFORM file and extract it to C:\QT. We will use this file to temporarily remove the OS checks preventing the installation. (A “transform” file or “.mst” is just a simple file that adds or removes things from an MSI-based installation (like QuickTime.msi).
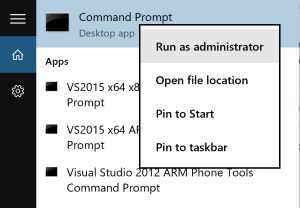
8. Click the Windows icon or Search icon and search CMD. Right-click the Command Prompt shortcut/icon and chooseRun as administrator.
9. Type the following command and hit ENTER:
msiexec /i QuickTime.msi /qn TRANSFORMS=FIX.mst ALLUSERS=1 /log C:\QT\install.log
10. Installation shouldn’t take more than a couple of minutes…
11.NOTE: A log file called install.log will be created in the C:\QT folder, which should end with something along the lines of “Return code 0”. If not, and QuickTime wasn’t installed, you may look in this file for any possible error codes (opens fine in Notepad or WordPad). You will need to install the older version QuickTime v7.7.6.
Solution 3 – Play QuickTime MOV in Windows 10 Without Installing QuickTime
In order to solve can’t play QuickTime MOV in Windows Media Player issue, a recommended solution is to convert QuickTime MOV to Windows Media Player compatible QuickTime MOV, WMV, ASF, MPG. Pavtube Video Converter is just the ideal QuickTime MOV to Windows Media Player which can fast convert QT MOV files to WMP supported video format without quality loss. Besides, no extra system component will be installed to your Windows and would probably slow down your computer. It’s fully compatible with Windows 10.
Free download it and follow the guide to convert QuickTime MOV to WMV format so you can import and play MOV files with Windows10 nicely.


1. Launch the Pavtube Video Converter and import QuickTime mov files.
Drag & drop QuickTime mov files to the program directly. Or go to the “File” menu, choose “Add Video” to locate the QT mov files you want to add. You can add several files to do batch conversion.

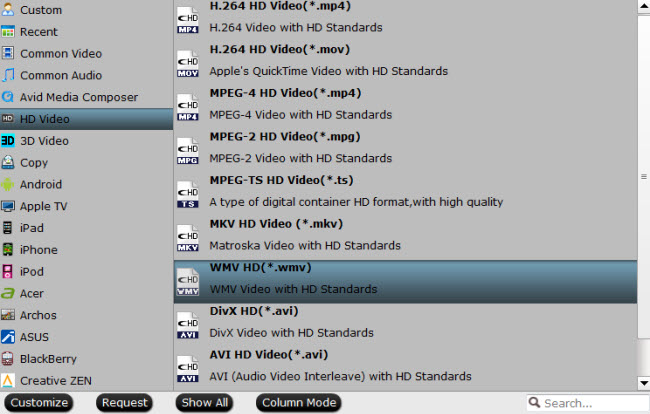
2. Choose WMV as output format
Click the Format menu, select Windows Media Player friendly format as your output video format. There, you can take WMV as your output video format. If you prefer high definition videos, move your mouse pointer to “HD Video” and then choose HD WMV.
3. Start converting QuickTime MOV to Windows 10
Press the big “Convert” button to start the QuickTime MOV video converting process. After the conversion, you can add your QuickTime (MOV) videos in Windows 10 for playing at your will without hassle.
Read More: