A nice talking on how to easily import our Sony a7II XAVC S recordings to Sony Vegas Pro 13/12/11 below, would you like to join us ?
This guide is mainly written for those who have cameras shoot the recordings encoded by XAVC S. I guess you all must get no ideas about how to edit XAVC S files for a further dispose in some popular editing tools. So today the topic is Sony Vegas Pro 13/12/11. Let’s learn some skills of importing XAVC S to Sony Vegas. Come on!
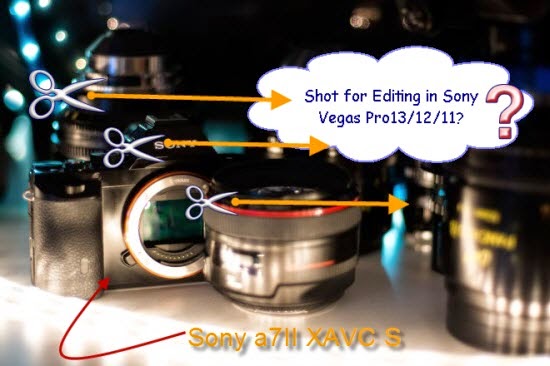
No more talks on Sony a7II camera, with the capability of shooting 4K videos while delivering it to an external recorder in 8 bit 4:2:2. Unlike the a7 and a7r, the latest model is not constrained by the AVCHD standard, also offering the XAVC S system, with bitrates of up to 50Mbps. So with the newest features, it cannot fit some popular editing software. Such as the typical example Sony Vegas Pro. Someone said that the Sony Vegas 12 may support the XAVC S format but with the latest operation Mac OS X, it seems that something wrong happed there.
Wanna no troubles when importing XAVC S files to Sony Vegas Pro? So easy if you know how to convert your XAVC S files to MPEG-2 (*.mpg), we all know the best one for Sony Vegas. To achieve the goal, we need a professional XAVC S Converter to change the XAVC S format for the first step. Here the Pavtube XAVC S to Sony Vegas Converter for Mac is the right one you are looking for. (For Windows version?)To handle the work well, it can perfectly convert your XAVC S files to MPEG-2 with a high quality preserved.
Guide is allowed here to convert Sony a7II to Sony Vegas Pro MPEG-2 MPG.


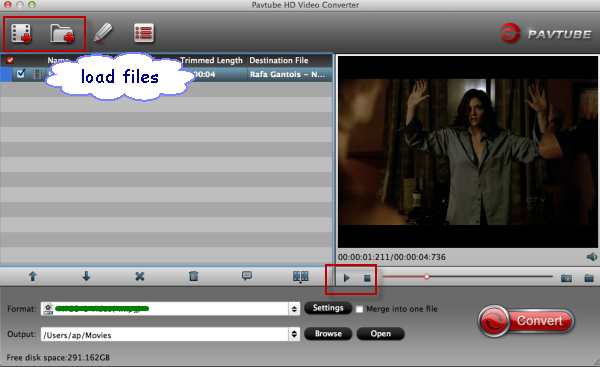
Step 1: Run the program you set up on your computer. Drag and drop the source XAVC S files to this converting program. Also, ‘Add video’ and ‘Add from folder’ could drag them easily.
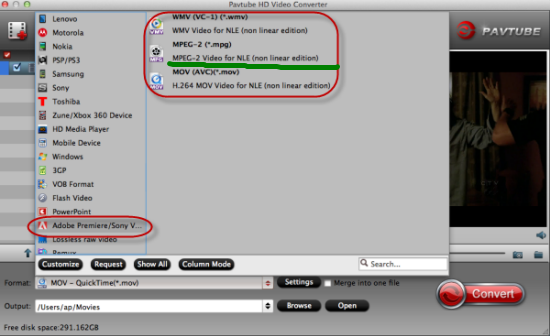
Step 2. The top important step you should not miss here. On the output list, drop sown the list, nearly on the bottom of the list there, ‘Adobe Premiere Pro>>MPEG-2 (*,mpg)’ could be the most suitable one. Would you like to have a try? In another way, just tap the item in the searching box is okay.
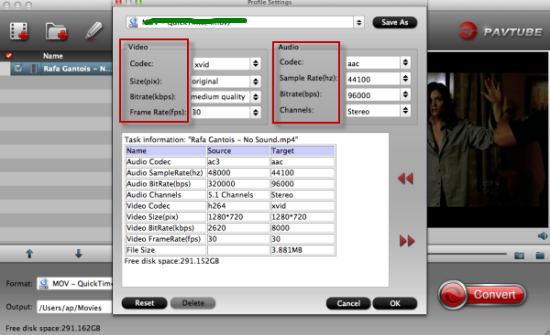
Step 3: (Optional)If you wanna some advanced settings? Why not come to the ‘Settings’ interface to adjust your output videos? No matter for your videos or audios, just set what you like here. Video size, codec, bitrates, frame rate or audio channels, etc. Or just leave them as the original default is not a bad idea.
In the end, it’s time to tap the ‘Convert’ icon to start your conversion. For more related posts about Sony cameras? Why not read them on this Sony Topic Page? Then just enjoy your editing with Sony Vegas Pro 13/12/11. Good luck with you!
More guides: