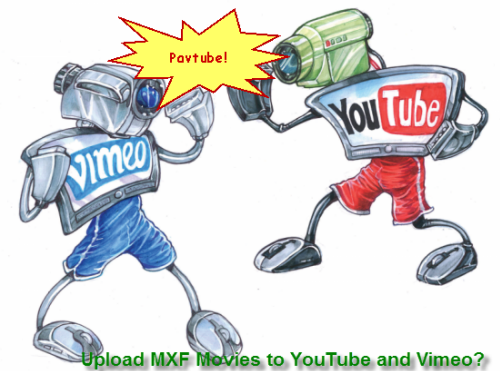
Looking for some efficient solution on uploading your MXF recordings shot by Canon XF300 camera to YouTube and Vimeo? However it seems that this job could be a litter hard for us to complete, right? Without the professional MXF assistant to help us to convert and edit these MXF recordings with the suitable formats, we will be trapped in this situation. Let’s see why and how.
‘Our company has shot some commercial production movies by Canon XF300 camera and we planned to advertise them on YouTube and Vimeo to do a good promotion. However, cause the recordings are encoded by MXF, some errors like ‘refused’ appeared on the screen. We are now seeking some solutions to this workflow;
While we have known that MXF is a prevalent audio & video container format mainly applied in some digital camcorders like Cannon XF300. On the other hand, YouTube is the most popular website where we can upload our favorite to it for sharing online with more other people. However, the YouTube only supports videos in AVI, FLV, MPEGPS, MPEG4, MOV, 3GP and WebM formats for uploading. So in this way, besides for MXF, such as MTS is not available for YouTube/Vimeo.
Professional MXF converting assistat----Pavtube MXF Converter for Mac
With it, you can easily transcode the MXF files to any YouTube compatible format you need in a rather high quality and speed. Once gained such a MXF converter, uploading your MXF files to YouTube is never a headache to you. It is also available for Sony footage, etc. Windows version is also allowed here!
Some specific steps of converting MXF to compatible ones for YouTube/Vimeo are allowed here:
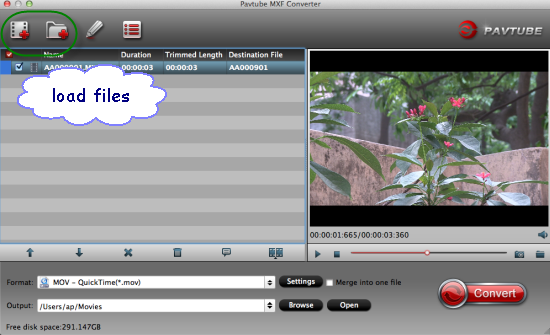
Step 1.Load our source MXF files
When you download and install the MXF program, open the main interface and choose the ‘Add video’ to load you files in. For the multiple video clips we can hit the ‘Merge into one file’ to combine them into a complete one.
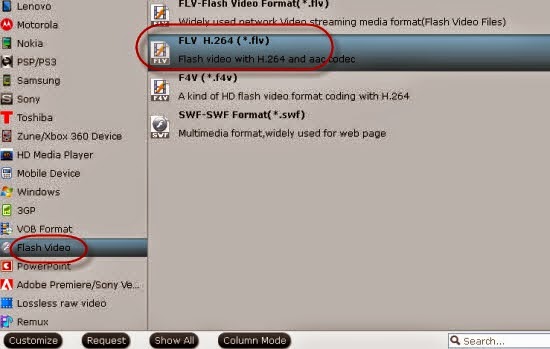
Step 2 Choose individual output ones for YouTube and Vimeo
Stepping into the output list and on the output list, you can choose the ‘Flash Video’>>’FLV H.264 (*.flv)’ for YouTube like this:
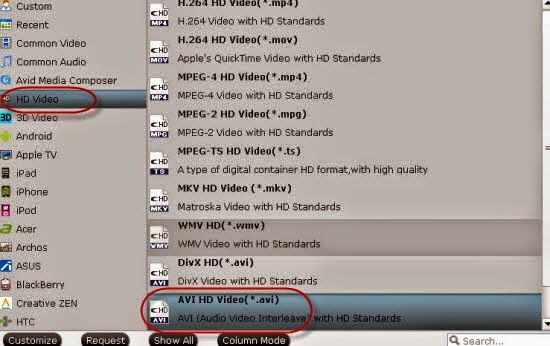
While for Vimeo, you should select this item, ‘HD Video’>>’AVI HD Video(*.avi)’ as the most compatible one.
Notes: For other usage of these MXF footage? Why not take the following MXF Video Converter Review as good references?
Step 3. Make your movies more enjoyable with ‘Edit’ here.
Most of you guys must have the desire of a further editing with your output videos, right? On the main interface, ‘Edit’ is waiting for you. ‘Trim’ to decide where to start and where to end, ‘Crop’ to cut some unwanted clips, ‘Subtitles’ to add some explanations to your audience.
At the end, after you have finished your preparation job, just go back to the main interface to click the ‘Convert’ button, you can start your conversion job. Both for converting and editing MXF files, this program can handle the job well. What are you waiting for?
More: