Showing posts with label MOV. Show all posts

Tuesday, October 1, 2013

How do I import .mov file from Canon T4i/650D into Avid Media Composer

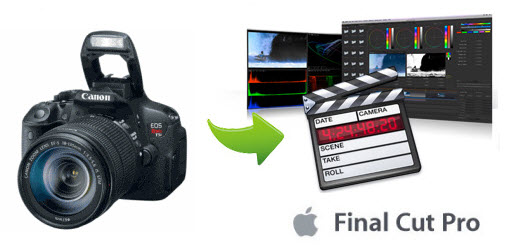
After learning this following guide, you will know how to import and convert Canon T4i/650D H.264 MOV footages to Avid Media Composer on Mac OS X and edit the 1080p mov video with DNxHD codec easily.


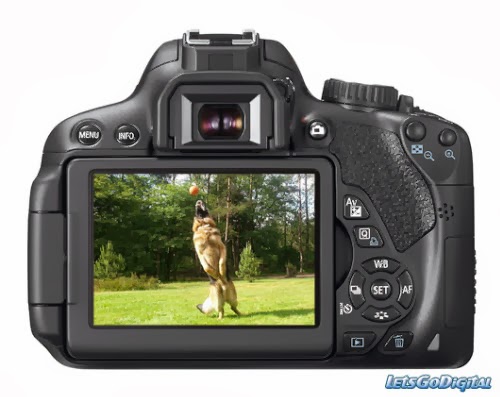
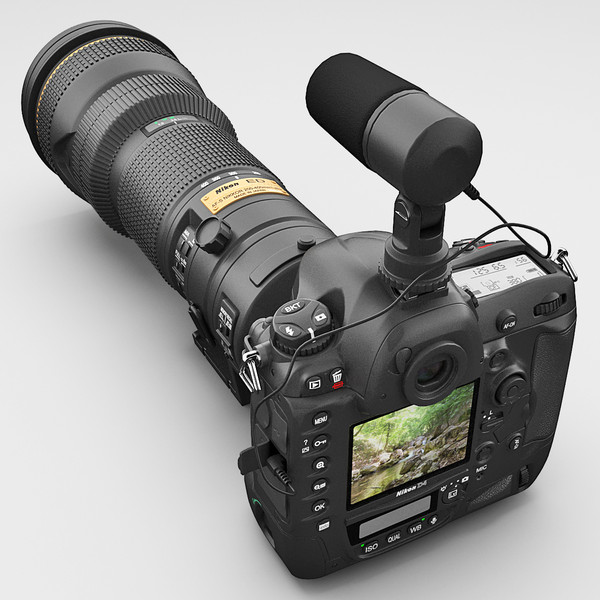
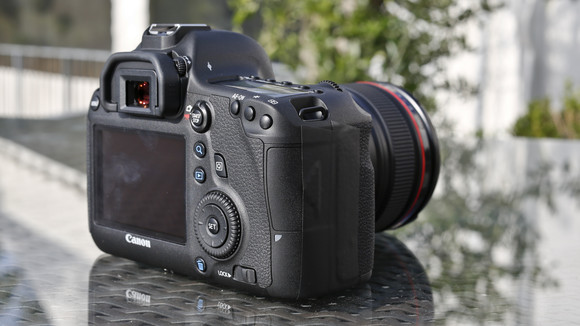
The Canon EOS Rebel T4i Digital Camera is an ideal camera for any level photographer. T4i features incredible image quality with an 18 Megapixel CMOS (APS-C) sensor, Canon DIGIC 5 Image Processor that helps capture all the action with high-speed continuous shooting of up to five frames per second and an extended ISO range of 100-12800 (expandable to 25600 in H mode) that gives digital photographers the opportunities to take the Canon EOS Rebel T4i into more shooting situations than ever before.

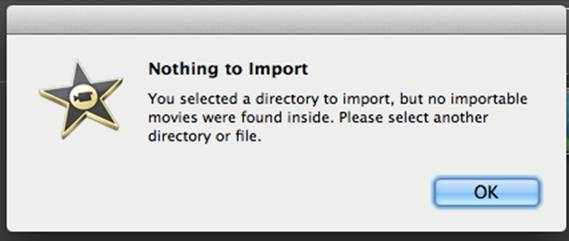
Canon T4i uses the same workflow as the Canon EOS series of cameras which includes the 550D (T2i), 600D (T3i), and 1000D (XS), because it records in the same H.264 MOV format. Although the tools for importing the footage have been updated by Canon, it seems not working well when ingesting T4i footage to Avid Media Composer. Below, I will throw a quick tutorial up on how to import videos from Canon T4i/650D into Avid MC without the EOS Movie Plugin-E1.

As H.264 codec is not good for editing, the H.264 compression format requires that files be transcoded into a format better suited to editing, effects, and color grading. To successfully put your Canon T4i footage into Avid Media Composer for smoothly editing on Mac, you're suggested to transcode Canon T4i mov to DNxHD, which perfectly supported by Avid software. Along with some help from a third-party software.

Pavtube HD Video Converter for Mac is a well known professional converter which can deal nearly all kinds of MOV videos, it can convert Canon T4i H.264 MOV files to DNxHD codec MOV natively for Avid Media Composer on Mac, and then you can edit Canon T4i MOV files natively in Avid MC.
Just download a free trial and take a look at the brief guide below.

Transcoding/Importing Canon T4i H.264 footage to Avid Media Composer


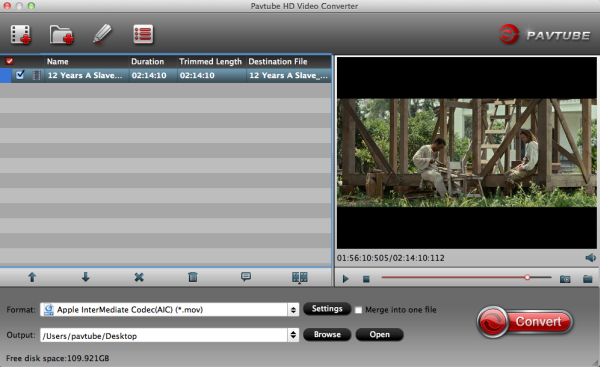
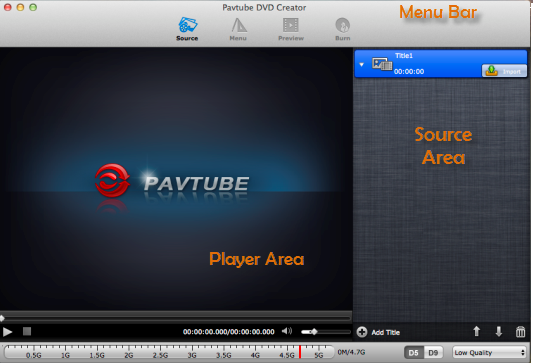
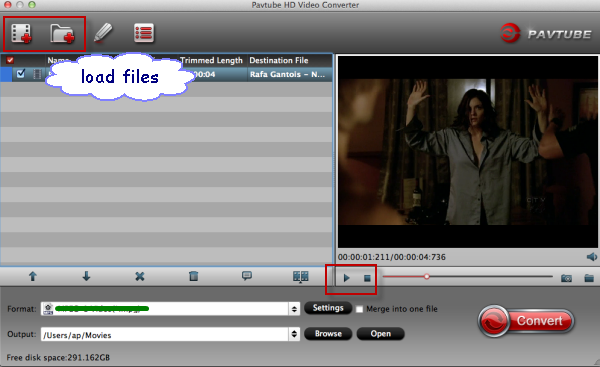
1. Run the top Mac Canon H.264 MOV Converter and load T4i H.264 MOV clips to the program.  You can click either “Add Video” button or “Add from folder” button to load source MOV files.


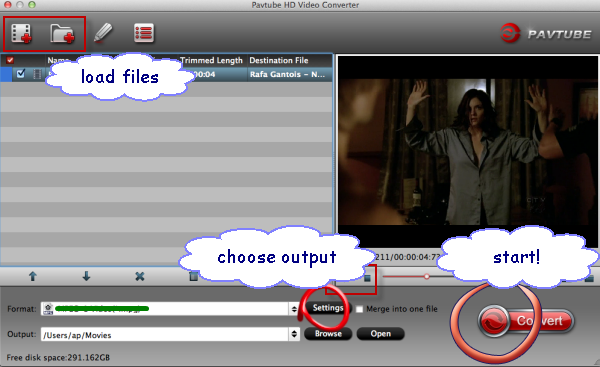
P.S. If you want to combine the loaded MOV clips into one file, simply tick off the checkbox before “Merge into one file”.

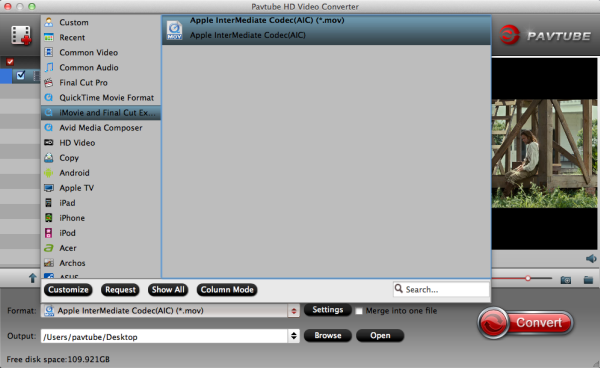
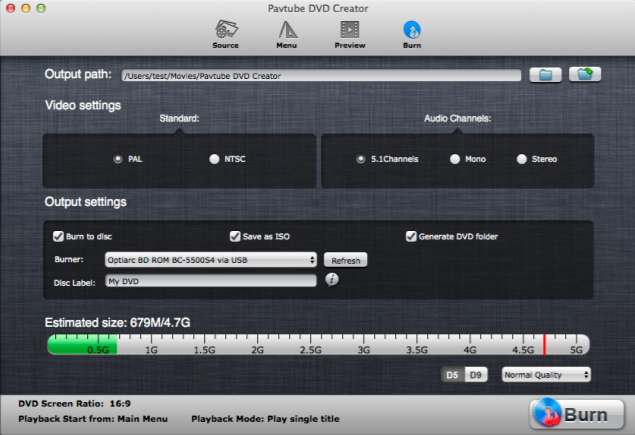
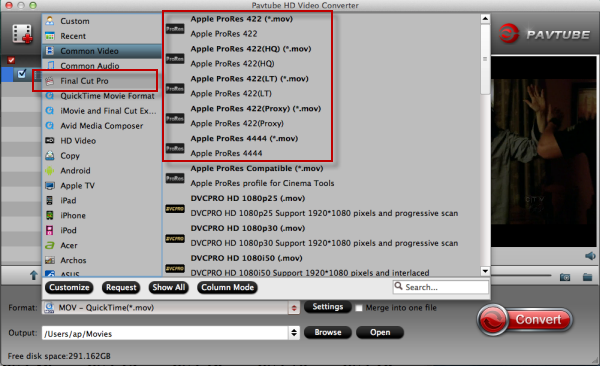
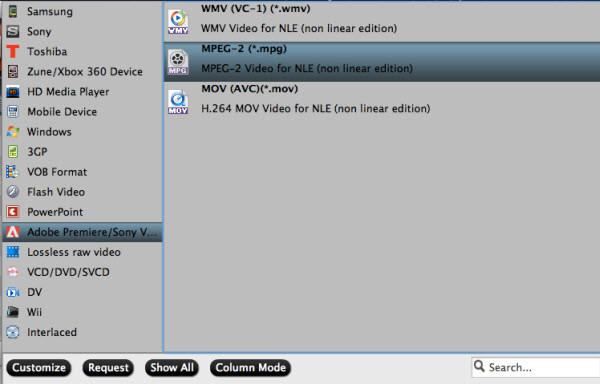
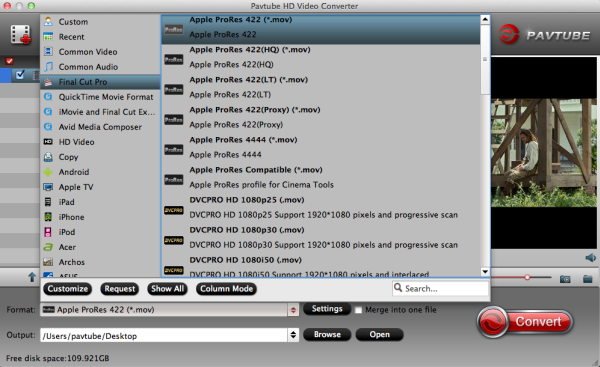
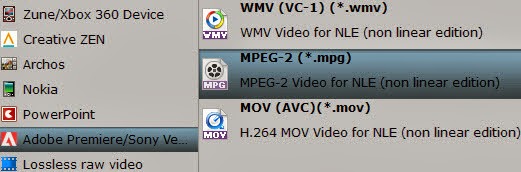
2. Click “Format” bar to determine output format.

You are recommended to choose Avid Media Composer -> Avid DNxHD (*.mov), this format is best for Avid MC editing.


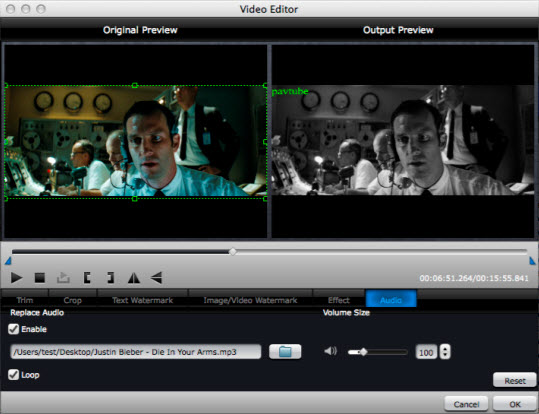
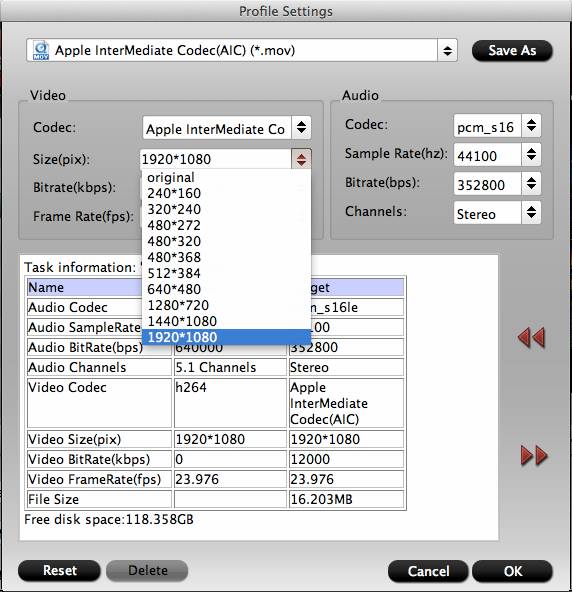
Tip: By clicking “Settings” button, you are able to enter the “Profile Settings” panel to adjust video and audio parameters for your Canon T4i MOV source files, including video size, bit rate, frame rate and more.  (Optional)

3. Click “Convert” to start.

The best H264 to DNxHD Converter can help you to convert Canon T4i MOV video to Avid Media Composer natively for editing. Once the process completes, you are able to import/ingest Canon T4i footage to Avid Media Composer for further editing on Mac as you want.

You can read more guides as below:

Tuesday, September 17, 2013

Get iMovie/FCE to recognize or import Nikon D4 1080p mov videos

Having got a Nikon D4, and tried importing some raw video footage shot with it into iMovie or FCE but with no luck. If you have the same issues, check out the easy solution here.

Nikon's new flagship professional digital SLR, the D4, the successor to the Nikon D3s, features a newly-developed a 16.2-megapixel FX-format CMOS sensor, as well as the powerful Expeed 3 image processing engine. Nikon D4 has been developed through continuous dialogue with professional photographers. It is wonderful to be taken to take photos and record HD videos when you travel or commute.


If you have got the Nikon D4 camera and often use it to shoot 1080P video, you may have the need to edit Nikon D4 h.264 mov footages in iMovie/FCE on Mac, but you will encounter some editing problems with D4 full hd videos, like importing slowly, and couldn't edit videos smoothly as iMovie/FCE doesn't support h.264 footages well. 

As far as I am concerned, it will be the best choice to convert Nikon H.264 MOV to iMovie/FCE best native supported video format - AIC codec .MOV, then you can edit Nikon D4 1080p mov video well in iMovie/FCE on Mac. Check out Pavtube HD Video Converter for Mac, a top Nikon H.264 MOV to AIC Converter. It supports transcoding all Nikon 1080p MOV files to AIC so that you can easily import the Nikon h.264 recordings to iMovie, FCE for editing on Mac. Plus, it also supports converting H.264 MOV to Final Cut Pro, Avid Media Composer, Adobe and more.

Now free download it 
here and follow the steps below to convert Nikon D4 MOV to iMovie/FCE on Mac.

1. Transfer h.264 encoded .mov files from Nikon D4 camera to your Mac HDD via USB cable. Install and run the top Nikon H.264 MOV Converter for Mac , click “Add video” to load the Nikon D4 recorded MOV video or directly drag the files to this Mac HD Video Converter.


Tip: If you have multiple MOV clips, you can select the “Merge into one file” box to merge your multiple MOV files into one file.

2. Click “Format” bar and choose “iMovie/Final Cut Express -> Apple Intermediate Codec(AIC) (.mov)” as export format. This is iMovie/FCE preferred video format.


3. Click the “Settings” button and customize proper video/audio parameters if necessary. Video size, bitrate and frame rate are flexible and can be adjusted as you like. E.g. Set video size to 1920*1080 when you feel like to keep 1080p as the source file features.

Before start the conversion, edit function is useful and convenient for you to use. You can deinterlace, trim, crop, adjust effects or add watermark to the video.


4. Click “Convert” button and transform Nikon H.264 MOV to AIC MOV for using in iMovie/FCE on Mac.

Once the conversion is finished, you can click “Open” button to get the output files effortlessly. Now you have got it right and them import the AIC .mov to iMovie/FCE for editing.

Launch the iMovie or Final Cut Express, choose from File menu > Import > Files…

Read More:

Thursday, August 29, 2013

How can you burn dvd a disk directly for a Canon EOS 60D Camera

The Canon 60D raises the bar again with its full high-definition (HD) movie recording. You don’t have quite as many recording options as with a real (dedicated) video camera but you can make outstanding movies with your camera.

Before delving into the specifics, here’s a broad overview of moviemaking:

Movie quality: You can record movies at five different quality levels. In this case, quality means two attributes: pixel dimensions and frame rate. The setting you choose determines the frame size and aspect ratio of the movie:
  • Full high definition: 1920 x 1080
  • High definition: 1280 x 720
  • Standard definition: 640 x 480
As Canon 60D records video in H.264 mov format which contains a variety of codecs, this makes DVD burning workflow with MOV files can’t operate properly, neither using software iDVD nor Torast on Mac. This article will show you how to successfully burn/write MOV clips from Canon EOS 60D to DVD on Mac OS X (Mac Mavericks included).

How to Burn Canon 60D MOV files to DVD for playing with DVD player or backup on Mac?

Here a useful tool or software- Pavtube DVD Creator for Mac is recommended to you. Now Pavtube has released its Mac version. The DVD maker for Mac can help you burn any kind of video (MXF, MKV, AVI, MP4, WMV, MOV, TiVo, etc) to playable DVD with customized Menu and soundtrack . With its simple wizard-style user interface and powerful editing features, DVD authoring and burning can’t be easier.

Choosing DVD menu template/style, menu text, display aspect ratio and background for the DVD menu and setting chapter mark and playback mode, a DVD with your favourite style will present in front of your eyes!

Cant wait to have a try? Below is how Canon 60D MOV to DVD Burner works

1.
Free download this Mac MOV to DVD burnner. You can see the main interface. Connect your DVD Writer and insert a blank DVD.


2. Load your 60D mov files into the DVD creator for Mac. Use the 60D as a Firewire device, connect your camera to your computer via a Firewire cable and transfer and copy the footage onto your computer or another external Firewire device using the PC/Dub mode.

  • a. Drag and drop source files to source area (details in Source Screen)
  • b. Select “add Files” from the drop-down list of Quick Start menu
Each file is recognized as a chapter after being imported to DVD Creator. Press on “Add title” button to add more titles. And you can do some arrangement for titles or chapters.

3. You can Edit movie clip and Customize your DVD menu

Pavtube DVD Creator for mac will enables you to edit your videos with trim, crop, watermark, effect settings, audio replacing settings features if necessary before burnning.

Tip: Swich to “Audio” Tab from Edit, and add audio to target video file so that you can replace the original audio track with favorite melody. Check the box of “Enable” and click “Browse” button and select the audio or video file you’d like to add. You may check “Loop” to make the audio repeat in order to fit the full length of the video.


This MOV-to-DVD Creator also allows you to design and create your own DVD menu or add background picture as well as music to make your DVD more personalized.  To use a preset menu template and simply double-click on the template.

4. Preview Created DVD-Video. It’s great that you can preview the created DVD before burning to make sure everything is going well, and then you can choose to burn a DVD disc, a DVD folder, or a DVD ISO.

5. Start burning.

Click the “Burn” button to start burning Canon 60D mov files to DVD on Mac – video to a writable DVD (or ISO image) that will plays on standard DVD player after burning. Now you have finished the burning process and get the created DVD for watching on your home DVD player or TV.


With this professional mov  to DVD Maker, you will find it pretty easy to convert Canon 60D mov files to DVD for you to enjoy a quality time watching movies with your family at home.

Tips:

1. Learn write Sony XAVC footage to DVD.

2. Good news for Blu-ray/DVD fans! A way to save your money for more products: Have a look at some money-saving bundled products with special offer to get what you like. For example:

ByteCopy for Mac($42) + DVD Creator for Mac($35) = Only $44.9, Save $32.1
iMedia Converter Converter for Mac($65) + DVD Creator for Mac($35) = Only $64.9, Save $35.1
BDMagic for Mac($49) + DVD Creator for Mac($35) = Only $49.9, Save $28.1
DVDAid for Mac($35) + DVD Creator for Mac($35) = Only $35.9, Save $34.1

Wednesday, August 28, 2013

Canon Powershot N is a Facebook Ready Digital Camera

Facebook fanatics have a smartphone to call their own, and now they have a camera, too. Canon's PowerShot N, which first made its debut at CES, just scored a few (relatively minor) tweaks. The key distinguishing factor for this latest model in Canon's new Powershot lineup is the presence of a dedicated Facebook connect button which will, after a first time setup, allow users to directly upload their pictures to Facebook. Thanks to the presence of built-in WiFi capabilities, the user can subsequently comment on and share with others the pictures or videos throughout the social media site straight from the camera.


Canon PowerShot N Features

The Canon PowerShot N has a 12.1-megapixel CMOS sensor with an 8x optical zoom and 28mm wide-angle lens.

For the first time in the PowerShot range, Canon PowerShot N zoom lens and shutter are operated on the dual-ring lens. Users can also take a shot by pressing the touchscreen on the rear of the device. Holding their finger down will track the subject and releasing their finger takes the shot.

As the user rotates the camera to take a shot, the touch panel LCD also rotates the content with the movement of the camera.

With a DIGIC 5 Image Processor, the Canon PowerShot N has an Intelligent IS System that automatically changes the IS settings according to the current situation.

Capable of recording Full 1080p HD video via its dedicated movie button, users can try out the Hybrid Auto feature that creates a composite video of the day’s activities using short video clips.

Appealing to the social media addicts, Canon has included a dedicated Facebook Connect Button. After the user connects the camera to their Facebook account, they will be able to post photos and videos to their Facebook feed, either to everyone or select Facebook groups.

Canon PowerShot N Release Date and Price

The Canon PowerShot N will be released in September, available to buy from Canon Direct. It will be priced at $299.99, with UK pricing yet to be announced.

Wednesday, July 3, 2013

Canon 6D FCP workflow- Transcode Canon EOS 6D 1080p MOV to Final Cut Pro

If you don't know how to edit Canon 6D 1080p MOV video, please read the article below to learn the easy way to import and convert Canon EOS 6D H.264 MOV to ProRes for FCP 67/X editing.  

Less than a week after arch-rival Nikon grabbed headlines with the D600, Canon responded with an announcement of its own price-conscious full frame DSLR, the EOS 6D. The EOS 6D is perhaps best understood as a full frame version of the popular EOS 60D, and it primarily seeks to distinguish itself on the spec sheet with built-in Wi-Fi and GPS. For dedicated Live View users and video shooters, it could result in extra image noise or recording shutting off, since there's bound to be lots of heat generated.

And speaking of videographers, these users are able to record 1080P videos by Canon EOS 6D with full particulars, but they will be disappointed to find that it's impossible to edit Canon 6D 1080P MOV in FCP as below:

I have a Canon DSLR 6D and wanted to edit HD video in FCP. When I insert it on the timeline the settings that it comes to are skipping frames, cuts... I can't even insert Texts. Was I supposed to do something else?

In fact, Final Cut Pro will not accept MOV files from Canon 6D and the reason that the codec of Canon H.264 MOV isn't native with FCP (including both FCP 6/7 and FCP X).

To resolve this issue, you need to simply convert EOS 6D 1080p MOV to ProRes 422 codec MOV format, then you can edit EOS 6D 1080p mov video well in FCP on Mac. You can follow the steps below to convert Canon EOS 6D 1080p mov footages for FCP.

Step 1. Download and install Pavtube Canon Video Converter for Mac. It’s can convert videos between rich video formats, such as converting Canon 1080p MOV to ProRes 422 for FCP X.


Step 2. Drag and drop Canon EOS 6D recorded MOV video to this Mac Canon MOV to FCP Converter.


Step 3. Click "Format" column to choose the best output format for editing in FCP. if you want to edit EOS 6D 1080p MOV video in FCP, you are recommended to choose "Final Cut Pro -> Apple ProRes 422 (*.mov)".


(Optional) - You can click "settings" button to customize the output parameters, such as resolution and bitrate.


(Optional) - Edit function is useful and convenient for you to use. You can trim, crop, adjust effects or add watermark to the video.

Step 4. Click "Convert" button to start transcoding Canon EOS 6D 1080p MOV to ProRes 422 MOV for Final Cut Pro on Mac.

This Canon MOV Converter for FCP can help you convert the video format/codec you need quickly, video and audio quality are best guaranteed. You can also follow this article to import converted videos to final cut pro for editing.

Read Related Articles:

Sunday, June 30, 2013

Getting 1080p .MOV files from Canon EOS 100D/Rebel SL1 to work in After Effects CS6

Summary: This guide will help you easily transcode Canon EOS 100D/Rebel SL1 1080p MOV files to After Effects CS6 for editing.


When I got a hands-on sneak peek of the new 18-megapixel Canon EOS Rebel SL1 digital SLR last month, I was told that the "SL" in the model name stood for "super lightweight." And that it is. The new Lilliputian Rebel SL1 feels as light as most compact system cameras -- and nearly as small -- especially with a Canon EF 40mm f/2.8 STM pancake lens attached to the front of it. Clearly, the burgeoning, mirrorless CSC market is what Canon is aiming to take on with the fully mirrored SL1.

Canon Rebel SL1 is also called EOS 100D, I would rather use real dedicated video camera to shoot movies as Canon EOS 100D/Rebel SL1 can shoot 1080p30 video recordings. But recently I have encounter an problem with "importing Canon EOS 100D/Rebel SL1 1080p MOV to Adobe After Effects CS6" like someone asked in the forum:

Q1. I have a Canon 100D and wanted to edit HD video in Adobe After Effects CS6. Every time I try to import MOV into after effects it doesn't support it or something. Why? Was I supposed to do something else?

Q2. I am a beginner in using Adobe After Effects CS6 with Rebel SL1 footages. I am trying to import files (videos) with extensions like MOV. They will not import; After Effects doesn't support that file type according to the program. I am non-pro, it's home use. Any insights?

Q3. I have a weird problem with importing MOV files into Adobe After Effects CS6. When I try to import my MOV file, it says the file type is unsupported. I don't get it, can anyone help me? It was working fine as I was using it to play around with video I recorded by my new Canon SL1/100D on QuickTime , so think it was because of something I did.

What is the main reason?

Much to the disappointment of new filmmakers that they are not familiar with the 1080p .mov format, as MOV is just a container file and 1080p is in high quality. As the incompatibile codec, the footage created with Canon EOS 100D/Rebel SL1 could not be imported to After Effect, including the latest After Effect CS6 unless you convert Canon 100D/SL1 MOV to After Effects compatible MPG (MPEG-1. MPEG -2, MPEG -4), WMV, MOV.

With a professional and top MOV to After Effects converting program called Pavtube HD Video Converter for Mac, you can not only convert Canon EOS 100D/Rebel SL1 1080p MOV to MPG, WMV,mov to import Canon EOS 100D/Rebel SL1 MOV to After Effects, but also allows you to adjust video resolution, frame rate, bitrate, encoder and audio sample rate, channel, bitrate, encoder to get a better vision according to your needs. You may choose to cut off black sides by crop feature, split a time length segment by clip and tweak saturation, brightness, contrast by effects. It is 100& clean without any virus, adware and pop-ups.  Below is a quick guide of converting Canon EOS 100D/Rebel SL1 1080p mov for editing in AE CS6.


Step one: Download
Download MOV to AE CS6 Converter, and click to install.
 

Note: this is a Mac oriented solution. For Windows users the Pavtube Studio offers alternative HD Video Converter for PC, which is very similar to the Mac HD Video Converter. 

Step two: Load videos  

After launching the 
Mac MOV to AE CS6 Converter. Click "Add Video" and browse to a Canon .mov clip and the software will add it to file list. Repeat the operation to load multiple movvideos. Or you may click the "Add Folder" button to import all the .mov files in the MOV file structure. 


Step three:  Select proper output format  
Click on "Format" and choose "Adobe Premiere/Sony Vegas> MPEG-2 (*.mpg)" format as the best codec for editing Canon EOS 100D/Rebel SL1 MOV in Adobe After Effect CS6

In the drop down list of profiles, select After Effects format WMV or MOV.


Step four. Settings.
Click on "Settings" to redefine output quality. You can also set a different video resolution (1920x1080/1440x1080/1280x720/720x480), frame rate (24p/30p), bitrate, audio channels, etc. For users who would like to retain exactly the same settings (without any quality loss), set target settings the same to source video. 

Step five: Start conversion

Click "Convert" to start transcode Canon EOS 100D/Rebel SL1 1080p MOV for After Effect CS6 editing on Mac.

After conversion click "Open" to find .mpg videos and import converted .mpg files to Adobe After Effect CS6 for editing.

Now you can successfully handle Canon EOS 100D/Rebel SL1 1080p mov file in After Effects well. Just have a try!

Related tips:

Transcode Canon PowerShot N to FCP X
Canon 6D and Final Cut Pro workflow
Canon EOS M to ProRes
Convert Canon 60D MOV to AVI/WMV
Import Canon 100D (SL1) MOV to FCP 6/7
Edit T2i/550D MOV in FCP X
Transcode T5i MOV to FCP 6/7
Convert 650D/T4i MOV to Prores for FCP
Edit Canon EOS T4i MOV in iMovie
Work with PowerShot N in Apple Aperture 3

Thursday, June 20, 2013

Best workflow for editing Canon EOS 700D/T5i 1080p footage with Final Cut Pro 6/7

With the best Canon MOV to Prores Converter, your Canon 700D/Canon T5i 1080p footage workflow with Final Cut Pro 6/7 will be smmoth and native.

Canon EOS 700D/Rebel T5i is an awesome Digital SLR camera which attributes an 18.0 Megapixel APS-C size CMOS sensor and Dual DIGIC four Image Processors, capturing tremendous pictures at as much as ISO 12800 and speeds of as much as eight.0 fps. Body surface treatment process and key made optimized feel better.


As 650D does, Canon 700D records FULL HD video in a highly compressed video format MOV, which is not an ideal editing format for FCP 6/7. Of cource, you may downloaded the update from Canon, and it is reading the Canon alternatives on FCP, but dragging the mov's into Log & Transfer isn't working. It keeps saying "Can't Read" or "Not Compatible."

So to make it easy to use Canon 700D/T5i 1080p footage in Final Cut Pro 6/7, the conversion between MOV to FCP is necessary. Now Pavtube HD Video Converter for Mac gives you the ability to edit Canon EOS 700D in Final Cut Pro 6/7. Before importing EOS 700D MOV to FCP 6/7, you should transcode Canon MOV videos to FCP preferred movie types: like ProRes .mov, and Apple ProRes is the greatest choice for maintaining the highest quality and performance while requiring less storage space than uncompressed HD video.

Here comes the step-to-step guide to convert Canon T5i/700D footage to ProRes 422 for FCP 6/7.

For the preparation of this conversion, connect your Canon 700D/Canon T5i MOV to iMac or Macbook and transfer MOV video files into hard drive.

Step 1: Load Canon 700D/Canon T5i MOV video files into this program.
Run Pavtube HD Video Converter for Mac as a Canon MOV to FCP Converter, and click the "Add" button to load 700D/T5i.mov footage.


Hints: Batch video files are allowed to be imported,therefore joining several video files into big one is supported by ticking the checkbox of "Merge into one file" under the preview window.

Step 2: Choose Apple ProRes 422 MOV as the output video format and specify the destination folder.
Click on "Format" bar and set a FCP friendly codec in dropdown-list. You are advised to follow "Final Cut Pro" template and choose "Apple ProRes 422 (*.mov)" as an optional format for converting Canon 700D/T5i MOV files to Final Cut Pro 6/7 


Step 3: Edit Canon 70D/Canon T5i MOV video files.(Optional)
Click the big button "Editor" and another interface comes out for you to perfect video files. As it shows, some editing options are provided, and there you are free to crop unwanted video parts, trim video length and add interesting video to original one.

Step 4. Start the process to transcode Canon EOS 700D(T5i) mov files to ProRes 422.
Click the button "Convert", this conversion will begin immediately. And after a few minutes, Prores MOV files are ready for you to edit on Final Cut Pro 6/7.

Hope this guide "Canon 700D 1080p footage workflow with Final Cut Pro 6/7" really do some help, and this Mac Canon H.264 to Prores MOV Converter also supports importing Canon EOS 700D/T5i MOV to iMovie/FCE with AIC MOV Format. It will surely become your ideal assistant in your digital.

Read Related Articles:

Thursday, June 13, 2013

Mac Nikon MOV Converter-Compress Nikon D7100 HD MOV to iMovie 11

This guide will show you how to Convert Nikon D7100 HD MOV to iMovie 11 with AIC MOV , so that you can load your Nikon D7100 footages to iMovie/FCE for further editing on mac.

"I have 200+ raw mov files from a Nikon camera and want to edit these Nikon D7100 MOV in iMovie 11. Unfortunately, the file structure is gone and there's no way to edit this videos? I hope not. I am only hoping at this point to convert these files to useable formats and manually sync up the audio files and the video files. What can I do?" 


The MOV files Nikon D7100 outputs in encoded by H.264 high-def streams, which is different from QuickTime mov or others. Many traditional nonlinear editing programs on mac do not support H.264 codec directly, such as iMovie, FCP, Adobe premiere and so on. To load Nikon D7100 H.264 MOV to iMovie 11 or FCE, you need to convert them into iMovie preferred video format firstly. Besides, it's a pity if you don't keep the original file structure, but it's not unfixable – come and meet this Nikon D7100 Converter for Mac

This Mac Nikon to iMovie converter is not only able to convert organized videos files, but also able to deal with various videos and audios in batch. No need to install third party plug-in, no need to fix the settings manually; just import, choose iMovie preset, and click Convert. It's just as simple as that. The software does a good job in editing H.264 .mov files directly in iMovie/FCE and also easily convert Nikon D7100 video to FCP, AVI, WMV, MPG, etc. You can also remux, Trim, cut, split, mix videos, overlays, also add 3D effect to D7100 H.264 footages. Now mac 10.8.3 is supported, feel free to have a try! 

Now get this Mac iMovie AIC Converter installed; you can order a license directly or download a trial version here. 

Ok let's move on! 

How to Convert Nikon D7100 HD MOV to iMovie 11 with AIC MOV 

Step 1. Connect your Nikon D7100 camera to Mac with USB cable or use card reader to transfer the MOV files to Apple hard drive disk. 

Step 2. Add Nikon D7100 1080p H.264 MOV videos to Mac Nikon to iMovie Video Converter

Run HD Video Converter for Mac, and click the "Add Files"button to load individuals mov videos; or you can click "Add from folder"to load the entire folder. 


Step 3. Choose editing program compatible format. 

Click the "Profile"option, you will find various video formats sorted by different editing programs/devices. To get high video quality with least quality loss, you can choose iMovie and Final Cut Express>Apple InterMediate Codec(*.mov). 


Click Settings, you can fix the size to 1920*1080 to get better video quality; also you can fix the bitrate, frame rate as what you need. 


Step 4. Now click the big red Converter and wait for a while to get the fresh hot converted video. Click Browse to locate them directly. Ok now the transcoded files now are ready for editing Nikon D7100 MOV in iMovie 11 or FCE

Tips: 

This HD Video Converter is not only capable of converting Nikon footages, but also able to convert various video formats to each other. 

See also: 

Nikon D800E to FCP Converter 

Thursday, May 16, 2013

How to import Canon EOS T2i/550D MOV to FCP X for editing

Follow the guide to easily transcode your Canon T2i/550D 1080p H.264 MOV to ProRes 422 MOV format for smoothly editing on Mac.

EOS T2i/550D, a famous Canon DSLR that can offer HD video recording, is perfect for capturing clips or sequences which a consumer camcorder would otherwise find difficult or impossible. The T2i allows you to film at either 1920x1080, 1280x720 or 640x480 pixels with 30fps, 25fps, and 24fps. Video is an absolute highlight of the EOS T2i/550D and it's wonderful to have this degree of control in a camera. 

All of these are great, till you find it is a problem when you want to edit Canon T2i/550D footage in Final Cut Pro X. The thing is, I'm having an issue with the video clips during importing to FCP X: the output video from Final Cut Pro X is choppy, and there are lags or skipped frames even when exported to 30fps." The extension of the video file is mov, isn't this is a FCP friendly format? How can I import my Canon EOS Rebel T2i / 550D mov video to FCP X for editting?  
 

T2i record video in H.264 MOV, this format is supported by many editing software, but it can't be supported perfectly, take FCP X for example. Final Cut Pro X supported best video format is Apple ProRes 422 Codec MOV format, you can edit video with this format in Final Cut Pro X smoothly. That is to say, it's great choice to convert T2i/550D MOV to ProRes 422, then you can edit T2i/550D video well in FCP X on Mac. You can follow the steps below to convert T2i/550D footages for FCP X. 

Required software: Canon to FCP Converter for Mac 

Working as a Canon DSLR Camera to FCP Converter, it helps you import CanonT3i MOV to FCP, encode Canon 5D Mark III MOV for FCP X, edit Canon G12 MOV with FCP, as well as transcode Nikon D3200 MOV to ProRes for FCP X 

Step through: 

Step one. Run Pavtube Canon Video Converter for Mac. Click "Add" button, browse to the footages and load them to the converter. 


Step two. Select the items to be converted, and click on "Format" bar to set a FCP friendly format in Final Cut Pro template.

There are Apple ProRes family, DVCPRO and HDV codecs for your choice.

Basically, "Apple ProRes 422 (*.mov)" is the best format for 
converting 550D footage to FCP.


If you prefer smaller file size, choose "Apple ProRes 422 (LT) (*.mov)" instead. 


Step three. Click the "Settings" button and set proper video/ audio parameters.

My advice is to set the video size, bitrate and fame rate to be exactly as the footages so that you will suffer least quality degradation.

For example, when the video is shot at 1920*1080, 5mbps, 30fps, you could set Size-1920*1080, Bitrate-original, Frame rate-30.

If you would like to use default settings, simply skip this step. 


Step four. Click the "Browse" button next to the Output File Name field and select a location on your HDD for the output video file. 

Step five. Click the "Convert" button to start conversion. After conversion you can click the "Open" button to locate converted video files for importing to FCP without rendering.

Now can easily transcode T2i/550D 1080P H.264 files to FCP X compatible format for editing, this software runs fast, so you can convert your T2i/550D footages to FCP in less time.

Read Related Articles:

Wednesday, May 8, 2013

Does Sony Vegas like handling the Canon EOS-5D h.264 MOV files well

This article will show the best way to convert Canon 5D HD MOV to WMV for Sony Vegas editing. 

The Canon EOS 5D is a digital sngle lens reflex (DSLR) camera that can capture high definition stills and movie clips. It saves movie clips in-camera using a Compact Flash (CF) memory card. Canon bundles a simple free software package with the camera. Canon's supplied software applications are named ZoomBrowser for Windows and ImageBrowser for Mac which can play movie clips, and also perform rudimentary movie editing, but it not for windows, and some people have been asking importing issues about Canon 5D into Sony Vegas on Windows. 

I'm new to DSLR editing and have a bunch of 5D footage for a music video I just shot, and now need to edit it. I use Sony Vegas and have a relatively not that high performance laptop (about 4 years old) that has seen me through other editing projects, but I always feel theres a bit of a loss in quality in the finished product. I thought I'd ask, or if anyone can point me in the direction of places to find information, on 5D workflow for editing in Sony Vegas. If theres no hope for Vegas and my slow computer I will look into other options such as getting new editing software or borrowing someones mac or something. 

I've been annoyed that sony vegas and most other apps on my PC can't play the 5D full HD .mov files smooth. I was so excited about not having to transcode any files from shooting to editing. I have settled to transcode. But failed many times. Hope this helps anyone out there. I guess PC doesn't like handling the h.264 codec very well. 

How to edit 5D H.264 MOV files in Sony Vegas smoothly? The best way is to convert 5D H.264 MOV to Sony Vegas supported format, like MEPG-2/WMV format, which is best for Sony Vegas, and then you can edit the converted videos in Sony Vegas without problems. 

Software you need: Pavtube Video Converter Ultimate.

This software will help you to get  t 5D H.264 MOV files working well in Sony Vegas. It is capable of converting a variety of hd video, blu-ray, and dvd movies to another format. And meanwhile it supports to convert to many mobile devices and editing software, like After Effects, Avid Media Composer, Adobe Premiere Pro, and more. CUDA acceleration will give you faster conversion speed. Below is a guide for you.

1. Free download and install this 5D MOV to Sony Vegas Converter, just copy the HD MOV files from the CF cards right to your hard drive, import the files to the program.


2.Click format bar to choose the output format. Click and choose  Adobe Premiere/Sony Vegas --> MPEG-2 (*.mpg) or WMV (VC-1) (*.wmv). This format is best for Sony Vegas editing.


3.You can click "Settings" button to adjust the parameters, such as resolution, bitrate, etc.

4.Click convert button to start converting 5D H.264 MOV to Sony Vegas.

This Ultimate Caon H.264 MOV Converter from Pavtube can convert Canon 5D H.264 MOV files to Sony Vegas with best quality and fast speed. 

Once the conversion completes, you can click "Open" button to get the output files effortlessly.

Now you have got it right, just to import and edit Canon EOS 5D H.264 MOV files within Sony Vegas Pro 8/9/10/11/12 at ease.  

P.S.

If you want to burn Canon 5D mov to a DVD or a DVD iso file, you can get the bundled software- Video Converter Ultimate($65) + DVD Creater($35) = Only $64.9, Save $35.1. Never miss!

More info for you:

Transcode Canon EOS 6D 1080p MOV to FCP
Import Canon EOS DSLR H.264 MOV to Avid MC
Does Canon EOS 5D mark 3 1080p mov Capable with iMovie

Monday, April 15, 2013

Does Canon EOS 5D mark 3 1080p mov Capable with iMovie

When you find out some of MOV files from Canon 5D Mark 3 you can't import into iMovie, you can use a professional MOV to iMovie Video Converter for Mac to help you.
 
Canon EOS 5D Mark III,
as the next generation of Canon EOS 5D Mark II, has attracted much attention even since it has not came out to the market. Based around a 22MP full-frame sensor, it can shoot 6 frames per second and features a 61-point AF system much like the EOS-1D X. It can capture 1080p movies at 24, 25 or 30 fps and offers high quality intraframe (All-I) video compression amongst a host of movie-related improvements.

All of these are great, till you ingest Canon EOS 5D Mark III 1080p MOV files to iMovie. As we know, 5D3 recorded videos are in MOV format, this format is not compatible well with iMovie, iMovie best video format is Apple InterMediate Codec (AIC) MOV format, so if you want to edit 5D3 MOV video in iMovie smoothly, you'd better convert 5D3 MOV to AIC MOV for iMovie, you can follow the steps below to transcode 5D3 to iMovie.


1. Download and install Nikon H.264 MOV Converter from Pavtube, this software can help you convert 5D Mark III MOV to AIC for iMovie, more output formats are also supported, such as AVI/WMV/ProRes.


2. Click and choose the best output format, for editing 5D3 MOV video in iMovie, you are recommended to choose iMovie and Final Cut Express -> Apple InterMediate Codec(AIC) (*.mov), it's the best format for iMovie and FCE.


3. You can click settings button to adjust output parameters as you want, such as codec, resolution, etc.


5. Edit function is useful and convenient; you can do easy editing to the 5D3 MOV video.

6. Click convert button to start, 5D Mark III MOV to AIC iMovie converter will help you convert videos easily, then you can import and edit 5D3 video in iMovie freely. And you can get more info about how to import/edit Nikon HD video to iMovie on pavtube website.

Read more:

Monday, April 8, 2013

Compatibility of Nikon mov files with Mac in FCP, Avid, iMovie, Premiere Pro, FCE

Along with Pavtube MOV Converter for Mac, you can easily convert and import Nikon MOV footage into FCP, Avid, iMovie, Premiere Pro, FCE for further editing on Mac (Mac Mountain Lion and OS X 10.9 Mavericks included).

Nikon DSLRs are excellent so that many people willing to buy one. Nikon hot cameras include Nikon D800, D4, D7000, Nikon D3100, D3200, D5100, etc. It's great to take photos and record full HD 1080P videos by Nikon DSLR. The Nikon DSLR recorded video format is H.264 MOV, this format is supported by many editing software, but sometime it is not supported perfectly on Mac editing software, like Final Cut Pro and Avid Media Composer 6. The main reason is the H.264 codec not well for editing.


What is Final Cut Pro 7/X best supported codec and format?

Final Cut Pro X/7 supported best video format is Apple ProRes 422 Codec MOV format, you can edit Nikon MOV video with this format in Final Cut Pro X smoothly without rendering.

What is Avid Media Composer 6 best supported codec and format on Mac mountain Lion?

Avid MC 6 best supported video format is DNxHD codec MOV format, or XDCAM codec MOV format, so DNxHD is the first choice if you need to edit Nikon MOV in Avid Media Composer 6.

What software supports Nikon H.264 MOV and both FCP 7/X, AMC 6 best codec output?

The best I have used is Pavtube HD Video Converter for Mac, it can convert videos with good video and audio quality, and offer rich video formats for output, such as convert Nikon MOV to ProRes 422 for FCP 7/X, or convert Nikon h.264 to DNxHD for AMC 6.

Here are easy steps for you to transcode Nikon MOV to both FCP 7/X and AMC 6.

1. Download Pavtube HD Video Converter for Mac, install and run this Nikon MOV to FCP/AMC converter on Mac Mountain Lion.


2. Click "Add" to load Nikon MOV video files or directly drag the files into file list.

3. Click "Format" bar to determine output format. You are recommended to choose Final Cut Pro -> Apple ProRes 422 (*.mov), it's for FCP 7/X; or choose Avid Media Composer -> Avid DNxHD (*.mov), it's for AMC 6.


4. Click convert button to start transcoding Nikon MOV to FCP 7/X or AMC 6.

As shown above, it is very easy to change Nikon MOV to prores 422 MOV, or DNxHD codec MOV, it becomes easy for you to use the recorded footages in Final Cut Pro 7/X and Avid Media Composer 6.

This Mac Nikon MOV Video Converter can also convert Nikon MOV to iMovie, Premiere Pro, FCE with good quality, just download the and have a try.

Sunday, April 7, 2013

Lossless edit best Digital SLR Cameras H.264 HD clips in FCP X

H.264 is a new video codec standard which can achieve high quality video in relatively low bitrates and it is a popular video format for playing. High definition video brings us more detailed, lifelike and impactful images. But not all HD video capture devices are created equal.

Best Digital SLR Cameras for Shooting Video recommended for you like: Canon T3i,60D,5D Mk II,5D Mark III,Nikon D700,Sony Alpha55,Sony NEX3 and Panasonic/Pentax/Olympus/Fujifilm cameras etc can capture in .mov container with this H.264 codec. Plus, like GoPro can also shot in this H.264 format in .mp4 container,also Sanyo Xacti HD shootings. But more the H.264 videos, the more video to FCP importing problems we will meet.

After recording, you may want to edit the video footages in FCP X on Mac, but, some video codecs and formats are not well supported by Final Cut Pro X, this article will share the way to transcode Canon/Nikon/Sony/Panasonic/Pentax/Olympus/Fujifilmrecorded videos to Apple ProRes 422 for FCP X editing, the prores codec is best for FCP X editing, with this codec, you can edit video in FCP X smoothly without any problems.

1. Download Pavtube HD Video Converter for Mac. This professional HD Video Converter can help you convert Canon/Nikon/Sony/Panasonic/Pentax/Olympus/Fujifilm video files to ProRes 422 MOV format for Final Cut Pro X, more output formats are also supported.


2. Install and launch this Canon/Nikon/Sony/Panasonic/Pentax/Olympus/Fujifilm video Converter. Import footage to the converter.

3. Click format bar to choose the output format. Click and choose Final Cut Pro -> Apple ProRes 422 (*.mov).


4. You can click "settings" to customize the output parameters, adjust the resolution, bitrate as you want.

5. Click convert button to start.

With this Canon/Nikon/Sony/Panasonic/Pentax/Olympus/Fujifilm/GoPro to Apple ProRes 422 converter, you can easily import camera video files to FCP X for editing, this software runs fast, so you can convert HD footages to FCP X in less time, video and audio synchronization are perfectly guaranteed.

How to take converted videos to FCP

For FCP 7: Simply navigate to File > Import > Files and select the converted clips. There is no need "Log and Transfer" with typical camcorders.

For FCP X, navigate to File > Import > Media and in the window that comes up, select your transcoded ProRes clips.

Read more:

Convert Canon XF300 MXF files to AIC .MOV for iMovie/FCE
Why MXF from Canon C300 not reading in Premiere Pro CS 6?