If you have no ideas on how to play XC10 4K MXF on Yosemite/Windows 10, why not move on to know more details below. Several main solutions are offered below which we can take as reference for playing 4K MXF on Yosemite/Windows 10 smoothly. Take a usual phenomenon as example: when you tried to open XC10 4K MXF files on your Mac Yosemite QuickTime for playing, something wrong would happen there along the lines of “This is not a movie file.” This gets really annoying if you come across a 4K MXF files for a playback on Mac Yosemite, right? MXF is not associated with the QuickTime player or some other NLEs.The incompatibility issue also happens to Windows users: “The latest Canon XC10 XF-AVC 4K camcorder seems not bad to take the higher images but I got some troubles when importing the XC10 4K MXF recordings to VLC for playback. ‘Errors’ always appeared there on the screen. The files were broken or incompatible problems? I need some help.”If you familiar with HD video format, you may know the main reason is the MXF video codec. Most MXF files are encoded with a non-Microsoft codec or with a codec not installed on your Mac/Windows computer. You will fail to play this kind of MXF videos. For users who want to play XC10 4K MXF on different media players such like QuickTime, VLC, Windows Media Player or Playback Pro and etc. on Yosemite/Windows 10, fortunately, Pavtube MXF Converter for Mac and Pavtube MXF Converter can be the best MXF transcoding programs to help you a lot. You can choose the corresponding version according to your requirements.
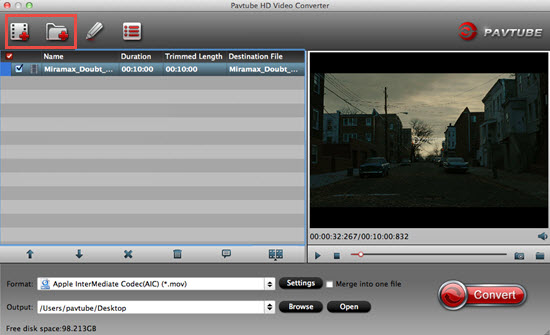
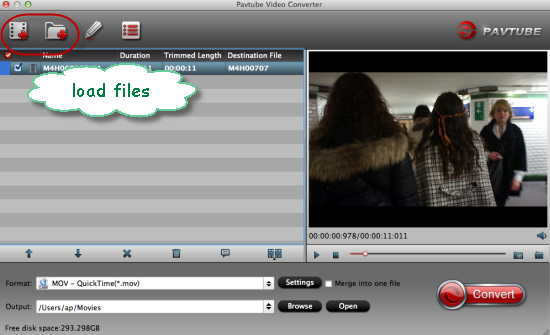
 Steps on how to play XC10 4K MXF on Yosemite/Windows 10 (Take playing XC10 4K MXF on QuickTime on Yosemite as an example):Step 1: Download, install and run this Mac MXF Converter as a professional MXF to QuickTime Converter. If you are running on Windows 10, download, install and launch the corresponding MXF Converter. You can click “Add video” button to import XC10 4K MXF to it when the main interface pops up. Directly drag the files in is also not a bad idea.
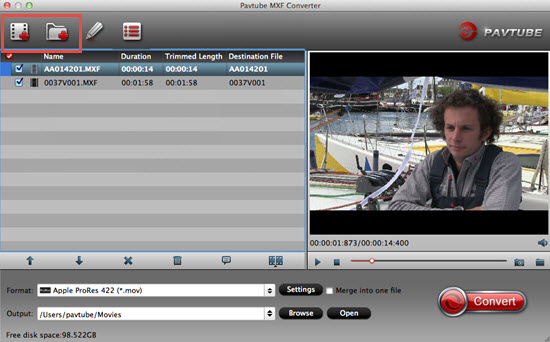 Step 2: Click “Format” bar and choose best output format for output. Click and choose “Common Video>>MOV-QuickTime (*.mov)”. You can also choose other formats according to your output devices and usage.
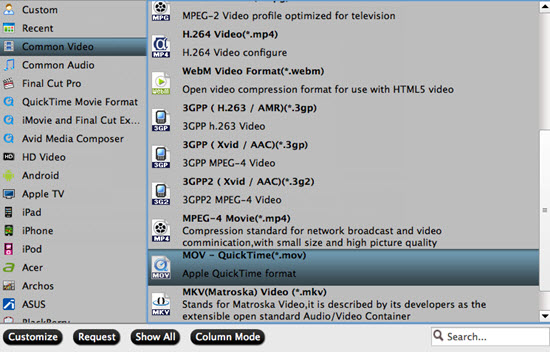 Tips: For playing XC10 4K MXF on VLC on Windows 10, choose “Common Video>>H.264 Baseline/Main/High Profile Video (*.mp4)” as output format. Why not have a try with free trial for playing XC10 4K MXF on other media players on Yosemite/Windows 10? You are definitely good readers!Step 3: (Optional Functions) Generally speaking, the default settings will ensure you a good balance between file size and image quality. But you can still click “Settings” button to modify video and audio settings like codec, resolution, bit rate, frame rate, sample rate, and audio channels in your own way.Step 4: When ready, click “Convert” button to begin format conversion. As soon as the conversion is complete, you can click “Open” button to get the generated 4K MXF files that are ready for playing with QuickTime, VLC and other media players on Yosemite/Windows 10.
 Conclusion: If you have plenty of 4K MXF to convert, you can choose bunch conversion. Select the files you want to convert at the same time, and then click the "Convert" button. The maximum number you can convert at a time is four; you can choose the conversion number by clicking “Option” button in the main UI. Maximum simultaneous running processes are for you to change.Further Reading:
Viewing through the FCP X forum online, we can find so many importing issues related to HC-X1000 4K AVCHD MTS: “I can’t import 4K AVCHD MTS to FCP X, why?” “How do I edit MTS in FCP X?” “What should I do in order to convert MTS to FCP X for smooth editing?” Read this guide below, we can solve your problems nicely.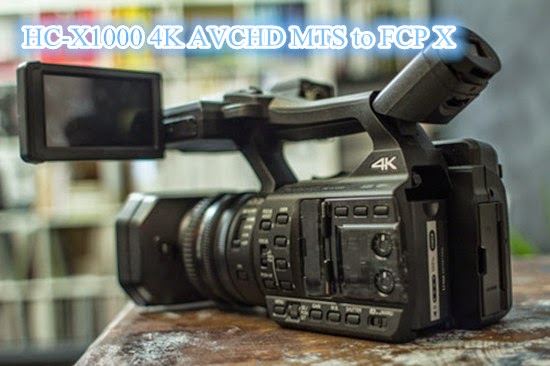 Panasonic announces the HC-X1000, a consumer-level 4K camcorder that incorporates a host of professional features that belies its consumer classification. This is a camcorder capable of recording 4K video straight to SD cards, but it also comes packed to the gills with the kind of high-end controls that pros would demand of a true cinema camera.Versatile formats and bit rates make the X1000 unbeatable in a wide range of applications. Its AVCHD, MOV and MP4 formats make editing quick and easy. But, if import the 4K video from Panasonic HC-X1000 to FCP X for editing on Mac, you will be in trouble.Learn from Apple official site, Final Cut Pro X natively supports 4K ProRes, Sony XAVC and REDCODE RAW. However, you can't edit Panasonic HC-X1000 4K AVCHD MTS files in FCP X directly. For importing MTS to FCP X for editing better, you are advised to convert MTS to FCP X best accepted ProRes first.To meet the needs of so many HC-X1000 users, here we recommend the best Pavtube MTS/M2TS Converter for Mac for you with which it’s easy for you to convert MTS to Apple ProRes codec compatible with FCP X. Furthermore, it’s available for you to set the video size, frame rate, bit rate, and audio channel to make a perfect parameter for Panasonic HC-X1000 with the best quality for FCP X. How to import HC-X1000 4K AVCHD MTS to FCP X for editing?Step 1: Connect your Panasonic HC-X1000 camcorder to Mac via USB cable and find the AVCHD files from the camera folder. Then copy and transfer the 4K AVCHD MTS from HC-X1000 to the Apple hard drive disk.Step 2: Import HC-X1000 4K AVCHD MTS files to Mac MTS Converter. Run it as the best MTS Converter, and click the "Add video" button to load 4K AVCHD MTS videos. You may also directly drag and drop HC-X1000 4K AVCHD MTS videos to application UI for importing files.
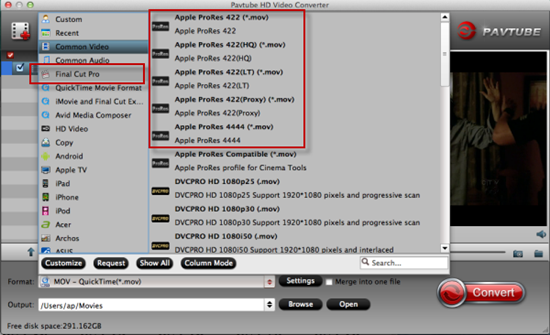
 Step 3: Click the “Format” option and navigate the mouse cursor to “Final Cut Pro >>Apple ProRes 422 (*.mov)” as output format. Apple ProRes 422 (*.mov) and Apple ProRes 422 (HQ) (*.mov) have higher qualities. Apple ProRes 422 (LT) (*.mov) and Apple ProRes 422 (Proxy) (*.mov) have smaller size. You can choose according to your requirement.
 Step 4: To set the profile settings, please click the “Settings” button. General speaking, the default settings are just fine. Click the “Browse” button to browse and specify a destination folder to save the converted files.Step 5: When everything is ready, click “Convert” to start converting 4K AVCHD MTS to ProRes 422. This Mac MTS/M2TS Converter supports batch conversion so you may load multiple files and convert them at one time.Conclusion: As 4K AVCHD MTS to Apple ProRes 422 Mac video converter, it enables you to trim out unwanted part, crop out black bars, change aspect ratio from 4:3 to 16:9 and vice versa, rotate 90 degrees clockwise, anti-clockwise, add plug-in subtitles, apply special effect, and more. Now, you can import 4K AVCHD MTS to FCP X without any hassles.Further Reading:
Panasonic has announced a selection of new Lumix cameras at CES, which are designed to give you better photographic power than your smart phone while still being compact. With the coming of Lumix TZ70, how to freely edit and play AVCHD on Mac/Windows is offered here.
 Searching from Panasonic Lumix TZ70 official website, we know that AVCHD MTS is the file format recorded by it. AVCHD (Advanced Video Coding High Definition) is a file-based format for the digital recording and playback of high-definition video. Developed jointly by Sony and Panasonic, AVCHD was introduced in 2006 primarily for use in high definition consumer camcorders, such as Lumix TZ70 we mentioned above. So, no matter edit AVCHD on Mac/Windows or play AVCHD on Mac/Windows, it’s becoming a common thing in our daily life.
Though this tiny camera can shot the wonderful moments for us with a high definition image, how can we edit AVCHD MTS footage recorded by TZ70 in some hot NLEs like FCP, iMovie, Premiere, Avid or playback on QuickTime, VLC media player, etc? For most editing software and media players don’t support AVCHD MTS very well. Issues like can’t import, images without sound, sound with no images and etc. are all possible to occur. To make the Lumix TZ70 AVCHD MTS recordings natively supported by those media players or editing tools and to edit and play AVCHD freely, we should convert AVCHD MTS to other programs’ accepted formats with the help of third-party software. We here highly recommend you Pavtube MTS/M2TS Converter for Mac. If you are running on Windows, please go to the equivalent version Pavtube MTS/M2TS Converter.
How to edit and play AVCHD on Mac Yosemite/Windows 8.1?
Step 1: Download and install the corresponding version on your computer. If you launch this AVCHD MTS Converter on your computer, on the main interface, we can load the files so nicely with “Add videos” button. You can load several AVCHD MTS files at one time thanks to “Add from folder” button.
Step 2: For any NLEs or media devices, you can find them all on the output list. What about other common videos? Why not go to the “Common Video” column to have a look? Take editing AVCHD MTS files in FCP as an example, click “Format” bar and choose “Final Cut Pro>>Apple ProRes 422 (*.mov)” which is the best choice of output format.
Step 3: In this program, we can customize our output videos so nicely. Click the “Effect” button to open the Video Edit window to achieve editing AVCHD MTS like trim, crop, image, watermark, effect, subtitles and rotate and etc. in the corresponding editing pane. Click the “Settings” button to adjust the output video codec, resolution, bitrates, frame rate, aspect ratio, audio codec, channel, volume and etc in the advanced tab.
Step 4: Come back to the main interface and hit the “Convert” button, we can easily convert the Lumix TZ70 AVCHD MTS to other programs like editing software and media players for further editing or playback.
Conclusion: From the steps above, this software will solve your problems of editing and playing AVCHD on Mac/Windows smoothly. After the process completes, click “Open” button to find the generated videos, and then you can enjoy editing and playing AVCHD on Mac/Windows.
Further Reading:
Searching from Panasonic Lumix TZ70 official website, we know that AVCHD MTS is the file format recorded by it. AVCHD (Advanced Video Coding High Definition) is a file-based format for the digital recording and playback of high-definition video. Developed jointly by Sony and Panasonic, AVCHD was introduced in 2006 primarily for use in high definition consumer camcorders, such as Lumix TZ70 we mentioned above. So, no matter edit AVCHD on Mac/Windows or play AVCHD on Mac/Windows, it’s becoming a common thing in our daily life.
Though this tiny camera can shot the wonderful moments for us with a high definition image, how can we edit AVCHD MTS footage recorded by TZ70 in some hot NLEs like FCP, iMovie, Premiere, Avid or playback on QuickTime, VLC media player, etc? For most editing software and media players don’t support AVCHD MTS very well. Issues like can’t import, images without sound, sound with no images and etc. are all possible to occur. To make the Lumix TZ70 AVCHD MTS recordings natively supported by those media players or editing tools and to edit and play AVCHD freely, we should convert AVCHD MTS to other programs’ accepted formats with the help of third-party software. We here highly recommend you Pavtube MTS/M2TS Converter for Mac. If you are running on Windows, please go to the equivalent version Pavtube MTS/M2TS Converter.
How to edit and play AVCHD on Mac Yosemite/Windows 8.1?
Step 1: Download and install the corresponding version on your computer. If you launch this AVCHD MTS Converter on your computer, on the main interface, we can load the files so nicely with “Add videos” button. You can load several AVCHD MTS files at one time thanks to “Add from folder” button.
Step 2: For any NLEs or media devices, you can find them all on the output list. What about other common videos? Why not go to the “Common Video” column to have a look? Take editing AVCHD MTS files in FCP as an example, click “Format” bar and choose “Final Cut Pro>>Apple ProRes 422 (*.mov)” which is the best choice of output format.
Step 3: In this program, we can customize our output videos so nicely. Click the “Effect” button to open the Video Edit window to achieve editing AVCHD MTS like trim, crop, image, watermark, effect, subtitles and rotate and etc. in the corresponding editing pane. Click the “Settings” button to adjust the output video codec, resolution, bitrates, frame rate, aspect ratio, audio codec, channel, volume and etc in the advanced tab.
Step 4: Come back to the main interface and hit the “Convert” button, we can easily convert the Lumix TZ70 AVCHD MTS to other programs like editing software and media players for further editing or playback.
Conclusion: From the steps above, this software will solve your problems of editing and playing AVCHD on Mac/Windows smoothly. After the process completes, click “Open” button to find the generated videos, and then you can enjoy editing and playing AVCHD on Mac/Windows.
Further Reading:
Facing issues when importing Nikon D7200 H.264 MOV to FCP X for further editing? Here you will find the best solution about MOV to FCP X workflow.
 The Nikon D7200 is a worthy successor to the D7100, which is a high performance, compact DSLR camera with high resolution photo and full HD video capability. As one of the hottest DSLRs in the market, the Nikon D7200 is great for us to take high quality images and record vivid full HD videos. If you are a D7200 user, you would encounter Nikon D7200 recorded H.264 MOV to FCP X importing issues. The unexpected crash, unsupported file format, no audio, and etc. happened.
The reason that you can't import Nikon D7200 MOV to FCP X for editing is simple: the Nikon DSLR uses the sophisticated H.264 compression method for recording video files to the camera's memory card. This is an ideal file type for video capture in an SLR camera, delivering relatively compact file sizes with image quality noticeably superior to alternate video compressions (such as Motion JPEG). However, the H.264 compression format requires that files be transcoded into a format better suited to editing, effects, and color grading; this would usually be Apple ProRes codec, which ensures maximum editing quality and efficiency when working with FCP X. Actually, you need to do MOV to FCP X conversion.
I did a lot search on net to find methods to convert MOV to FCP X best format, you may like to give a shot to this powerful Pavtube HD Video Converter for Mac. With intuitive interface, you can easily and fast convert MOV to FCP X on Mac. And the latest Mac OS X Yosemite is supported; now the trail-before-purchase is supported, just feel free to try it!
Tutorial on converting Nikon D7200 H.264 MOV to FCP X for editing:
Step 1: Launch the HD MOV to FCP X Video Converter on your Mac, and then click the “Add video” button to import your H.264 MOV files from Nikon D7200 directly. In order to import several files at one time, you can click “Add from folder” button.
The Nikon D7200 is a worthy successor to the D7100, which is a high performance, compact DSLR camera with high resolution photo and full HD video capability. As one of the hottest DSLRs in the market, the Nikon D7200 is great for us to take high quality images and record vivid full HD videos. If you are a D7200 user, you would encounter Nikon D7200 recorded H.264 MOV to FCP X importing issues. The unexpected crash, unsupported file format, no audio, and etc. happened.
The reason that you can't import Nikon D7200 MOV to FCP X for editing is simple: the Nikon DSLR uses the sophisticated H.264 compression method for recording video files to the camera's memory card. This is an ideal file type for video capture in an SLR camera, delivering relatively compact file sizes with image quality noticeably superior to alternate video compressions (such as Motion JPEG). However, the H.264 compression format requires that files be transcoded into a format better suited to editing, effects, and color grading; this would usually be Apple ProRes codec, which ensures maximum editing quality and efficiency when working with FCP X. Actually, you need to do MOV to FCP X conversion.
I did a lot search on net to find methods to convert MOV to FCP X best format, you may like to give a shot to this powerful Pavtube HD Video Converter for Mac. With intuitive interface, you can easily and fast convert MOV to FCP X on Mac. And the latest Mac OS X Yosemite is supported; now the trail-before-purchase is supported, just feel free to try it!
Tutorial on converting Nikon D7200 H.264 MOV to FCP X for editing:
Step 1: Launch the HD MOV to FCP X Video Converter on your Mac, and then click the “Add video” button to import your H.264 MOV files from Nikon D7200 directly. In order to import several files at one time, you can click “Add from folder” button.
 Step 2: Click the “Format” bar to get the drop-down menu and you can get “Final Cut Pro>>Apple ProRes codec”, including ProRes 422, ProRes 422 (HQ), ProRes 422 (LT), ProRes 422 (Proxy) and ProRes 4444. Choose the proper one you want. Here, we suggest you to choose Apple ProRes 422 .mov as the best output format.
Step 3: Press the “Settings” icon and you’d better set the video frame rate as 30fps, video size as 1920*1080 for editing Nikon D7200 H.264 MOV in FCP X easily.
Step 4: Click the “Convert” button at the bottom right corner to start converting MOV to FCP X. Once the conversion completes, you are free to import MOV to FCP X for further editing!
Conclusion: This smart HD MOV to FCP X Video Converter for Mac can automatically switch off the computer when the conversion is done, so you don’t need to wait around during the MOV to FCP X conversion. It does the video conversion like a charm and the output files will maximally preserve the quality of your original clips. Now you can import the generated H.264 MOV to FCP X to create your own masterpiece.
Further Reading:
Step 2: Click the “Format” bar to get the drop-down menu and you can get “Final Cut Pro>>Apple ProRes codec”, including ProRes 422, ProRes 422 (HQ), ProRes 422 (LT), ProRes 422 (Proxy) and ProRes 4444. Choose the proper one you want. Here, we suggest you to choose Apple ProRes 422 .mov as the best output format.
Step 3: Press the “Settings” icon and you’d better set the video frame rate as 30fps, video size as 1920*1080 for editing Nikon D7200 H.264 MOV in FCP X easily.
Step 4: Click the “Convert” button at the bottom right corner to start converting MOV to FCP X. Once the conversion completes, you are free to import MOV to FCP X for further editing!
Conclusion: This smart HD MOV to FCP X Video Converter for Mac can automatically switch off the computer when the conversion is done, so you don’t need to wait around during the MOV to FCP X conversion. It does the video conversion like a charm and the output files will maximally preserve the quality of your original clips. Now you can import the generated H.264 MOV to FCP X to create your own masterpiece.
Further Reading:
This article will go through briefly about Pavtube special offer and big deal on 2015 Easter promotion. Attractive activities of this grand festival held by Pavtube Studio will also be introduced.
 What do people usually do on Easter Day?
Many churches hold special services on Easter Sunday, which celebrate the Jesus Christ's resurrection after his crucifixion. Many people also decorate eggs. These can be hard boiled eggs that can be eaten later, but may also be model eggs made of plastic, chocolate, candy or other materials. It is also common to organize Easter egg hunts. Eggs of some form are hidden, supposedly by a rabbit or hare. People, especially children, then search for them. In some areas, Easter egg hunts are a popular way for local businesses to promote themselves or may even be organized by churches.
What could Pavtube Studio offer on this grand festival?
Since Easter is approaching, Pavtube Studio provides special offer on Pavtube Video Converter for Mac with 50% off! It saves your totally half price! This Mac Video Converter enables users to backup, convert, transcode, compress and edit source videos and movies to a preferred format for your mobile phones, tablets, or smart TV so you would have a chance to experience the Easter Day traditions at home with the help of Pavtube. Besides, you can import your Easter memorable videos to non-linear editing system like FCP, iMovie/FCE, Premiere, Avid and etc. for further editing so that you can share the fantastic moments with your family and friends. Burn them into DVDs for keeping is also a pretty good idea!
What can you expect for Pavtube special offer on 2015 Easter promotion?
Pavtube Studio is offering special discount on Video Converter for Mac to celebrate this year's Easter Day from March 30 to April 5. During these 7days, you can get wonderful products with attractive price just $17.5 /piece.
With this Mac Video Converter, you can do some simple edit work. On the program’s main interface, “Edit” is waiting for you. “Trim” to decide where to start and where to end, “Crop” to cut some unwanted clips, “Subtitles” to add some explanations to your audience and so on. Before conversion, you can preview the videos. When the video is playing, you may take snapshoot when it plays to your favorable frame by clicking the “Snapshoot” button. Tick off “Merge into one file” when you want to combine several files into an integrated one. You can also change aspect ratio from 4:3 to 16:9 and vice versa, rotate 90 degrees clockwise, anti-clockwise, add plug-in subtitles, apply special effect, and more. Why not download the free trail from the official website and take a close look and then have a try?
How about “Settings”? You can change the parameters by clicking “Settings” button. When Profile Settings pops up, you can change the bit rate, frame rate, codec, audio channel and etc. there. To be frank, if you are not good at change the parameters, you’d better follow the default ones. At least it can maintain the best video quality.
Starting on March 30 and ending on April 5, Pavtube Studio provides 2015 Easter promotion for all users. Let’s enjoy the annual Easter Sunday and the half price special offer! You can click here to know more details about Pavtube Easter Promotion!
More information about Pavtube, you can go to Pavtube official website.
What do people usually do on Easter Day?
Many churches hold special services on Easter Sunday, which celebrate the Jesus Christ's resurrection after his crucifixion. Many people also decorate eggs. These can be hard boiled eggs that can be eaten later, but may also be model eggs made of plastic, chocolate, candy or other materials. It is also common to organize Easter egg hunts. Eggs of some form are hidden, supposedly by a rabbit or hare. People, especially children, then search for them. In some areas, Easter egg hunts are a popular way for local businesses to promote themselves or may even be organized by churches.
What could Pavtube Studio offer on this grand festival?
Since Easter is approaching, Pavtube Studio provides special offer on Pavtube Video Converter for Mac with 50% off! It saves your totally half price! This Mac Video Converter enables users to backup, convert, transcode, compress and edit source videos and movies to a preferred format for your mobile phones, tablets, or smart TV so you would have a chance to experience the Easter Day traditions at home with the help of Pavtube. Besides, you can import your Easter memorable videos to non-linear editing system like FCP, iMovie/FCE, Premiere, Avid and etc. for further editing so that you can share the fantastic moments with your family and friends. Burn them into DVDs for keeping is also a pretty good idea!
What can you expect for Pavtube special offer on 2015 Easter promotion?
Pavtube Studio is offering special discount on Video Converter for Mac to celebrate this year's Easter Day from March 30 to April 5. During these 7days, you can get wonderful products with attractive price just $17.5 /piece.
With this Mac Video Converter, you can do some simple edit work. On the program’s main interface, “Edit” is waiting for you. “Trim” to decide where to start and where to end, “Crop” to cut some unwanted clips, “Subtitles” to add some explanations to your audience and so on. Before conversion, you can preview the videos. When the video is playing, you may take snapshoot when it plays to your favorable frame by clicking the “Snapshoot” button. Tick off “Merge into one file” when you want to combine several files into an integrated one. You can also change aspect ratio from 4:3 to 16:9 and vice versa, rotate 90 degrees clockwise, anti-clockwise, add plug-in subtitles, apply special effect, and more. Why not download the free trail from the official website and take a close look and then have a try?
How about “Settings”? You can change the parameters by clicking “Settings” button. When Profile Settings pops up, you can change the bit rate, frame rate, codec, audio channel and etc. there. To be frank, if you are not good at change the parameters, you’d better follow the default ones. At least it can maintain the best video quality.
Starting on March 30 and ending on April 5, Pavtube Studio provides 2015 Easter promotion for all users. Let’s enjoy the annual Easter Sunday and the half price special offer! You can click here to know more details about Pavtube Easter Promotion!
More information about Pavtube, you can go to Pavtube official website.
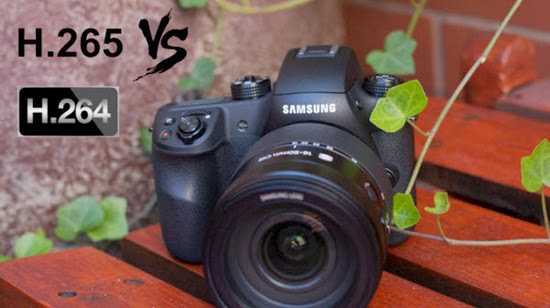
With this hottest Samsung NX1 released in 2014, most cameramen just can't wait to have a try. The stunning camera uses the newest ultra-efficient H.265/HEVC codec that some users may not very familiar with this new codec. Here is a detailed introduction on how to convert Samsung NX1 H.265 to H.264 for non-editors.
 You must have been noticed that H.265/HEVC has been applied in this brand new camera, which may lead us into a new 4K Era. But some users have already encountered many problems: Are there any
 NLEs
can handle this H.265/HEVC codec? Any media player can playback this video smoothly? How to convert Samsung NX1 H.265 to H.264 for non-editors? How to encode H.265 to H.264? How to decode H.265 to H.264?
While as a new guy in this video place, H.265/HEVC has not yet been accepted by most devices, players, editing software, TV and more. According to this case, how to encode or decode the H.265/HEVC footage is an emergency task for us. No matter for editing tools or Media players, no matter editing in Avid MC
, Adobe Premiere Pro
, After Effects or playing on Windows Movie Maker
, Pinnacle Studio, Sony Vegas Pro, etc., it is necessary for us to find a professional NX1 H.265 Video Converter to do a favor.
Luckily, Pavtube Studio has announced that with the upgraded version 4.8.2, H.265/HEVC codec and MXF
in XAVC codec
are fully supported well with all windows products. More details on this upgraded information. Overall, you can depend on Pavtube NX1 H.265 Video Converter which can make your H.265 footage accepted by almost all NLEs, Media Players, Tablets, Smart phones, 4K TVs, HDTV etc. with an easy operation job. H.265 recordings from Samsung NX1 camcorder are also included.
Tips: If you are Mac users, we can provide Mac version for you- Pavtube NX1 H.265 Video Converter for Mac.
How to convert Samsung NX1 H.265 to H.264 for non-editors?
Step 1: You can download and install NX1 H.265 Video Converter from the official website or click the “Free Trial” icon above in a nice way. Launch it and the main interface will pop up in front of our eyesight. Press on “Add” or “Add from folder” button and we can load our original NX1 H.265 files smoothly. Or drag NX1 H.265 files in directly is not a bad idea too.
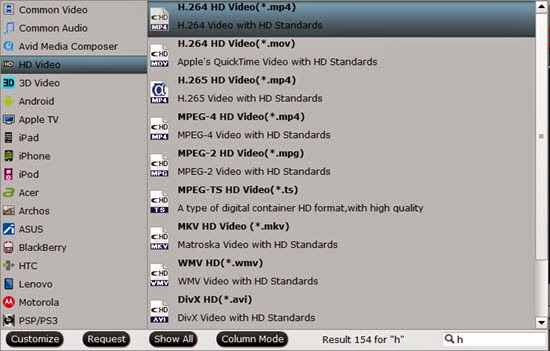
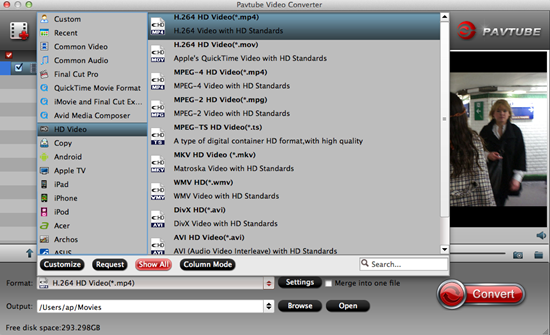
 Step 2: Go to the format bar to choose H.264 as your output format. Click the format bar, then select “HD Video>>H.264 HD Video (*.mp4)”.
Tips: The entire output format under H.264 in "HD Video" will output as H.264 high profile. This will reduce the quality drop of your raw H.265/HEVC to the least.
Step 2: Go to the format bar to choose H.264 as your output format. Click the format bar, then select “HD Video>>H.264 HD Video (*.mp4)”.
Tips: The entire output format under H.264 in "HD Video" will output as H.264 high profile. This will reduce the quality drop of your raw H.265/HEVC to the least.
 Step 3: After all have been settled, back to the main UI and click this "Convert" button to start your conversion. After the conversion, just click this "Open output folder" to check your converted files.
Conclusion: No matter you want to convert Samsung NX1 H.265 to H.264 or do other video conversion, this all-in-one program can help you do the job. You can review your video directly by loading your files or convert them into a friendly format for further editing or something else.
Further Reading:
Step 3: After all have been settled, back to the main UI and click this "Convert" button to start your conversion. After the conversion, just click this "Open output folder" to check your converted files.
Conclusion: No matter you want to convert Samsung NX1 H.265 to H.264 or do other video conversion, this all-in-one program can help you do the job. You can review your video directly by loading your files or convert them into a friendly format for further editing or something else.
Further Reading:
If you're shopping for a small, high-performance camera that you can take pretty much anywhere, there are a slew of options. The contenders include the announced Nikon 1 V3, a mirrorless camera with a promised shooting speed of 20 frames per second. Do you know how to import and edit Nikon 1 V3 MOV videos in FCP? Generally, all you need is a Nikon 1 V3 MOV video converter.
 With Nikon 1 V3, you can capture MOV recordings. If you have got the Nikon 1 V3 and often use it to record full HD video, you may have the need to import Nikon 1 V3 MOV videos to FCP on Mac for further editing. Whereas, FCP doesn’t support Nikon 1 V3 MOV videos well, you may encountered many problems, like import it slowly and couldn’t edit videos smoothly.
How to import Nikon 1 V3 MOV videos in FCP for editing without crashing problem and avoid rendering? The best method to solve these problems is to convert Nikon 1 V3 MOV videos to FCP best supported format ProRes for editing. If you are looking for a solution for the problem likewise, check out Pavtube HD Video Converter for Mac, a top Mac Nikon 1 V3 MOV Video Converter. It supports converting all Nikon MOV videos to ProRes codec so that you can easily import the Nikon MOV videos to FCP X/7/6 for editing on Mac(Yosemite, Mavericks, Mountain Lion included). This Nikon MOV video converter will help you import the files correctly and saving the rendering time.
How to import and edit Nikon 1 V3 MOV videos in FCP?
Step 1: Launch the Nikon 1 V3 MOV Video Converter on your Mac, and then click the “Add video” button to import your MOV videos from Nikon 1 V3 directly. In order to import several files at one time, you can click “Add from folder” button.
With Nikon 1 V3, you can capture MOV recordings. If you have got the Nikon 1 V3 and often use it to record full HD video, you may have the need to import Nikon 1 V3 MOV videos to FCP on Mac for further editing. Whereas, FCP doesn’t support Nikon 1 V3 MOV videos well, you may encountered many problems, like import it slowly and couldn’t edit videos smoothly.
How to import Nikon 1 V3 MOV videos in FCP for editing without crashing problem and avoid rendering? The best method to solve these problems is to convert Nikon 1 V3 MOV videos to FCP best supported format ProRes for editing. If you are looking for a solution for the problem likewise, check out Pavtube HD Video Converter for Mac, a top Mac Nikon 1 V3 MOV Video Converter. It supports converting all Nikon MOV videos to ProRes codec so that you can easily import the Nikon MOV videos to FCP X/7/6 for editing on Mac(Yosemite, Mavericks, Mountain Lion included). This Nikon MOV video converter will help you import the files correctly and saving the rendering time.
How to import and edit Nikon 1 V3 MOV videos in FCP?
Step 1: Launch the Nikon 1 V3 MOV Video Converter on your Mac, and then click the “Add video” button to import your MOV videos from Nikon 1 V3 directly. In order to import several files at one time, you can click “Add from folder” button.
 Step 2: Click the “Format” bar to get the drop-down menu and you can get “Final Cut Pro>>Apple ProRes codec”, including ProRes 422, ProRes 422 (HQ), ProRes 422 (LT), ProRes 422 (Proxy) and ProRes 4444. Choose the proper one you want. Here, we suggest you to choose Apple ProRes 422 .mov as the best output format.
 Step 3: Press the “Settings” icon and you’d better set the video frame rate as 30fps, video size as 1920*1080 for editing Nikon 1 V3 MOV videos in FCP easily.
Step 4: Now, click “Convert” button and let it go. The Nikon 1 V3 MOV Video Converter for Mac supports batch conversion. So if you have lots of MOV videos to convert, check “Shut down computer after conversion” and you can go away without keeping an eye on it.
Conclusion: Once the conversion process shows in 100%, click “Open” to get the output videos. Create a project and start Nikon 1 V3 editing MOV videos in FCP with light speed. Besides the functions mentioned above, Nikon 1 V3 MOV HD Video Converter for Mac enables you to trim out unwanted part, crop out black bars, change aspect ratio from 4:3 to 16:9 and vice versa, rotate 90 degrees clockwise, anti-clockwise, add plug-in subtitles, apply special effect, and more. What are you waiting for? Just try it for free now!
Step 3: Press the “Settings” icon and you’d better set the video frame rate as 30fps, video size as 1920*1080 for editing Nikon 1 V3 MOV videos in FCP easily.
Step 4: Now, click “Convert” button and let it go. The Nikon 1 V3 MOV Video Converter for Mac supports batch conversion. So if you have lots of MOV videos to convert, check “Shut down computer after conversion” and you can go away without keeping an eye on it.
Conclusion: Once the conversion process shows in 100%, click “Open” to get the output videos. Create a project and start Nikon 1 V3 editing MOV videos in FCP with light speed. Besides the functions mentioned above, Nikon 1 V3 MOV HD Video Converter for Mac enables you to trim out unwanted part, crop out black bars, change aspect ratio from 4:3 to 16:9 and vice versa, rotate 90 degrees clockwise, anti-clockwise, add plug-in subtitles, apply special effect, and more. What are you waiting for? Just try it for free now!
Read Related Articles:
Some media applications and portable media devices do not support AVI and require conversion, such as iPhone, iPod, iPad, HTC and so on, while MP4 is a video format commonly found on many portable media devices because of its high compression and high quality output.
 Maybe you've got some torrent movies or TV shows in AVI format, or some family AVI footages from your digital camcorders, like
 Canon camcorder
or mobile phone saved on your Mac's hard drive. But you may soon notice that you are not able to play AVI on Mac, because the Mac native player - QuickTime can't recognize your AVI files at all! And you are unable to organize AVI in iTunes, sync to iOS devices for playback on the move, and edit AVI in iMovie etc. All these happen because that AVI is not the compatible format with Mac OS X Yosemite and iOS. So if you want to use AVI which requires you to convert AVI to MP4 or other Mac OS X Yosemite/Windows 8.1 compatible formats for a change.
As the most widely used video format, MP4, to which you convert AVI, gives you access to your iPod, iPad or iPhone etc. with any video in unsupported file formats including AVI. This article would show you how to convert AVI to MP4 on Mac OS X Yosemite step by step with Pavtube Video Converter for Mac. If you want to convert AVI to MP4 on Windows 8.1, you can refer to corresponding Pavtube Video Converter.
Below are quick steps for you to convert AVI to MP4 on Mac Yosemite.
Step 1: Click the “Add Video” button or “Add from folder” icon on the main interface to import AVI files after downloading and installing this Mac Video Converter. Drag and drop files are also available. When the files are loaded to the program, you can view them from the Preview window. Simply select an item and click the “Play” button. When the video is playing, you may take snapshoot when it plays to your favorable frame by clicking the “Snapshoot” button.
 Step 2: Click the “Format” bar to get the drop-down menu and you can get “HD Video>>H.264 HD Video (*.mp4)” as best output format.
 Step 3: To set the profile settings, please click the “Settings” button. General speaking, the default settings are just fine. Click the “Browse” button to browse and specify a destination folder to save the converted files.
Step 4: When everything is ready, click “Convert” to start converting AVI to MP4. This Mac Video Converter supports batch conversion so you may load multiple files and convert them at one time.
Conclusion: As AVI to MP4 Mac Video Converter, it enables you to trim out unwanted part, crop out black bars, change aspect ratio from 4:3 to 16:9 and vice versa, rotate 90 degrees clockwise, anti-clockwise, add plug-in subtitles, apply special effect, and more. If you want to merge several clips into a whole one, “Merge into one file” can help you to realize it. Try it for free now!
Further Reading:
Step 3: To set the profile settings, please click the “Settings” button. General speaking, the default settings are just fine. Click the “Browse” button to browse and specify a destination folder to save the converted files.
Step 4: When everything is ready, click “Convert” to start converting AVI to MP4. This Mac Video Converter supports batch conversion so you may load multiple files and convert them at one time.
Conclusion: As AVI to MP4 Mac Video Converter, it enables you to trim out unwanted part, crop out black bars, change aspect ratio from 4:3 to 16:9 and vice versa, rotate 90 degrees clockwise, anti-clockwise, add plug-in subtitles, apply special effect, and more. If you want to merge several clips into a whole one, “Merge into one file” can help you to realize it. Try it for free now!
Further Reading:
Read More:
Summary: Tips and tricks for importing Canon T6s/760D MP4 files to VLC and QuickTime for playing and enjoying. Learn details.
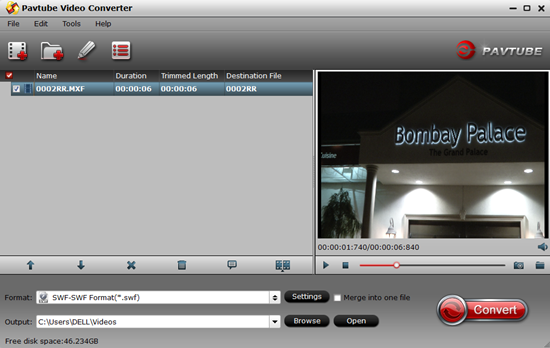
 EOS Rebel T6s/760D is a new model in Canon's DSLR. Users can record Full HD MP4 files with it. But there are some problems such as not showing the video, unsupported file type when playing and enjoying CanonT6s/760D MP4 videos. You cannot import recordings from Canon T6s/760D to VLC or QuickTime for playing. Is there any quick fix for the problems with Canon T6s and VLC/QuickTime? VLC does play MP4 files, but it has strict limitations: VLC Media Player is only compatible with MPEG-4 ASP, DivX 4/5/6, XviD, 3ivX D4 and H.264 / MPEG-4 AVC. However, MP4 is a multimedia container format with many kinds of video and audio codec. If your MP4 file contains a VLC unsupported audio or video codec, VLC won't play it. In this case, we will encounter the following symptoms when we play MP4 files in VLC: Question 1: "I'll get to about 1 hour and 50 minutes of a 3 hour long .mp4 video and the video will just stop, and it happens to all the videos I've downloaded." Question 2: "I am a fan of VLC so use it on most machines to play MP4 videos from my NAS. Tonight it has just stopped displaying the video." Question 3: "VLC will not play certain mp4 h264 files. Some H.264 files work, others don't." How to solve "VLC/QuickTime not playing MP4" Issue? Pavtube Video Converter for Mac is specially designed for solving the VLC/QuickTime MP4 issue like "Does VLC/QuickTime play MP4? Can VLC/QuickTime play MP4? VLC/QuickTime is not playing MP4? VLC/QuickTime won't play MP4? How to play MP4 on VLC/QuickTime smoothly?" With this powerful MP4 to VLC/QuickTime Converter, it becomes easier to play all kinds of MP4 on VLC/QuickTime and you will never encounter the above problems. If you are Windows users, the Windows Guide can help you. P.S Here you can choose more Video Converter for Mac softwares by viewing the Reviews. Now, download and install the program from the website or click the free trial icon: Other Download: - Pavtube old official address: http://www.pavtube.com/video-converter-mac/ - Amazon Store Download: http://www.amazon.com/Pavtube-Video-Converter-Mac-Download/dp/B00QIBK0TQ - Cnet Download: http://download.cnet.com/Pavtube-Video-Converter/3000-2194_4-76179460.html How to transcode Canon T6s/760D MP4 videos for playing on VLC or QuickTime? Step 1: Then, launch the best MP4 Mac video converter and load your original MP4 files in with "Add video" or "Add from folder". Directly drag files in is available.
  Step 2: Choose the right output format for VLC. As we mentioned above, we would like to introduce you to select the "HD Video>>H.264 HD Video (*.mp4)" as your best choice. Surely you can choose other suitable ones as you like.
  Tips: For QuickTime, choose "Common Video>>MOV-QuickTime (*.mov)". Step 3: The built-in editing function provided by Mac Video Converter is something worth trying. To trim the video, add artistic effects, adjust audio, add watermark, customize video parameters and so on. You can get the work done splendidly. Of course, if you don't think it's a necessary to do, you can skip it and move onto the next step directly.
  Tips: You can also go to the "Settings" to set the parameters for your videos. Step 4: Click the "Convert" button on the main interface if you have done all the preparation work. This is the workflow that we need to convert T6s/760D MP4 to VLC/QuickTime best accepted format. Conclusion: OK, everything is ready, and you can instantly play your Canon T6s/760D camcorder captured MP4 files on VLC/QuickTime. By the way, we have promoted money saving bundles & deals activity. It really saves a lot! Why not take a look and have a try about high quality products with attractive price? Good News! Pavtube Bundles Dealsare coming! If you want to import/preserve/mix multi-track MXF in MKV/MP4/MOV formats, get multi-track Apple Prores MOV for further editing in Final Cut Pro (X), the following bundled software is your best choice:? --------Video Converter($35) + MXF MultiMixer($45) = $54.9, Save $25.1 (buy link) --------Video Converter for Mac($35) + iMixMXF($45) = $54.9, Save $25.1 (buy link) Go ahead and click the link to get your coupon. Save up to $44.1!Never miss!!! Read More:
How to make Panasonic HC-X920 AVCHD MTS files compatible with Final Cut Pro? How to edit Panasonic HC-X920 AVCHD MTS files in FCP X? This article will give you a detailed solution. Panasonic HC-X920 is one of the most popular camcorders on the market. Many users choose to buy this device because of its excellent hardware equipment. It features three back-illuminated MOS sensors, and it can records full HD 1080/60p videos in the AVCHD format.There are all great improvements to an already excellent camcorder, but some limitations still exit there like the output 1080 60p or 50p AVCHD MTS movies cannot be supported by some non-linear video editors like the common tool FCP X/7/6 for Mac users, which causes unsmooth editing without rendering. This problem is largely caused by the incompatibility of video file format and video frame rate of Panasonic HC-X920 and Final Cut Pro X/7/6.Tips: FCP supported video formatsFrom Final Cut Pro X product page, you will find that Apple ProRes codec MOV format is native editing codec for FCP X. With this editing codec and format, you won’t have any importing or editing problems. As we talked above, you need to convert X920 AVCHD MTS files to FCP X Apple ProRes codec. Here, you will need an X920 to FCP X converter. We recommend you to take a try on Pavtube MTS/M2TS Converter for Mac. How to edit Panasonic HC-X920 AVCHD MTS files in FCP X?Step 1: Download, install and run the program on your Mac. When the main interface pops up, please click “Add video” button to import Panasonic X920 AVCHD MTS files that you want to convert. You can load several files at once by clicking “Add from folder”.
 Step 2: Click format column and choose best video format for FCP X. Just click and choose “Final Cut Pro>>Apple ProRes 422 (*.mov)” as output format for this profile is native format for FCP X. If you have the requirement to edit videos in other programs, you can choose according to your need.
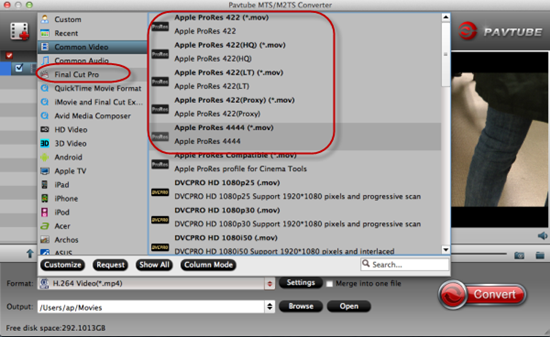 Tips: Apple ProRes 422 (*.mov) and Apple ProRes 422 (HQ) (*.mov) have higher qualities. Apple ProRes 422 (LT) (*.mov) and Apple ProRes 422 (Proxy) (*.mov) have smaller size. You can choose according to your requirement.Step 3: Adjust video and audio parameters in Profile Settings, where you can get by clicking “Settings” on the main interface.Tips: For FCP X users, 1920*1080 as video size, 30fps as video bitrate and pcm-s16le as audio codec are the most suitable settings.Step 4: Click “Convert” button to start Panasonic X920 AVCHD MTS to FCP X conversion process. This best Mac MTS converter will start the conversion process immediatelyConclusion: When all your Panasonic MTS files are converted, you can import X920 AVCHD files to FCP X and edit natively. In addition, the versatile Mac MTS Converter is also effective in getting MTS/M2TS files editable in iMovie, Final Cut Express, Avid Media Composer, Adobe Premiere Pro, etc. Just try and it will do you a favor.Further Reading:
- Advice on Buying Streamers of Roku, Apple TV, Chromecast and Amazon Fire TV: Among Roku, Apple TV, Chromecast and Amazon Fire TV, you maybe want to know which one has the coolest features, which one is the best, which one is the most popular.
- H.265 vs XAVC vs H.264 high profile output: For many person who just touch the electronic world, the thing which makes them very confused is that the difference, the advantages and disadvantages among those codecs.
- How to Store and Stream Movies with Plex for Beginners?: Plex organizes all of your personal media so you can enjoy it no matter where you are. Here are several important steps to store and stream videos, music, movies with Plex in your home.