Summary: If you are looking for ways about how to watch NX500 4K HEVC on QuickTime, you may wish to read this post. It introduces an easy-to-use and affordable application to accomplish ingesting 4K H.265 to QuickTime with excellent quality.
What kinds of camcorders can now shot the 4K and UHD recordings on the market? Samsung NX500 4K camcorder can be the right answer! While for playing NX500 4K H.265 on QuickTime with best supported formats, any troubles there you have ever met?
How do I play NX500 4K H.265 on QuickTime?
“Hi, there, when will Apple add support for 4K H.265/HEVC in QuickTime player on Mac? I got a bundle of NX500 4K H.265 files and would like to play them back on QuickTime. Unfortunately, QuickTime seems not to work with H.265 codec. Any suggestions to clear up my issue? I would really appreciate any help. Thanks.”
To be honest, the built-in H.265/HEVC codec, the most advanced compression technology available, brings efficiency to the storage of video clips by compressing high quality video to half the size and the bit rate of H.264 footage without any compromise on quality. While as the latest codec, H.265 is not supported by almost every editing software, media player and etc. To make NX500 4K H.265/HEVC widely supported, we here introduce you a strong functional H.265/HEVC decoder for all of you.
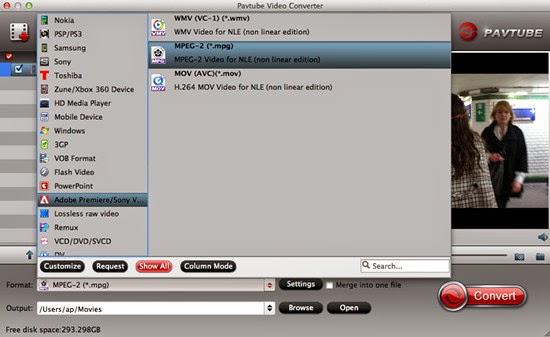
Pavtube Video Converter for Mac (Windows version), this is the best solution we would like to highly recommend. With the recent upgraded version 4.8.5.1, it can encode/decode H.265/HEVC videos so nicely. What’s more? Not only can you convert NX500 4K H.265/HEVC to MP4, AVI, WMV, MOV, FLV for easily playing, but also you can convert H.265/HEVC files to the editing tools with professional codec, like MPEG-2 for Adobe Premiere Pro/Sony Vegas, DNxHD for Avid Media Composer, AIC MOV for iMovie, Apple ProRes for FCP X/7/6 and etc. Besides, the built-in video editor allows you to modify your videos by trimming, cropping, adjusting video effects and more. By the way, this H.265 converting application also enables you to convert videos from almost any SD/HD input (M2TS, MTS, MKV, H.264, MP4, AVI, WMV, MOV, MXF, MPEG, etc.) to H.265/HEVC codec up to 4K.


How to ingest NX500 4K H.265/HEVC to QuickTime for playing?
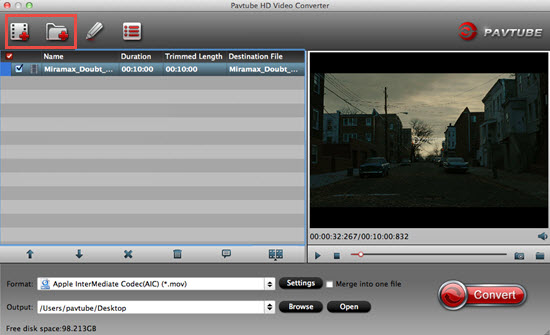
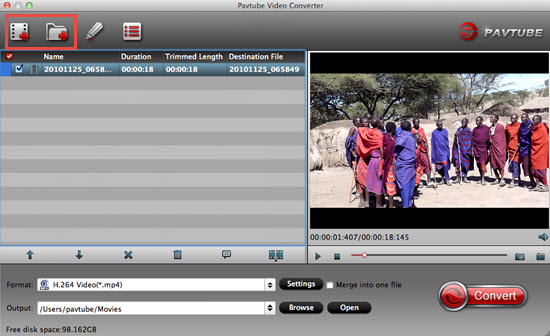
Step 1: Download and install the program. Click “Add video” button on the top side to open the file browser window and pick your Samsung NX500 4K H.265/HEVC video. You can also drag and drop files to the main interface of this best H.265/HEVC converter.
Tips: You can add multiple files to the queue and convert them all at one time.
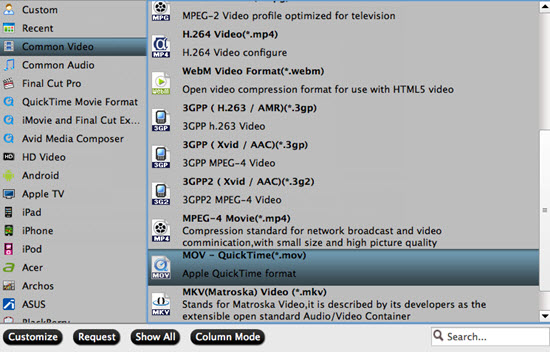
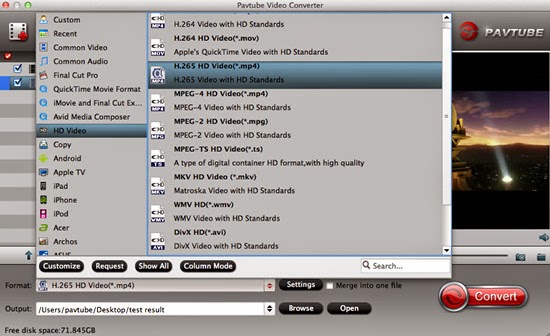
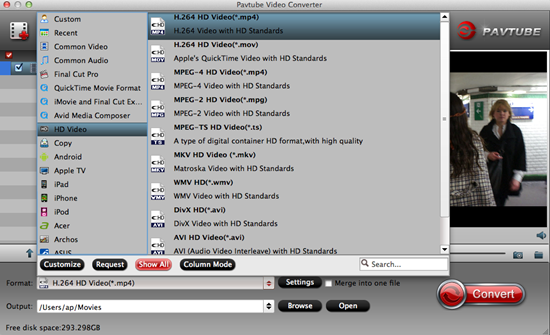
Step 2: Click on “Format” bar and select output format from the drop-down list. To play NX500 4K H.265/HEVC on QuickTime beautifully, you’d better choose “Common Video>>MOV-QuickTime (*.mov)” as best output format.

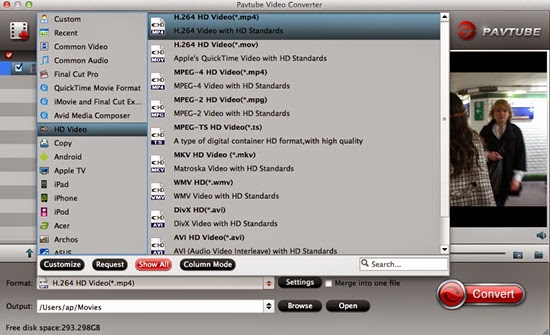
Step 3: Click “Settings” button to customize the output video and audio settings by yourself. But if you are not good at it, you’d better use the default parameters, they will ensure you a good balance between file size and image quality basically. You can change the resolution, bit rate, frame rate as you need.
Step 4: Click “Convert” button on the bottom of the screen to start NX500 4K H.265/HEVC video conversion process. The amount of time it takes will vary based on your system’s hardware and the quality settings you selected.
Conclusion: When the conversion is done, you can click “Open” button to get the generated video files. Now, you can play NX500 4K H.265/HEVC on QuickTime without any hassles.
Further Reading: