Showing posts with label Canon. Show all posts

Monday, July 15, 2013

Best .mts to Quicktime .mov converter for QuickTime Player

In this is AVCHD to MOV conversion guide, you will learn the best solution to play AVCHD .mts footages with QuickTime Player on your mac easily.

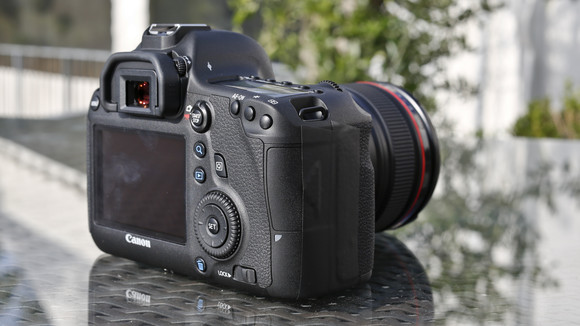
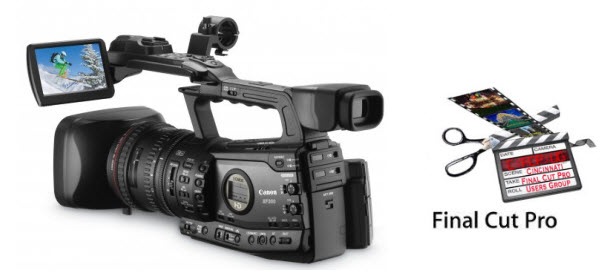
Q: I have a number of clips I downloaded onto my Win7 machine from a Canon HF S11 which are AVCHD .mts files, and tried to send them to someone with a Mac, but she couldn't open them. I'd like to convert them from .mts to Quicktime .mov and then resend them so she can open them. Once she opens them, she'll be doing some editing for me so I'd like to send her the highest quality resolution. What's the best .mts to QT .mov converter for that?

A: Usitng the best mts to Quicktime .mov Converter to do AVCHD to MOV conversion for QuickTimr Player on Mac.
            
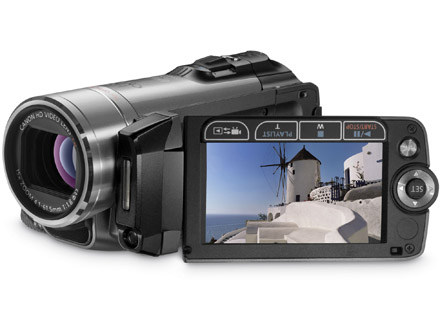
.MTS file format is an AVCHD file (Advanced Video Codec High Definition), a video file format created specifically for high-definition (HD) digital camcorders, like Sony HDR-SR-1,Panasonic HDC-SD1, Canon, JVC and Sanyo video camcorders. AVCHD video is MPEG-4 AVC/H.264 video compression, that allows the large data files created by HD video recording to be captured and saved on digital media such as hard disk drives and flash memory cards, or DVD disc.

QuickTime
is a multimedia framework developed by Apple Computer Inc. that consists of a QuickTime player, the QuickTime framework which provides a common set of APIs for encoding and decoding audio and video and the QuickTime movie file format .MOV.

AVCHD (MTS/M2TS/TS) video usually can not accepted by QuickTime. If you want to enjoy MTS files with QuickTime Players, you need to convert mts file to QuickTime supported .mov format.

Here, this Mac MTS to QuickTime Converter as the best .mts to Quicktime .mov converter, can easily help you convert mts file to mov for QuickTime easily with reliable efficiency and simple frank interface; no jitter, no slitter, you will have regardless HD video quality lost after converting. Come and download the powerful AVCHD Converter and let's start! 

Fast Convert AVCHD .mts videos to QuickTime MOV format

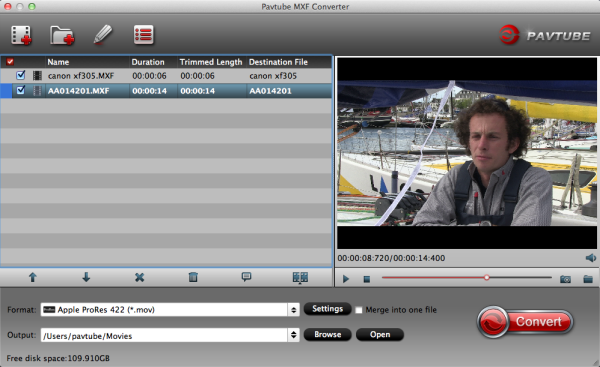
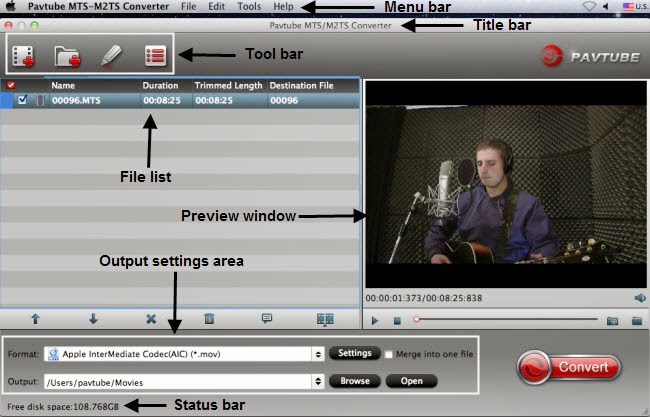
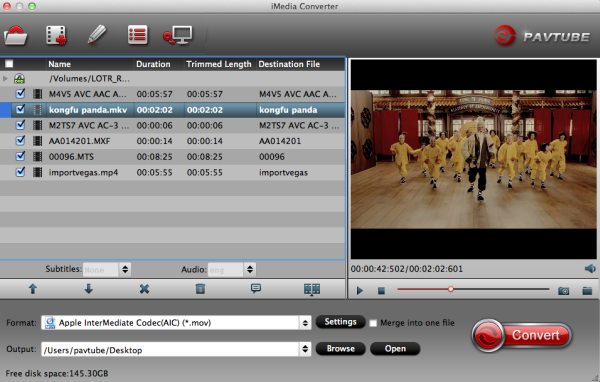
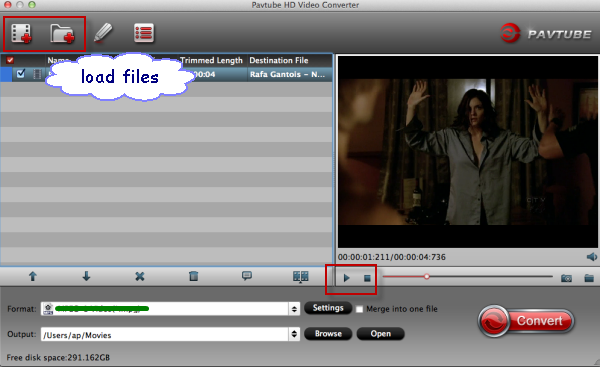
Step 1. Copy your AVCHD file to mac and keep it on. Launch Pavtube iMedia Converter for Mac; click the top left two icons to load your footages individually or in batch correspondingly.


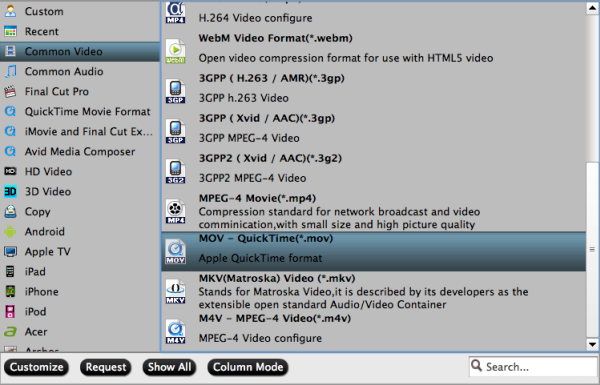
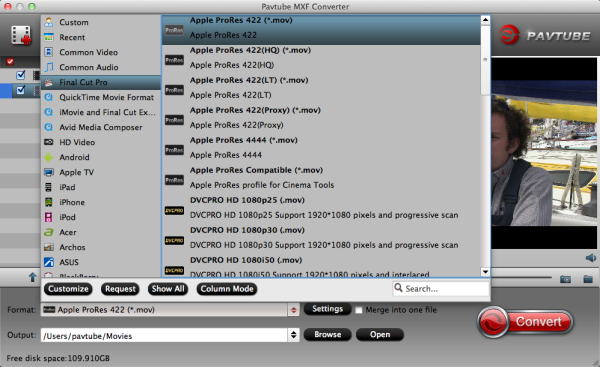
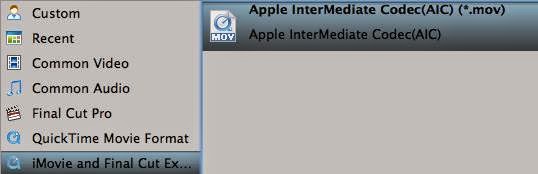
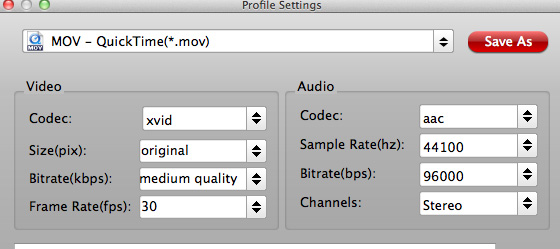
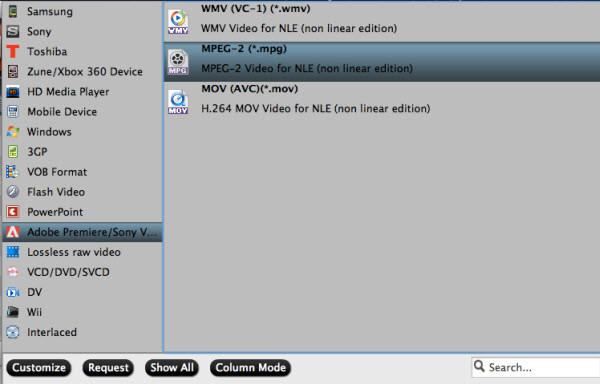
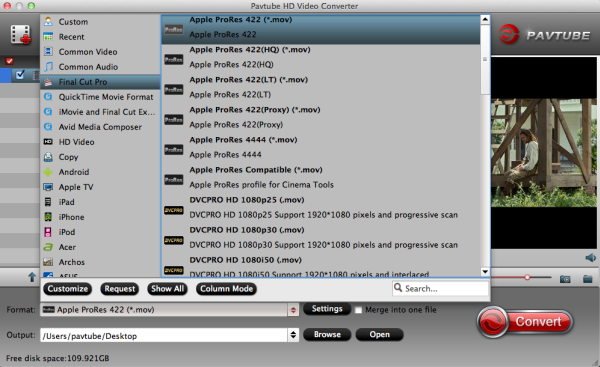
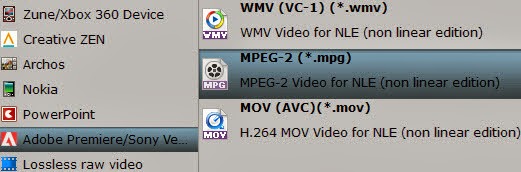
Step 2. Click Format, choose "Common Video > MOV-QuickTime(*.mov)" as the best video format for QuickTime Player.


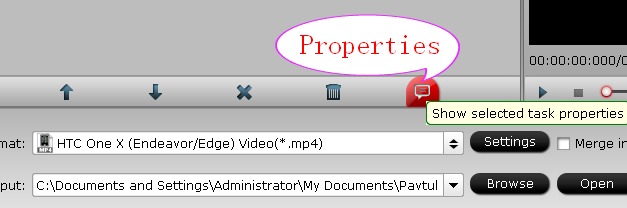
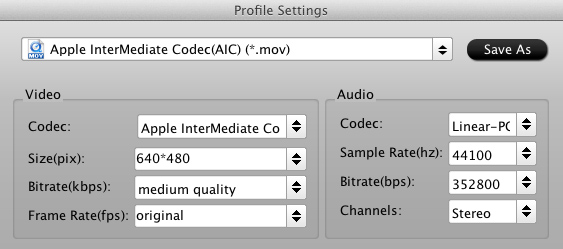
You can also click the Setting which is marked as 3 above, choose the output video size, video bitrate, frame rate, etc. all according to your needs.

Step 3. Now click the big red circle at the right bottom to start converting AVCHD .mts file to QuickTime preferred mov format. This program will help you to stream the converted video to home shared network so that you can playback the on another mac directly.

More Tips about QuickTime Player:

XF105 workflow- How to import .mxf files from Canon XF105 to Final Cut Pro X?

Here it mainly shows an easy way to transcode Canon XF105 MXF to Apple ProRes MOV on Mac so that you can smoothly import and edit Canon XF105 recorded MXF footage in Final Cut Pro X without rendering.   


Q1: I love photography and take pictures and have a Canon XF105 and shoot the videos recently, it supports Full HD 1920×1080 resolution with Canon XF codec, up to 50Mbps bit rate and 4:2:2 color sampling. After shooting some .mxf videos with Canon XF105, I want to join various mxf files into one and edit Canon xf105 mxf in FCP X. But I find the problem that Fianl Cut Pro X does not recognize the .mxf videos? What happened?

Q2:I've run into a problem with a project. I copied the entire card file structure of XF105 onto a hard drive, installed all the right codecs...and it's telling me the file structure is invalid. My question is, can I still have all the videos and work them in FCP X?

Q3:I am using the Canon XF105 camcorder. The format is MXF from a memory card. It's kind of obnoxious at the moment since FCP X won't work natively with MXF files, which isn't the end of the world, but is a pain.

So the Question is : How to Import Canon XF105 MXF files to FCP X on Mac 

AnswerConvert MXF to Apple Prores for Final Cut Pro X Editing on Mac OS X 

By Google search, I found a professional HD Video Converter for Mac , which is a best OS X Lion/Mountain Lion MXF Converter for Mac Software. It can not only convert Canon XF105 MXF videos to Prores MOV, but also join videos into one.

Transcode/Convert Canon XF105 recordings to Apple ProRes 422 for FCP X 

Step 1: Connect Canon camcorder to iMac with USB 2.0 cable, run the top MXF to FCP Converter for Mac as the best Canon MXF to MOV converter on Mac. Click the “Add” button to import Canon XF105 camcorder .mxf files.

Step 2. Click on "Format" and choose "Final Cut Pro > Apple ProRes 422 (*.mov)".


Step 3. Click "Convert" to start transcoding the Canon XF105 MPEG2 MXF recordings to Apple ProRes / converting .mxf to .mov videos. After conversion click "Open" to find .mov videos.  

Some more helpful features of the app: 

1. Settings- click to set video resolution(1920x1080/1440x1080/1280x720/720x480), bitrate(from 1Mbps to 20Mbps), frame rate (24p/30p) 

2. Editor (next to "Add" icon)- click to set deinterlace, denoise, mute, volume up, trim, crop, etc. 

Load/Import converted Canon XF105 footage to Final Cut Pro X 


Step 1. Start up Final Cut Pro X, follow "File > Import > Files". 

Step 2. Browse to the converted .mov video in the "Import Files" window. Press "Open" at the right bottom. 

Now you can import Canon XF105 footage to FCP X successfully and get down to video editing. 

MXF Related articles: 


Read More:

Tuesday, July 9, 2013

Fastly and easily import/edit Canon C300 MXF files in FCP X

The article shows you an easy workaround to import and edit Canon C300 recorded MXF files in FCP X on Mac 10.9 Mavericks along with some help from the best Prores Converter for FCP.

Canon has introduced a new Cinema EOS system, made up of a new interchangeable-lens digital video camcorder, the EOS C300, and seven 4K EF cinema lenses. C300 features a newly developed sensor, dubbed Super 35mm, offering a resolution of 8.29 megapixels.


Canon C300 is a new camcorder which focuses on film recording, it can give us excellent video quality. It uses MPEG-2 codec with an MXF File Wrapper. This codec offers a choice of 50 Mbps 4:2:2 component , 35 Mbps 4:2:0 component, and the standard HDV format of 25 Mbps 4:2:0. But the one thing which frustrate me is that, I can't handle the MXF files from my Canon C300 natively into FCP X. And this will stop me using FCP X. There were some Canon plugins available but the procedure is somwhat complex for me.

While looking for solutions to import Canon C300 MXF to FCP X on Mac, I find a easy workaround- that is to transcode Canon MXF footage to FCP X friendly Apple ProRes codec. It will saving rending time and avoid crashing problem, and thus, editing Canon MXF files in Final Cut Pro will be more easier.

For guys who may find it difficult to import and edit Canon C300 MXF files in FCP X on Mac, here is the fast guide to convert Canon C300 MXF to Prores MOV for FCP X. Along with some help from the 3rd-party software.

Required Software:
Pavtube MXF Converter for Mac is a good tool for you. This professional MXF transcoder for Mac can help you convert C300 MXF files to Final Cut Pro X. I downloaded and tried several converters. Only this MXF to FCP Converter for Mac works for me. I like the batch processing and joining of multiple mxf videos into one file. The editing feature to trim the recorded videos is great, as I can control the content for conversion. Here comes the steps:

1. Download Pavtube MXF to FCP Converter for Mac, it’s a good MXF converter/transfer on Mac.

2. Install and launch this C300 MXF transcoder for Mac, import the C300 MXF files to the converter.


3. Click format column to choose output format, for editing C300 MXF files in Final Cut Pro X, you can choose Final Cut Pro -> Apple ProRes 422 (*.mov).


4. You can click properties to adjust the audio stream ID if you find the C300 MXF no sound. Besides, you can click settings button to adjust the resolution, bitrate, etc. Just customize the parameters to meet your need.


5. Click convert button to start converting C300 MXF files to ProRes for FCP X, what’s more, with this MXF converter you can transfer MXF to QuickTime for playback.

Now you may have known how to convert/transfer canon C300 MXF to FCP X, just follow the steps above and have a try, you can edit C300 MXF footages in Final Cut Pro on Mac easily and fastly.


MXF Related articles:

Thursday, July 4, 2013

Deinterlace and import Canon VIXIA HF G20 1080 60i AVCHD to iMovie/FCE

In order to get better importing and editing effect, you'd better deinterlace/convert Canon Vixia HF G20 1080 60i MTS video before importing to iMovie or FCE on Mac, just follow this article.


Canon VIXIA HF G20 Full HD Camcorder shoots 1920 x 1080 Full HD video at 60i, in native 24p and 30p. With the 24p frame rate option you can give your footage a cinematic look. Using Cinema-Looks Filters you can boost that film look with multiple built-in adjustable filters. The HF G20 features a Genuine Canon 10x HD Video Lens with an 8-Blade iris for more professional-looking video and stills. It has a 30.4 - 304mm (35mm equivalent) focal length. The camcorder is also equipped with a Canon HD CMOS Pro image sensor that supports improved low-light performance and a wide dynamic range.


Vixia HF G20 captures Full HD 1920x1080p videos in MPEG4 or AVCHD format. The AVCHD delivers stunning picture quality, but is not full supported by iMovie and FCE. So it is headache if you want to deinterlace and edit Canon Vixia HF G20 1080 60i MTS in iMovie or FCE. To successfully get Canon VIXIA HF20 1080i MTS files to iMovie/FCE for further editing, the best way is to transcode Canon Vixia AVCHD to iMovie/FCE most compatible format like AIC. mov.

Here we recommend you to choose the top Canon MTS to AIC Converter for mac, which can convert Canon HF G20 AVCHD recordings to AIC for editing in iMovie/FCE on Mac and keep the quality as original. Plus, 1080i videos are not perfectly readable for these video edit programs like FCP, iMovie and FCE. Thus, deinterlacing Canon 1080/60i MTS on Mac is imperative to be considered.

Steps: Deinterlace and Convert Canon Vixia HF G20 1080 60i MTS clips to iMovie or FCE.

Step 1: Install the best Canon AVCHD Converter for Mac on your Mac OS X, and run it to import your Canon Vixia HF G20 1080 60i MTS footages to it.

Tip: If you want to combine the files together, please tick the box "Merge into one" on the main interface.


Step 2: Click the Format box and select best output format on the dropdown list. You are advised to choose Apple Intermediate Codec(AIC)(*.mov) as the export.


Step 3: Click the “Settings” icon on the main interface and you’d better set the video size as 1920*1080, video frame rate as 30fps(or 25fps PAL) for importing Canon HF G20 1080i MTS to iMovie or FCE with the best quality.


Step 4: Click Edit button and you can deinterlace Canon VIXIA HF G20 1080i AVCHD file for iMovie via ticking the “Deinterlacing” box in the Video Editor interface.

Step 5: Click the "Convert" button on main interface to start converting/deinterlace Canon HF G20 1080/60i MTS recordings to AIC for editing in iMovie and FCE  immediately.

After the Canon MTS to iMovie/FCE Converter finished transcoding, you can run the iMovie or FCE to import the converted files and edit Canon Vixia HF G20 1080/60i MTS in iMovie and FCE without any rendering or incompatibility problem.

You may also learn how to convert AVCHD to ProRes 422 for FCP.

Read More:

Wednesday, July 3, 2013

Canon 6D FCP workflow- Transcode Canon EOS 6D 1080p MOV to Final Cut Pro

If you don't know how to edit Canon 6D 1080p MOV video, please read the article below to learn the easy way to import and convert Canon EOS 6D H.264 MOV to ProRes for FCP 67/X editing.  

Less than a week after arch-rival Nikon grabbed headlines with the D600, Canon responded with an announcement of its own price-conscious full frame DSLR, the EOS 6D. The EOS 6D is perhaps best understood as a full frame version of the popular EOS 60D, and it primarily seeks to distinguish itself on the spec sheet with built-in Wi-Fi and GPS. For dedicated Live View users and video shooters, it could result in extra image noise or recording shutting off, since there's bound to be lots of heat generated.

And speaking of videographers, these users are able to record 1080P videos by Canon EOS 6D with full particulars, but they will be disappointed to find that it's impossible to edit Canon 6D 1080P MOV in FCP as below:

I have a Canon DSLR 6D and wanted to edit HD video in FCP. When I insert it on the timeline the settings that it comes to are skipping frames, cuts... I can't even insert Texts. Was I supposed to do something else?

In fact, Final Cut Pro will not accept MOV files from Canon 6D and the reason that the codec of Canon H.264 MOV isn't native with FCP (including both FCP 6/7 and FCP X).

To resolve this issue, you need to simply convert EOS 6D 1080p MOV to ProRes 422 codec MOV format, then you can edit EOS 6D 1080p mov video well in FCP on Mac. You can follow the steps below to convert Canon EOS 6D 1080p mov footages for FCP.

Step 1. Download and install Pavtube Canon Video Converter for Mac. It’s can convert videos between rich video formats, such as converting Canon 1080p MOV to ProRes 422 for FCP X.


Step 2. Drag and drop Canon EOS 6D recorded MOV video to this Mac Canon MOV to FCP Converter.


Step 3. Click "Format" column to choose the best output format for editing in FCP. if you want to edit EOS 6D 1080p MOV video in FCP, you are recommended to choose "Final Cut Pro -> Apple ProRes 422 (*.mov)".


(Optional) - You can click "settings" button to customize the output parameters, such as resolution and bitrate.


(Optional) - Edit function is useful and convenient for you to use. You can trim, crop, adjust effects or add watermark to the video.

Step 4. Click "Convert" button to start transcoding Canon EOS 6D 1080p MOV to ProRes 422 MOV for Final Cut Pro on Mac.

This Canon MOV Converter for FCP can help you convert the video format/codec you need quickly, video and audio quality are best guaranteed. You can also follow this article to import converted videos to final cut pro for editing.

Read Related Articles:

Tuesday, July 2, 2013

Convert Canon XF305 MXF file to MOV for playback with QuickTime on Mac

Follow this article you will know the easiest and fastest method to convert Canon XF305 MXF to QuickTime MOV on Mac for watching freely.

Speaking of the professional camcorder, how can we ever miss the fantastic Canon XF305 Camcorder, which represents Canon's entry into professional solid state video acquisition. Following on the heels of its widely respected XH line of tape-based camcorders, XF305 takes advantage of the latest HD technology–along with Canon's newly developed MPEG-2 4:2:2 codec–to record Full HD video to widely available Compact Flash cards.
However, users of these camcorders may always come across video formats compatible problems. Canon XF305 record videos in .MXF format which are not compatible with most of the media players on Mac like QuickTime, which is a multimedia framework released by Apple.

So how to make QuickTime to accept Canon XF305 MXF files? The easy way is convert MXF to Quicktime supported video formats like MOV, etc. At this time, you need a software applicationwhich called Pavtube MXF Converter for Mac to help you convert Canon XF305 MXF to Quicktime mov on Mac. 

Just in few steps, you can finish the MXF to QuickTime conversion.  If you want to edit your MXF files, the MXF to Quicktime MOV Converter Mac is your best choice. You can crop videos, add watermark, trim videos, merge videos. What's more, you can convert Canon XF305 MXF files to other friendly video formats like MP3, AVI, WMV, FLV, MPG, 3GP etc on Mac. The following guides shows you how to convert Canon XF305 MXF to Quicktime MOV for playback on Mac. 

Steps: Convert  Canon XF305  MXF to MOV for playing with QuickTime on Mac 

1.Download, install and launch Pavtube MXF to QuickTime Converter for Mac.

Once launched the program, click "Add" or "Add from folder" button to load your Canon XF305 MXF clips. You are allowed to add multiple files to convert at a time.


2.Select output format.

Click on the dropdown menu of "Format" and select "Common Video -> MOV – QuickTime (*.mov)" as target format. This format is specially designed for QuickTime playback. You can also choose format as you need in the format column, such as AVI, MKV, MP4, etc.


3.Adjust video and audio parameters.

Click "Settings" button to customize the output video and audio settings by yourself. You can also use the default parameters, they will ensure you a good balance between file size and image quality basically. You can change the resolution, bitrate, frame rate as you need.


4.Click convert button to start to convert Canon XF305 MXF file to QuickTime MOV on Mac with this best Mac MXF Converter.

After you converting Canon XF305 MXF files to MOV for QuickTime, you can enjoy and play the converted footages smoothly on Mac with QuickTime Player. 

Sunday, June 30, 2013

Getting 1080p .MOV files from Canon EOS 100D/Rebel SL1 to work in After Effects CS6

Summary: This guide will help you easily transcode Canon EOS 100D/Rebel SL1 1080p MOV files to After Effects CS6 for editing.


When I got a hands-on sneak peek of the new 18-megapixel Canon EOS Rebel SL1 digital SLR last month, I was told that the "SL" in the model name stood for "super lightweight." And that it is. The new Lilliputian Rebel SL1 feels as light as most compact system cameras -- and nearly as small -- especially with a Canon EF 40mm f/2.8 STM pancake lens attached to the front of it. Clearly, the burgeoning, mirrorless CSC market is what Canon is aiming to take on with the fully mirrored SL1.

Canon Rebel SL1 is also called EOS 100D, I would rather use real dedicated video camera to shoot movies as Canon EOS 100D/Rebel SL1 can shoot 1080p30 video recordings. But recently I have encounter an problem with "importing Canon EOS 100D/Rebel SL1 1080p MOV to Adobe After Effects CS6" like someone asked in the forum:

Q1. I have a Canon 100D and wanted to edit HD video in Adobe After Effects CS6. Every time I try to import MOV into after effects it doesn't support it or something. Why? Was I supposed to do something else?

Q2. I am a beginner in using Adobe After Effects CS6 with Rebel SL1 footages. I am trying to import files (videos) with extensions like MOV. They will not import; After Effects doesn't support that file type according to the program. I am non-pro, it's home use. Any insights?

Q3. I have a weird problem with importing MOV files into Adobe After Effects CS6. When I try to import my MOV file, it says the file type is unsupported. I don't get it, can anyone help me? It was working fine as I was using it to play around with video I recorded by my new Canon SL1/100D on QuickTime , so think it was because of something I did.

What is the main reason?

Much to the disappointment of new filmmakers that they are not familiar with the 1080p .mov format, as MOV is just a container file and 1080p is in high quality. As the incompatibile codec, the footage created with Canon EOS 100D/Rebel SL1 could not be imported to After Effect, including the latest After Effect CS6 unless you convert Canon 100D/SL1 MOV to After Effects compatible MPG (MPEG-1. MPEG -2, MPEG -4), WMV, MOV.

With a professional and top MOV to After Effects converting program called Pavtube HD Video Converter for Mac, you can not only convert Canon EOS 100D/Rebel SL1 1080p MOV to MPG, WMV,mov to import Canon EOS 100D/Rebel SL1 MOV to After Effects, but also allows you to adjust video resolution, frame rate, bitrate, encoder and audio sample rate, channel, bitrate, encoder to get a better vision according to your needs. You may choose to cut off black sides by crop feature, split a time length segment by clip and tweak saturation, brightness, contrast by effects. It is 100& clean without any virus, adware and pop-ups.  Below is a quick guide of converting Canon EOS 100D/Rebel SL1 1080p mov for editing in AE CS6.


Step one: Download
Download MOV to AE CS6 Converter, and click to install.
 

Note: this is a Mac oriented solution. For Windows users the Pavtube Studio offers alternative HD Video Converter for PC, which is very similar to the Mac HD Video Converter. 

Step two: Load videos  

After launching the 
Mac MOV to AE CS6 Converter. Click "Add Video" and browse to a Canon .mov clip and the software will add it to file list. Repeat the operation to load multiple movvideos. Or you may click the "Add Folder" button to import all the .mov files in the MOV file structure. 


Step three:  Select proper output format  
Click on "Format" and choose "Adobe Premiere/Sony Vegas> MPEG-2 (*.mpg)" format as the best codec for editing Canon EOS 100D/Rebel SL1 MOV in Adobe After Effect CS6

In the drop down list of profiles, select After Effects format WMV or MOV.


Step four. Settings.
Click on "Settings" to redefine output quality. You can also set a different video resolution (1920x1080/1440x1080/1280x720/720x480), frame rate (24p/30p), bitrate, audio channels, etc. For users who would like to retain exactly the same settings (without any quality loss), set target settings the same to source video. 

Step five: Start conversion

Click "Convert" to start transcode Canon EOS 100D/Rebel SL1 1080p MOV for After Effect CS6 editing on Mac.

After conversion click "Open" to find .mpg videos and import converted .mpg files to Adobe After Effect CS6 for editing.

Now you can successfully handle Canon EOS 100D/Rebel SL1 1080p mov file in After Effects well. Just have a try!

Related tips:

Transcode Canon PowerShot N to FCP X
Canon 6D and Final Cut Pro workflow
Canon EOS M to ProRes
Convert Canon 60D MOV to AVI/WMV
Import Canon 100D (SL1) MOV to FCP 6/7
Edit T2i/550D MOV in FCP X
Transcode T5i MOV to FCP 6/7
Convert 650D/T4i MOV to Prores for FCP
Edit Canon EOS T4i MOV in iMovie
Work with PowerShot N in Apple Aperture 3

Thursday, June 20, 2013

Best workflow for editing Canon EOS 700D/T5i 1080p footage with Final Cut Pro 6/7

With the best Canon MOV to Prores Converter, your Canon 700D/Canon T5i 1080p footage workflow with Final Cut Pro 6/7 will be smmoth and native.

Canon EOS 700D/Rebel T5i is an awesome Digital SLR camera which attributes an 18.0 Megapixel APS-C size CMOS sensor and Dual DIGIC four Image Processors, capturing tremendous pictures at as much as ISO 12800 and speeds of as much as eight.0 fps. Body surface treatment process and key made optimized feel better.


As 650D does, Canon 700D records FULL HD video in a highly compressed video format MOV, which is not an ideal editing format for FCP 6/7. Of cource, you may downloaded the update from Canon, and it is reading the Canon alternatives on FCP, but dragging the mov's into Log & Transfer isn't working. It keeps saying "Can't Read" or "Not Compatible."

So to make it easy to use Canon 700D/T5i 1080p footage in Final Cut Pro 6/7, the conversion between MOV to FCP is necessary. Now Pavtube HD Video Converter for Mac gives you the ability to edit Canon EOS 700D in Final Cut Pro 6/7. Before importing EOS 700D MOV to FCP 6/7, you should transcode Canon MOV videos to FCP preferred movie types: like ProRes .mov, and Apple ProRes is the greatest choice for maintaining the highest quality and performance while requiring less storage space than uncompressed HD video.

Here comes the step-to-step guide to convert Canon T5i/700D footage to ProRes 422 for FCP 6/7.

For the preparation of this conversion, connect your Canon 700D/Canon T5i MOV to iMac or Macbook and transfer MOV video files into hard drive.

Step 1: Load Canon 700D/Canon T5i MOV video files into this program.
Run Pavtube HD Video Converter for Mac as a Canon MOV to FCP Converter, and click the "Add" button to load 700D/T5i.mov footage.


Hints: Batch video files are allowed to be imported,therefore joining several video files into big one is supported by ticking the checkbox of "Merge into one file" under the preview window.

Step 2: Choose Apple ProRes 422 MOV as the output video format and specify the destination folder.
Click on "Format" bar and set a FCP friendly codec in dropdown-list. You are advised to follow "Final Cut Pro" template and choose "Apple ProRes 422 (*.mov)" as an optional format for converting Canon 700D/T5i MOV files to Final Cut Pro 6/7 


Step 3: Edit Canon 70D/Canon T5i MOV video files.(Optional)
Click the big button "Editor" and another interface comes out for you to perfect video files. As it shows, some editing options are provided, and there you are free to crop unwanted video parts, trim video length and add interesting video to original one.

Step 4. Start the process to transcode Canon EOS 700D(T5i) mov files to ProRes 422.
Click the button "Convert", this conversion will begin immediately. And after a few minutes, Prores MOV files are ready for you to edit on Final Cut Pro 6/7.

Hope this guide "Canon 700D 1080p footage workflow with Final Cut Pro 6/7" really do some help, and this Mac Canon H.264 to Prores MOV Converter also supports importing Canon EOS 700D/T5i MOV to iMovie/FCE with AIC MOV Format. It will surely become your ideal assistant in your digital.

Read Related Articles:

Monday, June 3, 2013

Top MXF to MOV Transcoder- Convert Canon XF300 MXF files to AIC .MOV for iMovie/FCE

This guide will show you how to convert Canon MXF files to AIC MOV on Mac so that you can smoothly import/edit Canon XF300 MXF files in iMovie and Final Cut Express without any problem. 

Canon HD camcorders are more and more popular and XF300 Professional Camcorder takes advantage of the latest HD technology, along with Canon's newly developed MPEG-2 4:2:2 codec to record Full HD video to affordable Compact Flash cards. So it is a good choice to shoot funny videos or record their interesting family life with it. But for the Canon XF300 output format is mxf, and most of video editors can not recognize mxf file format, like iMovie and Final Cut Express, this make many Canon fans be headache. Below, I will throw a quick guide up for those who wanna ingest/edit Canon XF300 MXF footages into iMovie and FCE smoothly.


Here is the easy way to fix it, namely, converting Canon XF300 MXF to AIC MOV on Mac. If you are interested doing likewise, check out Pavtube's iMedia Converter for Mac, the best Mac MXF to MOV Converter. The program is an easy-to-use and intuitive Mac tool for camcorder users. It is good at batch converting MXF recordings shot by Panasonic P2 camcorders, Canon XF series cameras to AIC MOV formats compatible with your Mac iMovie and FCE, becide it supports XF300 MXF to FCP transcoding.

Guide on how to convert Canon XF300 MXF files to AIC for iMovie/FCE on Mac

If you have the same problems about editing Canon XF300/XF105/XF100 or C300 MXF Videos on Mac, you may follow the step-by-step guide.

Step 1. Free download and run the best Mac MXF to AIC Transcoder for FCE/iMovie, add MXF captured by XF300 to the program. You can not only click "add video" button to import Canon mxf files, but also you can click "add from folder" button to add MXF folder.


Step 2: In order to convert/import Canon XF300 MXF files to AIC for iMovie/FCE, you just need select AIC (*.mov) as output format.

Please click on the dropdown menu of "Format", and then follow "iMovie and Final Cut Express > Apple InterMediate Codec(AIC)(*mov)."


Some more helpful features of the batch MXF to MOV Converter for Mac:

1. Settings- click to set video resolution(1920×1080/1440×1080/1280×720/720×480), bitrate (from 1Mbps to 20Mbps), frame rate (24p/30p)

2. Editor (next to "Add" icon)- click to set deinterlace, denoise, mute, volume up, trim, crop, etc.

3. This all-in-one toolbox can not only convert MXF files, but also transcode other HD video and rip Blu-ray/DVD  for playback, storage or editing.

Step 3: Click Convert" button to start transcoding XF300 MXF files to AIC MOV for iMovie/FCE  editing on Mac.

So there you have it. Once the MXF to MOV Conversion is done, you can go to the output folder to find the converted video files. Now you are free to import/edit Canon XF300 MXF files in iMovie/FCE under Mac without problems.

Read More:

Sunday, May 19, 2013

Import and Edit Canon C500 MXF in Adobe Premiere Pro CS 4/5/6 on Mac

In this article, I will shows the best method for editing Canon C500 MXF in Adobe Premiere Pro CS 4/5/6 on Mac. If you have problems when importing Canon C500 MXF to Adobe Premiere Pro on Mac Mopuntain Lion, please follow this post below to know how to import Canon C500 mxf footage to Adobe Premiere Pro CS 4/5/6 for editing without rendering.  


Canon has officially announced the EOS C500, the professional 4K video camera output that it promised at the NAB trade show in April. A continuation of the concept of the C500, it can capture Raw 4K video footage and offers frame rates of up to 120fps in compressed 4K. It also captures 2K footage (2,048 x 1,080 pixels) at 12-bit, with 4:4:4 Y'CbCr chroma sub-sampling for high colour resolution. For 4K and 2K recording, uncompressed output is delivered to external recording systems via built-in dual 3G SDI ports. Dual HD-SDI monitor outputs support external live monitoring. Simultaneously, HD content can be written to dual onboard CF cards to provide proxy video for offline NLE systems.

Read More: Canon XF300 | Canon XF105 | Canon XF100

Canon C500 is very excellent, you may have bought a C500 camcorder and need to edit C500 files in Premiere Pro CS 4/5/6, but C500 MXF files are not well supported by Premiere Pro CS, as you may encounter many audio and video problems, such as bitrate unsupported, and synchronization program. 

We did a test, we had only been able to get 35Mbps and 25Mbps files to work in PPro CS4, we have to use CS5 or above to edit natively 50MBPS 422HD recordings with AMA MXF or Canon XF Plugin. To edit C500 MXF videos, you’d better upgrade to CS5/CS6. But some users can’t upgrade to CS5/CS6, what will you do? 


In fact, it is an easy solution for many users, it can save money and same time. The most importnat is that the conversion won’t reduce the video qaulity. Here we run an top tool as the MXF to Adobe PPro Converter to take an example. Below is the simple guide on how to convert C500 MXF movies to Premiere Pro CS4/5/6 supported formats.


Step 1. After downloading, install and run this Mac MXF Converter for Premiere Pro, just copy the MXF files from the CF cards right to your hard drive, import the files to the software.


Step 2. Click "Format" bar to choose the output format. Click "Format > Adobe Premiere/Sony Vegas > MOV (AVC)(*.mov) or MPEG-2 Video (*.mpg)" as output format. The MXF to Premiere CS Converter for Mac will convert Canon C500 MXF videos to MOV/MPG with the original video resolution.


Step 3. You can click "Settings" button to adjust the parameters, such as resolution, bitrate, etc.

Step 4. Click "Convert" button to start converting Canon C500 MXF to MOV/MPG for importing to Premiere Pro CS4/5/6 on Mac.

After the conversion is finished, just run Adobe Premiere Pro CS4/5/6 and import the .mpg or .mov files for editing. You will find the output video work perfectly on Adobe Premiere Pro CS.


PS. If you do not know how to import video to Adobe, please reference the following guide:

Adobe Premiere Pro workflow: How to import Media Files to Premiere Pro on Mac

Canon MXF

Read More:

Thursday, May 16, 2013

Mac Canon MTS Converter-Working with Canon Legria HF20/HF200 MTS (AVCHD) Videos on Mac

Using a top Canon MTS Converter, you can make it easy to import and edit Canon Legria HF20/HF200 AVCHD files in Final Cut Pro, Avid, iMovie, Final Cut Express and Premiere Pro on Mac.


Canon's acquitted itself quite well with a nearly identical trio of flash-based AVCHD camcorders, the HF10/HF11/HF100, and follow-up models HF20 and HF200 manage to improve upon their legacy. Canon Legria HF20 and HF200 are hot Canon cameras, and the only difference between the two models is color and memory configuration: the HF20 has 32GB built in, while the HF200 has none. Aside from their stunning features, the compatibility of Canon Legria HF20/HF200 with Mac is the hot topic of discussion among the users.


As the AVCHD format is not good for Mac editing, it takes long time to render, and you can't edit the Canon HF20/HF200 AVCHD MTS files smoothly in Final Cut Pro (X), Avid, iMovie,FCE and Premiere Pro. To achieve you goal smoothly, below is simple tutorial for you.

Tips:Watch MTS Movies on Mac via iTunes?

Converting Canon Legria HF20/HF200 MTS files for editing in FCP (X), Avid, iMovie,FCE and Premiere Pro etc.

In order to process Canon HF20/HF200 footage fast and seamless on Mac, it requires that the AVCHD .mts videos to be transcoded into an editing friendly format before importing the HF20/HF200 video to non-linear editing apps. This is usually done with a Mac Canon Video Converter.

Recommended Tool: Pavtube HD Video Converter for Mac

The software converts Canon HF20/HF200 mts to Apple ProRes/DVCPRO/HDV/Avid DNxHD/AIC/AVI/WMV/MOV/MP4 and creates stunning high definition footage up to 1080p.

1. Download and run the perfect Mac Canon MTS Converter (If you are windows user, clik to download Canon MTS Converter), and then click "Add Video" button or "Add from folder" button to load HF20/HF200 AVCHD MTS source files.


2. Click format bar to choose the format for output.

For iMovie and FCE, you can choose 'Final Cut Express -> Apple InterMediate Codec (AIC) (*.mov)';


For FCP (X), you can choose 'Final Cut Pro -> Apple ProRes 422 (*.mov)';


For Avid, choose 'Avid Media Composer -> Avid DNxHD (*.mov)';


For Premiere, just choose Adobe Premiere -> WMV (VC-1) (*.wmv).

You can click "Settings" button to customize the output settings such as resolution and bitrate. Edit function is also available in this great Canon AVCHD Converter.

3.. Click "Convert" button to start transcoding Canon AVCHD MTS files on Mac for popular NLEs. Once the coversion completes, you can import and edit Canon HF20/HF200 AVCHD files natively with Final Cut Pro (X), Avid, FCE, iMovie, Premiere you want.

To make things much easier, please learn to know how to huge MTS files to DVD if you like, and learn More Canon MTS Video Converter Related Guide: 

Read More:

How to import Canon EOS T2i/550D MOV to FCP X for editing

Follow the guide to easily transcode your Canon T2i/550D 1080p H.264 MOV to ProRes 422 MOV format for smoothly editing on Mac.

EOS T2i/550D, a famous Canon DSLR that can offer HD video recording, is perfect for capturing clips or sequences which a consumer camcorder would otherwise find difficult or impossible. The T2i allows you to film at either 1920x1080, 1280x720 or 640x480 pixels with 30fps, 25fps, and 24fps. Video is an absolute highlight of the EOS T2i/550D and it's wonderful to have this degree of control in a camera. 

All of these are great, till you find it is a problem when you want to edit Canon T2i/550D footage in Final Cut Pro X. The thing is, I'm having an issue with the video clips during importing to FCP X: the output video from Final Cut Pro X is choppy, and there are lags or skipped frames even when exported to 30fps." The extension of the video file is mov, isn't this is a FCP friendly format? How can I import my Canon EOS Rebel T2i / 550D mov video to FCP X for editting?  
 

T2i record video in H.264 MOV, this format is supported by many editing software, but it can't be supported perfectly, take FCP X for example. Final Cut Pro X supported best video format is Apple ProRes 422 Codec MOV format, you can edit video with this format in Final Cut Pro X smoothly. That is to say, it's great choice to convert T2i/550D MOV to ProRes 422, then you can edit T2i/550D video well in FCP X on Mac. You can follow the steps below to convert T2i/550D footages for FCP X. 

Required software: Canon to FCP Converter for Mac 

Working as a Canon DSLR Camera to FCP Converter, it helps you import CanonT3i MOV to FCP, encode Canon 5D Mark III MOV for FCP X, edit Canon G12 MOV with FCP, as well as transcode Nikon D3200 MOV to ProRes for FCP X 

Step through: 

Step one. Run Pavtube Canon Video Converter for Mac. Click "Add" button, browse to the footages and load them to the converter. 


Step two. Select the items to be converted, and click on "Format" bar to set a FCP friendly format in Final Cut Pro template.

There are Apple ProRes family, DVCPRO and HDV codecs for your choice.

Basically, "Apple ProRes 422 (*.mov)" is the best format for 
converting 550D footage to FCP.


If you prefer smaller file size, choose "Apple ProRes 422 (LT) (*.mov)" instead. 


Step three. Click the "Settings" button and set proper video/ audio parameters.

My advice is to set the video size, bitrate and fame rate to be exactly as the footages so that you will suffer least quality degradation.

For example, when the video is shot at 1920*1080, 5mbps, 30fps, you could set Size-1920*1080, Bitrate-original, Frame rate-30.

If you would like to use default settings, simply skip this step. 


Step four. Click the "Browse" button next to the Output File Name field and select a location on your HDD for the output video file. 

Step five. Click the "Convert" button to start conversion. After conversion you can click the "Open" button to locate converted video files for importing to FCP without rendering.

Now can easily transcode T2i/550D 1080P H.264 files to FCP X compatible format for editing, this software runs fast, so you can convert your T2i/550D footages to FCP in less time.

Read Related Articles:

Wednesday, May 8, 2013

Does Sony Vegas like handling the Canon EOS-5D h.264 MOV files well

This article will show the best way to convert Canon 5D HD MOV to WMV for Sony Vegas editing. 

The Canon EOS 5D is a digital sngle lens reflex (DSLR) camera that can capture high definition stills and movie clips. It saves movie clips in-camera using a Compact Flash (CF) memory card. Canon bundles a simple free software package with the camera. Canon's supplied software applications are named ZoomBrowser for Windows and ImageBrowser for Mac which can play movie clips, and also perform rudimentary movie editing, but it not for windows, and some people have been asking importing issues about Canon 5D into Sony Vegas on Windows. 

I'm new to DSLR editing and have a bunch of 5D footage for a music video I just shot, and now need to edit it. I use Sony Vegas and have a relatively not that high performance laptop (about 4 years old) that has seen me through other editing projects, but I always feel theres a bit of a loss in quality in the finished product. I thought I'd ask, or if anyone can point me in the direction of places to find information, on 5D workflow for editing in Sony Vegas. If theres no hope for Vegas and my slow computer I will look into other options such as getting new editing software or borrowing someones mac or something. 

I've been annoyed that sony vegas and most other apps on my PC can't play the 5D full HD .mov files smooth. I was so excited about not having to transcode any files from shooting to editing. I have settled to transcode. But failed many times. Hope this helps anyone out there. I guess PC doesn't like handling the h.264 codec very well. 

How to edit 5D H.264 MOV files in Sony Vegas smoothly? The best way is to convert 5D H.264 MOV to Sony Vegas supported format, like MEPG-2/WMV format, which is best for Sony Vegas, and then you can edit the converted videos in Sony Vegas without problems. 

Software you need: Pavtube Video Converter Ultimate.

This software will help you to get  t 5D H.264 MOV files working well in Sony Vegas. It is capable of converting a variety of hd video, blu-ray, and dvd movies to another format. And meanwhile it supports to convert to many mobile devices and editing software, like After Effects, Avid Media Composer, Adobe Premiere Pro, and more. CUDA acceleration will give you faster conversion speed. Below is a guide for you.

1. Free download and install this 5D MOV to Sony Vegas Converter, just copy the HD MOV files from the CF cards right to your hard drive, import the files to the program.


2.Click format bar to choose the output format. Click and choose  Adobe Premiere/Sony Vegas --> MPEG-2 (*.mpg) or WMV (VC-1) (*.wmv). This format is best for Sony Vegas editing.


3.You can click "Settings" button to adjust the parameters, such as resolution, bitrate, etc.

4.Click convert button to start converting 5D H.264 MOV to Sony Vegas.

This Ultimate Caon H.264 MOV Converter from Pavtube can convert Canon 5D H.264 MOV files to Sony Vegas with best quality and fast speed. 

Once the conversion completes, you can click "Open" button to get the output files effortlessly.

Now you have got it right, just to import and edit Canon EOS 5D H.264 MOV files within Sony Vegas Pro 8/9/10/11/12 at ease.  

P.S.

If you want to burn Canon 5D mov to a DVD or a DVD iso file, you can get the bundled software- Video Converter Ultimate($65) + DVD Creater($35) = Only $64.9, Save $35.1. Never miss!

More info for you:

Transcode Canon EOS 6D 1080p MOV to FCP
Import Canon EOS DSLR H.264 MOV to Avid MC
Does Canon EOS 5D mark 3 1080p mov Capable with iMovie

Sunday, May 5, 2013

Canon XF305 to FCP- Import Canon XF305 MXF to FCP on Mac

Follow the post to learn how to import Canon XF305 MXF to FCP with FCP native codec on Mac.

The XF305, one of Canon's first file-based professional camcorders, records MPEG-2 MXF (Media eXchange Format) files – up to 1920 x 1080 Full HD at 50Mbps (4:2:2) – to CompactFlash (CF) memory cards. The Canon XF305 also offers multiple recording bit rates, resolutions and variable frame rates to expand your creative flexibility, and allow you to work in virtually any production environment.

Have you put your hands on this professional camcorder? If so, you would have collected a pile of MXF recordings, and have you tried to import Canon XF305 MXF to FCP for editing? Ever encountered some importing or editing troubles? If so, go through the page to find the solution.


As we know, FCP is the free and useful part of the Apple Mac iLife, you can use it to edit your movie or camcorder video which is shot by yourself. It supports video files like MPEG2, DV, HDV, QuickTime Movie and MPEG4 but no Canon XF .mxf files. So, to freely edit XF305 MXF in FCP on Mac, you need to convert XF305 MXF to FCP compatible video format.

Canon MXF to FCP Converter is the best Mac MXF Converter for you to convert MXF to iMovie on Mac. You can use it to convert/trasnscode Canon XF305 MXF files to Prores(Apple Prores Codec) codec MOV format, which is the FCP perfectly supported one. You can follow the guide below.

1. Download this best MXF converter for Mac OS X. This MXF to MOV converter will help you convert MXF to any formats you want, such as Apple ProRes 422 MOV, Apple InterMediate Codec MOV, etc.


2. Install and launch this XF305 MXF video converter for Mac. Import XF305 footages to the MXF Converter.

3. Click format bar to choose the output format you want. For converting XF305 MXF to FCP, you can choose Final Cut Pro -> Apple ProRes 422 (*.mov), it’s best supported by FCP.


4. You can click settings button to adjust the output parameters if you want.

5. Click convert button to start converting MXF to Apple ProRes 422.

With the best MXF to MOV Converter, you can easily convert XF305 MXF to FCP, by converting MXF to ProRes 422 codec MOV format, you can edit recorded footages in FCP smoothly.

Read More: