Wednesday, April 17, 2013

How to Use Sony Alpha DSLR AVCHD MTS recordings in Final Cut Pro X/7

To get Final Cut Pro working perfectly with Sony Alpha AVCHD .mts files, a best way is to convert MTS to ProRes MOV at first. 

As Sony Alpha DSLR cameras are becoming more and more popular in the market, many Sony camera and camcorder users are wondering how to import Sony Alpha DSLR AVCHD MTS/M2TS files to FCP X/7 for editing on Mac. Most users have the issue to import Sony Alpha camera AVCHD MTS/M2TS files, the main problems are: 1. FCP doesn’t support 1080 50/60P AVCHD import; 2. Sony AVCHD codec is not well to FCP X or FCP 7.

You may like shooting video with Sony Alpha DSLR, after recording, you may need to import the Sony AVCHD footages to Final Cut Pro for editing, but, Sony Alpha DSLR AVCHD MTS/M2TS format is not compatible with many editing software, such as Final Cut Pro X/7, the FCP doesn’t supports AVCHD MTS/M2TS 60P/50P.


What's the best solution to import Sony Alpha DSLR AVCHD files to FCP X/7 for editing? How to edit Sony AVCHD smoothly without rendering? The best way is to convert Sony recorded AVCHD to ProRes codec MOV format, Apple ProRes 422 MOV format is best supported by FCP, below is a brief guide for you.

1. Download Mac Sony Alpha MTS Converter, it's an professional Sony DSLR AVCHD converter on Mac which can convert Sony Alpha DSLR AVCHD files to different formats.


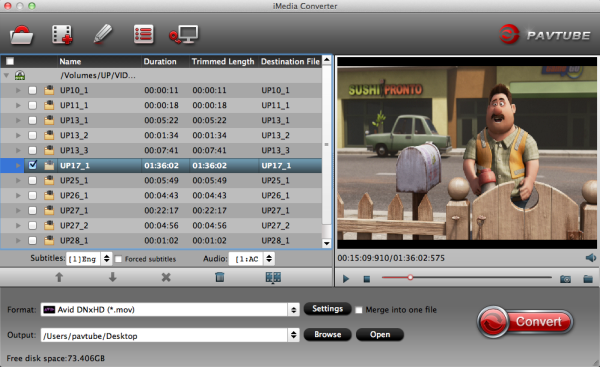
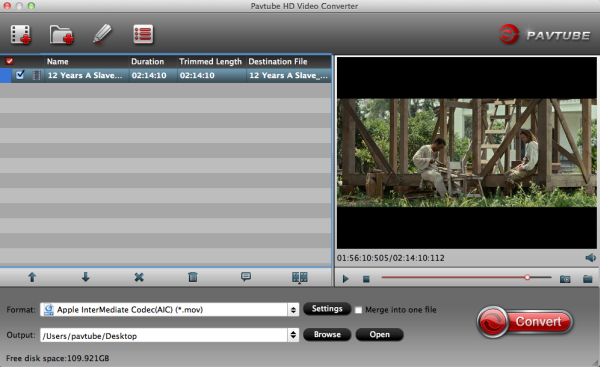
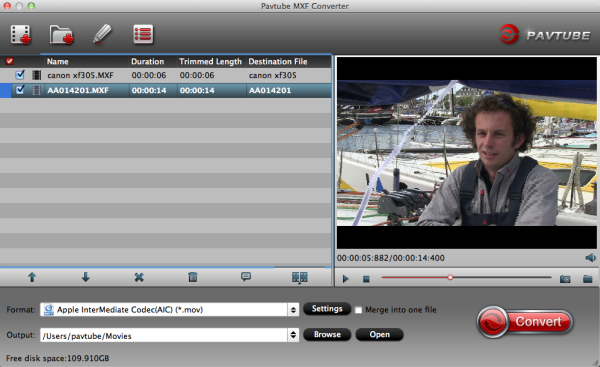
2. Install and launch this Sony Alpha DSLR MTS/M2TS Converter. Import the 1080p footages to the converter.

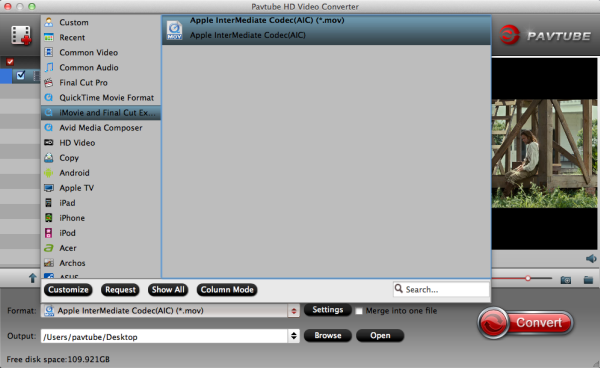
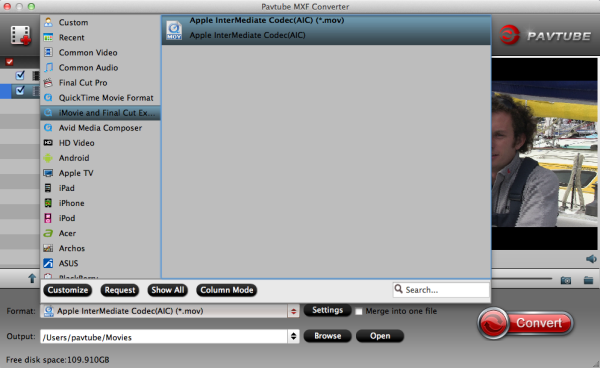
3. Click format bar to choose output format, you can click and choose Final Cut Pro -> Apple ProRes 422 (*.mov) or Apple Prores 422(HQ) (*.mov).


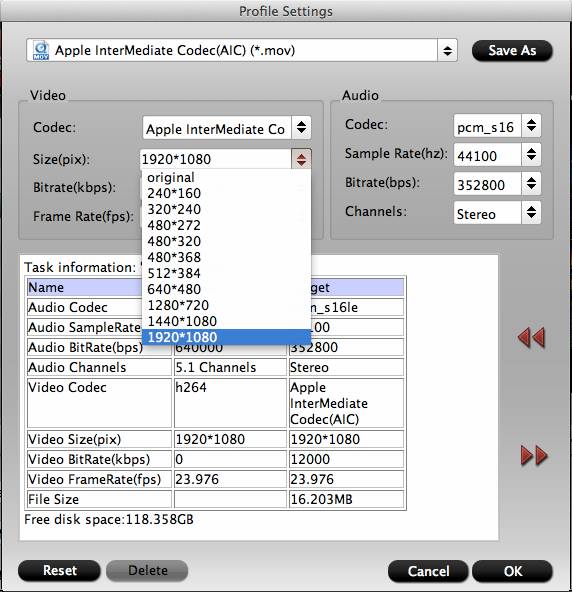
4. If you want to customize the output parameters, you can click settings button. Adjust the resolution and others as you need.

5. Click convert button to start the Sony Alpha DSLR AVCHD to ProRes 422 conversion.

With Pavtube MTS/M2TS converter for Mac, you can easily transcode Sony Alpha DSLR AVCHD files to Final Cut Pro X/7 for editing with Prores 422 codec MOV format, just try and have a good time.

Tuesday, April 16, 2013

Rewrap P2 MXF to MOV-Import Panasonic AVC-Intra P2 MXF to Avid Media Composer

This article shows you the best way to convert Panasonic recorded P2 MXF files to MOV for editing in Avid Media Composer.
 
As we know, P2 media is recorded in MXF format, it offers a variety of formats to choose from (DV, DVCPRO, DVCPRO 50, DVCPRO HD, and AVC-Intra 50 and AVC-Intra 100), differing in bit depth (8 or 10 bits), scanning mode (Progressive or Interlaced) and also frame rate. The Panasonic's 10-bit AVC-Intra codecs (AVC-Intra 50 and AVC-Intra 100) are very demanding on your computer's processor.The AVC-intra codec is a very processor heavy codec. It's possible the computer doesn't have enough horse power to play the clips.

I would like to edit the recorded P2.mxf video on iMac with Avid Media Composer, which is a professinal and popular editor works on Mac. While looking for solutions to import Panasonic P2 MXF to Avid Media Composeron iMac, I downloaded and tried several converters. Only Panasonic AVC-Intra MXF Converter for Mac from Pavtube works for me. I like the batch processing and joining of multiple mxf videos into one file. The editing feature to trim the recorded videos is great, as I can control the content for conversion.

For guys who may find it difficult to import and edit Panasonic AVC-Intra P2 MXF files on Mac, here is the fast guide to merge and convert Panasonic MXF to DNxHD MOV for Avid Media Composer. The DNxHD files it output works great in our Media Composer, hope it helps you too.

1. Load P2 AVC-Intra 50/100 MXF videos into Pavtube MXF to Avid Converter for Mac via clicking "Add video" icon.


2. Click "Format" bar to determine output format. For natively editing in Avid, you are recommended to choose Avid Media Composer -> Avid DNxHD (*.mov), this format is best for Avid Media Composer native editing.


3. If you would like to customize the video and audio parameters, you can click "Settings", adjust the parameters as you want, like Video Codec, aspect ratio, bit rate, frame rate, Audio codec, sampling rate, bit rate, channels.

4. Click "Convert" to start to convert Panasonic P2 to Avid Media Composer DNxHD codec for native editing.

For some Mac users, with P2 MXF Converter for Mac, editing the P2 AVC Intra MXF videos in Avid Media Composer is very easy and you will have no problem with MXF and Avid importing and A/V syncing.

Read more MXF editing solutions and how to import Panasonic P2 files.

Read More:

Monday, April 15, 2013

Does Canon EOS 5D mark 3 1080p mov Capable with iMovie

When you find out some of MOV files from Canon 5D Mark 3 you can't import into iMovie, you can use a professional MOV to iMovie Video Converter for Mac to help you.
 
Canon EOS 5D Mark III,
as the next generation of Canon EOS 5D Mark II, has attracted much attention even since it has not came out to the market. Based around a 22MP full-frame sensor, it can shoot 6 frames per second and features a 61-point AF system much like the EOS-1D X. It can capture 1080p movies at 24, 25 or 30 fps and offers high quality intraframe (All-I) video compression amongst a host of movie-related improvements.

All of these are great, till you ingest Canon EOS 5D Mark III 1080p MOV files to iMovie. As we know, 5D3 recorded videos are in MOV format, this format is not compatible well with iMovie, iMovie best video format is Apple InterMediate Codec (AIC) MOV format, so if you want to edit 5D3 MOV video in iMovie smoothly, you'd better convert 5D3 MOV to AIC MOV for iMovie, you can follow the steps below to transcode 5D3 to iMovie.


1. Download and install Nikon H.264 MOV Converter from Pavtube, this software can help you convert 5D Mark III MOV to AIC for iMovie, more output formats are also supported, such as AVI/WMV/ProRes.


2. Click and choose the best output format, for editing 5D3 MOV video in iMovie, you are recommended to choose iMovie and Final Cut Express -> Apple InterMediate Codec(AIC) (*.mov), it's the best format for iMovie and FCE.


3. You can click settings button to adjust output parameters as you want, such as codec, resolution, etc.


5. Edit function is useful and convenient; you can do easy editing to the 5D3 MOV video.

6. Click convert button to start, 5D Mark III MOV to AIC iMovie converter will help you convert videos easily, then you can import and edit 5D3 video in iMovie freely. And you can get more info about how to import/edit Nikon HD video to iMovie on pavtube website.

Read more:

Sunday, April 14, 2013

How to convert Canon Vixia video AVCHD (.mts) to iMovie

This guide shows users how to convert Canon Vixia AVCHD files to AIC with Mac MTS to iMovie Converter on Mac.

Canon are very popular in the market, it's a great competitor to sony and Panasonic. And Canon Vixia camcorder can give us high quality images, the HD Video Lens make every scene clear and steady, and new built-in features make it easy to give your videos added creativity, so it's a good choice if you have got one.


If you have used Canon vixia camcorders to recorded many HD videos, you may need to import Canon Vixia AVCHD files to iMovie for editing. But, you may encounter many problems when you want to load and edit Canon MTS/M2TS in iMovie, the reason is that AVCHD format is not well supported by iMovie on Mac, iMovie best format is Apple InterMediate Codec (AIC) MOV format, so if you want to import and edit Canon AVCHD videos in iMovie smoothly, the best way is to convert AVCHD to AIC format. Below is a guide for you.

1. Free download Canon Vixia Converter for Mac, it's an excellent Canon Vixia AVCHD converter which can help you convert Canon Vixia recorded files to FCP, iMovie, etc.

2. Install and run this Vixia MTS converter. Import the files you want to convert.


3. Click format bar to choose the format for output, you can choose iMovie and Final Cut Express -> Apple InterMediate Codec (AIC) (*.mov). It's the best format for iMovie - to import Canon Vixia MTS clips to iMovie or FCE.


4. You can click settings button to adjust output parameters, such as resolution, bitrate, etc.

5. Click "Convert" button to start.

This Canon Vixia AVCHD converter can help you transcode Canon Vixia AVCDH files to rich formats for use, and Vixia series camcorders are well supported, you can convert Canon XA10 to iMovie, convert Vixia HF M300 to iMovie, convert Vixia HF M500 to iMovie, convert Canon Vixia HF S10 to iMovie, convert Canon Vixia HF S100 to iMovie, etc. just follow the steps above and import Canon Vixia video to iMovie for further use.

More Related Guide:

Thursday, April 11, 2013

How to get Sony Alpha NEX-F3 AVCHD Video (.MTS) into Adobe Premiere

Does Sony MTS just go straight into Adobe Premiere Pro? In this article, we will give you the tips how to import and edit Sony Alpha NEX-F3 AVCHD MTS files in Adobe Premiere Pro without problems.

The Sony Alpha NEX-F3 Mirrorless Digital Camera with 18-55mm f/3.5-5.6 and 55-210mm f/4.5-6.3 Lenses Bundle contains a mirrorless digital camera and two zoom lenses that cover a wide spectrum of focal lengths from wide-angle to telephoto.


Sony NEX-F3 can record AVCHD video, you may have recorded many vivid clips when you travel. AVCHD format is not a widely used video format, so edit Sony NEX-F3 AVCHD in Adobe Premiere is not so easy. To edit Sony NEX-F3 video in Premiere smoothly without any problems, the best way is to convert Sony NEX-F3 AVCHD to Adobe Premiere best supported WMV format. Below is a brief guide for you, and you will know how to convert SONY NEX-F3 AVCHD to WMV format for Adobe Premiere.

1. Download Pavtube Video Converter Ultimate. This is professional SONY NEX-F3 MTS/M2TS Converter, it can convert SONY NEX-F3 AVCHD files between rich formats, such as convert SONY AVCHD to WMV format.


2. Install and launch this NEX-F3 AVCHD to WMV converter.

3. Click format bar to choose the output format, you can click and choose Adobe Premiere/Sony Vegas > WMV (VC-1) (*.wmv), this is the best format for editing in Adobe Premiere.


4. You can click settings button to adjust the resolution, bitrate, etc.

5. Click convert button to start.

With this Sony NEX AVCHD Converter, you can transcode SONY NEX-F3 MTS/M2TS files to Premiere easily, just follow the steps above and have a try.

Read More:

Wednesday, April 10, 2013

Import/Load Canon VIXIA HF S100 MTS to FCP X on Mac OS X

Have got a Canon VIXIA HF S100 and have issues with importing movies from HF S100 into FCP X? Is there any solution? Just convert MTS video to Prores for FCP editing on Mac.

Canon Vixia HF S100 goes beyond home movies with features specially included for the aspiring film-maker. The camera has microphone and headphone terminals and a Mini Advanced Accessory shoe for holding external lights and mics. Not only that, but 24p Cinema mode gives your video a film-look while 30p Progressive mode is ideal for action or sports footage. The VIXIA HF S100 allows you to record at up to 24Mbps, the highest bit rate in AVCHD format, for the highest quality image.

My Sister Jane is a user of Canon VIXIA HF S100, she likes it very much as it can shot 1080p 60p HD movies smoothly for her , which make her gain a stanout experience of hdcamcorder, and currently she uses the FCP X for editing, she told me while she is trying to drag and import the avchd files from S100 to FCP X timeline, they immediately need rendering, and the timeline becomes extremely sluggish for scan or preview.


Actually, as we all know, AVCHD is not the favorable format for all the non-linear editing software like Final Cut Pro, FCE, iMovie, including Adobe Premiere Pro.
So if we want to import AVCHD files to FCP X with less quality loss, we need to google and download an excellent MTS Converter for FCP to transcode Canon Vixia AVCHD to Prores MOV(compatible format for FCP 6/7X) without rendering.

As far as I know, Pavtube MTS/M2TS Converter for Mac is the best Mac AVCHD to FCP Converter, you can go to download it and have a free try! Below is a simple guide for importing Canon Vixia HF S100 AVCHD MTS/M2TS to FCP X for editing on Mac OS X, take a look at it and take as a reference.

Step 1. Load Canon HF S100 AVCHD videos to Mac AVCHD to Prores Converter.

Just connect Canon HF S100 to iMac with USB cable, and copy the files to hard drive. Run Pavtube Canon AVCHD Video Converter for Mac as the best Canon AVCHD to FCP Converter, and click the "Add" button to load 1920×1080 .mts videos.


Step 2. Choose the best output video format for editing in FCP X.

Clock the format column and choose the Final Cut Pro > Apple ProRes 422 (*.mov). It’s the best video format for FCP.


Step 3. If you want to adjust the output videos’ parameters, you can click settings button to change the Size, the Bitrate, and the Codec for getting the perfect effects.

Step 4. If you want to edit the video before converting Canon HF S100 AVCHD to FCP MOV format, Pavtube iMedia for Mac offers easy but useful edit function as shows below.

Step 5.Click "Convert" button to transcode Canon HF S100 AVCHD to ProRes 422 for FCP X editing on Mac OS X Lion.

P.S.

Pavtube MTS/M2TS Converter for Mac can convert 1080p cameras/camcorders footages to editable HD video formats for non-linear editing software like iMovie, Final Cut Express, Final Cut Pro, Final Cut Studio, Avid, Adobe Premiere etc. The HD footage can be compressed to SD video clips for storage when you wanna save storage space.

Read More:

Tuesday, April 9, 2013

Convert/Import/Edit MXF/P2 MXF recordings in iMovie '11

Shot footage in MXF format? This article tells you how import your .mxf files to edit in iMovie 11 by converting MXF to AIC codec.
 
Nowadays, the professional camcorders such as Canon XF series camcorders and Panasonic P2 card camcorders are becoming more and more popular. While, what's a pity that these professional camcorders shooting footage in MXF format cannot be recognized by the popular video editor iMovie, even the latest version iMovie '11. So, how to import MXF/P2 MXF files to iMovie '11 for editing without any trouble?


You need a MXF Converter to convert MXF to iMovie supported video format, iMovie best video format is Apple Intermediate Codec (AIC) MOV format, so it’s great choice to transcode MXF to iMovie AIC MOV format, you can follow the guide below.


1. Download Pavtube MXF Converter for Mac, this software supports MXF conversion well; you can choose many formats for output.


2. Install and launch the MXF to iMovie converter.

3. Click format bar to choose best output format. For editing MXF files in iMovie on Mac OS, you can click and choose “iMovie > Apple Intermediate Codec (*.mov)”.


4. You can click settings button to adjust output parameters.

5. Click convert button to start. Pavtube MXF Converter will help you import/edit MXF to iMovie on Mac easily. Then you can use converted MXF files in iMovie on Mac as you want.

Tips:

The MXF/P2 MXF to iMovie Converter is the best application for you to convert/transcode MXF files to iMovie'11. Besides, if you want to convert/import MXF to FCP X, iDVD, etc for editing, this MXF/P2 MXF to iMovie Converter can also do you a favor.

Read more:

Convert Canon C500 (PL) 4K MXF to FCP X
Transcode MXF/P2 MXF to Apple ProRes for FCP X